TTY Interface
A screen-oriented TTY interface is also available to use with SunVTS. You can use it in a CDE or OPEN LOOK window, from a telnet, rlogin, or tip session, or from a terminal attached to a serial port or connected to the system being tested through a modem. Most of the control and monitoring options available through the GUI are also available through the TTY interface.
Note -
To start SunVTS with the TTY interface see Chapter 3, Starting SunVTS ".
Note -
For step by step instructions refer to "Running SunVTS With the TTY Interface (Tutorial)".
TTY Main Window
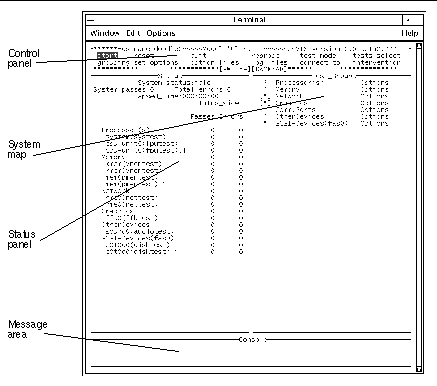
The TTY main window is divided into four areas (Figure 4-38):
-
Control panel--access to SunVTS commands and options
-
System map--shows the testable devices and provides access to test options
-
Status panel--displays the SunVTS test status information
-
Message area--test and error messages are displayed; no user input is accepted in this area
Figure 4-38 TTY Main Window
Navigating the TTY Interface
Keyboard commands are used for navigating and controlling the TTY interface. Table 4-8 summarizes these commands.
Table 4-8 TTY Keyboard Commands|
Key |
Description of Action |
|---|---|
|
Tab |
Moves the highlight or shifts the focus to another window. For example, if you are working in the Control panel and press the Tab key, the focus (or highlight) shifts to the Status panel. Highlighted panels are bordered by asterisks (*). Before you can change an option, you must first highlight that panel. |
|
Return |
- Displays a menu - Selects and applies a choice or a command in a menu |
|
Spacebar |
Selects or deselects an option checkbox; [ ]= select; [*]= deselect |
|
Arrow keys |
Moves between options in a highlighted panel |
|
Backspace key |
Deletes text in a text field |
|
Escape |
Discards a pop-up menu or window |
|
Control-F |
Scrolls forward in a scrollable window |
|
Control-B |
Scrolls backward in a scrollable window |
|
Control-X |
Quits the TTY user interface but leaves the SunVTS kernel running |
|
Control-L |
Refreshes the TTY window |
The following sections lead you through some common testing procedures. In all cases, use these keyboard commands to select and apply your test options.
Setting TTY Options
To Select and Change System Options
-
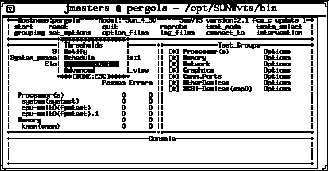
Highlight the Control panel with the Tab key (Figure 4-39).
Asterisks (*) appear around the Control panel when it is highlighted.
-
Select set_options with the arrow keys.
-
Display the SunVTS System options with the Return key.
Figure 4-39 System Option Categories (TTY Interface)
-
Highlight Test_Execution using the arrow keys and press Enter.
When an option is highlighted, it can be changed. There are two ways to change the system options: from the menu and by typing in the text field.
-
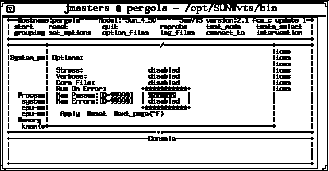
Select the Core File option with the Return key.
-
Select this option.
A menu is displayed listing the choices of the Core File option (Figure 4-40).
-
Highlight enabled.
Figure 4-40 Selecting a Menu Option (TTY Interface)
-
Select this choice with the Return key.
This option changes from disabled to enabled.
-
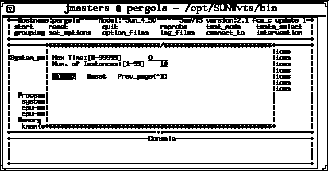
View the second page of the Options menu by pressing Control-F (Figure 4-41).
-
Select the num_instances text field.
-
Change the value to the number of test instances that you want to run.
Use the up or down arrow keys to move the cursor out of the text field.
Figure 4-41 Changing a Text Field Option in TTY
-
-
Highlight Apply after you finish changing the options.
-
Apply the changes and close the Options window by pressing the Return key.
Note -If you want to remove the Option window without changing any options, press the Escape key.
Selecting Tests and Test Groups
To Select and Deselect Tests and Test Groups
-
Select the Tests panel with the Tab key.
When selected, the panel is bordered by asterisks.
-
Highlight the checkbox by the test group name.
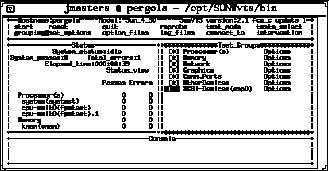
In this example (Figure 4-42) the checkbox associated with SCSI-Devices (esp0) group is selected, so it is highlighted.
-
Deselect the test group with the spacebar.
Notice that the asterisk no longer appears between the brackets, and that the test names are removed from the Status panel.
Figure 4-42 Deselecting a Test Group (TTY Interface)
-
Highlight the test group name using the right arrow key.
-
Display the tests within the test group by pressing the Return key.
-
Highlight the brackets in front of the test you want to enable, using the up and down arrow keys.
-
Select the test with the Spacebar.
An asterisk displays between the two brackets, and the test group and test name appears on the Status panel (Figure 4-43).
Figure 4-43 Selecting a Test (TTY Interface)
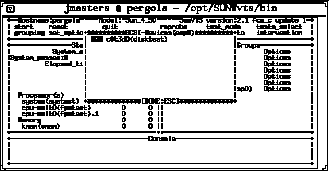
Note -If you want to change the test options, highlight the test name and press the Return key to display the test option menus.
-
Close the test group window by pressing the Escape key.
Using the TTY Status_view Menu
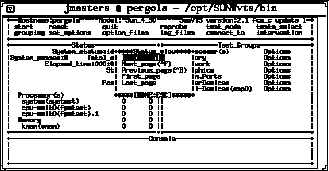
The Status_view menu has a scrollable area. It is possible to select more tests than the status panel can display at one time. Use the Control-F and Control-B keys to scroll forward and backward to view additional selections. You can also display only those tests with errors by highlighting the Errors Only in the Status_view menu (see Figure 4-44 and Table 4-9).
To Scroll Through Tests Using the Status_view Menu
-
Highlight the Status panel with the Tab key.
When selected, the panel has asterisks around the border. Notice that the Status_view option is also highlighted.
-
Display the Status_view menu with the Return key (Figure 4-44).
Figure 4-44 TTY Status_view Menu
-
Move to the option you want with the arrow keys (Table 4-9).
Choose one of the following options:
Table 4-9 Status_view Menu OptionsOption
Description
Errors_only
Displays only the tests that produce errors
Next_page
Skips to the next page of tests
Previous_page
Goes back to the previous page of tests
First_page
Goes to the first page of tests
Last_page
Goes to the last page of tests
-
Select your choice with the Return key.
The Status panel changes to reflect your choice.
Using the TTY Log_Files Menu
The following paragraphs describe how to display, print, and remove log files.
To Display, Print, or Remove Log Files
-
Highlight the Control panel with the Tab key.
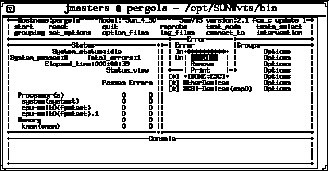
When selected, the panel has asterisks around the border (Figure 4-45).
Figure 4-45 Log Files Menu (TTY Interface)
-
Highlight the log_files option with the arrow keys.
-
Display the log_files menu with the Return key.
-
Select the option you want with the arrow keys (Table 4-10).
Choose one of the following options:
Table 4-10 TTY Log_files Menu OptionsOption
Description
Error
Selects the Error log file
Information
Selects the Information log file
Unix Msgs
Selects the UNIX messages log file
Note -If you do not want to select a log file, press the Escape key to close the Log_files menu.
-
Select the log file and display another menu by pressing Return.
From this menu, you can either display, remove, or print the selected log file. See Table 4-10, for a description of these options.
-
Confirm your choice by pressing Return.
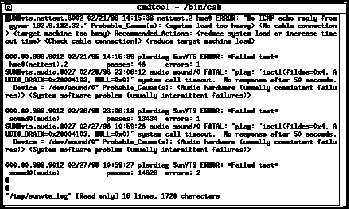
Figure 4-46 is a sample SunVTS log file displayed in TTY mode. You can use the commands Control-F and Control-B to page forward and backward through the log file.
Figure 4-46 Sample Log File (TTY Interface)
-
Return to the main window by typing :q.
Note -If you try to run a graphics test on a test machine that is not running OPEN LOOK, and you are running the SunVTS TTY interface on the test machine monitor, the graphics test may fail. You can avoid this failure by either running the SunVTS TTY interface on a terminal attached to a serial port on the test machine, or you can run the TTY interface from a remote machine.
- © 2010, Oracle Corporation and/or its affiliates
