| C H A P T E R 3 |
|
Creating a Web Service Client |
The Sun ONE Studio 5, Standard Edition IDE gives you several ways to create a web service client without writing client code. This chapter describes the IDE tools and procedures that you can use to do each of the following tasks:
This section assumes that you start with an existing web service developed in the IDE.
You can automatically generate a simple client to test your web service during development. (See .)
You can customize the generated client or replace it entirely by a more sophisticated client that can be used for business purposes.
You can create a client starting at a web service node, a package node, or the IDE's main window menu.
To start at a web service node:
1. To open the New Web Service Client wizard from the Explorer, right-click the web service node (the one with the blue sphere icon  ) and choose Create New Web Service Test Client.
A dialog box is displayed, as illustrated in FIGURE 3-1.
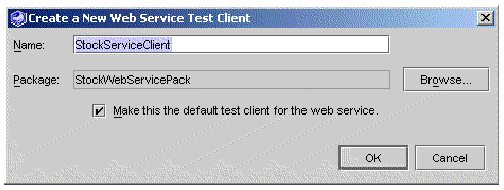
2. Enter the desired location of your web service client in the Package field, or click Browse to find and select a package.
3. In the Name field, type a name for the new web service client and click OK.
Your new web service client is displayed in the Explorer. A client node ( ) appears under the designated package.
If you enter the name of a web service client that already exists in the package designated in the wizard, the IDE displays an informative error message.
To start at a Java package node:
1. Right-click a Java package node and choose New  All Templates
  Web Services
  Web Service Client.
Alternatively, Choose File  New
New  Web Services
  Web Service Client from the IDE's main window.
In this case the IDE displays the Web Service Client dialog box, as illustrated in FIGURE 3-2.
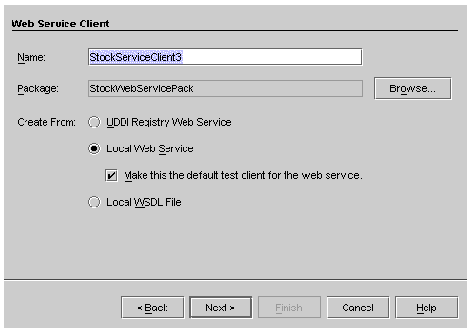
2. Set the desired name and package.
3. Select Create From: Local Web Service.
4. Click Next to open a chooser, select the desired web service, and click Finish.
Your new web service client is displayed in the Explorer. A client node ( ) appears under the designated package.
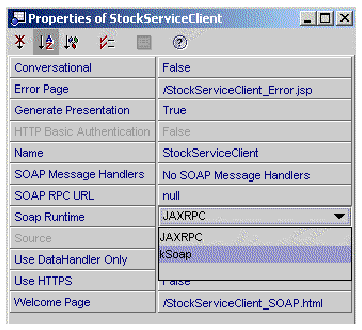
The IDE can generate a client that uses the JAX-RPC runtime (the default) or the kSOAP runtime. A JAX-RPC client is implemented as a web application with JSP pages as the presentation layer and a web browser as the front end. kSOAP is a SOAP API suitable for the Java 2 Microedition (J2ME) and wireless applications.
|
Note - If you have an old Apache SOAP client, the IDE automatically converts it to a JAX-RPC client during the generation. |
2. Right-click the client node and choose Properties. The Soap Runtime property has the default value JAXRPC.
The choices JAXRPC and kSoap are displayed, as shown in FIGURE 3-3.
4. Choose kSoap or leave the default value, JAXRPC.
When you generate the client, a kSOAP or JAX-RPC client is created.
Clients that use the kSOAP runtime execute on small J2ME devices such as cell phones and PDAs, whose user interfaces are typically constrained by the display limitations. Developers often use Java AWT, WML, and other presentation technologies to create the user interfaces.
For information about wireless applications, see the following resources:
The following sections describe JAX-RPC clients and kSOAP clients.
1. Set the Soap Runtime property value to JAXRPC.
2. Right-click the client node in the Explorer, and choose Generate Client Files.
Each of these elements is described in the following sections.
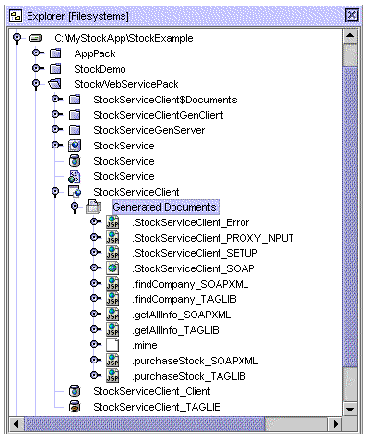
The IDE displays the generated client files under two nodes in the same package as the client:
The Explorer hierarchy for a JAX-RPC client is illustrated in FIGURE 3-4.
 [ D ]
[ D ]This book assumes general knowledge of JSP technology. There are many books available on this subject. You can find the JSP specification at:
http://java.sun.com/products/jsp/download.html#specs
The IDE generates a JSP tag library with custom tags that make the client's JSP pages easier to read. Web designers can customize the client's presentation without expert knowledge of the Java programming language, using web design tools such as Macromedia's Dreamweaver.
Here is an example of a custom tag:
<ws:sayHello string_1=":?" var="resp">
</ws:sayHello>
This tag could be used to invoke a remote web service operation exposing the following method:
String resp = sayHello(String string_1);
Each web service's operation name and operation parameters are mapped to the corresponding tag name and tag attributes.
The tag attribute value ":?" instructs the tag handler to automatically bind the attribute value from HTML form request variables.
The result of the web service operation call is returned to the JSP page as a JSP scripting variable named in the attribute var. The JSP page renders the content of the returned scripting variable, using JSTL (Java Standard Tag Library) tags to produce the default result presentation.
The generated client documents include:
The names of the welcome page and JSP error page appear in the IDE as properties of the client node, as illustrated in FIGURE 3-3.
To view the code of an HTML page or JSP page:
 Right-click the node of the desired document and choose Open.
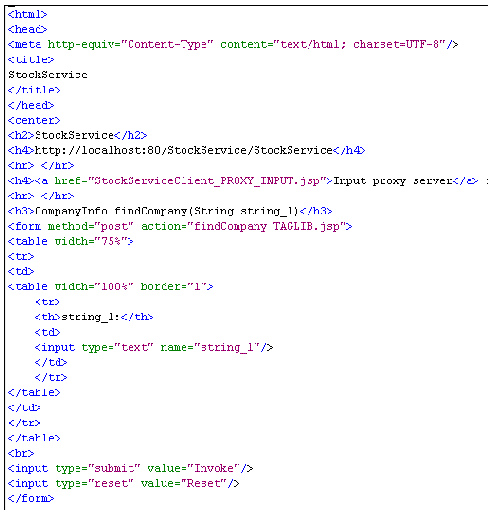
Sample code for a generated welcome page is illustrated in FIGURE 3-5.
Sample code for a generated JSP page is illustrated in FIGURE 3-6.
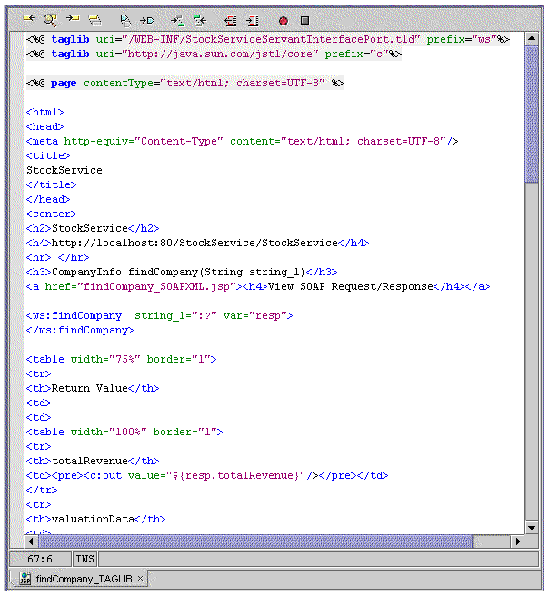
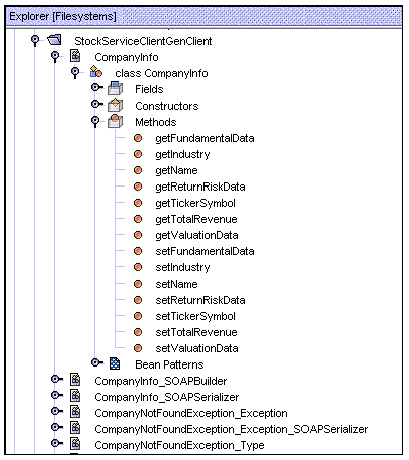
FIGURE 3-7 shows an Explorer view of some of the classes generated for a JAX-RPC client.
 Right-click a class or method node and choose Open.
The IDE lets you edit the proxy source, but if you regenerate the client in the IDE your proxy source changes are not preserved.
You can use the generated client proxy with a Java Swing client or more sophisticated HTML and JSP pages.
You might already have a front end for your business client, such as a Swing component or a more sophisticated set of HTML pages and JSP pages than those generated by the IDE. Under those circumstances you might want the IDE to generate only the client proxy classes.
To generate only the client proxy classes:
2. Right-click the client node and choose Properties. The Generate Presentation property has the default value True.
3. Change the Generate Presentation property value to False.
When you generate the client, only the client proxy classes are created. Typically you might do this if you are using your own front-end presentation. In this case, you might need to add your own documents, libraries, or classes to the client's WAR file.
To add documents, libraries, or classes to your client's WAR file:
1. If the files were created outside the IDE, such as HTML and JSP pages created in a web design tool, mount the directory containing the files so they are visible in the IDE's Explorer.
2. Right-click the client node and choose Add to WAR File > objectType, where object-type is Documents, Libraries, or Classes.
3. Navigate to a folder that contains your documents, libraries, or classes, select the desired objects, and click OK.
The IDE creates a Documents, Libraries, or Classes folder under the client node, with references to the added objects, as illustrated in FIGURE 3-8.

The IDE adds the documents, libraries, or classes to your client's WAR file and you can use them to build a custom client.
During the generation process, the IDE analyzes the web service's WSDL and issues validation warning and error messages if there are problems such as invalid data types (for example, a user object that is not a valid JavaBeans component). Validation is especially important when you are creating a client from someone else's web service, such as a web service accessed through a UDDI registry. IDE validation is based on the JAX-RPC reference implementation.
The Refresh From Web Service menuitem is an alternative to Generate Client Files. When you choose Generate Client Files, the IDE generates client proxy classes and documents based on a combination of the web service properties and the client properties.
For example, if a local web service is stateful, the IDE creates a stateful client by default. The web service and client both have their Conversational property set to True. If you manually change the client's Conversational property to False and then use the Generate Client Files, the IDE keeps your change and generates a stateless client.
An alternative to Generate Client Files is Refresh from Web Service. When you choose this menuitem, the IDE generates the client proxy classes and documents based on the properties of the web service. In this case, if your local web service has the Conversational property True, the IDE makes the Conversational property of the client True to match the web service.
If a web service is enhanced after a client was created, methods might be added and method signatures might change. The Refresh uses the new WSDL and generates client files appropriate to the enhanced web service.
If the client is generated from a WSDL file or from the WSDL reference in a UDDI registry, only the web service properties that are carried in the WSDL are used by Refresh From Web Service. In particular, security and conversational properties are not specified in WSDL, so the IDE does not change the client values.
To regenerate a client based on the web service:
 Right-click the client in the Explorer and choose Refresh From Web Service.
This causes the client proxy and documents to be regenerated.
For your client to access a service instance at runtime, the client proxy must use the endpoint URL of the service. The IDE can set a default URL in the proxy, or the URL can be passed to the proxy at runtime in its serviceURL parameter, which overrides the default.
The client JSP pages generated by the IDE do not pass the URL at runtime but instead assume that the client proxy has a default value for serviceURL. The default URL comes from the WSDL that is used to generate the client proxy.
You might want the client to override the WSDL value of the endpoint URL if the web service is redeployed to a production system, or for other reasons.
To make your client pass the endpoint URL at runtime:
1. Right-click the client in the Explorer and choose Properties.
2. Set the SOAP RPC URL property to a URL of your choice.
This URL overrides any default URL that might have been derived from the WSDL file.
The IDE deploys the client as a web application in your application server's web container.
 Right-click its node in the Explorer and choose Deploy.
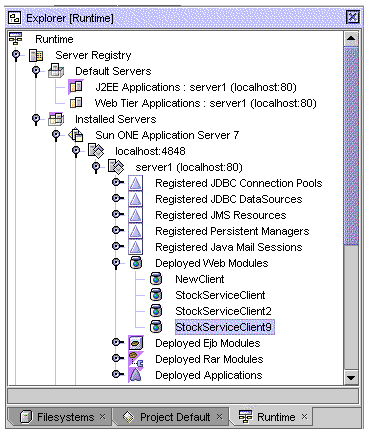
The client's deployed WAR file is visible in the Explorer's runtime tabbed pane, as illustrated in FIGURE 3-9.
The client's WAR file node is visible in the Explorer's Filesystems tabbed pane, as illustrated in FIGURE 3-10.

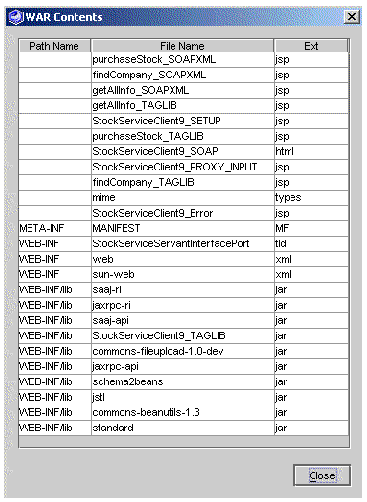
To view the contents of the WAR file:
 Right-click the client's WAR node in the Explorer's Filesystems tabbed pane, and choose View WAR Content.
The IDE displays the WAR file contents, as illustrated in FIGURE 3-11.
This section assumes that the web service referenced by your client has been deployed, that your client has been deployed, and that the servers hosting the service and client are running.
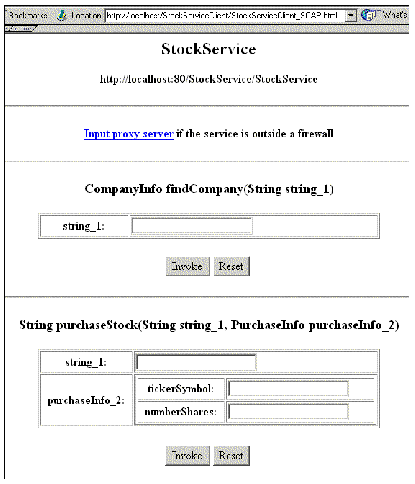
 Right-click the client node in the Explorer and choose Execute.
The IDE executes the client and displays the welcome page in your default web browser, as illustrated in FIGURE 3-12.
Suppose that the web service is deployed in a J2EE application, and that you make the client the default test client, as explained in . In this case the IDE deploys the client with the web service, and you can execute the client from the J2EE application node.
To execute the default test client from the J2EE application node:
 Right-click the J2EE application node in the Explorer and choose Execute.
The client generated by the IDE gives you two ways of viewing the result of each web service method call. You can view the results in a user-friendly format, or you can view the SOAP request and response messages in XML format.
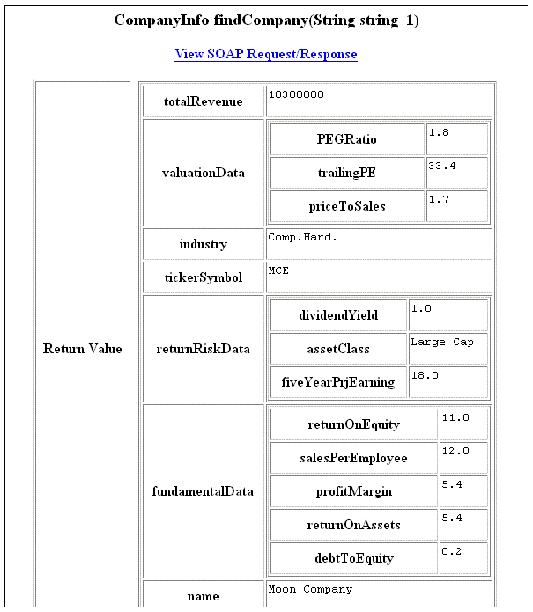
Consider the example in FIGURE 3-12 and the findCompany method. Suppose you enter a valid company ticker symbol for string_1 and click Invoke. The client displays company information in the browser, as illustrated in FIGURE 3-13. This is a user-readable display that can be a starting point for a web designer to customize the presentation.
 [ D ]
[ D ]
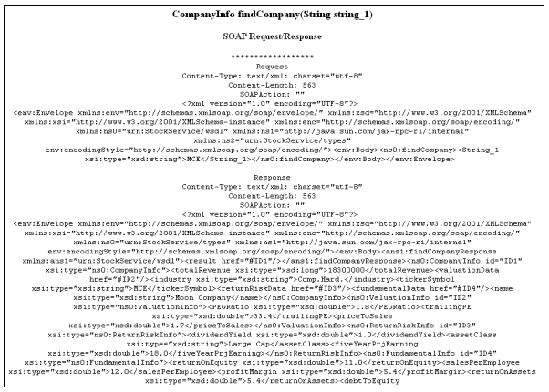
If you click the View SOAP Request/Response link, the client displays the SOAP request message (which is sent from the client to the web service) and the SOAP response message (which is sent from the web service to the client). This display, illustrated in FIGURE 3-14, includes SOAP envelopes and data, and might be useful for debugging a client or web service.
If the client is executing inside a firewall and the web service is outside the firewall, you must specify the proxy host and proxy port.
To specify the proxy host and proxy port at runtime:
 Click the Input proxy server link on the welcome page.
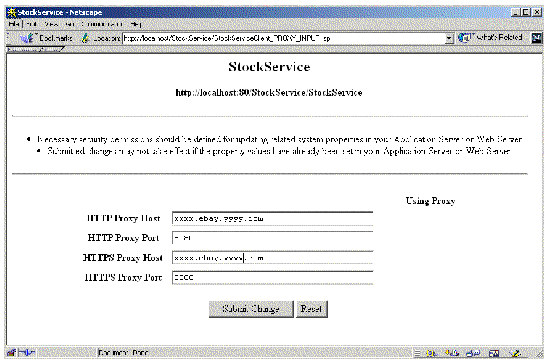
The client displays a page, illustrated in FIGURE 3-15, in which you can enter values for the proxy host and proxy port.
To specify default values for the proxy host and proxy port in the IDE:
 Choose Tools
  Options
  IDE Configuration
  System
  System Settings
  System from the IDE's main window, and set the values of Proxy Host and Proxy Port.
These values become the default values for clients generated by the IDE.
|
Note - If a client's user enters runtime values for proxy host and proxy port, the runtime values override any default values set in the IDE. |
A variety of problems can arise when the client and web service are running in different servers. In a development environment the servers are likely to be the same and under your control. In a production environment the servers are likely to be different and under the control of system administrators. You might encounter runtime messages, such as a java.security.AccessControlException message, that require permissions to be set on the server.
For further information about problems of this kind, see Sun ONE Studio 5, Standard Edition Release Notes.
In order to generate a kSOAP client in the IDE, you must have the kjava module installed. For information about how to install this module, see Setting the Client Type: JAXRPC or kSoap
1. Set the client's Soap Runtime property value to kSoap, as described in Setting the Client Type: JAXRPC or kSoap.
2. Right-click the client node in the Explorer, and choose Generate Client Files.
The generated client nodes are illustrated in FIGURE 3-16.

Clients that use the kSOAP runtime execute on small J2ME devices such as cell phones and PDAs, whose user interfaces are typically constrained by the display limitations. Developers often use Java AWT, WML, and other presentation technologies to create the user interfaces.
|
Note - For a kSOAP client, the IDE does not create a Generated Documents node and does not generate HTML or JSP pages. |
In order to execute a kSOAP client in the IDE, you must have the kjava-emulator module installed. For information about how to install this module, see Setting the Client Type: JAXRPC or kSoap.
To execute a kSOAP client in the IDE:
 Right-click the client node in the Explorer, and choose Execute.
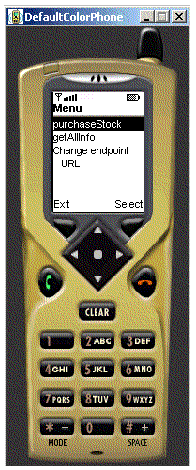
The IDE opens the emulator and displays a client menu, as illustrated in FIGURE 3-17.
WSDL provides a portable representation of the external interfaces of a web service. See for the procedure to create a WSDL description of your web service. See WSDL and for other information about WSDL and UDDI registries.
WSDL can be useful even if you are not using a UDDI registry. Several people on a project might be developing different kinds of clients, perhaps in different locations or on different schedules. They can be given copies of the WSDL to generate clients. A WSDL file is an XML document and can be put on a shared network drive, sent as an email attachment, or passed around on a disk. The developers must also have network access to a runtime instance of the web service to test their clients.
The following procedure assumes that you have a WSDL file, that the file name extension is .wsdl, and that the directory containing the file is mounted in the IDE. The .wsdl file appears as a node in the Explorer with a green sphere icon ( ). If someone gives you a WSDL file that does not satisfy this naming convention, you can rename it or make a copy with a file-name extension of .wsdl.
To generate a client from a WSDL file:
1. From the IDE's main window, choose File  New
New  Web Services
  Web Service Client, and click Next.
The IDE displays the Web Service Client dialog box, as illustrated in FIGURE 3-2.
2. Set the desired name and package, and select Create From: Local WSDL File.
3. Click Next to open a chooser window.
4. Select the desired WSDL node in the chooser window, and click Finish.
The IDE creates a client node with default Soap Runtime property JAXRPC. You can change this property to kSoap if you want a wireless client.
5. Right-click the client node in the Explorer and choose Generate Client Files.
The IDE creates the client files.
|
Note - As an alternative to Generate Client Files, you can choose Refresh From WSDL. See Refreshing a Client From Its Web Service for an explanation of this context-sensitive menuitem. |
6. The remaining steps, including deployment and execution, are the same as in Creating a Client From a Local Web Service.
To generate only the client's supporting classes, without the Generated Documents (for a JAX-RPC client) or the MIDlet (for a kSOAP client):
1. Right-click the client node in the Explorer, choose Properties, set the value of the Generate Presentation property to False.
2. Right-click the client node in the Explorer and choose Generate Client Files.
The IDE creates only the client proxy classes.
3. Create your own client component that makes calls to the client proxy.
This might be the best approach if you already have fully developed clients that you can easily customize to use the client proxy, or if you want to use a type of client that is different from the HTML and JSP pages generated by the IDE, such as a Java Swing client.
Some of the business needs and scenarios that might lead you to create a client from a UDDI registry are described in Chapter 1. This section gives an overview of the planning and work flow, followed by the procedures for searching a UDDI registry, selecting a web service, and creating a client.
The work flow consists of these tasks:
Determining your criteria for finding a web service in a UDDI registry requires advance planning and is part of the application design process. It is not enough to consider only the characteristics of the web service. You also have to think about the business that is providing the service, what kind of support the business offers, and how much your use of the service is likely to cost. The analysis is simplified if you are using a private registry and the service provider is a part of your own project or enterprise, or perhaps a business partner collaborating on your project.
This section describes how to use the IDE to select a registry, search the registry for a service, and generate a client that can access a runtime instance of the service.
1. Right-click a Java package node and choose New  All Templates
  Web Services
  Web Service Client.
Alternatively, Choose File  New
New  Web Services
  Web Service Client from the IDE's main window.
The IDE displays the Web Service Client dialog box, as illustrated in FIGURE 3-18.
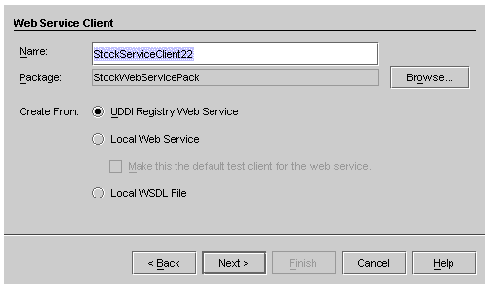
2. Set the desired name and package, and select the UDDI Registry Web Service radio button for Source.
3. Click Next to display the Select a UDDI Registry dialog box, as illustrated in FIGURE 3-19.
The dialog box displays a list of UDDI registries.
At this point you can select the desired registry.
You can also click Edit to change the default registry or edit registry information (see ).
|
Note - The initial default registry in the IDE is the internal UDDI registry that is bundled with the IDE. For further information about this registry, see . |
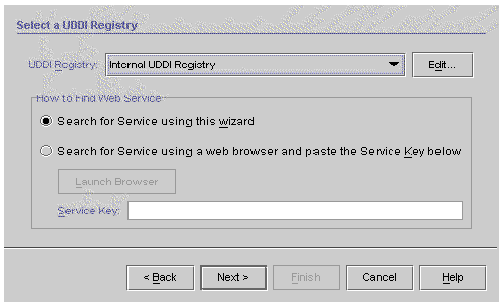
The IDE provides two ways to search for a web service. You choose the search method my clicking one of two radio buttons. The default choice, illustrated in FIGURE 3-19, uses the IDE wizard to conduct the search. The other choice uses a web browser and browser-based software provided by the registry owners.
Most UDDI registries provide browser-based tools for registry searches and for adding, editing, and deleting registry entries. The Browser Tools URL for a registry is one of the properties that you can edit in the IDE (see ).
To search a selected registry with its own browser tools:
a. Select the "Search for service using a web browser" radio button.
The Launch Browser button becomes active.
If you already have the web service's registry key from a previous search, paste the value into the Service Key field and click Next. The IDE displays the final wizard step in which you can click Finish to create the client, bypassing intermediate UDDI registry search steps.
The IDE opens your default web browser at the Browser Tools URL web page.
c. Use the browser tools to locate the web service that you want to access with your client.
d. Copy the web service registry key and paste it into the Service Key field in the Select a UDDI Registry dialog box.
The IDE displays the final wizard step in which you can click Finish to create the client, bypassing intermediate UDDI registry search steps.
|
Note - The remainder of this procedure assumes that you do your search through the IDE wizard. This is the default radio button under "How to Find Web Service." |
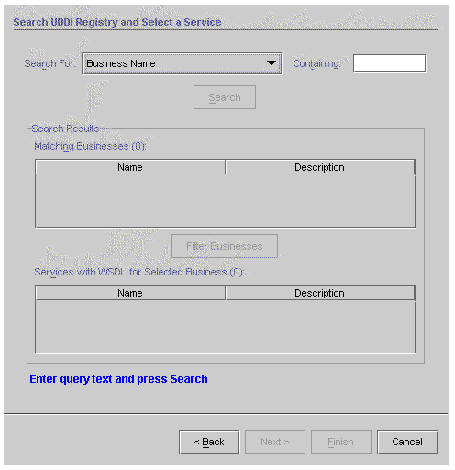
4. Select a registry from the UDDI Registry list and click Next to display the Search UDDI Registry dialog box, as illustrated in FIGURE 3-20.
 [ D ]
[ D ]
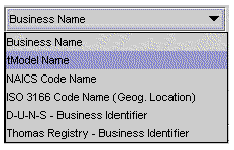
You can search for businesses whose names contain a string that you specify. You can also base your search on a type other than business name. The list of search types is shown in FIGURE 3-21.
 [ D ]
[ D ]
You can search on tModel name, NAICS code name, or ISO 3166 code name.
You can also search for a D-U-N-S business identifier or Thomas Registry business identifier, in which case the search is for a value "Equal To" rather than "Containing." You might know the identifier from a previous search. If you are using a private UDDI registry, someone in your project or enterprise might give you the identifier.
|
Note - If the search type requires an exact value, the label in the UDDI Registry Search dialog box (FIGURE 3-20) changes from Containing to Equal To. |
For NAICS or ISO 3166 code name searches, you can enter either a name or a code in the Containing field. For example:
A search on tModel Name returns all businesses that contain services that are based on the tModels matching the search string.
A search on NAICS Code Name or ISO 3166 Code Name returns all businesses that have categories matching the search string.
The remainder of this procedure assumes that you search on business name.
5. Enter a string in the Containing field and click Search.
The Matching Businesses table displays all businesses in the registry whose names contain your search string, as illustrated in FIGURE 3-22. Each business is listed with its name and an optional description. The number of matching businesses is also displayed.
You can select a business from the table and proceed to Step 7 of this procedure.
Depending on your search string and the size of the registry, your search might return a large number of businesses. This is most likely to occur with public registries, which are expected eventually to grow to tens of thousands or even millions of entries. If the list returned by your search is too large, you can enter a more carefully chosen search string or you can use the registry browser tools to perform a more advanced search.
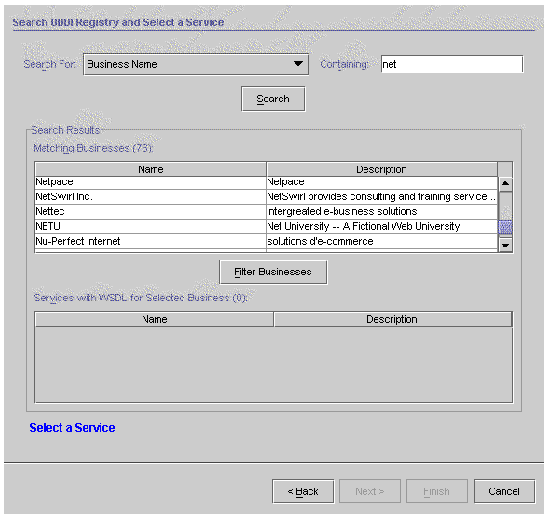
6. Click Filter Businesses to further refine your search.
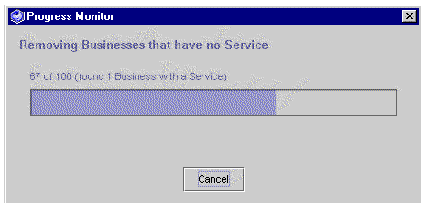
There might be services in the registry that have no WSDL tModel entries. Since you can't create clients for those services, the IDE enables you to filter them out of the Matching Businesses table. When you click Filter Businesses, the IDE searches the UDDI registry for services associated with the businesses in your result set. The IDE checks the services for tModels that have an OverviewDoc with an OverviewURL field that begins with http:// and ends with either wsdl or asmx. Businesses that fail this test are filtered out of the Matching Businesses table.
The IDE displays a progress monitor window with a Cancel button, as illustrated in FIGURE 3-23. The filtering process can take some time. If it takes too long, you can click Cancel and start over with a more refined search string.
7. Select a business from the Search Results list.
The IDE displays services associated with the selected business, as illustrated in FIGURE 3-24, and activates the Next button. Only services with WSDL tModel entries are displayed.
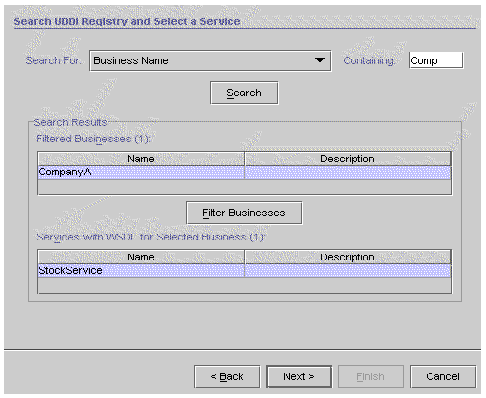
8. Select a service and click Next to display the Service Interface dialog box, as illustrated in FIGURE 3-25.
The dialog box shows detailed information about the service and the tModels and WSDL that it references.
For the service, you see the name, network endpoint, and key. The network endpoint is the URL that a client can use to access the runtime service instance.
For each WSDL tModel, you see a name and overview URL. The overview URL is the locator for the WSDL that the IDE uses to create your client.
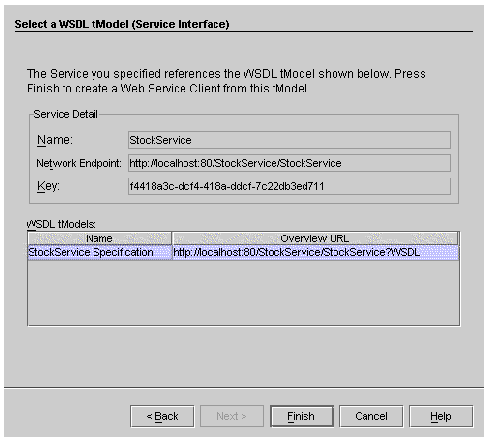
9. Select a WSDL tModel and click Finish.
The IDE creates your web service client. It appears in the Explorer under the designated package as a new client node.
10. Right-click the client node in the Explorer and choose Generate Client Files.
The IDE creates the client files.
|
Note - As an alternative to Generate Client Files, you can choose Refresh From UDDI. For an explanation of this context-sensitive Refreshing a Client From Its Web Service. |
11. The remaining steps, including deployment and execution, are the same as in Creating a Client From a Local Web Service.
A web service operation's input parameters and return values are transmitted in one of two ways: encoded as XML tags or attributes within the message's SOAP body, or appended to the message as an attachment. Attachments are generally used for objects that are not easily or efficiently serialized into an XML representation, such as images. An attachment is packaged as a well-defined MIME-encoded region of the message. The IDE supports the World Wide Web Consortium (W3C) standard for SOAP attachments.
The most common use of JAX-RPC attachments is for the return of images, such as gif and jpeg data. The IDE can generate "image-aware" JAX-RPC test clients for web-centric web services that return images (objects of the Java.awt.Image class).
The following example is based on a Java class named attTest that has several methods for processing images and text. A web-centric web service named attWS exposes the business methods of the Java class. A JAX-RPC test client named attWSClient communicates with the web service.
The example assumes that the web service has been deployed and that the server is running.
CODE EXAMPLE 3-1 shows the source code of the Java class, attTest. The business methods are:
FIGURE 3-26 shows an Explorer view of a web-centric web service named attWS and a test client named attWSClient, which call the methods of the attTest Java class.
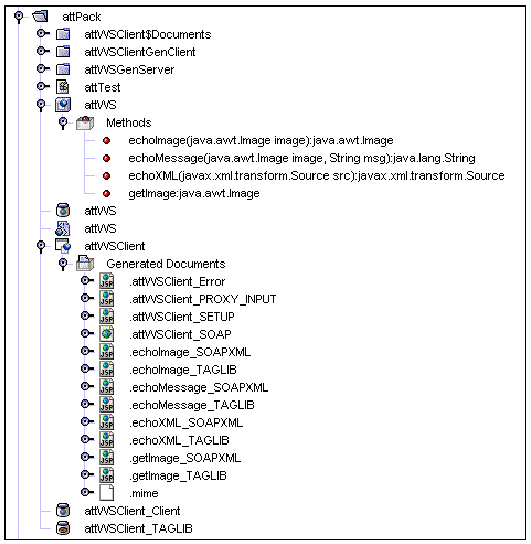
When you right-click the web service and choose Execute, the IDE opens a browser and displays the client's welcome page, as illustrated in FIGURE 3-27.
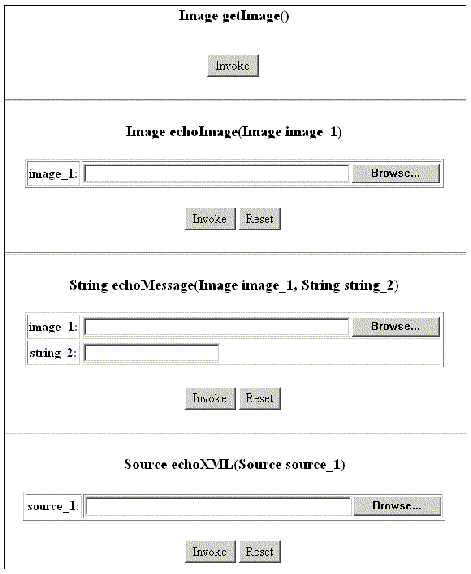
When you click Invoke for the getImage method, the client displays the page illustrated in FIGURE 3-28.
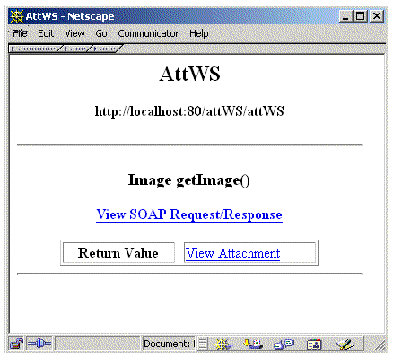
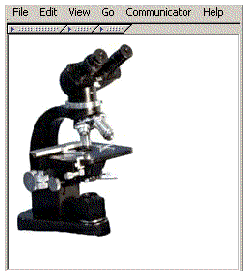
When you click the View Attachment link, the client displays opens a new window and displays the image, as illustrated in FIGURE 3-29.
The JAX-RPC specification, Section 7.2, states:
(See Software Versions for the URL of the JAX-RPC specification.)
The IDE provides a client property that you can use to cause a generated client to represent MIME encoded content with the DataHandler class. To do this:
1. Right-click the client node, choose Properties, and change the Use DataHandler Only property from False (the default) to True.
2. Right-click the client node and choose Generate Client Files.
FIGURE 3-30 shows the client class attWSRPC that the IDE generates when the Use DataHandler Only property is False.
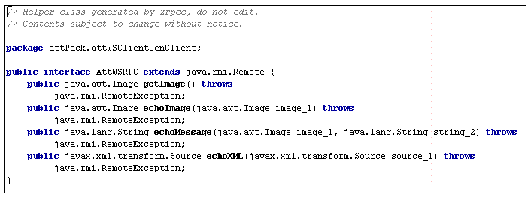
FIGURE 3-31 shows the client class attWSRPC that the IDE generates when the Use DataHandler Only property is True.

For information about how to use the DataHandler class, see http://java.sun.com/j2ee/sdk_1.2.1/techdocs/api/javax/activation/DataHandler.html
For information about creating stateful web services and clients, see .
For information about using SOAP message handlers with web services and clients, see Chapter 4.
For information about implementing security for web services and clients, see Appendix A.
Copyright © 2003, Sun Microsystems, Inc. All rights reserved.