| Skip Navigation Links | |
| Exit Print View | |

|
Sun Fire X2270 M2 Server Service Manual |
About This Documentation (PDF and HTML)
Download Server System Tools and Drivers
Sun Fire X2270 M2 Server Service Manual Organization
Sun Fire X2270 M2 Server Overview
Front and Rear External Features and Components
Maintaining the Sun Fire X2270 M2 Server
Preparing for Service and Operation
Antistatic Procedures and Precautions
How to Remove the Server from the Rack
How to Remove the Server Cover
How to Install the Server Cover
Powering On and Powering Off the Server
Component Replacement Procedures and Topic
Sun Fire X2270 M2 Server Service Procedures and Information
Using the Tools and Drivers CD
How to Backup Motherboard FRUID Information
BIOS Booting and Setup Considerations
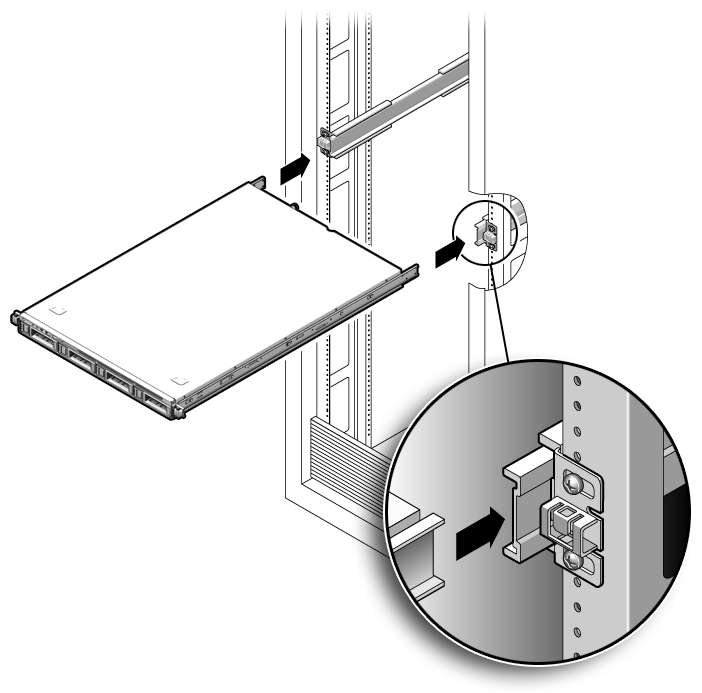
Use this procedure to install the server chassis, with mounting brackets, into the slide rail assemblies that are mounted to the rack.
 | Caution - This procedure requires a minimum of two people because of the weight of the server. Attempting this procedure alone could result in equipment damage or personal injury. |
 | Caution - Always load equipment into a rack from the bottom up so that it does not become top-heavy and tip over. Deploy your rack’s anti-tilt bar to prevent the rack from tipping during equipment installation. |
Push the slide rails into the slide rail assemblies and then collapse the assemblies.

You will hear a click.
 | Caution - Verify that the server is securely mounted in the rack and that the slide rails locks are engaged with the mounting brackets before continuing. |
Next Steps
See Also