Accessing and Administering TNAS and TotalAdmin
This section contains instructions for the following tasks:
2.1 Configuring the TotalNET Master Server
A TotalNET master server acts as the central database for multiple TAS hosts and their associated information. TAS hosts in the enterprise find out about the TotalNET master through the enterprise's host-naming facility. To name a master host, you need to set up the TotalNET master command alias. A master host must have access to all TAS hosts, and preferably all other network servers.
The following steps describe how to use the system's hosts file:
-
Check for the presence of a TotalNET system manager--tnmaster--from a previous TAS installation. If you have one, indicate whether you want it to serve as your desired master system.
If you do not have one, or if you do not want the current one to play the master system role, you may add one using the method for adding server aliases in your enterprise. For example, to configure the TotalNET system manager in the server's "hosts" file, such as the /etc/hosts file, you might add the following tnmaster IP address, tnmaster alias, and DNS address:
IP Address
Alias
199.240.202.10
spirogyra
199.240.202.3
simba simba.syntax.com tnmaster tnmaster.syntax.com
199.242.200.1
syntax
-
Decide where to place the TotalNET master command alias, according to local administrative requirements. If you wish to have a single TotalNET master system--and, consequently, a single list of TAS hosts--for your entire enterprise, put the TotalNET master command host in your top-level domain. If you want to have a separate TotalNET master for each of your sub-domains, you can create several aliases.
If you use DNS, you only need to make one change to the DNS database to change the TotalNET master. You must add an alias or aliases to the appropriate DNS domain. If you use NIS, you must add an alias to the appropriate NIS map. NIS does not have the notion of nested domains. If you use a simple host-file solution you need to add the TotalNET master command alias to the host file of every TAS host in your enterprise. Because of the increasing popularity of the Internet and intranets, most sites will use DNS to establish the TotalNET master alias.
To understand DNS "nested domains" in relation to a TotalNET master server, imagine you have a set of such domains with the innermost domain inner.top.customer.com. Hosts in this domain have names like host1.inner.top.customer.com. When searching for a host named tnmaster, the standard DNS resolver looks for the following system aliases, in order:
-
tnmaster.inner.top.customer.com
-
tnmaster.top.customer.com
-
tnmaster.customer.com
In other words, DNS automatically searches enclosing domains when trying to find a system by name. This means that you can decide where to place the tnmaster alias, according to local administrative requirements. If you wish to have a single TotalNET master system and, consequently, a single list of TAS hosts for your entire enterprise, you can put the tnmaster host in your top-level domain--tnmaster.customer.com. If you want to have a separate TotalNET master for each of your sub-domains, you can create several aliases, such as tnmaster.top.customer.com and tnmaster.yoyo.customer.com.
-
2.2 Accessing TNAS and TotalAdmin
Access TNAS from any web browser with support for tables, forms, Java, and JavaScript. Supported web browsers include Netscape Navigator 3.0 or higher and Microsoft Internet Explorer 3.0.1 or higher.
Follow these steps to connect to TNAS:
-
Using an appropriate web browser, connect to TNAS by entering the URL below. The host variable represents the name of the UNIX server on which TAS resides, and nnnn represents the TNAS port number, 7777 by default. To assign a port number of your choice, see "2.3 Changing the TNAS Port Number".
http://host:nnnn
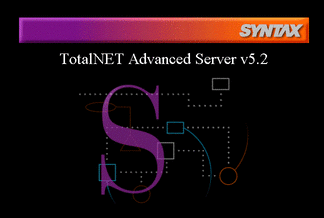
The TotalNET Advanced Server v5.2 screen appears, along with a TNAS icon and a TAS icon for checking status (see "4.1.4 Updating System Configuration"):
-
Click on the center of the screen or the TNAS icon:

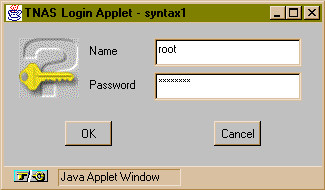
The TNAS login window appears:
-
Log in as root with your root password.
The following screen appears:

-
Click on the TAS sphere icon:

The TotalAdmin menu frame appears:
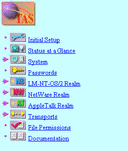
If you have not yet run the initial setup wizard, only the Initial Setup and Documentation options appear.
2.3 Changing the TNAS Port Number
If your system already uses the default port number, 7777, when you install TAS, the installation program searches for the port numbers 7778, then 7779, and so on, until it finds an available port. You can find the TNAS host name and port number in $TNHOME/etc/httpd/conf/httpd.conf.
Follow these steps to change the default TNAS port number from 7777 to a number of your choice:
-
Access $TNHOME/etc/httpd/conf/httpd.conf, where $TNHOME represents /var/opt/totalnet or, for AIX, /var/totalnet.
-
Find the line that begins with Port nnnn, where nnnn represents the port number.
-
Change the port number to the number you want.
-
Save the file.
-
Use the following command:
$TNHOME/usr/sbin/tnsystem -M -a tnas-port=nnnn
-
Stop and restart TNAS with the following commands:
$TNHOME/usr/sbin/tas.sh stop totaladmin
$TNHOME/usr/sbin/tas.sh start totaladmin
2.4 Stopping and Restarting TNAS
Stop and restart TNAS with the following commands:
$TNHOME/usr/sbin/tas.sh stop totaladmin $TNHOME/usr/sbin/tas.sh start totaladmin
2.5 Viewing Current TNAS Sessions
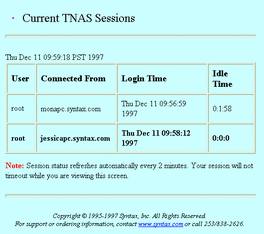
Follow the links below to view current TNAS sessions. This allows you to see other TNAS users--information you can use to prevent interfering with their administration.
Control Frame->TNAS administration icon->Current TNAS Sessions
The Current TNAS Sessions screen appears:
2.6 Setting TNAS Time-Out and Expiration Times
Follow the steps below to set TNAS time-out and expiration times. When time-out occurs, you must log in again, but TNAS recalls the screens at which you left your session. When expiration occurs, TNAS does not recall your session when you log in again.
-
Follow these links:
Control Frame->TNAS administration icon->TNAS Configuration
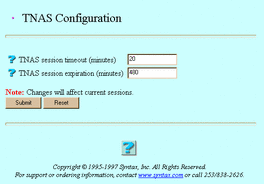
The TNAS Configuration screen appears:
-
Enter values for the following attributes, as needed:
TNAS session timeout (minutes) -- The amount of TNAS inactivity you want to pass, in minutes, before a TNAS session times out.
TNAS session expiration (minutes) -- The amount of TNAS inactivity you want to pass, in minutes, before a TNAS session expires.
-
Click Submit.
The Updating TNAS Configuration screen appears.
2.7 Licensing
Activate your initial license through the initial configuration wizard. Only use this section to add additional TotalNET licenses, update license information, or view current product licenses.
Without a license key, TAS supports only single-user mode, with which you can evaluate TAS. You need a license key to add users to your license. Each time you start TAS and execute a server daemon, TAS verifies the identification number of its host server, checks the user limit, and, if applicable, checks the expiration date. TAS counts licensed connections by clients' addresses. It counts a single-host client connecting to multiple services as one user. Contact your Sun Microsystems sales representative to purchase additional user licenses.
Follow these steps to administer a TotalNET license:
-
Follow these links:
Control Frame->TNAS administration icon->Manage Licenses
The Select a License Key screen appears.
-
From the list, select the product whose license key you want to delete, update, or view, or click Create to activate a key for a new product.
-
Click Create, Modify, Delete, or View.
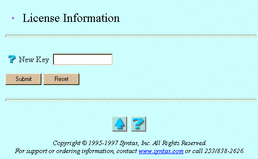
If you clicked Create, the License Information screen below appears. Go to Step 4.
If you clicked Modify, the License Information for productname screen, same as the License Information screen below, appears. The License Information for productname screen also lists the product, host ID, user limit, and time limit (see the descriptions below). When you modify a license key value, you create the same results as removing it and adding a new one. Go to Step 4.
If you clicked Delete, the Confirmation screen appears. Click OK. Do not go to Step 4.
If you clicked View, a License Information screen appears. It contains the following information:
Product -- The TotalNET program you use.
Host Id -- The numeric identifier for the host. It uniquely identifies every computer.
User Limit -- The maximum number of users who may connect to TAS.
Time Limit -- The number of days remaining until license expiration.
Do not go to Step 4.
-
Enter a value for the following attribute:
New Key -- Your license key. Enter the letters in the key in the case provided by your Sun License Center.
-
Click Submit.
The Manage Licenses screen appears.
-
Click OK.
To administer a TotalNET license from the UNIX command line, use the tnlicense command.
- © 2010, Oracle Corporation and/or its affiliates
