Creating a Child Workspace
To create a child workspace:
-
Start TeamWare Configuring.
-
If the workspace from which you must obtain your files is not automatically loaded, choose File > Load Workspaces.
-
Select the workspace in the Load Workspaces dialog box and click Load Workspaces.
The parent workspace is loaded and its icon appears in the Configuring window.
-
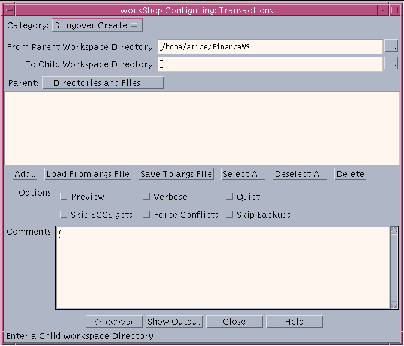
Drag and drop the parent workspace icon onto a vacant space in the Configuring window, or choose Transactions > Bringover > Create, to open the Bringover Create version of the Transactions window (see Figure 1-2).
-
In the Bringover Create Transactions window, type the child workspace path name in the text box labeled: To Child Workspace Directory.
-
In the Directories and Files pane, create the list of directories and files you wish to bring over to your workspace from the parent workspace.
Click Add to open the Add Files dialog box and select files to bring over. Shift-click to select more than one file. To select all of the files, type a period (.) in the Name text box. Click Add Files when you have selected all the files you want.
Note -You can select the Preview option to verify your transaction before you actually transfer any files.
-
Click Bringover in the Transactions window to initiate the Bringover Create transaction.
-
View transaction output in the Transaction Output window.
For more information about the Bringover Create transaction, see "Creating a New Child Workspace (Bringover Create)".
Figure 1-2 Bringover Create Version of Transactions Window

- © 2010, Oracle Corporation and/or its affiliates
