|
|
| iPlanet Process Manager, Version 6.5 Process Builder's Guide |
Chapter 10 Deploying an Application
This chapter describes how to deploy an application. Deployment is specified through the Deployment Dialog Box. After you deploy an application and test it, you'll typically need to change the application and redeploy it.
This chapter describes the following topics:
- "Before You Deploy"
- "Steps for Deploying an Application"
- "The Deploy Application Dialog Box"
- "Revising a Deployed Application"
- "Redeploying an Application"
- "Deploying an Application to More Than One Cluster on the Same Machine"
- "Deploying Applications with the Command Line Deploy Tool"
Before You Deploy
Deploying an application makes it available to test and use. However, before you deploy an application, make sure the following tasks have been performed:
- "Set up and Configure iPlanet Process Manager"
- "Deploy Subprocesses First"
- "Save the Process Map, If Desired"
- "Fix Application Errors"
Set up and Configure iPlanet Process Manager
Before you can deploy an application, you must have all the pieces of iPlanet Process Manager installed and configured, including the corporate user directory, the database, and Process Administrator. In addition, you must have a cluster set up to deploy it to. For more information on creating a cluster, see the Process Administrator's and Business Manager's Guide.
You must also have your cluster information included in your preferences.ini file. For more information, see "Editing the preferences.ini File".
If you want to deploy your applications using https, see the section "Configuring Builder for Secure Deployment".
If you want to deploy your applications through a proxy server, see the section, "Configuring Builder for Deployment Through a Proxy".
Deploy Subprocesses First
If you are using subprocesses, the child process must be deployed before you use it in a parent process. In this way, all expected components are in place when you deploy the parent process.
Save the Process Map, If Desired
When an administrator is viewing the Work Items List produced by the Work Items Statistics page, it's convenient for the administrator to have an image of the process map. If you want to provide this image, you must save the process map as an image file before you deploy the application. To save the process map, choose "Save Process Map Image" from the Applications menu.
Fix Application Errors
Once you have built an application and filled in the necessary configuration information, you can begin deploying the application. During the deployment process, your application syntax is checked. If errors are generated, you must correct them before you can deploy the application. If only warnings are generated (and no errors are generated), you are allowed to deploy the application. However, doing so might lead to problems using the application.
Steps for Deploying an Application
To deploy an application
- With your application open, click Deploy, or open the Application menu and choose Deploy.
If errors are reported, you must fix them first. If no errors are reported, the Deploy Application dialog box appears. For details about this dialog box, see "The Deploy Application Dialog Box".
- From the drop-down menu, select the cluster to which you want to deploy the application.
If this is the first time you are deploying an application, the Authorization Required dialog box appears, prompting you to enter a Process Express username and password.
- Enter your iPlanet Process Manager administration username and password.
As an alternative, you can enter the username and password of someone with deployment privileges. By default, any administrator can deploy an application. A sample entry is shown in Figure 10-1:
Figure 10-1 The Authorization Required dialog box
- Click OK to close the Authorization Required dialog box.
- In the Deploy Application dialog box, the database user and database password fields are filled in automatically. Change them if necessary.
- Select a stage for deployment. If you are still designing the application, you typically want to deploy it to Development. If the application is ready for people to use, deploy it to Production.
- Choose whether the application is in testing mode or not.
If testing mode is set to true, all work items in the application are assigned to the creator of the process instance. If set to false, the work items are assigned to the groups and user roles defined in the application.
- Click OK.
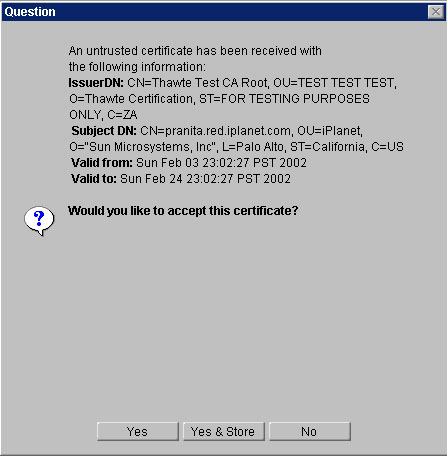
If your Web Server is configured for secure (https) deployment and the certificate sent by the Web Server is not stored in Process Manager's certificate store, a question dialog appears requesting your approval to accept a certificate. The dialog appears in Figure 10-2.
For details about secure deployment using Process Builder, see "Configuring Builder for Secure Deployment".
- Accept or deny the certificate.
You have three options.
Yes. If you choose Yes, Builder accepts, but does not store the certificate and the deployment continues.
Yes & Store. If you choose Yes & Store, Builder accepts and stores the certificate and the deployment continues.
No. If you choose No, Builder denies the certificate and the deployment terminates.
Figure 10-2 Certificate Acceptance Dialog
If deployment succeeds, an Information dialog box appears. A sample is shown in Figure 10-3:
Figure 10-3 A successful deployment brings up the Information dialog box
- From the Information dialog box, you have two main choices:
Click OK to close the dialog box and resume working in Process Builder.
Click one of the highlighted links (Process Express Worklist, Application List, or the application name) to launch Process Express at a particular location.
Solaris Only. In order for the links to work on Solaris, you must add the following line in your preferences.ini file:
browser = netscape_root/netscape -remote openURL{(0)}
where netscape_root is the directory in which your Netscape browser is installed. Without the previous line, your browser will not open when you click the links in the Information dialog box.
After you deploy the application, it is available for use.
The Deploy Application Dialog Box
Figure 10-4 shows the Deploy Application dialog box, where you enter deployment information.
Figure 10-4 The Deploy Application dialog box

Name The name of the application that appears in the list of applications. You cannot edit this field.
Description A longer description of the application. This description appears in Process Express. The user has to have enough information between the Display Name and the Description to identify the application they want from a list of applications, so it's important to make these two fields descriptive.
Display Name The longer, more descriptive name displayed by Process Express. If you are updating an existing application by saving it with a new application name, you can still keep the same Display Name, so that the name users see can be the same from version to version of the application.
Database Table The table in the database where the data for the application is stored. This table is created automatically when you deploy the application. The table name for each application must be unique. This field defaults to the application name. Because the table name can be no more than 15 characters long, if your application name is longer, it truncates the application name. This field is required.
Database User The user name for accessing the database where the application's data is stored. This field is required. This user can be your cluster database user, or you can use a more restrictive application-specific database user. The default is the cluster database user. If you use a a more restrictive application-specific database user, then the cluster database user must have privileges to create tables in the table space of the application-specific database user. Note: While this feature is more appropriate for Oracle database users, it may not be as useful for other database users. You must not change the user after the application is deployed. If you do, you may get errors when the application is run.
Database Password The password used to access the database. This field should be left unmodified. It is filled with the cluster database user's password. Changing this field has no affect on the application runtime.
Deployment Stage Indicates whether the application is in Development or in Production. The deployment stage governs what you can change in the application. In Development, you can change all application information. In Production, there are some application changes you are not allowed to make.
Testing Mode This property designates whether the application is in testing mode or not. If set to true, the application is in testing mode. In testing mode all work items are assigned to the process initiator. You can deploy in testing mode in either the Development or Production stage. This field is required.
Revising a Deployed Application
The deployment stage affects the types of revisions you can make to an application. You can deploy an application either to Development or to Production:
- Development
When you deploy with the deployment stage set to Development, you can test the deployed application. After testing, you can change anything about the application. For example, you can deploy an application, test it, and decide to add or delete data fields.
Because the application is still in development, iPlanet Process Manager assumes that you do not need to preserve data or open work items. As a result, if you make changes to the data dictionary by adding or deleting data fields, iPlanet Process Manager replaces the whole application when you redeploy it. This causes all existing process instances to be deleted.
However, if you do not make changes to the data dictionary, your existing process instances will still be there if you redeploy the application.
- Production
After you deploy an application with a deployment stage of Production, you can still change certain application information if you need to. For example, you can add new activities to an application that is deployed to Production.
Summary of Allowed Revisions
This section lists the different aspects of an application that you can change. The summary lists are grouped as follows:
- "Changes to Activities and Transitions"
- "Changes to Data Elements"
- "Changes to Forms, Scripts, and Content Store"
Changes to Activities and Transitions
Table 10-1 summarizes the revisions allowed to activities and transitions, depending on the application's deployment stage.
Changes to Data Elements
Table 10-2 summarizes the revisions allowed to data elements, depending on the application's deployment stage.
Changes to Forms, Scripts, and Content Store
Table 10-3 summarizes the changes allowed to forms, scripts, and the content store in deployed applications. These changes are allowed in both the development stage and in the production stage.
Deployed Applications Compared with Local Copies
In most cases, you want to edit the deployed version of an application, not the version stored locally. You'll want to do this because the deployed version is usually the most current. If you edit the local version and then deploy it, you will overwrite your current deployed version.
Note If your local version has a unique application ID that differs from that of your deployed version, you will not be allowed to deploy the local version.
Using a Backup of a Local Application
When you open a deployed application, Process Builder saves a copy of the application locally, in the builder/Applications/application_name folder. But you may already have a version of the same application stored locally. In that case, opening the deployed version will launch a dialog box that asks whether you want to overwrite the local version with the deployed version.
If you choose to overwrite the local version, Process Builder saves a copy of the local version in a file called application_name_backup.zip. In this way, you'll have a backup of your local version in case you need to revert to it. For example, the deployed version might be corrupted, or it might not contain recent changes that you made to the local version. To revert to the local backup version, unzip the file.
Saving a Local Application to Another Name
Sometimes you want to make changes to an application, but the changes are not allowed at the deployment stage. In that case, use Save As to rename the application, and then make the changes in the new application.
To rename an application
- Open the most recent version of the application (usually the one deployed to the cluster).
- From the Application menu, choose Save As.
- In the dialog box that appears, rename the application.
Note that you can use the same name if you save the application to a different local folder, but the new application will have a different unique ID. You will not be able to overwrite the deployed version of the application with your updated version, even though the name is the same, because the unique ID is different.
- In the application tree view, double-click the application name to access the properties.
- Make any changes required to the application, and redeploy under its new name.
Redeploying an Application
After you have deployed an application, you can change it and redeploy it.
- If the deployment stage is Development, redeploying deletes any open work items and data (if they are affected by the application revisions you made).
- If the deployment stage is Production, your open work items and data are preserved.
When you redeploy an application, the application's stage (shown in Process Administrator) is set to the stage of the deployed application, not the locally stored application. For example, if the application in the cluster had a stage of Open, and the local application had a stage of Testing, the redeployed application's stage is set to Open. For more information on application stages, see the Process Administrator's and Business Manager's Guide.
Deploying an Application to More Than One Cluster on the Same Machine
Each application you deploy to the application server receives an ID that is generated based on the name of the application. If you deploy an application on one cluster and then try to deploy the application using the same name on a different cluster, the application server does not allow the deployment because of the similar ID. If you want to deploy the same application to more than one cluster that resides on the same application server machine, you must rename the application before you deploy it.
For example, you want to deploy an application named ProcessOrder to a cluster named MyOracleCluster, and you want to deploy the same application to a cluster named MySybaseCluster. If you do not change the name of the application, the application server will not register the second instance of ProcessOrder.
To deploy an application to more than one cluster on the same application server
- Create application directories on your local machine, one for each cluster:
<iPM_install_directory>/builder/MyOracleCluster/Applications
<iPM_install_directory>/builder/MySybaseCluster/Applications
- Open the preferences.ini file located in the following directory: <iPM_install_directory>\builder
- Locate the local_folder entries in the preferences.ini file.
- Add the following lines for your new local application directories, one for each cluster:
local_folder = Oracle Cluster Apps;MyOracleCluster/Applications
local_folder = Sybase Cluster Apps;MySybaseCluster/ApplicationsThe part of the assignment preceding the semi-colon is the name of the directory that appears in the builder UI when browsing for applications. The part of the assignment following the semi-colon is the path to the directory on the local machine.
You must provide the full path to the directory if it does not reside within the builder directory. Otherwise, you can provide the path relative to the builder directory as shown above.
- Save the preferences.ini file.
- Open the ProcessOrder application in the Process Builder.
- Select the Save As command and save the ProcessOrder application into the MyOracleCluster/Applications directory using the application name OraProcessOrder.
- Select Open and Browse to the original ProcessOrder application.
- Select the Save As command and save the ProcessOrder application into the MySybaseCluster/Applications directory using the application name SybProcessOrder.
You can now open both applications and deploy them to your clusters.
Deploying Applications with the Command Line Deploy Tool
The command line deploy tool allows you to deploy one or more applications created in the Process Manager Builder. It is not a standalone substitute for Builder. The command line deploy tool delivers the deployment functionality of the Process Manager Builder deploy function without having to use the Builder's UI.
The command line deploy tool has three dependencies:
- A deployment descriptor (.dd) file. Inside this text file, you determine the deployment settings required to deploy/test your application.
If you do not provide a deployment descriptor file, the command line deploy tool supplies the default values used in a typical development deployment from within Builder.
- A PMExtensionManager.properties file. This is the cluster boot file. It contains the address of the application's target cluster configuration directory. When you create a cluster, Process Manager creates the PMExtensionManager.properties file in the cluster's directory: /iPlanet/ipm65/bpm/<ClusterName>/. In a single cluster implementation, the default cluster name is PMCluster.
By default, the command line deploy tool looks in the local directory for the cluster boot file. You can move this file to any location, but you must reference its location at deploy time.
- An exported Process Manager Builder application .zip file.
By default, the command line deploy tool looks for the application .zip file in the local directory. You can export the file to any location, but you must reference its location at deploy time.
Deploying an Application with the pmdeploy Command
- Export a Builder application to a zip file.
- Create a deployment descriptor (.dd) file for the application.
If you choose not to create a deployment descriptor file, the Command Line Deploy Tool supplies the default values used in a typical development deployment from within Builder.
- Invoke the pmdeploy command from the command line.
You can choose to deploy a single application from the command line or deploy multiple applications using a batch file or a makefile.
A Typical Deployment Descriptor .dd File
corpdirurl: URL to the corporate ldap directory
prettyname: Name of the application
description: Description of the application
dbuser: User name for the database
dbpassword: Password for the database
dbdatatablename: Name of the database table
appstage: DEVELOPMENT/PRODUCTION
apptesting: true/false
You can also add EJB references to the deployment descriptor file. To learn more about adding EJB references to an application's deployment descriptor file, see "Adding EJB References to an Application Using the Command Line Deploy Tool".
Syntax for pmdeploy
pmdeploy -U <username> -P <password> -apppath <path_to_app.zip> -deployfilepath <path_to_app.dd> -bootfilepath <path_to_PMExtensionManager.properties> <appname>
The only required values in the pmdeploy command are the username, the password, and the appname.
Note The pmdeploy command does not consult Builder's preferences.ini file when deploying an application.
Other optional values that can be used in the pmdeploy command:
When the web server and Builder are configured for secure deployment, the pmdeploy command requires you to accept or decline any unknown certificates. To accept an unknown certificate, type "y" when prompted and the deployment proceeds. To decline an unknown certificate, type "n" when prompted and the deployment terminates. To override this prompt, use the options dontAskCert and forceAcceptCert as described in Table 10-4.
For details on configuring iPlanet Process Manager for secure deployment of applications, see the section, "Configuring Builder for Secure Deployment".
Contents