| C H A P T E R 1 |
|
Introduction to the Sun Control Station CC Edition Software |
This chapter describes the Sun Control Station CC Edition software, henceforth referred to as Sun Control Station software.
This software package enables administrators to view tasks and events, install and administer the control modules, and schedule tasks.
The Sun Control Station application consists of a core framework, which is the engine for executing control modules. You can obtain these control modules from Sun Microsystems, Inc., third-party vendors, or your in-house design team.
The Sun Control Station software includes the following modules:
 9 Operating System. However, it is not part of the Sun Control Station software for the Solaris 10 Operating System.
These modules are described in separate documents, which are available online through the browser interface. See How to Access Online Documentation.
This section describes the control station features that are available from the browser interface.

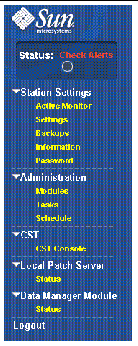
Each page in the browser interface has the following navigation features:
A triangle icon appears next to each menu name. When the menu is collapsed, the triangle points to the right. When the menu is expanded, the triangle points down. Click a menu name to expand or collapse the menu.
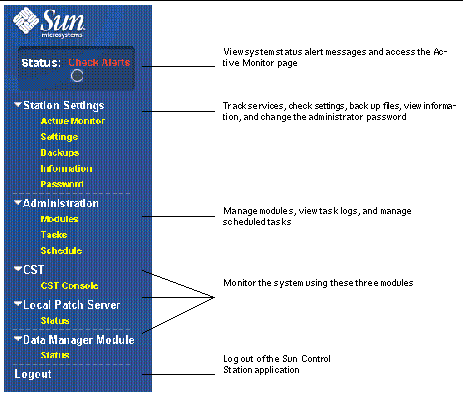


The Active Monitor cron job displays the status of the services and system components for the server on which the Sun Control Station software runs. See Active Monitor.
A Check Alerts status message appears if one of the services or system components monitored by Active Monitor changes to a yellow or red status.
Click the status icon in the Status Alert box or choose the Active Monitor item from the Station Settings menu to open the Active Monitor status page (FIGURE 1-5). If you enabled email notification, a yellow or red status alert triggers an email message to be sent to the email address you specified. See How to Configure Settings.
From the Station Settings menu, you can monitor your system, configure the application, perform backups, view application information, and change the administrator password.
The Active Monitor item on the Station Settings menu enables you to monitor the status of services and system components. The Active Monitor runs a cron job on the system every 10 minutes, which updates the status of the services and system components. Status alerts appear in the Status Alert box.
For procedures, see How to View Active Monitor Information on Your Server and How to Verify Disk Usage and Remove an Alarm Condition.
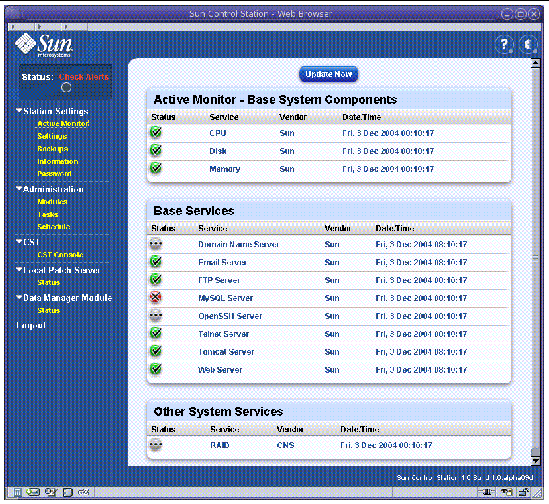
The Active Monitor page displays the status, service name, vendor name, and timestamp of the last status check for the following components and services:
The status of each service or system component is indicated by one of the following status icons that appear beside each service entry on the Active Monitor page.
These threshold defaults indicate when a yellow or red alarm is triggered for the Active Monitor:
The Settings item on the Station Settings menu enables you to configure these optional features: HTTP proxy server, FTP proxy server, days to keep tasks and events, and Active Monitor notification email. For procedures, see How to Configure Settings.

The Backups item on the Station Settings menu enables you to perform both manual backups and scheduled backups of Sun Control Station data. See Backing Up and Restoring Sun Control Station Data.
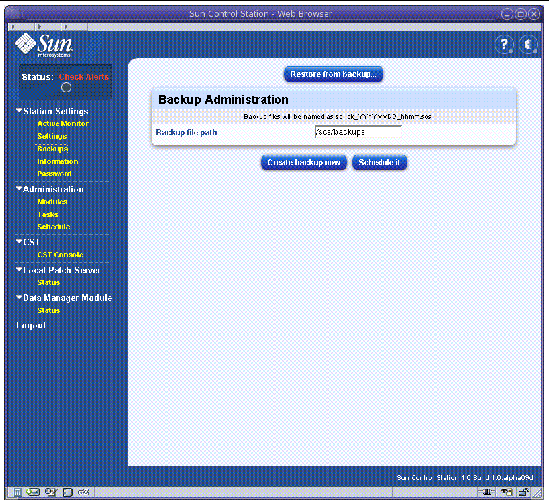
When backing up your data to another server, you can use either Windows File Sharing (SMB) or Network File System (NFS) software. The default backup location is in the /scs/backups directory on the local server.

|
Caution - Back up your data to a different server. Do not back up to the local server. |
The Information item on the Station Settings menu enables you to view current information about your Sun Control Station application and register. Complete the registration the first time you log in to the Sun Control Station application.
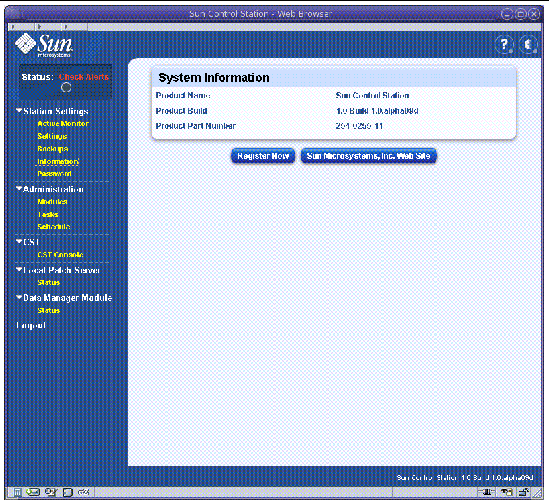
From the System Information page, you can see the product name, the product build number, and the product serial number.
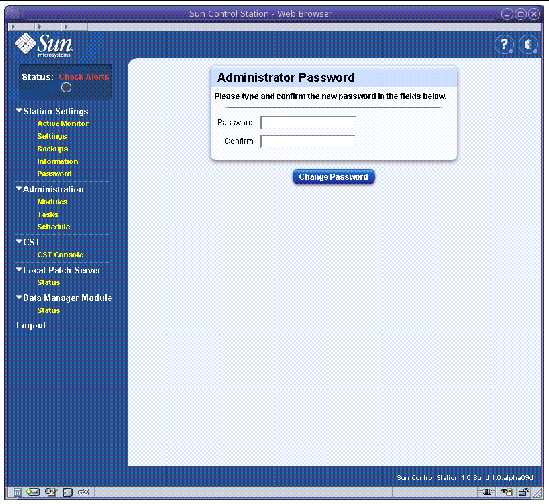
The Password item on the Station Settings menu enables you to change the administrator password. Change this password the first time you log in. See How to Change the Administrator Password.
From the Administration menu, you can administer modules, perform tasks, and schedule tasks.
The Modules item on the Administration menu opens the Control Modules page. From this page, you can view the details about a module, add a module to, or remove a module from the Sun Control Station application.
For related procedures, see How to Add a Module, How to View Module Details, or How to Remove a Module.
The Sun Control Station software for Solaris 9 systems includes the CST and LPS modules and a placeholder for the DMM module. For Solaris 10 systems, the control station software includes the CST module and placeholders for the LPS and DMM modules. To learn more about these modules, view the online documentation. See How to Access Online Documentation.
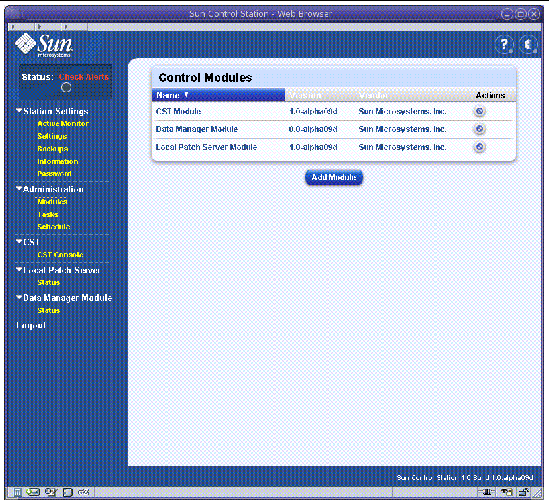
The Control Modules page shows the name, version number, and vendor name of each installed control module.
To delete a module from the control station, click the icon in the Actions field for the module you want.
You can sort the list of modules in ascending or descending order by the module name, version number, or vendor name. By default, the modules are sorted by module name in ascending order.
The sorting order is indicated by a triangle in the heading of the column that has been sorted. A triangle that points down indicates ascending order, while a triangle that points up indicates descending order.
The Tasks item on the Administration menu enables you to view and schedule tasks.
A task is an executed operation that has a determined start and end point, such as adding a host or uploading a module. A task is invoked by a user. Invoking a task generates one or more events.
An event is a notification message that provides information about one part of a task. A task can generate one or more events. An event is generated by the control station or by an agent on a managed host.
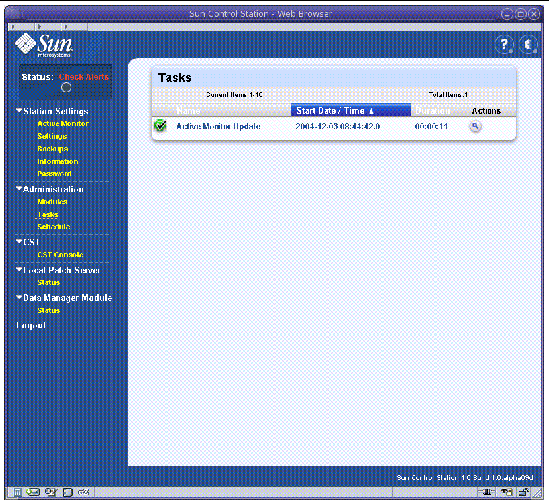
Each task entry on the Tasks page includes the following information about the task:
A new page appears that lists the events. Click the up arrow icon to return to the Tasks page.
|
Note - Only the first 10 entries appear on the Tasks page. Use the buttons at the bottom of the page to view the rest of the entries. |
You can sort the list of tasks in ascending or descending order by the task name, the start date and time, or the duration of the task. By default, the task list is sorted by start date and time in ascending order.
The sorting order is indicated by a triangle in the heading of the column that has been sorted. A triangle that points down indicates ascending order, while a triangle that points up indicates descending order.
The Schedule item on the Administration menu opens the Schedule page. Use the Schedule feature, also referred to as the scheduler, to start tasks at specific times. See How to Schedule a Task. The scheduler works the same way for any task.

No information appears on the Schedule page until you schedule a task.
Copyright © 2004, Sun Microsystems, Inc. All Rights Reserved.