| C H A P T E R 3 |
|
Working With Station Settings |
This chapter includes procedures that describe how to do the following:
You must log in to the Sun Control Station application as the administrator to perform all tasks.
|
1. From the Station Settings menu, click Active Monitor.
The Active Monitor page appears.
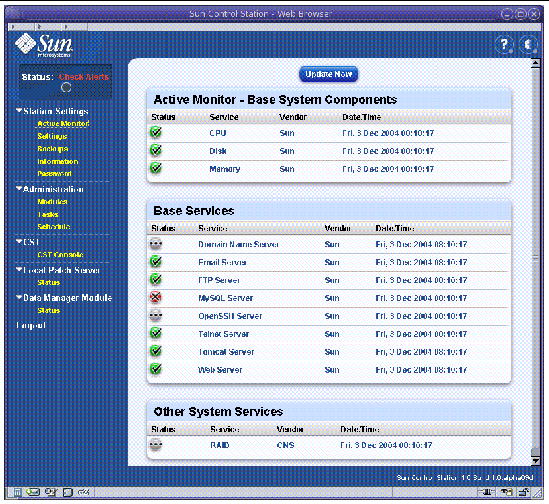
The Active Monitor page displays the status, service name, vendor name, and timestamp of the last status check for the following components and services:
2. Click Update Now to retrieve current service status information.
System information updates can take several minutes. The update time depends on the amount of data being processed. The Task Progress indicator page appears while the statistics are being retrieved from the system.
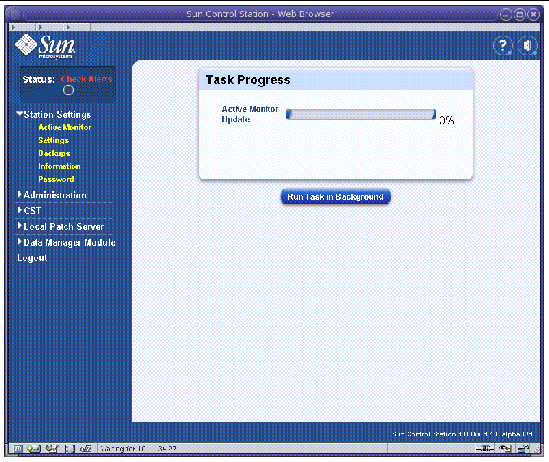
When the update completes, the following happens:
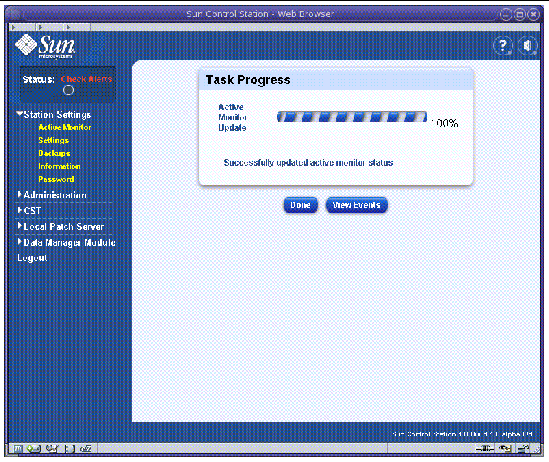
3. (Optional) Click View Events to view the event log.
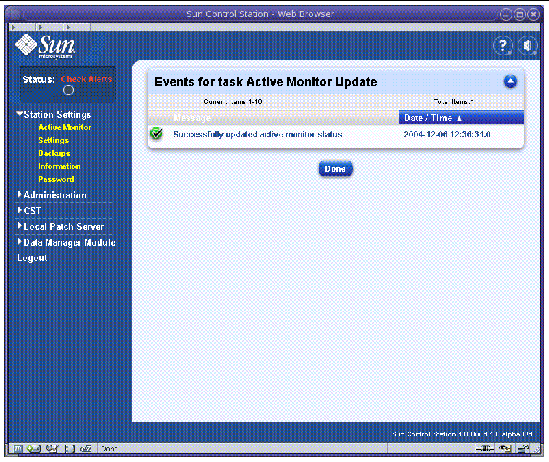
The Active Monitor page appears with updated information.
|
The Active Monitor cron job verifies the disk usage for only the root (/), /var, and /home disk slices. Use this procedure to verify disk usage for other disk slices or to remove a disk usage alarm condition.
|
Note - A yellow or red alarm for disk drive usage usually occurs if you automatically download any available package files from a BlueLinQ server. |
1. Use ssh to log in to the Sun Control Station application.
3. Check the disk capacity of your disk slices.
For a description of the output from the df command, see the df(1) man page.
An alarm is generated if the value in the Capacity % field is higher than the threshold value. See Active Monitor Thresholds.
4. Clean up the files in your disk slices.
5. From the Station Settings menu, click Active Monitor.
The Active Monitor page appears.
6. Click Update Now to begin updating the system and service status information.
7. From the Stations Setting menu, click Active Monitor.
If the value in the Capacity % field is below the threshold, the status returns to normal. The normal status is indicated by the green icon with a checkmark.
|
1. From the Station Settings menu, click Settings.
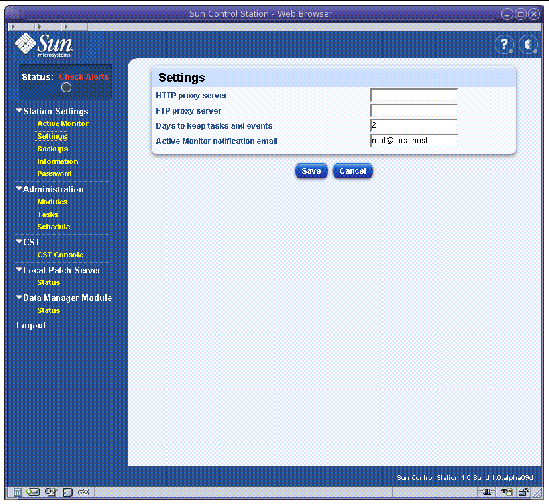
2. Configure the following settings:
For example, an IP address might be 192.168.48.18. A fully qualified host name might be host1.mycompany.com, where host1 is host-name and mycompany.com is domain-name.
For example, an IP address might be 192.168.48.18. A fully qualified host name might be host1.mycompany.com, where host1 is host-name and mycompany.com is domain-name.
You can perform both scheduled backups and manual backups from the Sun Control Station application.
This section covers the following procedures:
You can use either Windows File Sharing (SMB) or Network File System (NFS) software to back up your control station data to another server. If the disk drive on which the backup files are stored fails, you will lose them and the rest of the server data.
The default path is /scs/backups on the local server.

|
Caution - Back up your data to a different server. Do not back up to the local server. |
The backup file name uses the following format:
YYYY represents the 4-digit year, MM represents the 2-digit month, DD represents the 2-digit day, hh represents the 2-digit hour (in a 24-hour clock), and mm represents the 2-digit minute.
For example, the bk_20050126_1745.scs file name indicates that the backup file was created at 17:45 on January 26, 2005.
|
To schedule tasks to create, modify, and delete backup files, see How to Schedule a Task.

|
Caution - Back up your data to a different server. Do not back up to the local server. |
1. From the Station Settings menu, click Backups.
The Backup Administration page appears.
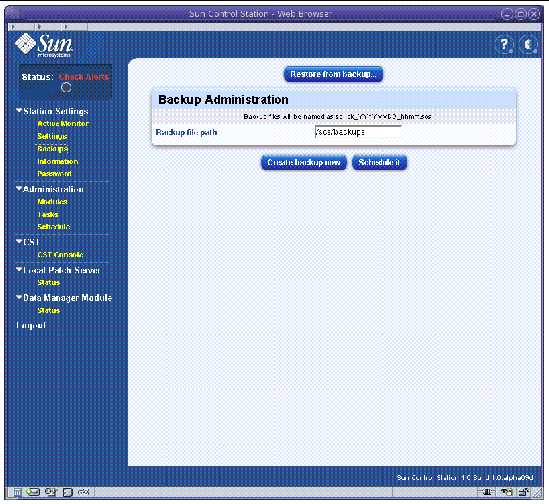
2. In the Backup File Path field, type the path to the directory in which to store the backup files.
For example, to back up your data to the server1 system in the /scs/backups directory, specify server1:/scs/backups.
You can also use SMB or NFS to mount a remote file system on which to store the backup file. You must have write permissions for the directory on the file system in which you plan to create the backup file.
By default, backups are written to the /scs/backups directory on the local server.
The Task Progress dialog box appears.
|

|
Caution - Interrupting the restore process might cause data corruption. If the restore process is interrupted, have the administrator restart the restore process. |
When a backup task runs, it creates a new backup file in the location specified in the Backup File Path field on the Backup Administration page.
The backup file name uses the bk_YYYYMMDD_hhmm.scs format.
YYYY represents the 4-digit year, MM represents the 2-digit month, DD represents the 2-digit day, hh represents the 2-digit hour (in a 24-hour clock), and mm represents the 2-digit minute.
For example, the bk_20050126_1745.scs file name indicates that the backup file was created at 17:45 on January 26, 2005.
|
Note - The CST module cannot be overwritten. To successfully restore from a backup file, you must remove the CST module from the control station before you start the backup. |
1. From the Station Settings menu, click Backups.
The Backup Administration page appears.
The Restore Administration page appears.

3. Specify the location of the backup file in one of these ways:
4. Click Prepare Restore to restore from this backup file.
The Task Progress dialog box appears.
When the prepare restore operation completes, the dialog box shows that the restore script is ready to run.
5. Log out of the control station application.
6. Use ssh to log in to the server on which you want to restore the backup data.
Several messages appear in the terminal window. The final message is All Done.
9. Log in to the control station application to verify that the restore succeeded.
|
Use this procedure to restore the control station software following a system failure or after you detect data corruption.
1. Reinstall the operating system you were running on your system.
2. Reinstall the Sun Control Station software on your system.
3. Log in to the Sun Control Station application.
4. Restore the Sun Control Station data.
See How to Restore Sun Control Station Data From Backup Files.
Copyright © 2004, Sun Microsystems, Inc. All Rights Reserved.