Chapter 2 Customizing Project WebSynergy
To be done.
Branding and Site Identity
To be done.
 To change the Banner Logo
-
Login to Project WebSynergy as Test User.
-
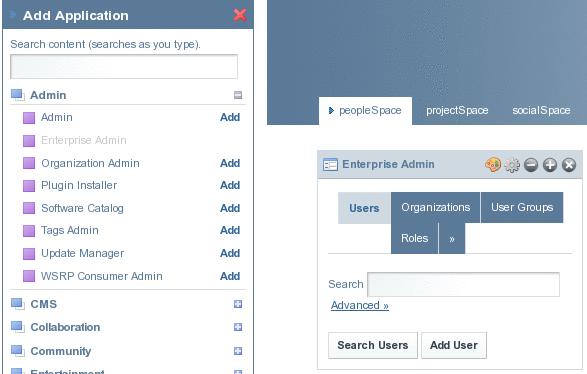
Click Add Applications and expand the Admin folder.
-
Click Add against the Enterprise Admin portlet.
The Enterprise Admin portlet is added to your page
Figure 2–1 Enterprise Admin portlet
-
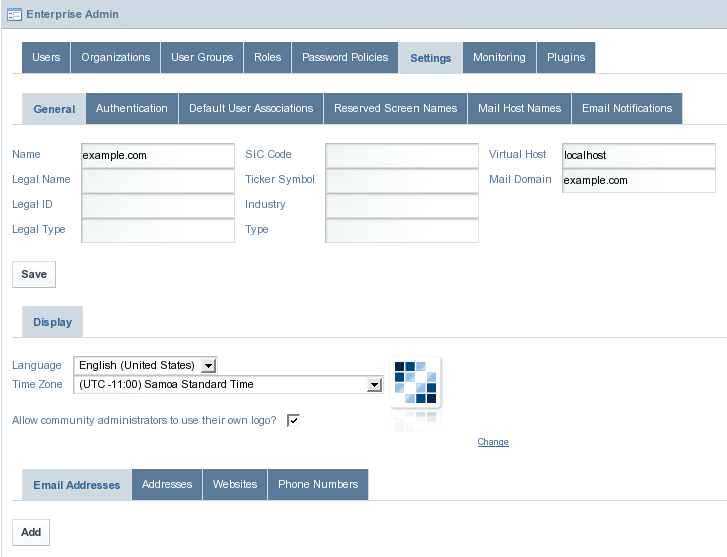
Maximize the portlet, and click on the Settings tab.
Figure 2–2 Settings page
-
Click on the Change link. You are prompted to browse and select a new banner logo.
 To change the Address Bar and Browser tab Icons
-
Navigate to the directory which contains the WebSynergy installation.
-
From the directory containing the WebSynergy installation, navigate to /glassfish/domains/domain1/applications/j2ee-modules/websynergy/html/themes/classic/images.
-
Change the liferay.ico image.
-
Clear the browser cache and reload the page.
Friendly URLs
To be done.
 To change the Friendly URL of a Page
-
Login to Project WebSynergy as Test User.
-
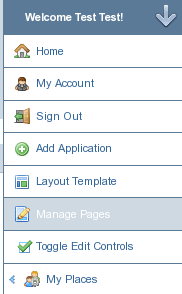
Click on Manage Pages from the welcome menu.
Figure 2–3 Welcome menu – Manage Pages
You can see all the pages on the left hand side under the Guest (Test Test).
Figure 2–4 Manage Pages page
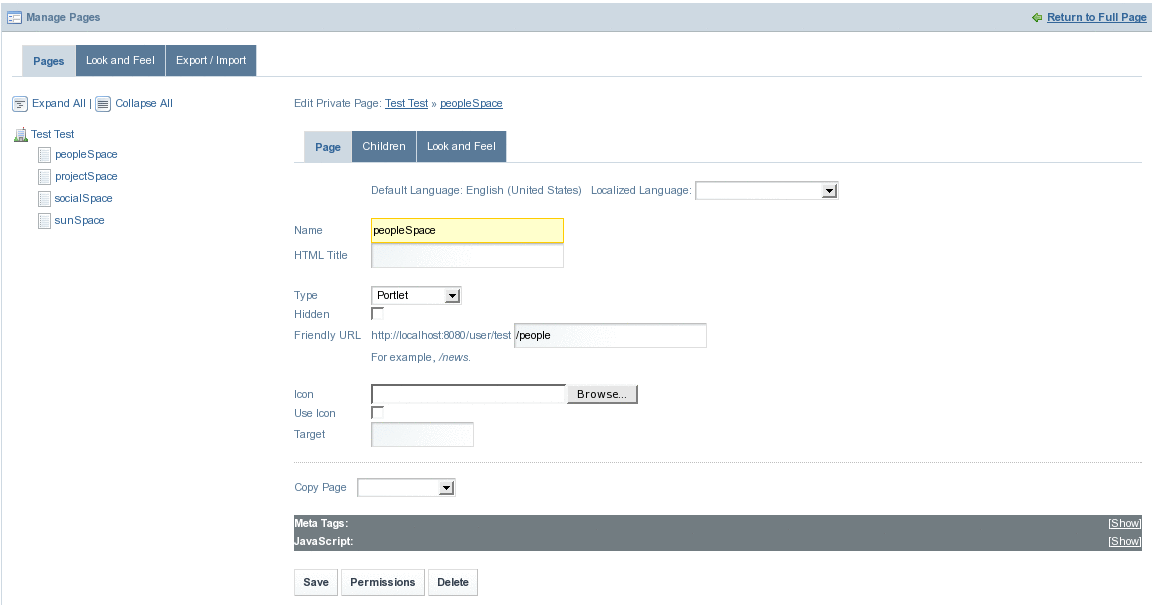
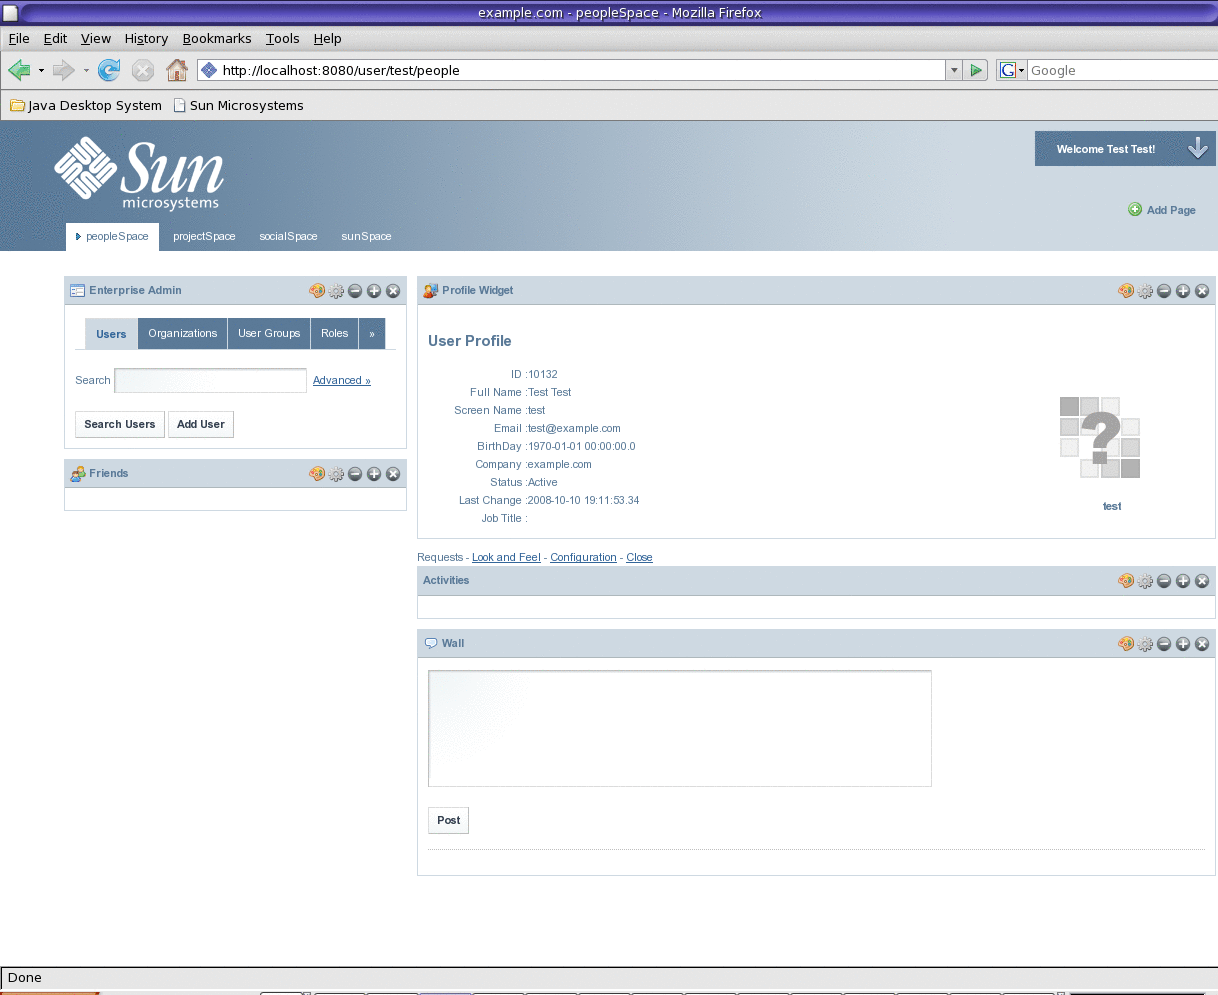
Friendly URL for the PeopleSpace page is http://localhost:8080/user/test/people. This means, you can directly access the PeopleSpace page by typing the URL http://localhost:8080/user/test/people, as seen in the below figure.
Figure 2–5 Friendly URL for the page
You can note the at value in the Friendly URL field looks as below:
Figure 2–6 Friendly URL field

-
Change the value of the Friendly URL to the value you like.
In our example, we change it from people to friendly_url.
Figure 2–7 Friendly URL field with new Friendly URL

-
Click Save.
A message saying that the page is not found appears. For the changed URL to take effect, logout and login back to WebSynergy.
-
Now you can view the Friendly URL.
The changed Friendly URL for the PeopleSpace page is http://localhost:8080/user/test/friendly_url.
Figure 2–8 New Friendly URL

Virtual Hosting
Virtual Hosting is a method where more than one domain or subdomain name can be hosted on the same WebSynergy portal binaries.
Comparison
In the ASP model, each "Instance" or "Company" maintains data in the database that is completely segregated from other data in the database. This is usually handled via an entry in each database table known as a companyId and must be assigned a specific virtual host address. Hence, if there is to be complete isolation of different sets of data, this is the best mechanism for virtual hosting. However, due to the fact that the data is effectively namespaced, a completely separate set of users/admins are needed to manage each unique Company. Other data (e.g., Journal CMS content) can be shared across the different Companies and, hence, must be completely reproduced.
For "Communities," these are common areas that users within a given Company can access if given the rights. Creating Communities is a matter of clicking a button and can be configured to have a virtual host address if so desired (but not necessary, unlike the ASP model). User management is much simpler in this case since users can be participating in a number of different communities. Also, Instance-scoped or Company-scoped data can be accessed from other communities as well. The main con in this environment is the lack of isolation in the data.
Virtual Hosting (ASP)
To be done.
Virtual Hosting (Communities)
To be done.
Site Layout and Navigation
To be done.
 To change the Site Layout
-
Login to Project WebSynergy as Admin user.
-
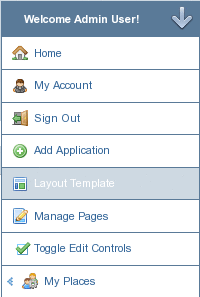
Click on Layout Template from the Welcome menu.
Figure 2–9 Welcome menu – Layout Template
-
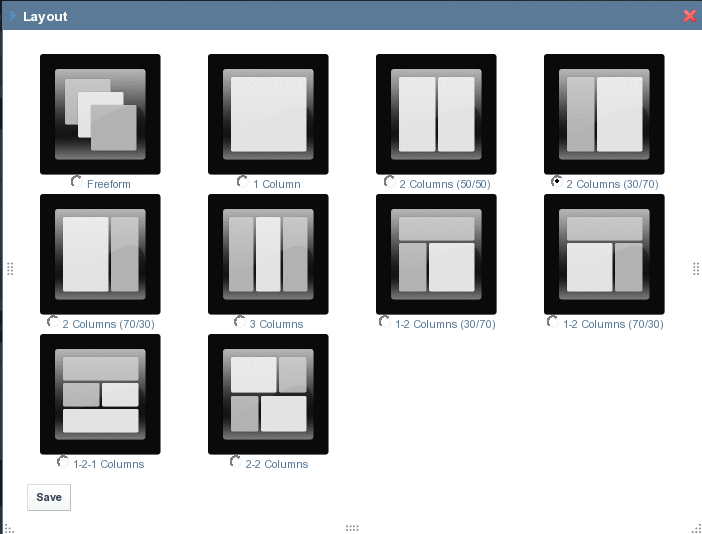
The Layout page appears.
Figure 2–10 Layout Templates
-
Select the Layout you want to use and click Save.
 To create a new Layout
Changing the Page Theme
You can view and change your page theme. The below procedure explains how you can change the page theme.
 To Change the Page Theme
-
Login to Project WebSynergy.
Any user can change themes, but only the admin user has access to all available themes, and has the privilege to install more themes.
-
Choose Manage Pages from the welcome menu.
-
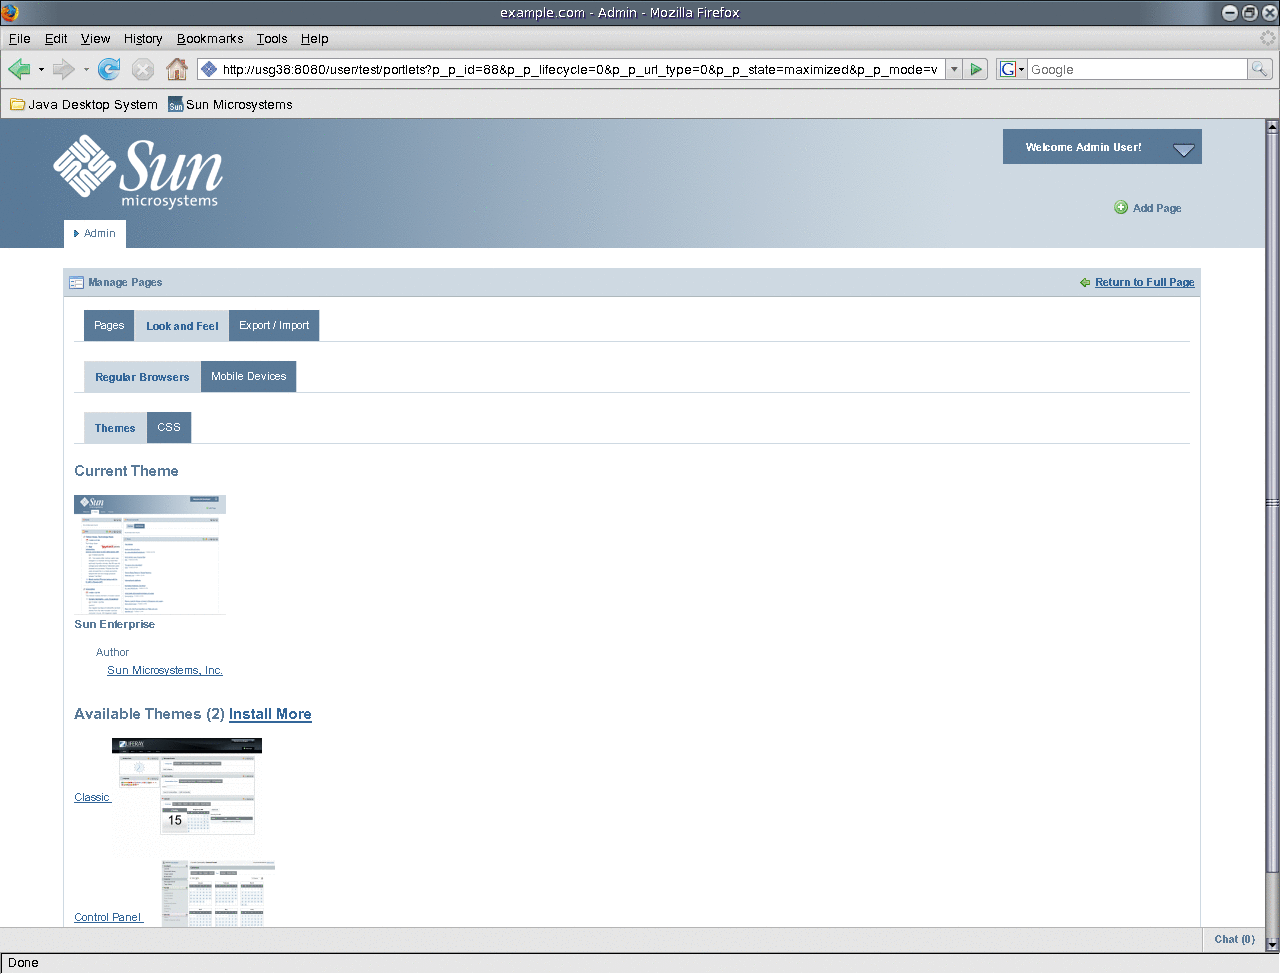
Click on the Look and Feel tab.
The Current Theme for the page and all the available themes are displayed.
Figure 2–11 Page Theme
-
To change the theme, click on a theme from Available Themes.
The theme is applied to your page.
Using Bundled WebSynergy Portlets
To be done.
 To use Bundled WebSynergy Portlets
-
Login to Project WebSynergy as Admin user.
-
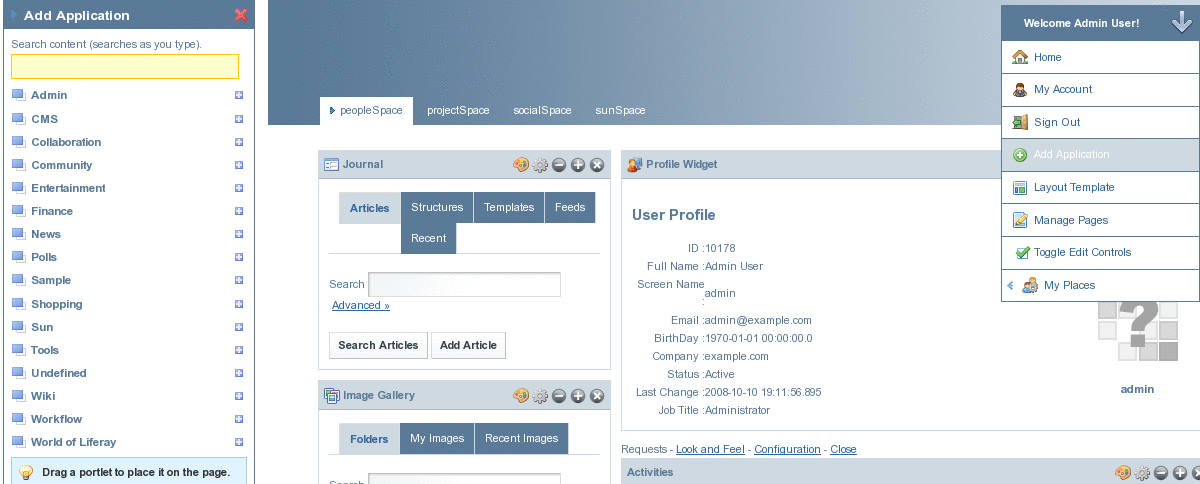
Click on Add Applications from the welcome menu.
Figure 2–12 Bundled WebSynergy Portlets
-
Add the required portlet to your page.
Customizing the Look and Feel and Configuration of a Portlet
You can change the display name of a portlet and also its look and feel.
Changing the Name of a Portlet
You can change the display name of a portlet simply by clicking on the name of the portlet.
 To Change the Name of a Portlet which is on a Private
Page
-
Login to Project WebSynergy as any user of your choice.
In this example, login as Paul Tester.
-
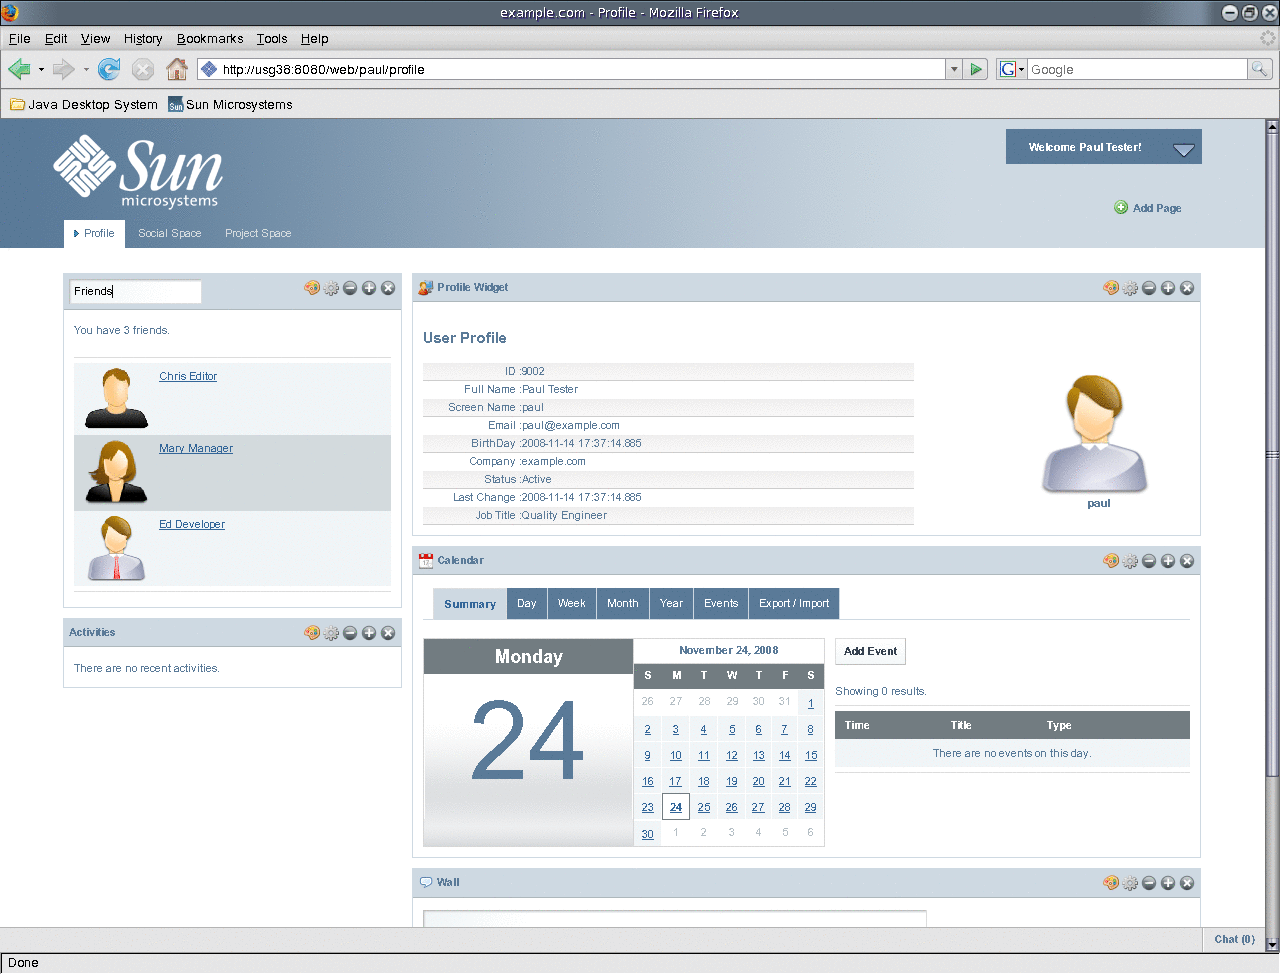
Click on the name of a portlet.
For example, click on the name of the Friends portlet.
Figure 2–13 Changing the display name of a portlet
-
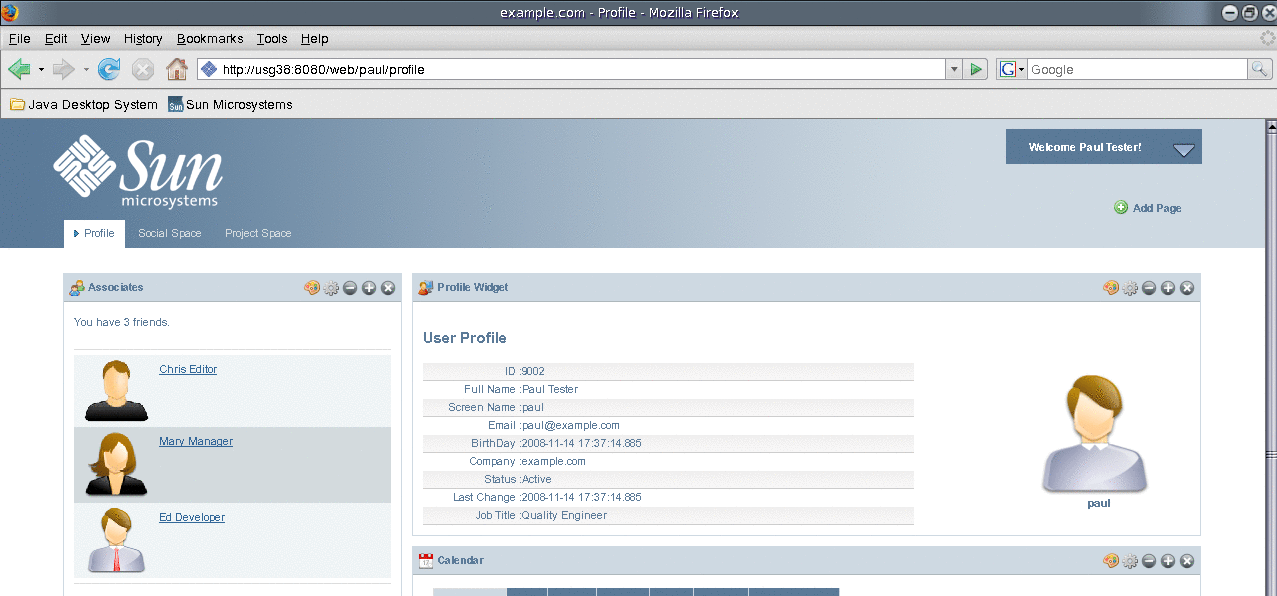
Edit the display name.
In this example change the name of the portlet to Associates.
Figure 2–14 Changed display name
 To Change the Name of a Portlet which is on a Public
Page
To change the name of a portlet which is on the public page of a user, you need to login as the user and navigate to the public page of the user from My Places on the welcome menu.
-
Login to Project WebSynergy as any user of your choice.
-
Navigate to a public page of the user by selecting My Places on the welcome menu.
-
Click on the name of a portlet, and edit and change the name.
Customizing the Look and Feel and Configuration of a Portlet
The Look and Feel and Configuration buttons on a portlet can be used to customize the portlet.
Figure 2–15 Look and Feel and Configuration buttons on a portlet

The Look and Feel Button
A window pops-up on clicking the Look and Feel button. The window provides options to customize the look and feel of the portlet.
Figure 2–16 Customizing the Look and Feel
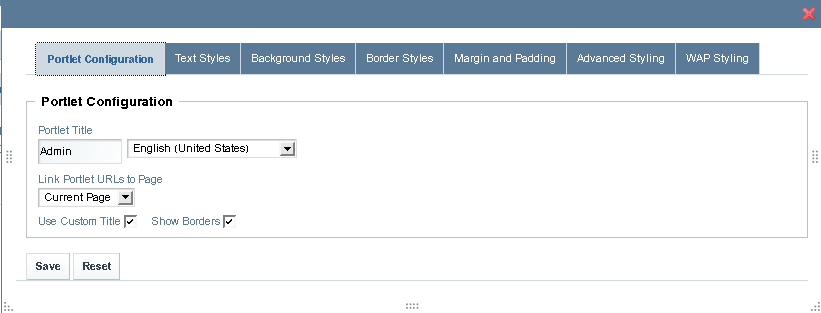
The window has tabs for Portlet Configuration, Text Styles, Background Styles, Border Styles, Margin and Padding, Advanced Styling, and WAP Styling.
Portlet Configuration tab
If you enable the Use Custom Title option, you can change the value in the Portlet Title field. When you click Save, the new title for the portlet takes effect. The Show Borders option can be used to enable or disable the display of borders.
Text Styles tab
Using this tab, you can change the default settings for text such as, font, size, color, alignment, bold, and italic.
Background Styles tab
Using this tab, you can change the default background color for the portlet.
Border Styles tab
Using this tab, you can change the border styles for the portlet. You can change the default settings for the Border Width, Border Style, and Border Color. You can set different width, style, and colors for different borders by disabling the Same for All option.
- © 2010, Oracle Corporation and/or its affiliates
