WebSynergy Features and Use Cases
To be done.
A Use Case for Friends Portlet
The following is a use case for adding a friend to the Friends Portlet.
You can view the list of your friends and their profiles on the Friends widget. There is no easy and straight forward way of adding friends to the Friends widget.
This use case explains a scenario where you make use of the Search and Invite Friends widgets and the Requests widget to add a friend to the Friends widget.
 To Add a Friend
-
login to WebSynergy as Paul.
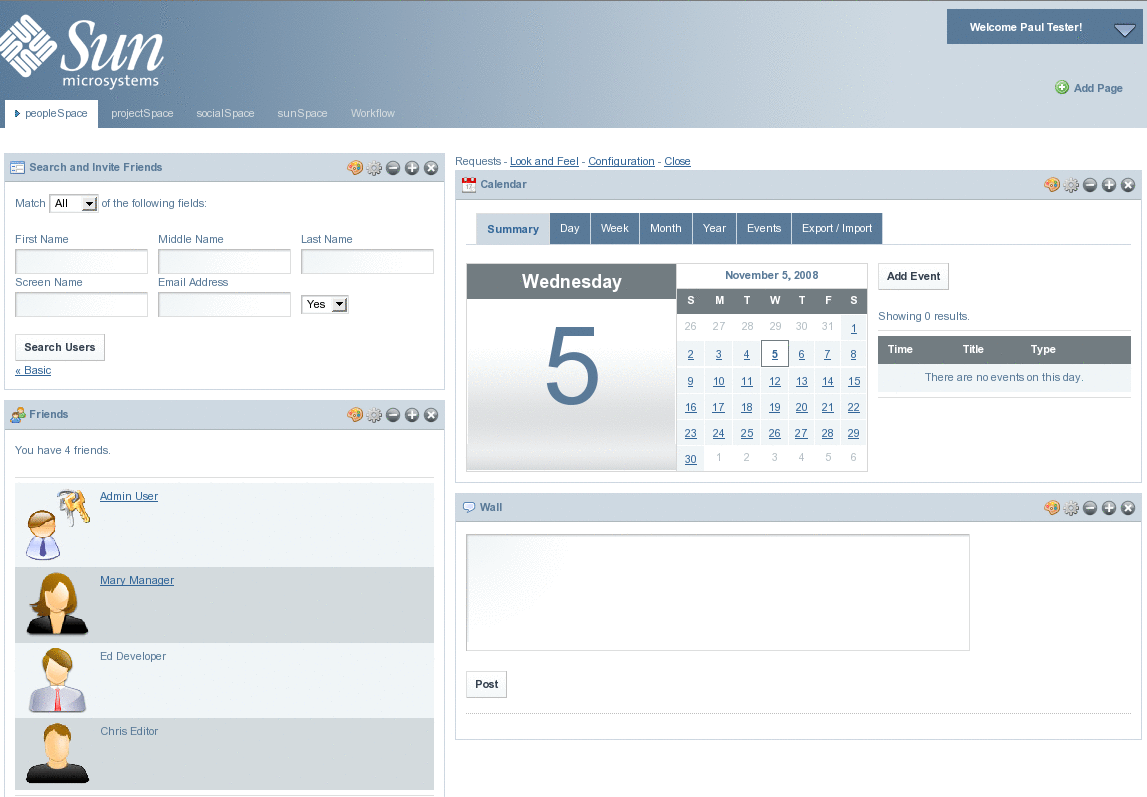
The Friends widget is displaying Mary manager, Ed Developer, and Chris Editor as the friends for Paul Tester.
-
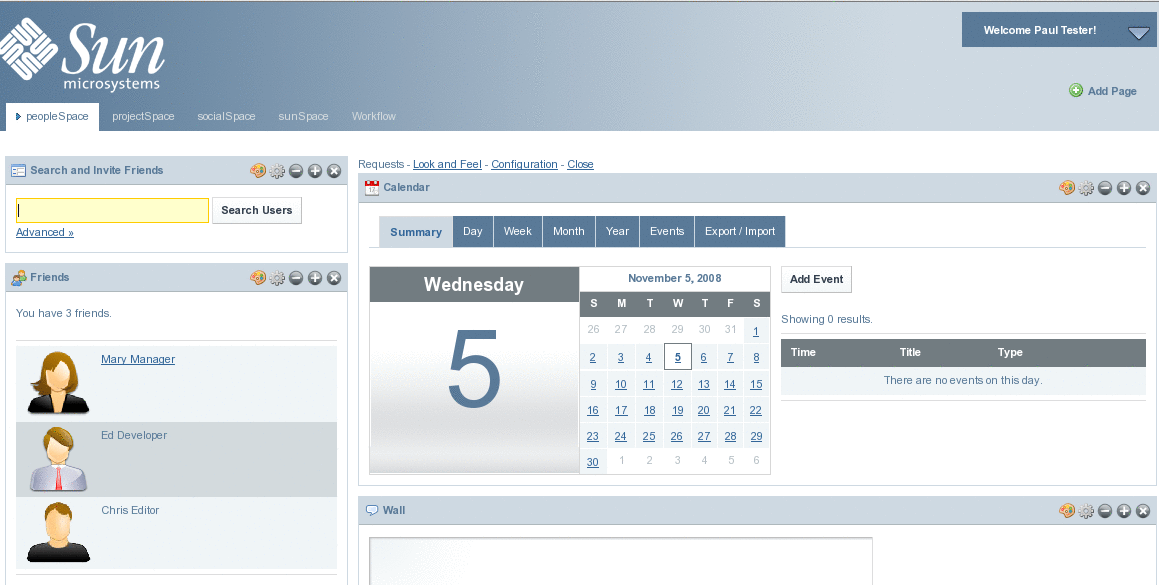
Add the Search and Invite Friends widget to your page.
Figure 1–9 To Add a Friend
-
Click on the Advanced link.
Specify the search strings which need to be included in you search. For example, type 'example' in the Email Address field to search for users with email id containing the text 'example'.
Figure 1–10 To Add a Friend
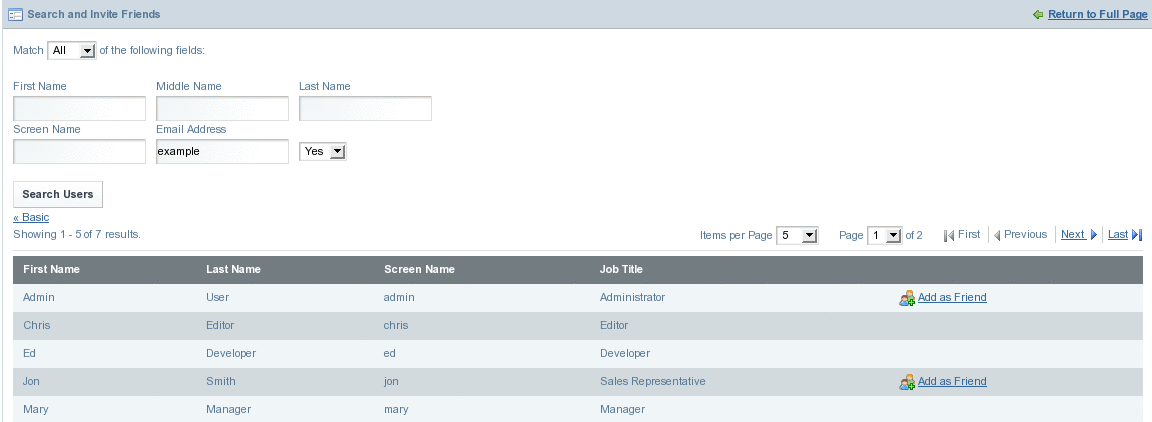
You can notice that Chris, Ed, and Mary are already friends for Paul, and there is no Add as Friend link against them.
-
Select a user and click Add as Friend link against the user.
In our example, Click Add as Friend against the Admin user. You get a message saying 'Your request is processed successfully'.
-
Logout and login again as the user selected as friend.
In our example, login as Admin user.
-
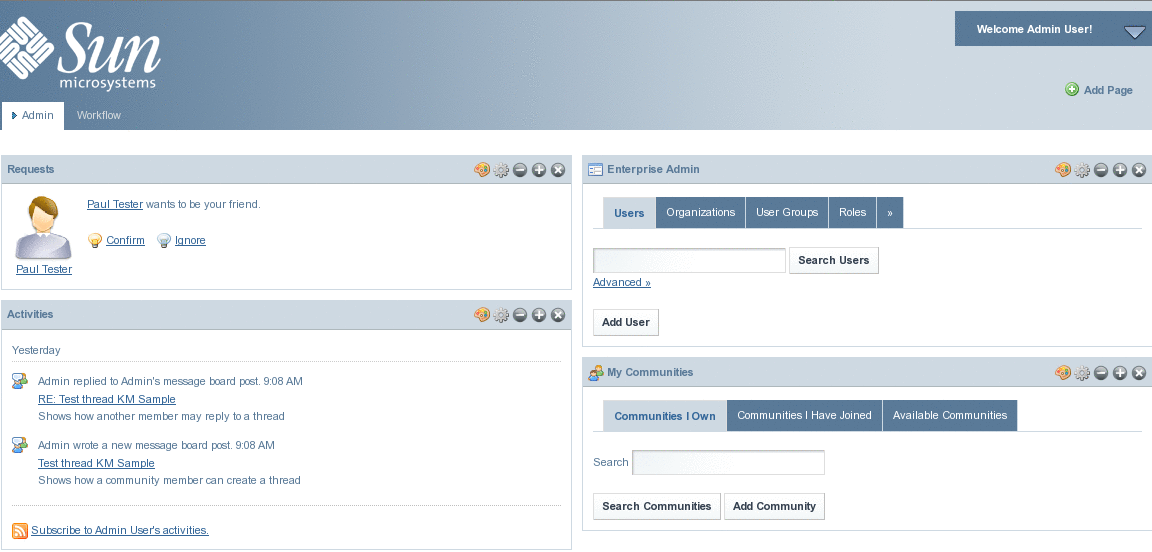
Add the Requests portlet to your page.
Figure 1–11 To Add a Friend
-
Click on the Confirm link.
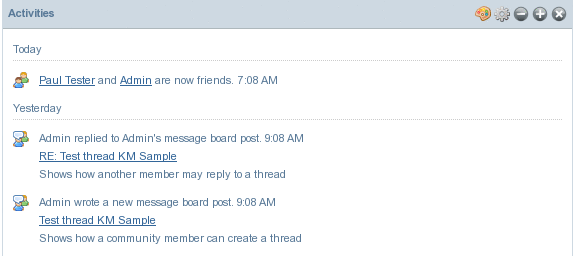
You can see on the Activities portlet that Paul Tester and Admin are now friends.
Figure 1–12 To Add a Friend
The Friends portlet on the Paul Testers page includes Admin as among the friends for Paul.
Figure 1–13 To Add a Friend
A Use Case for the Expense Report Portlet
The Expense Report widget models the Expenses Reports Reclaim process that is typical in any large organization. An Expense Report is a report comprising details of the expenses (like Business Travel, Relocation, Broadband Bills Claim) incurred by an employee that can be reclaimed from the organization.
An Expense Report created by an employee can be approved by his or her superior. Users available to the system created using the Enterprise Admin Portlet are mapped to either the Employee role or the Manager role. Let us consider the following Use Case:
Paul Tester (Employee) submits an Expense Report for a business trip. Mary Manager (Manager) verifies and approves the Expense Report. The following is the process involved:
-
Paul Tester submits an Expense Report. Paul performs the following steps to submit his report:
-
Paul selects the expense category, and enters an expense amount and description and saves the report. The system assigns a unique expense ID to the report.
-
Paul reviews the report summary.
-
Paul submits the saved report for approval by his manager.
-
-
Mary Manager verifies the details of the Expense Report. She can either approve or reject the report.
 To Submit an Expense Report
-
Login to WebSynergy as Paul Tester.
-
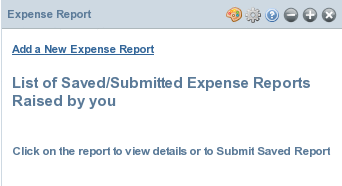
Add the Expense Report Portlet to your page.
Figure 1–14 To Submit an Expense Report
-
Click on the Add a New Expense Report link.
-
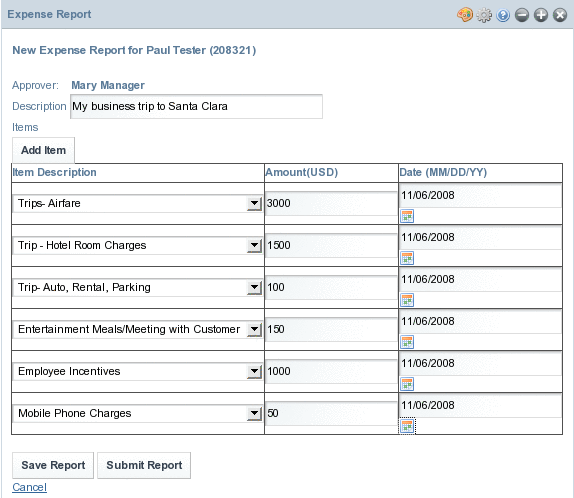
Enter a description for the Expense Report.
Enter values for Item Description, Amount, and Date fields. Click on Add Item to add a new row.
Figure 1–15 To Submit an Expense Report
-
Click on Save Report.
-
Click on the Go back to Report Summary link to view the report summary.
The summary page displays the Report No., Description, Submission Date, Amount, and the Status.
Figure 1–16 To Submit an Expense Report
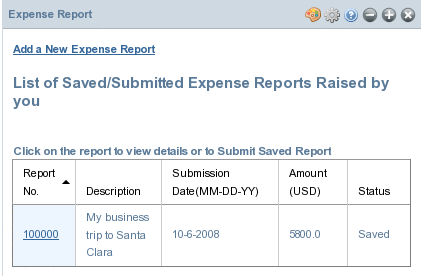
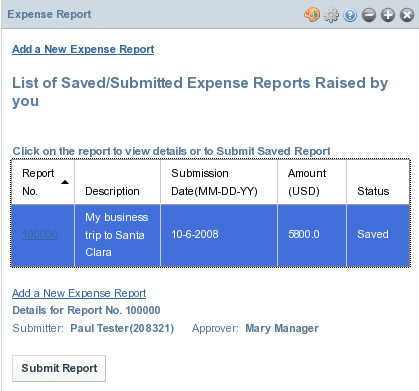
Click on the report ID. The report is enabled for submit.
Figure 1–17 To Submit an Expense Report
-
Click Submit Report.
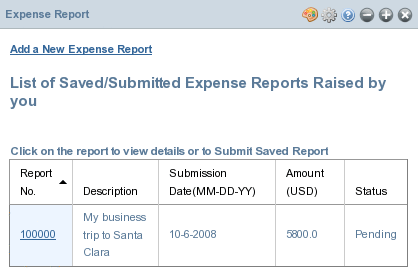
The report is submitted for approval. Status of the report changes to Pending.
Figure 1–18 To Submit an Expense Report
 To Approve an Expense Report
-
Login to WebSynergy as Mary Manager.
-
Add the Expense Report Portlet to your page.
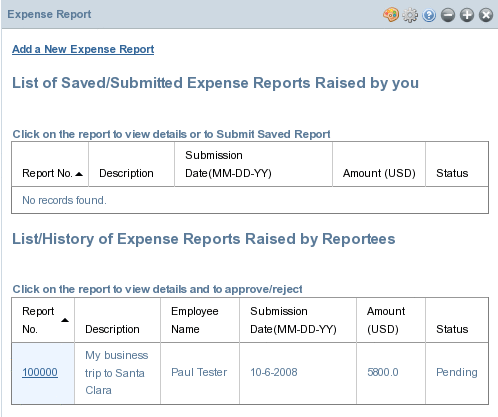
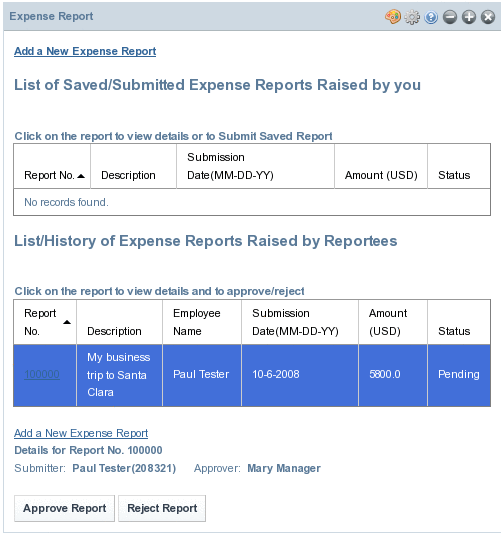
The report submitted by Paul is displayed under the List/History of Expense Reports Raised by Reportees.
Figure 1–19 To Approve an Expense Report
-
Click on the report ID.
Details of the Submitter are displayed. Also, the Approve Report and Reject Report buttons appear.
Figure 1–20 To Approve an Expense Report
-
Click on the Approve Report button to approve the report.
A Use Case for Delegated Administration – Delegating Portlets to Users
A User has a number of Roles associated to him. Each portlet is also associated with one or more Roles. A user can access only the portlets which are associated with his roles. If the administrator (Admin User) assigns a new role to a user, all the portlets which are associated with the role are accessible by the user. If the administrator creates a new role and associates it with some portlets, those portlets will be accessible by any of the users who have this new role assigned to them. Like this, roles can be used to delegate portlets to users.
A portlet has one or more of the four roles (Guest, Power User, User, and Administrator) by default. You can associate more roles to a portlet. For example, you can add 'Power User' and 'User' roles to a portlet which has 'Guest' role associated with it. In this case, any user with either 'Guest', 'Power User', or 'User' role will be able to access the portlet.
Consider the following scenario:
The user 'Chris Editor' has 'Power User' and 'User' Roles assigned to him. He can access only the portlets with Power User and User roles. The 'Admin portlet' has only the 'Administrator' role assigned to it, and only the 'Admin User' can access that portlet. Creating a new role named 'DelegatedAdmin' and assigning it to the Admin portlet. Then, assign the DelegatedAdmin role to Chris Editor. Now, Chris Editor has Power User, User, and DelegatedAdmin roles. Chris Editor becomes the delegated administrator for the Admin Portlet. Chris Editor can access the Admin Portlet.
This following are the steps involved:
-
Login to WebSynergy as Admin User and use the Enterprise Admin portlet to create a new role named 'DelegatedAdmin'.
-
Add the DelegatedAdmin role to the Admin Portlet.
-
Assign the DelegatedAdmin role to Chris Editor.
-
Login to WebSynergy as Chris Editor. You can access the Admin Portlet.
The following are the tasks involved:
 To Create a new Role
-
Login to WebSynergy as Admin User.
-
Click on the Roles tab in the Enterprise Admin portlet.
-
Click on the Add Role button.
-
Specify a name for the role.
In this example, DelegatedAdmin is the name of the role.
-
Click Save.
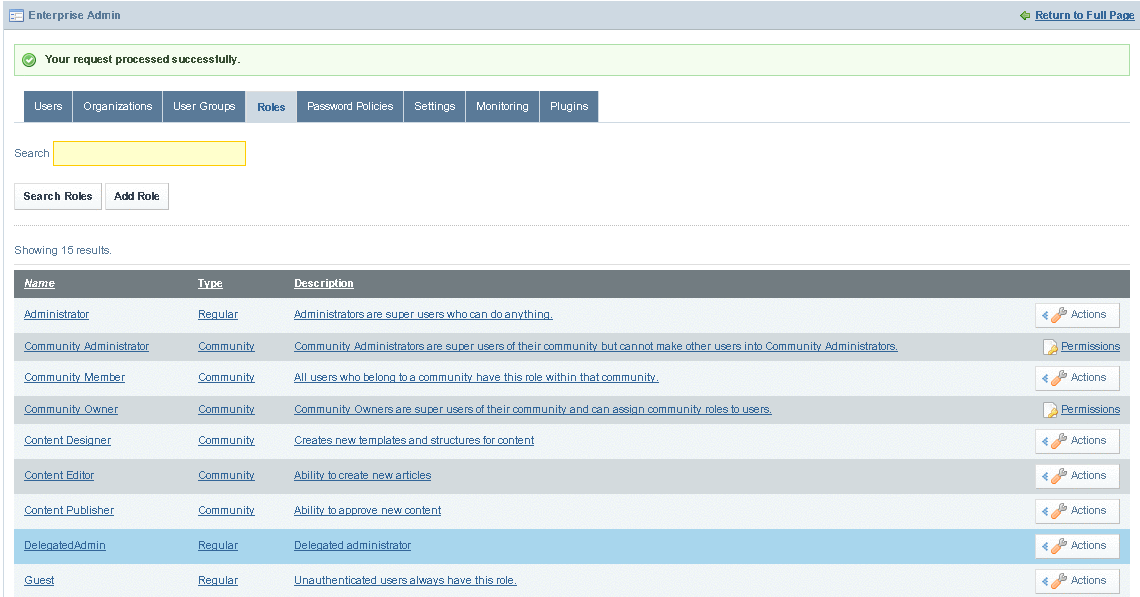
The new role is added to the list of roles.
Figure 1–21 To Create a new Role
 To Assign a new Role to a Portlet
-
Login to WebSynergy as Admin User.
-
click any of the tabs in the Enterprise Admin portlet.
The Enterprise Admin portlet expands.
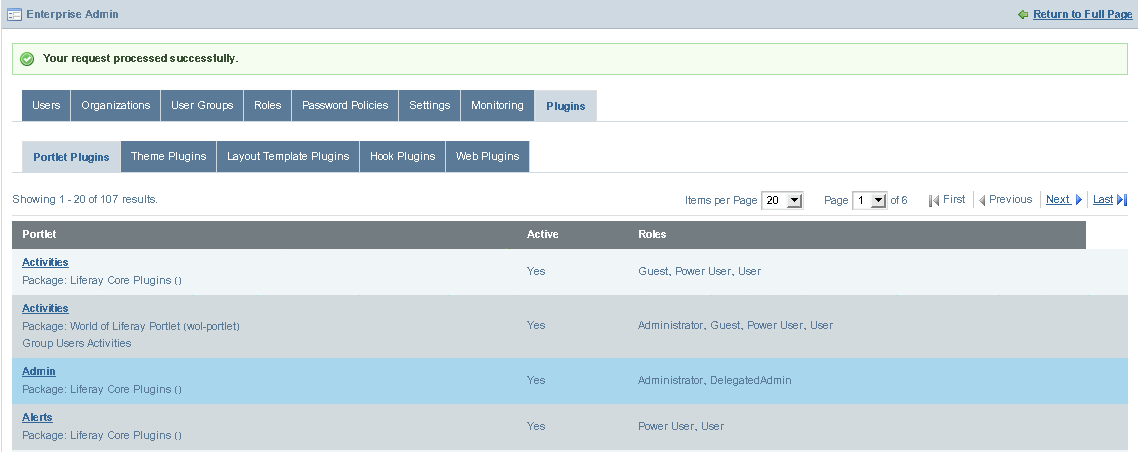
-
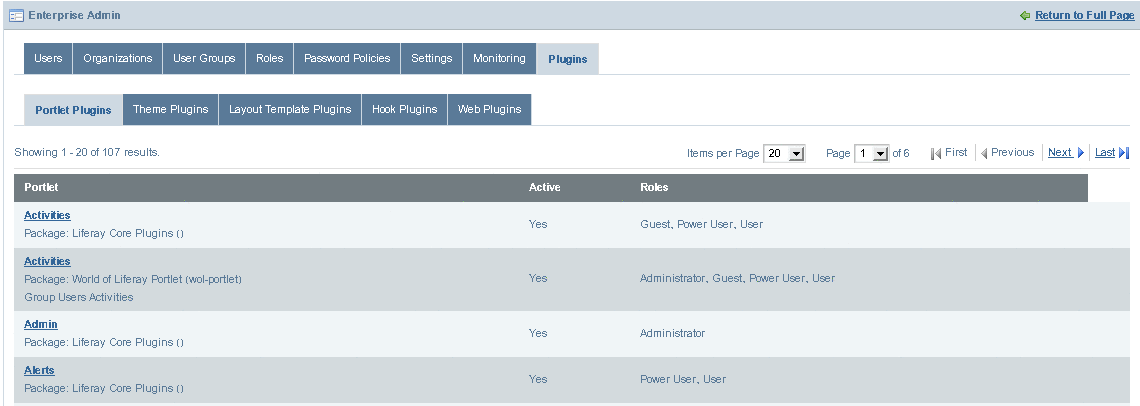
Click on the plugins tab.
All plugins are listed. The first tab displays portlet plugins.
Figure 1–22 To Create a new Role
-
Click on a portlet plugin.
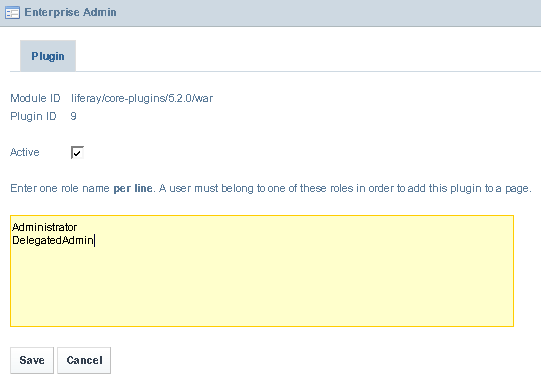
In this example, click on 'Admin'. The edit page for plugin attributes appears.
-
Add a new role for the plugin.
In this example, add the 'DelegatedAdmin' role.
Figure 1–23 To Create a new Role
-
Click Save.
The new role is added to the portlet plugin.
Figure 1–24 To Create a new Role
 To Assign a new Role to a User
-
Login to WebSynergy as Admin User.
-
Click on the Users tab.
-
Click on a user.
In this example, choose 'Chris'. The page for the user appears
-
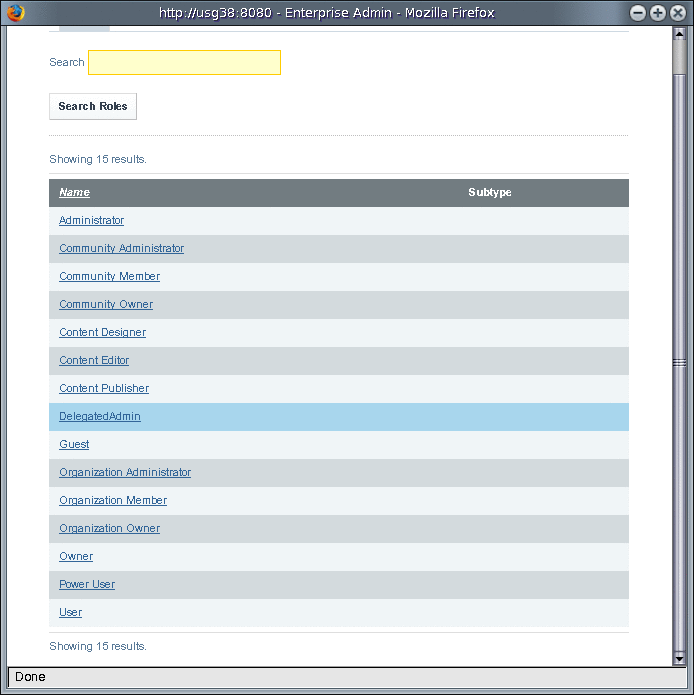
Click on the Select button below Roles.
The window listing all available roles appears.
Figure 1–25 To Assign a new Role to a User
-
Click on a selected Role.
In this example, click on 'DelegatedAdmin'. The Role is assigned to the User.
-
Click Save.
 To Access a Portlet
-
Login to WebSynergy as a general user.
In this example, login as Chris Editor.
-
Click Add Application form the welcome menu.
-
Search for the delegated portlet using the search box in the Add Application window.
In this example, search for 'Admin'.
-
Add the portlet to your page by clicking on the Add button against the portlet.
In this example, add the Admin portlet to your page.
A Use Case for Presence Feature
To be done.
Chatting Using Project WebSynergy
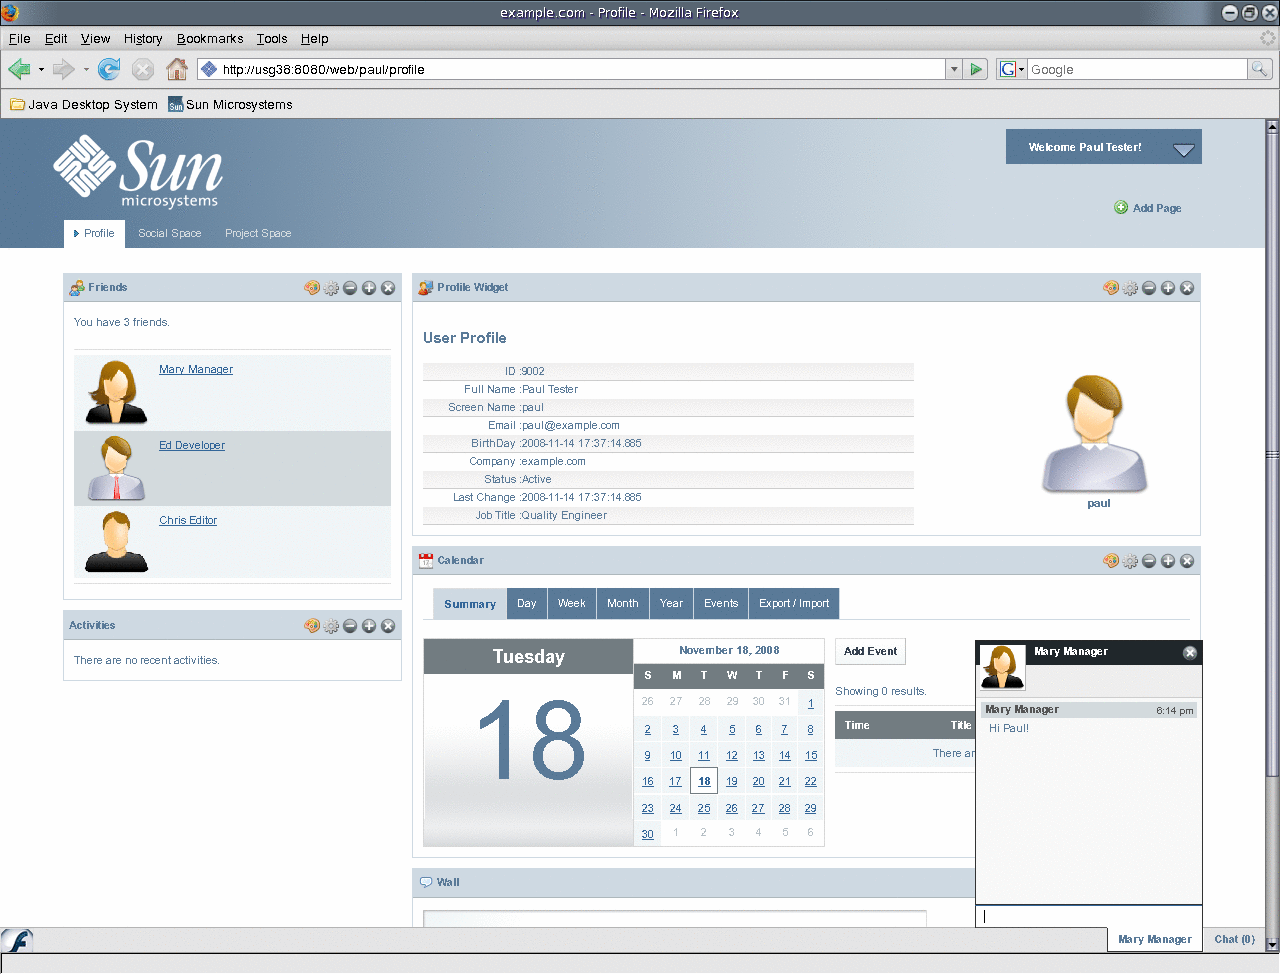
The 'Chat' feature in Project WebSynergy enables you to chat with the 'Friends' who are currently online.
If you consider the example of Sample Users for Project WebSynergy, Ed Developer, Mary Manager, and Chris Editor are the Friends for Paul Tester. The Friends portlet displays all the friends for the user.
This means, Paul can chat with Ed, Mary or Chris if they are online. You can chat with friends by clicking on Chat at the right-bottem of your page. Chat {0} indicates that no friends are online. Chat {1} indicates that there is one friend online.
Consider, a simple use case to demonstrate the working on the Chat feature.
-
Open a browser window and login to Project WebSynergy as Paul Tester.
-
Open another browser window and login as Mary Manager.
-
Click on Chat. It displays all the friends who are online. In this example, it displays 'Paul Tester'. Click on 'Paul Tester' to write a message, and press Enter.
-
When you login again as Paul Tester, you can view the message form Mary Manager by clicking on Chat. You can reply to the message from Mary Manager.
Figure 1–26 Chat feature
Making Calls Using Project WebSynergy
To be done.
A Use Case for Enterprise Social Networking
Facebook, Linkedin, Plaxo, and Twitter are the two most popular Enterprise Social Networking websites. The Facebook, Linkedin, Plaxo, and Twitter portlets inWebSynergy provide the interface to work with these Enterprise Social Networking websites respectively.
 To Access the Facebook Portlet
-
Login to WebSynergy as a general user.
In this example, login as Chris Editor.
-
Click Add Application form the welcome menu.
-
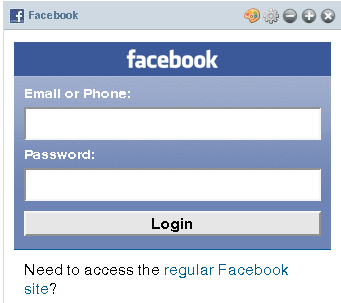
Add the Facebook portlet to your page.
Figure 1–27 Facebook portlet
-
Login to Facebook by using the interface provided by the portlet.
 To Access the Linkedin Portlet
- © 2010, Oracle Corporation and/or its affiliates

