Table of Contents
- 5.1. User Roles
- 5.2. Service Manager Installation
- 5.2.1. Service Manager Installation Common Parameters
- 5.2.2. Service Manager Installation on Windows
- 5.2.3. Service Manager Installation on Mac OS X
- 5.2.4. Service Manager Installation on Unix
- 5.2.5. Starting/Stopping the MySQL Enterprise Monitor Service on Windows
- 5.2.6. Starting/Stopping the MySQL Enterprise Monitor Service on Unix and Mac OS X
- 5.2.7. MySQL Enterprise Service Manager Configuration Settings and Advisor Installation
- 5.3. Monitor Agent Installation
- 5.3.1. Creating a MySQL User Account for the Monitor Agent
- 5.3.2. Installing the Agent on Microsoft Windows
- 5.3.3. Installing the Agent on Mac OS X
- 5.3.4. Installing the Monitor Agent on Unix
- 5.3.5. Starting/Stopping the MySQL Enterprise Agent
- 5.3.6. Monitoring Multiple MySQL Servers
- 5.3.7. Configuring an Agent to Monitor a Remote MySQL Server
- 5.3.8. Monitoring Outside the Firewall with an SSH Tunnel
- 5.3.9. Generating a new UUID
- 5.3.10. Troubleshooting the Agent
- 5.4. Unattended Installation
- 5.5. Post-Installation Considerations
- 5.6. Upgrading, Re-Installing or Changing Your Installation
- 5.7. Uninstalling the MySQL Enterprise Monitor
MySQL Enterprise subscription, MySQL Enterprise Monitor, MySQL Replication Monitor, and MySQL Query Analyzer are only available to commercial customers. To learn more, see: http://www.mysql.com/products/enterprise/features.html.
This chapter describes the process of installing the MySQL Enterprise Monitor on all operating systems. A working installation requires the installation of a MySQL Enterprise Service Manager, the MySQL Enterprise Advisors and one or more MySQL Enterprise Agents. The agent inspects the MySQL server it is monitoring, reports to the Service Manager, and the results are interpreted by the advisors and displayed in the MySQL Enterprise Dashboard for viewing in a web browser.
One Monitor Agent is installed for each MySQL server that is being monitored. The Monitor Agent usually runs on the same machine that hosts the monitored MySQL server, but it can run on any machine that has access to both the monitored MySQL server and the MySQL Enterprise Dashboard. The agent reports its findings to the Service Manager, and these results are interpreted by Advisors and displayed in the dashboard. The MySQL operator opens a web browser to view the information presented in the dashboard. The Service Manager and dashboard run on the same machine, and both have access to a local MySQL server installed as part of the MySQL Enterprise Monitor. This server is known as the repository and provides storage for the data provided by the agent.
Installation is a three-step process:
Install and start the Service Manager on the monitoring system. See Section 5.2, “Service Manager Installation”.
Configure the Service Manager, see Section 5.3, “Monitor Agent Installation”.
Start the MySQL Enterprise Service Manager and MySQL Enterprise Agent instances, and then use the MySQL Enterprise Dashboard to install the Advisors and complete the configuration and installation. See Section 5.2.7, “MySQL Enterprise Service Manager Configuration Settings and Advisor Installation”.
Depending on your configuration and environment, you download various components and files from MySQL Enterprise website available on the download page. These include:
MySQL Enterprise Service Manager and MySQL Enterprise Dashboard for the platform that you intend to execute the MySQL Enterprise Service Manager on. These have names like
mysqlmonitor-, with the appropriate version and platform name. To perform an upgrade, download the upgrade installer, with a name like2.1.0.1096-linux-x86_64-installer.binmysqlmonitor-.2.1.0.1096-linux-x86_64-update-installer.binOne or more MySQL Enterprise Agent, one for each MySQL Server that you want to monitor. Download an installer package for the right platform for the MySQL server you want to manage. Agent installers are available with names like
mysqlmonitoragent-. Upgrade installers to update an existing MySQL Enterprise Agent installation are named like2.1.0.1093-linux-debian3.1-powerpc-installer.binmysqlmonitoragent-.2.1.0.1093-linux-debian3.1-powerpc-update-installer.binOptional
A product key file for MySQL Enterprise Service Manager. If your MySQL Enterprise Service Manager has internet connectivity, your product key can be downloaded automatically during the initial phase of configuration directly from the MySQL Enterprise website. For more information, see Section 5.2.7, “MySQL Enterprise Service Manager Configuration Settings and Advisor Installation”.
Optional
An advisor bundle equal to the level of your MySQL Enterprise subscription (Platinum, Gold, or Silver), which is required for MySQL Enterprise Service Manager. If your MySQL Enterprise Service Manager has Internet connectivity, your advisor bundle can be downloaded automatically during the initial phase of configuration directly from the MySQL Enterprise website. For more information, see Section 5.2.7, “MySQL Enterprise Service Manager Configuration Settings and Advisor Installation”.
For information on the installation requirements for different platforms, see Section B.3, “Installation Requirements”.
Prior to installation you will need to have at hand credentials for access to the MySQL server you plan to monitor and also your MySQL Enterprise credentials. During installation and when first logging in, you will set up a variety of users with different roles and credentials. This can become confusing. This section outlines the various users associated with the MySQL Enterprise Monitor and gives a brief description of their roles.
The MySQL Enterprise user: These are the credentials you use to log in to the MySQL Enterprise web site. You will need them in order to acquire the Advisor files and receive updates and, if necessary, acquire a product key.
The MySQL user: For Monitor
Agents to report the status of a MySQL server they must have
privileges on that server. To perform all functions an agent must
have SHOW DATABASES, REPLICATION
CLIENT, SUPER,
CREATE, and SELECT
privileges. In short, the Monitor Agent needs to have read access
to all data. Details about this account are given in
Section 5.3.1, “Creating a MySQL User Account for the Monitor Agent”.
The Repository user: This user is
the only user in the user table in the
mysql database in the bundled MySQL server. To
avoid confusion with monitored MySQL servers, this server is
referred to throughout this document as the
repository. The repository user can log in from
localhost using the password specified during
installation and has all privileges on all databases. These
credentials are used to create the repository and its tables and
to record data in them. During installation the default value for
the user name for this role is service_manager.
No default password is specified. You can use these credentials to
manage the repository from the command line or when using a
program such as MySQL Administrator.
During installation the file
configuration_report.txt is created.
Reference this file for the credentials of the repository manager.
After the MySQL Enterprise Service Manager is installed, look for this file in the
following directories:
Windows:
C:\Program Files\MySQL\Enterprise\MonitorUnix:
/opt/mysql/enterprise/monitorMac OS X:
/Applications/mysql/enterprise/monitor
The Root user: This user is the
administrator of the dashboard. The first time you log in to the
dashboard you must log in as this user. The default user name for
this user is admin. There is no default
password for this user.
The Agent user: The Monitor Agent
needs to report the status of the MySQL server it is monitoring.
For this reason it needs to log in to the dashboard. The default
user name for this user is agent. There is no
default password for this user.
The Monitor Agent has two roles in the MySQL Enterprise Monitor; it must have access to the dashboard and to the MySQL server it is monitoring. For a description of the agent as a MySQL user see Section 5.1.1, “Existing Users”.
- 5.2.1. Service Manager Installation Common Parameters
- 5.2.2. Service Manager Installation on Windows
- 5.2.3. Service Manager Installation on Mac OS X
- 5.2.4. Service Manager Installation on Unix
- 5.2.5. Starting/Stopping the MySQL Enterprise Monitor Service on Windows
- 5.2.6. Starting/Stopping the MySQL Enterprise Monitor Service on Unix and Mac OS X
- 5.2.7. MySQL Enterprise Service Manager Configuration Settings and Advisor Installation
The MySQL Enterprise Service Manager is the core element of the MySQL Enterprise Monitor. The installation process for this element is completely self-contained, but the installation includes the following components:
Apache Tomcat
MySQL Server
Java VM
After installation, to determine the version numbers of the
components, enter
http://
into the web browser's address bar.
server_name:18080/main?command=list_versions
During installation, versions of MySQL and Tomcat are installed onto the machine. The installer automatically provides default network ports that are different from standard installation for these applications. You can change the ports during installation.
During installation, default values are shown for user names and ports. This is for your convenience only; you can choose different values. The installer detects ports that are already in use and lets you select different ports.
The MySQL Enterprise Service Manager version 2.0 requires agents using 2.0 or higher.
All the installations share the same basic configuration parameters that you confirm during installation. Before you start your installation, review the section on these common parameters, then proceed to section specific to your installation platform. For details of the common parameters, see Section 5.2.1, “Service Manager Installation Common Parameters”. For information on installation under Windows, see Section 5.2.2, “Service Manager Installation on Windows”, for Mac OS X see Section 5.2.3, “Service Manager Installation on Mac OS X”, and for Unix/Linux, see Section 5.2.4, “Service Manager Installation on Unix”.
All installations of the Service Manager install the Tomcat and MySQL applications using the same basic set of parameters. The defaults provided by the installation process are designed to be unique so that they do not interfere with existing installations of either product. However, you should check these parameters before installation to ensure that you do not experience any problems.
The common parameters are divided into those applying to the location of the MySQL server, the Tomcat server, and the connection properties for the MySQL server (Repository Configuration):
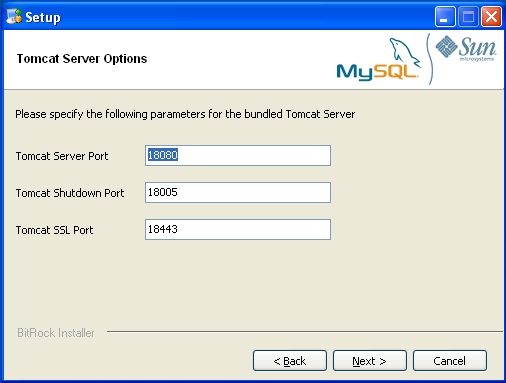
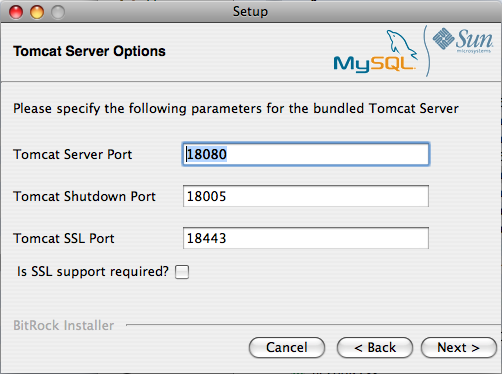
Tomcat Server Options
Tomcat Server port: The default port that the Tomcat server uses when listening for connections. If you change this option, make the same change to the port number used to connect to the Service Manager. The default value is 18080.
NoteIf you do not have a web server running on port 80, you can use this well-known port rather than
18080. Since port80is the default for a web server, you can then open the dashboard without specifying a port.Tomcat Shutdown port: The port used by the management scripts that is used to shut the Tomcat server down when you need to stop the Service Manager. The default value is 18005.
Tomcat SSL Port: The standard port used to connect to the Service Manager when you want to use Secure Sockets Layer (SSL) encrypted communication. The default value is 18443.
MySQL Server selection
You are asked whether you want to use your own MySQL Server to store repository data, or use the bundled MySQL Server. The MySQL server can be located on the same machine as the MySQL Enterprise Service Manager, or on a different machine. If you choose to use your own server, it must already be running when you start the installer. The requirements for the MySQL server are:
MySQL 5.1.43 or higher.
Partitioning enabled.
InnoDB Storage Engine enabled.
Configure the MySQL server with suitable credentials to allow MySQL Enterprise Service Manager to create the database, tables and other settings. The user should have
ALLprivileges on the MySQL Enterprise Monitor repository, which is stored within the databasemem, or you can provide full access to all tables. Also ensure you have theGRANT OPTION. For example, you might create a suitable user using the followingGRANTstatement:mysql> GRANT ALL PRIVILEGES ON *.* TO 'service_manager'@'localhost' -> IDENTIFIED BY PASSWORD 'PASSWORD' WITH GRANT OPTION
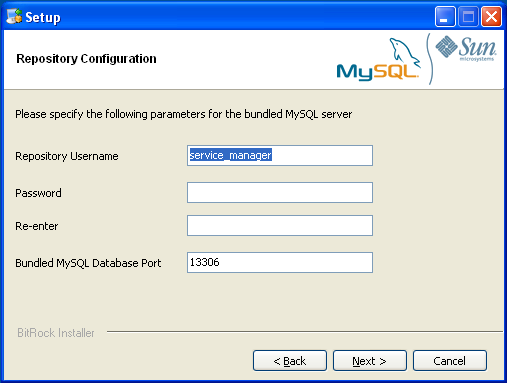
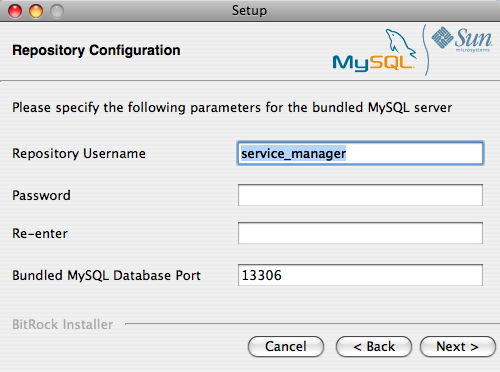
Repository Configuration (MySQL Server)
Repository Username — if you are connecting to an existing MySQL database, this should be the username and password that you have configured with access to the MySQL Enterprise Monitor repository. If you install the bundled MySQL database, the credentials given are used as the username/password for the MySQL Enterprise Service Manager and are created automatically during installation. In normal use, you should not need to use or modify this information, but it may be required if you have a support issue. The default value is
service_manager.Repository User password — the password to be used for the connecting to the MySQL database. This should be set to a secure password so that the repository data is secure.
The information that you configure during installation is recorded
within the configuration_report.txt file
within the installation directory for the Service Manager.
Because the information stored within the
configuration_report.txt file is in plain
text, the Repository user name and password information are also
exposed within this file. Secure the installation directory and
file, so that they can only be accessed by users who need to use
the information.
On Windows, the installation modes are win32
and unattended only.
unattended mode is especially useful if you are
doing multiple installations. For more information on this topic
see Section 5.4, “Unattended Installation”.
In order to install the Service Manager as a Windows service, you must do the installation as a privileged user.
On Windows Vista or later, if user account control is on, an operating system dialog box requests confirmation of the installation.
To install the Service Manager on Windows, find the executable
file named
mysqlmonitor-
(where version-windows-installer.exeversion represents the
three-part version number).
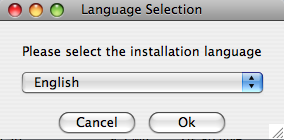
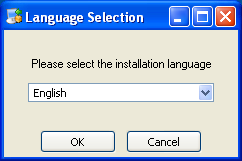
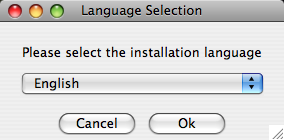
Double-click the MySQL Monitor installer. You should be presented with the Language Selection prompt. Select the language to use for the installer and then click .
With the installation language selected, the remainder of the installation sets up the installation location and the main configuration parameters required by MySQL Enterprise Service Manager. Click to continue.
Select the installation directory where you want the MySQL Enterprise Service Manager components installed. By default on Windows the directory is
C:\Program Files\MySQL\Enterprise\Monitor. You click the button next to the installation directory field to select a directory using the File chooser, or type the directory manually. Click to continue.Configure the options that set the network ports used by the Tomcat server. For more information, see Section 5.2.1, “Service Manager Installation Common Parameters”. Click to continue.
Configure the repository settings, setting the user name, password and port for the bundled MySQL server that stores the information and statistics for your installation. For more information, see Section 5.2.1, “Service Manager Installation Common Parameters”. Click to continue.
NoteIf the Windows firewall is enabled, unblock ports for Apache/Tomcat and the MySQL server.
You receive information and a warning about the configuration options and how they are stored in the
configuration_report.txtfile, and its location. Record the full path to this file for future reference. Click to continue.You are now prompted to start the installation process. Click to continue.
Once the installation is completed, you receive information on how to uninstall MySQL Enterprise Service Manager. Click to continue.
To complete the installation and set up your MySQL Enterprise Service Manager, login to the Dashboard. You can do this automatically by leaving the box checked on the final window before clicking . To skip the Dashboard at this time, uncheck the box and click .


For instructions on starting the MySQL Enterprise Monitor services under Windows, see Section 5.2.5, “Starting/Stopping the MySQL Enterprise Monitor Service on Windows”.
On Mac OS X there are three installation modes
osx, text, and
unattended. For more information on this topic
see Section 5.4, “Unattended Installation”. The
text mode installation for Mac OS X is
identical to text installation under Unix. For
text mode installation instructions see
Section 5.2.4, “Service Manager Installation on Unix”.
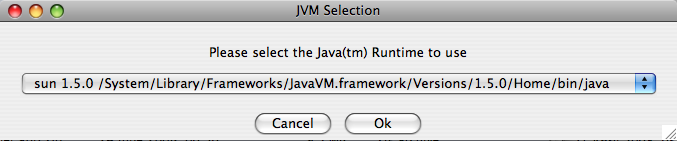
Installing the MySQL Enterprise Service Manager on Mac OS X requires an existing installation of Java. The minimum required version is 1.5.0_7. If this version is not installed on your machine you can download it from Apple. This version of Java requires Mac OS X version 10.4.5 as a minimum, so you may need to upgrade your operating system in order to install it.
For reasons of backwards compatibility, Mac OS X is usually
installed with multiple versions of Java. When installing in
osx mode, version 1.5.0_7 must be the default
version. Upon installation, Java 1.5.0_7 sets itself as the
default so this is usually not a problem.
If you have changed the default you can reset it or you may
install the MySQL Enterprise Service Manager in text mode,
setting the environment variables to point to the correct version
of Java. To install in text mode, find the
installbuilder file in the
Contents/MacOS directory immediately below
the
mysqlmonitor-
directory. Installing the MySQL Enterprise Service Manager in
version-osx-installer.apptext mode is identical to the procedure
described in Section 5.2.4, “Service Manager Installation on Unix” with the
minor differences noted above.
To install using the GUI (osx) installation,
follow these instructions:
Double-click the MySQL Monitor installer. You should be presented with the Language Selection prompt. Select the language to use for the installer and then click .
If you have multiple Java installations on your machine, choose which Java to use with your MySQL Enterprise Service Manager installation (1.5.0 or later is required), and click .
With the installation language and Java version selected, the remainder of the installation sets up the installation location and the main configuration parameters required by MySQL Enterprise Service Manager. Click to continue.
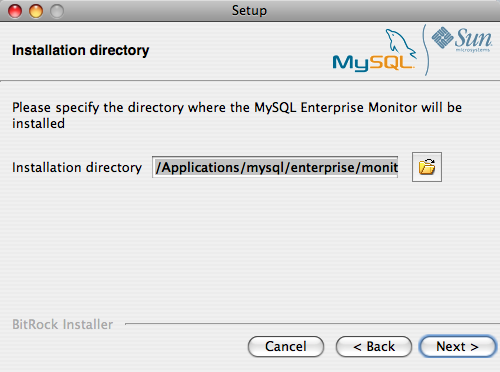
Select the installation directory where you want the MySQL Enterprise Service Manager components installed. By default on Mac OS X the directory is
/Applications/mysql/enterprise/monitor. You click the button next to the installation directory field to select a directory using the File chooser, or type the directory manually. Click to continue.Configure the options that set the network ports used by the Tomcat server. For more information, see Section 5.2.1, “Service Manager Installation Common Parameters”. Click to continue.
Configure the repository settings, setting the user name, password and port for the bundled MySQL server that stores the information and statistics for your installation. For more information, see Section 5.2.1, “Service Manager Installation Common Parameters”. Click to continue.
You receive information and a warning about the configuration options and how they are stored in the
configuration_report.txtfile, and its location. Record the full path to this file for future reference. Click to continue.You are now prompted to start the installation process. Click to continue.
Once the installation is completed, you receive information on how to uninstall MySQL Enterprise Service Manager. Click to continue.
To complete the installation and set up your MySQL Enterprise Service Manager, login to the Dashboard. You can do this automatically by leaving the box checked on the final window before clicking . To skip the Dashboard at this time, uncheck the box and click .
Your installation is now complete. To continue with the configuration of MySQL Enterprise Service Manager, see Section 5.2.7, “MySQL Enterprise Service Manager Configuration Settings and Advisor Installation”.
To install the Service Manager find the file named
mysqlmonitor-
(where version-installer.binversion indicates the version
number, the OS, and the architecture ). Ensure that this file is
executable by typing:
shell> chmod +x mysqlmonitor-version-installer.bin
To install to the default directory
(/opt/mysql/enterprise/monitor), login as
root. An unprivileged user installs to the
/home/
directory.
user_name/mysql/enterprise/monitor/
What follows describes installation from the command line. You can
install the Service Manager graphically by running the installer
from within a windows manager. In both cases, the steps are
identical. You can also install the Service Manager in
unattended mode. This is especially useful if
you are doing multiple installations. For more information on this
topic, see Section 5.4, “Unattended Installation”.
Begin installation by typing:
shell>
./mysqlmonitor-version-installer.binFirst choose the language for the installation:
Language Selection Please select the installation language [1] English [2] Japanese Please choose an option [1] :
Throughout the installation process, you are asked the configuration questions for different options. Default values are shown between square brackets; to use the default press Enter. Otherwise, enter the new value and press Enter:
First, select the directory to install MySQL Enterprise Service Manager. The default is
/opt/mysql/enterprise/monitor/. Make sure that the location you choose has enough space to hold the installation files and the database information that is created when MySQL Enterprise Service Manager is running.Please specify the directory where the MySQL Enterprise Service Manager will be installed. Installation directory [/opt/mysql/enterprise/monitor/]:
Now set the Tomcat Server options. For more details on these parameters, see Section 5.2.1, “Service Manager Installation Common Parameters”.
---------------------------------------------------------------------------- Tomcat Server Options Please specify the following parameters for the bundled Tomcat Server Tomcat Server Port [18080]: Tomcat Shutdown Port [18005]: Tomcat SSL Port [18443]:
Choose if SSL support is required. When your agents and the monitor communicate with each other using SSL, the data is exchanged in encrypted form and you can monitor servers securely, or monitor agents over a public connection.
Enable SSL by pressing Y when prompted during installation:
Is SSL support required? [y/N]:
Set the repository (embedded MySQL server) configuration options. For more details on these parameters, see Section 5.2.1, “Service Manager Installation Common Parameters”.
---------------------------------------------------------------------------- Repository Configuration Please specify the following parameters for the bundled MySQL server Repository Username [service_manager]: Password : Re-enter : Bundled MySQL Database Port [13306]:
Before the final installation process, you receive the location of the file that contains a copy of all of the settings. Follow the instructions and store this report in a secure location. There is no password recovery feature.
---------------------------------------------------------------------------- Configuration Report Note: The settings you specified will be saved here: /opt/mysql/enterprise/monitor/configuration_report.txt IMPORTANT: This configuration report includes passwords stored in plain text; it is intended to help you install and configure your agents. We strongly advise you to secure or delete this text file immediately after installation. Press [Enter] to continue :
Confirm the installation process.
Setup is now ready to begin installing MySQL Enterprise Monitor on your computer. Do you want to continue? [Y/n]: Y Please wait while Setup installs MySQL Enterprise Monitor on your computer.
The installation process may take a few minutes to complete. Upon completion, you see:
Completed installing files Setup has completed installing MySQL Enterprise files on your computer Uninstalling the MySQL Enterprise files can be done by invoking: /opt/mysql/enterprise/monitor/uninstall To complete the installation, launch the MySQL Enterprise Dashboard and complete the initial setup and product activation information. Refer to the readme file for additional information and a list of known issues. Press [Enter] to continue :
Finally, you can read the
Readmefile that contains important information about how to use and start your MySQL Enterprise Service Manager.---------------------------------------------------------------------------- Setup has finished installing MySQL Enterprise Monitor on your computer. View Readme File [Y/n]: nOnce the
Readmefile has been displayed, or if you did not elect to read the file, the installation provides information about how to continue with your installation.Info: To access the MySQL Enterprise Monitor please visit the following page: http://localhost:18080/Auth.action Press [Enter] to continue :
The Enterprise Dashboard does not start up automatically if you
perform a text mode installation. For more
information on starting and stopping MySQL Enterprise Service Manager, see
Section 5.2.6, “Starting/Stopping the MySQL Enterprise Monitor Service on Unix and Mac OS X”.
You can choose to start up the MySQL Enterprise Service Manager on installation. The installed services are called:
MySQL Enterprise Tomcat
MySQL Enterprise MySQL
You can stop or start the services from the Microsoft Management
Console Services window. Look for the MySQL Enterprise
Tomcat and the MySQL Enterprise MySQL
entries.
On Windows Vista or later, starting these services requires
administrative privileges—you must be logged in as an
administrator. To start or stop a service right-click it and
choose the menu option.
The same restriction applies to using the menu options discussed
in the following and to starting the services from the command
line. To open an administrator cmd window
right-click the cmd icon and choose the
menu option.
To start or stop a service, right-click it and choose from the options in the pop-up menu.
There is also a menu entry for starting and stopping the services.
Navigate to the Program,
MySQL, MySQL Enterprise Monitor,
Services entry to stop or start the services.
You can also stop or start a service from the command line. To start the Tomcat service type:
shell> sc start MySQLEnterpriseTomcat
or:
shell> net start MySQLEnterpriseTomcat
To stop this service type:
shell> sc stop MySQLEnterpriseTomcat
or:
shell> net stop MySQLEnterpriseTomcat
In similar fashion, you may stop or start the MySQL server from
the command line. The service name is
MySQLEnterpriseMySQL.
You may also start, stop, and restart a specific service or both
services using the mysqlmonitorctl.bat file.
To execute this file, go to the command line and navigate to the
C:\Program Files\MySQL\Enterprise\Monitor
directory. Typing mysqlmonitorctl.bat help
produces the following output:
usage: mysqlmonitorctl.bat help
mysqlmonitorctl.bat (start|stop|restart|install|uninstall)
mysqlmonitorctl.bat (start|stop|restart) tomcat
mysqlmonitorctl.bat (start|stop|restart) mysql
help - this screen
start - start the service(s)
stop - stop the service(s)
restart - restart or start the service(s)
install - install the service(s)
uninstall - uninstall the service(s)
To stop a specific service, pass the argument
tomcat or mysql in addition
to the status change argument. If you wish to change the status of
both services, do not specify a service name. You may also
uninstall the services using this batch file.
Configuration of the dashboard begins immediately after the Service Manager is installed. To continue a Windows installation skip the next section and go to Section 5.2.7, “MySQL Enterprise Service Manager Configuration Settings and Advisor Installation”.
The services incorporated into the MySQL Enterprise Service Manager are:
The MySQL Server
The Apache/Tomcat Server
Should you need to stop, start, or restart the MySQL Enterprise Service Manager
call the mysqlmonitorctl.sh file located in
the /opt/mysql/enterprise/monitor/ directory
on Unix or the
/Applications/mysql/enterprise/monitor/ on
Mac OS X. To see all the available options navigate to the
appropriate directory and type:
shell> /opt/mysql/enterprise/monitor/mysqlmonitorctl.sh help
Executing this script produces the following output:
usage: ./mysqlmonitorctl.sh help ./mysqlmonitorctl.sh (start|stop|status|restart) ./mysqlmonitorctl.sh (start|stop|status|restart) mysql ./mysqlmonitorctl.sh (start|stop|status|restart) tomcat help - this screen start - start the service(s) stop - stop the service(s) restart - restart or start the service(s) status - report the status of the service
Using this script you can stop, start, or restart all the Service
Manager components. To do this make a call to
mysqlmonitorctl.sh start from your start-up
script.
To start the service:
shell> ./mysqlmonitorctl.sh start ./mysqlmonitorctl.sh : mysql started nohup: redirecting stderr to stdout Starting mysqld daemon with databases from /opt/mysql/enterprise/monitor/mysql/data/ Using CATALINA_BASE: /opt/mysql/enterprise/monitor/apache-tomcat Using CATALINA_HOME: /opt/mysql/enterprise/monitor/apache-tomcat Using CATALINA_TMPDIR: /opt/mysql/enterprise/monitor/apache-tomcat/temp Using JRE_HOME: /opt/mysql/enterprise/monitor/java
If you try to start the service and it is already running, you are warned that the services are already running:
shell> ./mysqlmonitorctl.sh start ./mysqlmonitorctl.sh : mysql (pid 18403) already running ./mysqlmonitorctl.sh : tomcat (pid 18480) already running
To stop the service:
shell> ./mysqlmonitorctl.sh stop Using CATALINA_BASE: /Applications/mysql/enterprise/monitor/apache-tomcat Using CATALINA_HOME: /Applications/mysql/enterprise/monitor/apache-tomcat Using CATALINA_TMPDIR: /Applications/mysql/enterprise/monitor/apache-tomcat/temp Using JRE_HOME: /System/Library/Frameworks/JavaVM.framework/Versions/1.5.0/Home Stopping tomcat service .. [ OK ] STOPPING server from pid file /Applications/mysql/enterprise/monitor/mysql/data/mysqld.pid 090209 15:37:09 mysqld ended
The restart command is equivalent to executing
a stop and then start
operation.
This script can also be used to check the status of the Tomcat web server or the MySQL repository.
shell> ./mysqlmonitorctl.sh status MySQL Network MySQL is running MySQL Network Tomcat is running
Configuration of the dashboard begins immediately after the MySQL Enterprise Service Manager is installed.
The Enterprise Dashboard is the web-based interface to the Service Manager so the procedure for starting the dashboard is identical for all platforms. From the dashboard you can configure the settings necessary for receiving updates from MySQL Enterprise and for the initial installation of the Advisors.
If you installed the Service Manager using a graphical interface, you have the option of launching the dashboard on the final installation screen (as long as the checkbox is checked).
Otherwise, you can view the dashboard by typing
http://localhost:
into the address bar of your web browser. If you are unsure of the
host name and port to use, check the
18080/Auth.actionconfiguration_report.txt file.
Under Windows it is also possible to open the dashboard by
choosing the MySQL menu item and finding the
MySQL Enterprise Monitor entry. Under this entry choose
Start Service Manager.
If this is the first time that you have attempted to log in to the dashboard you should see a screen similar to the following:
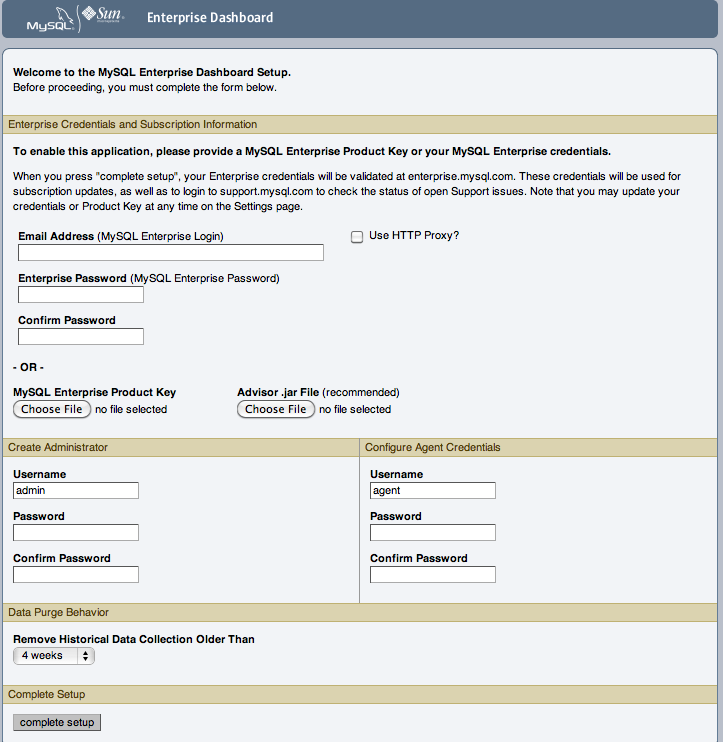
Use this screen to perform the following tasks:
Install the Advisors
Set up your MySQL Enterprise credentials
Create a user name and password for the dashboard administrator
Create a user name and password for the Monitor Agent
If you have been provided with a MySQL Enterprise
Product Key and an Advisors file click the
button and locate these files. The
advisor file is named,
AdvisorScript-
and the product key,
version.jarSubscription-level_date.xml
If you are activating the MySQL Enterprise Monitor using a product key, do not enter your MySQL credentials; entering both produces an error message.
If you have Internet access from the dashboard, activate
MySQL Enterprise Monitor by supplying your MySQL Enterprise credentials. Enter
your email address as the MySQL Enterprise
Login and enter and confirm your MySQL Enterprise
password. If you specify incorrect credentials, you receive the
error message, “Unable to connect to verify
credentials.”
In the Create Administrator section of this
screen, enter credentials for the dashboard administrator. This
creates the root user described in
Section 5.1.3, “Users Created on First Log-in”. Record the user
name and password as these credentials are required for any
future login.
In the Configure Agent Credentials section
of this screen enter the credentials for the agent. This is the
agent user also described in
Section 5.1.3, “Users Created on First Log-in”. The agent must
log in to report its findings. Record the agent's credentials;
this information is required when installing the agent.
When all the settings have been specified, click the button. If you log in successfully, you should see a message displaying the number of graphs and advisors that have been imported. This number varies depending upon your subscription level.
If importation of the advisor files fails, you see the message:
Unable to import Advisor Jar. You may download the jar manually from the Enterprise Portal and import it from the 'Check For Updates' page.
In this case you may download the advisor file from the Enterprise website and install it as described in Section 5.2.7.3, “Installing, Updating or Upgrading Advisors After Initial Login”.
If this is the first time that you have launched the dashboard you are asked to set your time zone and locale. Choose the appropriate values from the drop-down list boxes. Setting the time zone ensures that you have an accurate time reference for any notifications from the MySQL Enterprise Advisors.
It is especially important that the time zone be set correctly as this may also affect the way the graphs display. For this reason, also ensure that the time reported by the operating system is correct. To change the time zone or locale see Section 2.8.2, “User Preferences”.
The locale chosen determines the user's default language when logging in to the Dashboard. This overrides the default browser settings whenever this specific user logs in.
After specifying your time zone and locale, the dashboard opens on the Monitor tab. For a detailed examination of the Monitor Screen, see Section 2.1, “MySQL Enterprise Dashboard”.
The Advisors interpret the data sent by the Monitor Agents and display the results in the dashboard. A minimal set of Advisors are pre-installed with the Service Manager. To obtain the full set of Advisors and get the most value from the MySQL Enterprise Monitor, you must download Advisors from MySQL Enterprise.
If you did not install the Advisors when you first logged in to
the MySQL Enterprise Dashboard, open the dashboard, find the
Advisors tab, and choose the Check
for Updates link. Doing this downloads the latest
version of the Advisors from the MySQL Enterprise web site. To
install the advisors in this fashion, specify your MySQL
Enterprise credentials. Find instructions for doing this in
Section 2.8.1, “Global Settings”.
If you do not allow Internet access from the dashboard, install
the Advisors from a local file. You need an advisor file named
AdvisorScript-.
If you do not already have this file, you can find it on the
MySQL Enterprise downloads page. Download the Advisors file to
a location that is accessible from the dashboard. Use the
button to find the Advisors file
and then choose to load the
advisors.
version.jar
- 5.3.1. Creating a MySQL User Account for the Monitor Agent
- 5.3.2. Installing the Agent on Microsoft Windows
- 5.3.3. Installing the Agent on Mac OS X
- 5.3.4. Installing the Monitor Agent on Unix
- 5.3.5. Starting/Stopping the MySQL Enterprise Agent
- 5.3.6. Monitoring Multiple MySQL Servers
- 5.3.7. Configuring an Agent to Monitor a Remote MySQL Server
- 5.3.8. Monitoring Outside the Firewall with an SSH Tunnel
- 5.3.9. Generating a new UUID
- 5.3.10. Troubleshooting the Agent
A MySQL Enterprise Agent monitors a MySQL server and sends data to the Advisors. The data is interpreted and displayed in the dashboard. The Monitor Agent is installed on all platforms using the steps described in the next section.
The MySQL Enterprise Service Manager version 2.0 or higher requires agents with a version number of 2.0 or higher.
The MySQL Enterprise Agent requires a user configured within each MySQL
instance that is being monitored with suitable privileges to
collect information about the server, including variable names,
replication, and storage engine status information. The agent
installer can create a suitable user for you during installation
if you supply the installer with a user/password for a user with
suitable credentials (such as the root user).
The account information is used only during the installation to
perform the user creation. If you want to use this option, you can
skip this section.
If you do not supply the root user information to the installer, you can create a user manually within your MySQL server and provide these credentials as the agent user/password combination during installation. The privileges required for this user account vary depending on the information you gather using the MySQL Enterprise Agent. The following privileges allow the Monitor Agent to perform its assigned duties without limitation:
SHOW DATABASES: The MySQL Enterprise Agent can gather inventory about the monitored MySQL server.REPLICATION CLIENT: The MySQL Enterprise Agent can gather Replication master/slave status data. This privilege is only needed if the MySQL Replication Advisor Rules are employed.SELECT: The MySQL Enterprise Agent can collect statistics for table objects.SUPER: The MySQL Enterprise Agent can executeSHOW ENGINE INNODB STATUSto collect data about InnoDB tables. This privilege is also required to obtain replication information usingSHOW MASTER STATUS, and to temporarily switch off replication when populating themysql.inventorytable used to identify the MySQL instance.PROCESS: When monitoring a MySQL server running MySQL 5.1.24 or above withInnoDB, thePROCESSprivilege is required to executeSHOW ENGINE INNODB STATUS.INSERT: Required to create the UUID required by the agent.CREATE: The MySQL Enterprise Agent can create tables. During discovery, the agent creates the tableinventorywithin themysqldatabase that is used to the UUID for the server. Without this table, the agent cannot determine the UUID of the server, which it sends along with other information to MySQL Enterprise Service Manager.
For example, the following GRANT statement
gives the agent the required SELECT,
REPLICATION
      CLIENT
, SHOW
DATABASES and SUPER rights:
GRANT SELECT, REPLICATION CLIENT, SHOW DATABASES, SUPER, PROCESS ON *.* TO 'mysqluser'@'localhost' IDENTIFIED BY 'agent_password';
For security reasons, you might limit the
CREATE and INSERT privileges
to the agent so that it can only create tables within the
mysql database:
GRANT CREATE, INSERT ON mysql.* TO 'mysqluser'@'localhost' IDENTIFIED BY 'agent_password';
To enable replication discovery to work, grant the
SELECT privilege on the
mysql.inventory table for each user with
replication privileges on the corresponding replication master.
This is required to let the MySQL Enterprise Agent read the replication
master UUID. For example:
GRANT SELECT ON mysql.inventory TO 'replicationuser'@'%' IDENTIFIED BY 'replication_password';
You should perform this step after after
having run the agent on the corresponding MySQL server to ensure
that the mysql.inventory table has been
correctly created. You can do this by running the agent,
shutting the agent down, running the above
GRANT statement, and then restarting the
agent.
If the agent is unable to access the information from the table, a warning containing this information is written to the agent log.
You may want to disable logging for the grant statement to
prevent the grant information being replicated to the slaves. If
this is the case, execute the statement SET
SQL_LOG_BIN=0 before you execute the above
GRANT statement.
In a typical configuration, the agent runs on the same machine as
the MySQL server it is monitoring, so the host name is
localhost. However, this changes if the
agent is running on a machine other than the one that hosts the
monitored MySQL server. In this case, change
localhost to the appropriate value. For
more information about remote monitoring see
Section 5.3.7, “Configuring an Agent to Monitor a Remote MySQL Server”.
To install the MySQL Enterprise Agent on Windows, double-click the
mysqlmonitoragent-
(where version-windows-installer.exeversion indicates the three-part
version number) installer.
In order to install the agent as a Windows service, you must do the installation as a privileged user.
On Windows Vista or later, if user account control is on, an operating system dialog box requests confirmation of the installation.
You may also install the Monitor Agent in
unattended mode. This is especially useful if
you are doing multiple installations. For more information on this
topic see, Section 5.4, “Unattended Installation”.
If you want to install multiple agents on the same machine, you
must use the servicename option to the
installer prevent installing an agent with the same service
name. For more information, see
installer_servicename
If the installer identifies an existing installation and you do
not specify an alternative service name, the installer
terminates.
First, select the language for the MySQL Enterprise Agent installation. Click to continue installation.
Click to start the installation process.
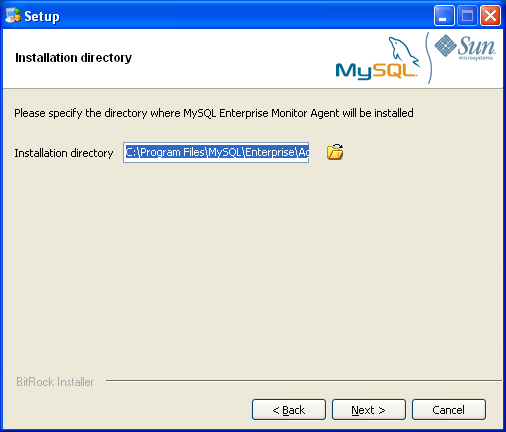
Select the installation directory. The default installation directory is
C:\Program Files\MySQL\Enterprise\Agent. Select the installation directory, or type the new directory location. Click to continue the installation process.You need to choose the operations that you want this agent to perform. You choose from one or more of the following areas of functionality:
Enable monitoring a MySQL Server: This is the main operation of monitoring the MySQL server in terms of performance, security and availability.
Enable the MySQL Enterprise Agent Proxy Service: If you want to study your query analyzer information by sending your queries through the MySQL Enterprise Agent Proxy Service you must switch this option on.
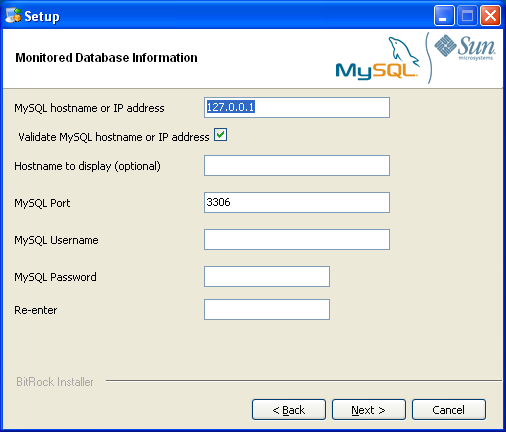
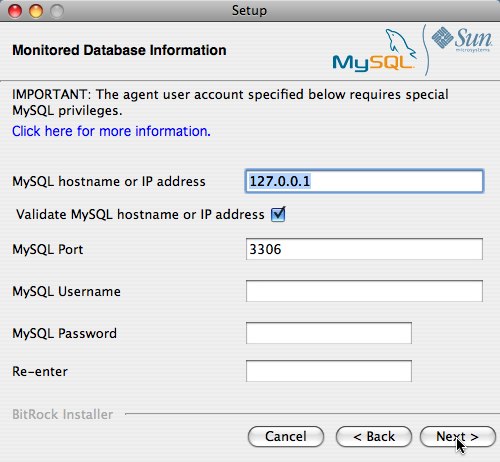
Specify the information about the MySQL server that you want to monitor. Enter the IP address or host name of the host you want to monitor, and the port, user name and password that you use to connect to the MySQL server. To confirm that the MySQL server is currently reachable using the information, select the Validate MySQL host name or IP address checkbox.
NoteCurrently, on Windows, the monitor agent only includes support for connecting to the server to be monitored via TCP/IP, so if the server has been started with
--skip-networkingit cannot be monitored.If the MySQL server to be monitored has been started using the command option
--bind-address, the server only listens for connections on the specified IP address (of the MySQL server). If the monitor agent uses TCP/IP networking and the default address of 127.0.0.1, it cannot connect to the server to be monitored. Also, if “localhost” is specified as the host name during agent configuration, a connection cannot be established, as the server listens for connections on the address specified with the--bind-addressoption, not 127.0.0.1.Click to continue the installation.
The installer can create the MySQL Enterprise Agent user on the MySQL server that is required to connect to the server and obtain statistical information. You can elect to create an account automatically using the installer, or you can use an account that you have already created. If you want the installer to create the user, enter the credentials of a user with the correct abilities to create the user and grant the created user the right abilities to monitor the server. By default, the installer requests the rights of a
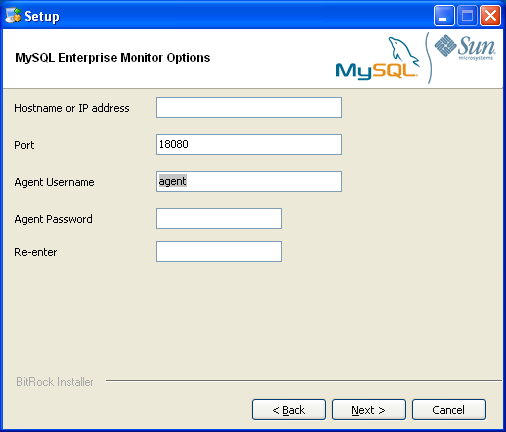
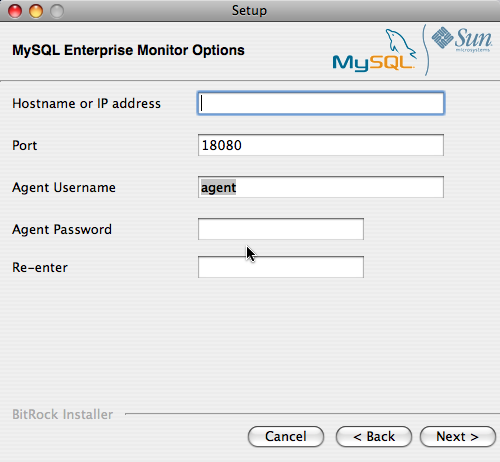
rootuser to perform this operation.The MySQL Enterprise Service Manager that you want to use must be configured during installation. The host name, port and agent authentication information must be entered. If you have already installed MySQL Enterprise Service Manager then you can locate the information in the installation report file created during installation. Enter the required information and then click to continue.
If you want to use Query Analyzer with the MySQL Enterprise Agent Proxy Service, then you need to enable the MySQL Enterprise Agent Proxy service and configure the port and other information. If you disable the Proxy during installation, enable it later before you can use Query Analyzer. For more information on Query Analyzer, see Section 2.6, “The Query Analyzer Tab”.
When Proxy is enabled, MySQL Enterprise Agent listens on a network port for client applications, and forwards the connections to the backend MySQL server. You can change the port number that MySQL Enterprise Agent listens for connections.
The default port is 6446.
A Configuration Report summarizes the information that you entered during the installation. Check the information provided in the report. If you see a problem, use to go back to the configuration screen and change the information. If the information is correct, click to continue.
You are given a final opportunity to change the installation parameters. Click to start the installation process.
Once the agent is installed, you get a confirmation message. Click to finalize the installation.
You can start the MySQL Enterprise Agent automatically now that the installation has been completed. To start the agent immediately, leave the checkbox selected. To start the agent separately, uncheck the checkbox. Click to exit the installation.
Once the Monitor Agent is installed, it needs to be started. For information on how to start and stop the Agent, see Section 5.3.5.1, “Starting/Stopping the Agent on Windows”.
To install the MySQL Enterprise Agent on Mac OS X, decompress the
mysqlmonitoragent-
and then run the
version-installer.app.zipmysqlenterpriseagent-
application.
version-installer
First, select the language for the MySQL Enterprise Agent installation. Click to continue installation.
Click to start the installation process.
Select the installation directory. The default installation directory is
C:\Program Files\MySQL\Enterprise\Agent. Select the installation directory, or type the new directory location.You also need to select the method that the agent uses to communicate with the MySQL server. You can choose either to use a TCP/IP (network) connection, or a Socket (local) connection. Choose the connection method, and click .
NoteThe monitor agent always associates “localhost” with the TCP/IP address 127.0.0.1, not the MySQL socket. This is in contrast to the MySQL Command Line Tool, which connects via the MySQL socket by default on Unix, if the hostname “localhost” is specified.
If the MySQL server to monitor is started with the
--skip-networkingcommand option, you cannot connect to it via TCP/IP, as the server does not listen for TCP/IP connections. In this case, configure the monitor agent to use the MySQL socket. This can be done during installation by selecting “socket” rather than “TCP/IP” and then specifying the MySQL socket name. This can also be configured after installation by editing theagent-instance.iniconfiguration file, for further information on this refer to Section C.2.2, “MySQL Server (agent-instance.ini) Configuration”.If the MySQL server to be monitored is started using the command option
--bind-address, the server only listens for connections on the IP address specified, that is, the IP address of the MySQL server. If the monitor agent is started using TCP/IP networking and the default address of 127.0.0.1, it cannot connect to the server to be monitored. Also, if “localhost” is specified as the host name during agent configuration, a connection cannot be established, as the server listens for connections on the address specified with the--bind-addressoption, not 127.0.0.1.You need to choose the operations that you want this agent to perform. You choose from one or more of the following areas of functionality:
Enable monitoring a MySQL Server: This is the main operation of monitoring the MySQL server in terms of performance, security and availability.
Enable the MySQL Enterprise Agent Proxy Service: If you want to study your query analyzer information by sending your queries through the MySQL Enterprise Agent Proxy Service you must switch this option on.
Specify the information about the MySQL server that you want to monitor. The configuration information you enter depends on the connection method selected in the previous screen.
If you chose TCP/IP as the connection method, enter the IP address or host name of the host you want to monitor, and the port, user name and password that you use to connect to the MySQL server. To confirm that the MySQL server is currently reachable using the information, select the Validate MySQL host name or IP address checkbox.
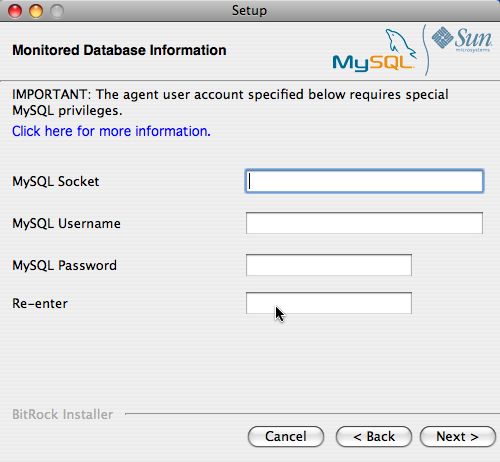
If you chose Socket as the connection method, you must enter the full path name to the Unix socket created by your MySQL server, and the user name and password to authenticate with the server. Typical values include
/tmp/mysql.sockand/var/mysql/mysql.sock.
Click to continue the installation.
The installer can create the MySQL Enterprise Agent user on the MySQL server that is required to connect to the server and obtain statistical information. You can elect either to create an account automatically using the installer, or you can use an account that you have already created. If you want the installer to create the user, you must enter the credentials of a user with the correct abilities to create the user and grant the created user the right abilities to monitor the server. By default, the installer requests the rights of a
rootuser to perform this operation.The MySQL Enterprise Service Manager that you want to use must be configured during installation. The host name, port and agent authentication information must be entered. If you have already installed MySQL Enterprise Service Manager then you can locate the information in the installation report file created during installation. Enter the required information and then click to continue.
If you want to use Query Analyzer with the MySQL Enterprise Agent Proxy Service, then you need to enable the MySQL Enterprise Agent Proxy service and configure the port and other information. If you disable the Proxy during installation, enable it later before you can use Query Analyzer. For more information on Query Analyzer, see Section 2.6, “The Query Analyzer Tab”.
When Proxy is enabled, MySQL Enterprise Agent listens on a network port for client applications, and forwards the connections to the backend MySQL server. You can change the port number that MySQL Enterprise Agent listens for connections.
The default port is 6446.
A Configuration Report summarizes the information you entered during the installation. Check the information provided in the report. If you see a problem, use to go back to the configuration screen and change the information. If the information is correct, click to continue.
You are given a final opportunity to change the installation parameters. Click to start the installation process.
Once the agent has been installed, you get a confirmation message. Click to finalize the installation.
You can start the MySQL Enterprise Agent automatically now the installation has been completed. To allow the agent to be started, leave the checkbox selected. To start the agent separately, uncheck the checkbox. Click to exit the installation.

Once the Monitor Agent is installed, it needs to be started. For information on how to start and stop the Agent, see Section 5.3.5.2, “Starting/Stopping the Agent on Mac OS X”.
As a prerequisite for installing the MySQL Enterprise Agent on Linux systems you must have the Linux Standards Base (LSB) initialization functions installed.
You can check the existence of the LSB components by looking for an LSB package within your Linux package management environment. For example, on RedHat and other RPM-based distributions:
shell> rpm -qa | grep -i lsb redhat-lsb-3.1-19.fc8.x86_64
Under Debian/Ubuntu:
shell> dpkg -l|grep -i lsb
ii lsb-base 3.2-20ubuntu4
Linux Standard Base 3.2 init script function
ii lsb-release 3.2-20ubuntu4
Linux Standard Base version reporting utilitAlternatively, you can use the lsb_release command. Existence of this command normally indicates that the current distribution is LSB compliant.
To install the agent navigate to the directory that contains the
file,
mysqlmonitoragent-
(where version-installer.binversion indicates the three-part
version number, the OS, and the architecture). Ensure that this
file is executable by typing:
shell> chmod +x mysqlmonitoragent-version-installer.bin
To install to the default directory
(/opt/mysql/enterprise/agent) you need to be
logged in as root. Installing as an
unprivileged user installs to the
/home/
directory.
user_name/mysql/enterprise/agent
If you install the agent as an unprivileged user, it does not automatically start up on rebooting.
What follows describes installation from the command line. You may
install the Monitor Agent graphically by running the installer
from within a windows manager. In both cases the steps are
identical. You may also install the Monitor Agent in
unattended mode. This is especially useful if
you are doing multiple installations. For more information on this
topic see Section 5.4, “Unattended Installation”.
If you want to install multiple agents on the same machine, you
must use the servicename option to the
installer prevent installing an agent with the same service
name. For more information, see
installer_servicename
Begin installation from the command line by typing:
shell> ./mysqlmonitoragent-version-installer.bin --mode text
The various options are shown in what follows. Default values are indicated by square brackets; to select them press . Otherwise enter a value of your choosing.
First, you must select the Language you want to use during the installation process:
Language Selection Please select the installation language [1] English [2] Japanese Please choose an option [1] :
Next, specify the directory where you want the agent installed:
---------------------------------------------------------------------------- Welcome to the MySQL Enterprise Monitor Agent Setup Wizard. ---------------------------------------------------------------------------- Please specify the directory where MySQL Enterprise Monitor Agent will be installed Installation directory [/opt/mysql/enterprise/agent]:
If an existing version of the MySQL Enterprise Agent is installed, provide an alternative name for the installation. This will be used as the name of the file created in
/etc/init.dused to start the agent. You can enter a different name to perform multiple installations.Specify the MySQL server to monitor. First, specify whether to use a TCP/IP or socket-based connection to communicate with the MySQL Server:
How will the agent connect to the database it is monitoring? [1] TCP/IP [2] Socket Please choose an option [1] :
You need to choose the operations that you want this agent to perform. You choose from one or more of the following areas of functionality:
Enable monitoring a MySQL Server: This is the main operation of monitoring the MySQL server in terms of performance, security and availability.
Enable the MySQL Enterprise Agent Proxy Service: If you want to study your query analyzer information by sending your queries through the MySQL Enterprise Agent Proxy Service you must switch this option on.
If you chose to monitor a MySQL server, provide the connection options for communicating with the server.
If you selected TCP/IP, enter the TCP/IP address and port number:
---------------------------------------------------------------------------- Monitored Database Information IMPORTANT: The agent user account specified below requires special MySQL privileges. Visit the following URL for more information: https://enterprise.mysql.com/docs/monitor/2.0/en/mem-install.html#mem-agent-rights MySQL hostname or IP address [127.0.0.1]: Validate MySQL hostname or IP address [Y/n]: MySQL Port [3306]:
If you selected Socket, provide the path name to the MySQL socket. Typical values are
/tmp/mysql.sock,/var/lib/mysql.sock, or/var/run/mysql.sock.---------------------------------------------------------------------------- Monitored Database Information IMPORTANT: The agent user account specified below requires special MySQL privileges. Visit the following URL for more information: https://enterprise.mysql.com/docs/monitor/2.0/en/mem-install.html#mem-agent-rights MySQL Socket []:
NoteThe monitor agent always associates “localhost” with the TCP/IP address 127.0.0.1, not the MySQL socket. This is in contrast to the MySQL Command Line Tool, which connects via the MySQL socket by default on Unix, if the hostname “localhost” is specified.
If the MySQL server to monitor is started with the
--skip-networkingcommand option, you cannot connect to it via TCP/IP, as the server does not listen for TCP/IP connections. In this case, configure the monitor agent to use the MySQL socket. This can be done during installation by selecting “socket” rather than “TCP/IP” and then specifying the MySQL socket name. This can also be configured after installation by editing theagent-instance.iniconfiguration file. For further information, refer to Section C.2.2, “MySQL Server (agent-instance.ini) Configuration”.If the MySQL server to be monitored is started using the command option
--bind-address, the server only listens for connections on the IP address specified, that is, the IP address of the MySQL server. If the monitor agent is started using TCP/IP networking and the default address of 127.0.0.1, it cannot connect to the server to be monitored. Also, if “localhost” is specified as the host name during agent configuration, a connection cannot be established, as the server listens for connections on the address specified with the--bind-addressoption, not 127.0.0.1.Specify the user credentials for the MySQL server to monitor:
MySQL Username []:
service_agentMySQL Password : Re-enter :The installer can create the MySQL Enterprise Agent user on the MySQL server that is required to connect to the server and obtain statistical information. You can elect either to create an account automatically using the installer, or you can use an account that you have already created. If you want the installer to create the user, enter the credentials of a user with the correct abilities to create the user and grant the created user the right abilities to monitor the server. By default, the installer requests the rights of a
rootuser to perform this operation.If you selected to enable the MySQL Enterprise Agent Proxy Service for Query Analyzer, enter the configuration information. If you disable the Query Analyzer during installation, manually edit the configuration file to re-enable the Query Analyzer functionality later. If you enable Query Analyzer (Proxy), specify the port on which the agent listens for queries.
---------------------------------------------------------------------------- Query Analyzer Configuration MySQL Proxy enables query monitoring and analysis by listening on a specified port for client connections that are then passed through to a backend MySQL database server. It is not needed for basic monitoring functionality. Click here for more information. [Y/n]: Enable Proxy (recommended) [Y/n]: Proxy Port [6446]: Backend Host: 127.0.0.1 (cannot be changed) Backend Port: 3306 (cannot be changed)
For more information on enabling Query Analyzer if you disabled it during installation, see Section 2.6, “The Query Analyzer Tab”.
Enter the details of the MySQL Enterprise Service Manager that you want to use with this agent. The configuration information required is available within the installation report generated when you installed MySQL Enterprise Service Manager
---------------------------------------------------------------------------- MySQL Enterprise Monitor Options Hostname or IP address []:
192.168.0.197Tomcat Server Port [18080]: Tomcat SSL Port [18443]:The agent and MySQL Enterprise Service Manager support using SSL for communication. If you want to enable SSL communication between the agent and the MySQL Enterprise Service Manager, you must reply Y to the following question.
Use SSL? [y/N]: Agent Username [agent]: Agent Password : Re-enter : ----------------------------------------------------------------------------Before installation starts, you are provided with a summary of your installation settings:
Here are the settings you specified: Installation directory: /opt/mysql/enterprise/agent Monitored MySQL Database: ------------------------- Hostname or IP address: 127.0.0.1 Port: 3306 MySQL username:
mysql_userMySQL password:passwordQuery Analyzer Configuration ------------------------- Proxy Enabled: yes Proxy Port: 6446 MySQL Enterprise Manager: ------------------------------ Hostname or IP address:192.168.0.197Tomcat Server Port: 18080 Tomcat SSL Port: 18443 Use SSL: 0 Agent username:agentPress [Enter] to continue : ---------------------------------------------------------------------------- Setup is now ready to begin installing MySQL Enterprise Monitor Agent on your computer. Do you want to continue? [Y/n]: yThe installer copies the necessary files and creates the configuration file required to run the agent:
---------------------------------------------------------------------------- Please wait while Setup installs MySQL Enterprise Monitor Agent on your computer. Installing 0% ______________ 50% ______________ 100% ######################################### ---------------------------------------------------------------------------- Info to start MySQL Agent The MySQL agent was successfully installed. To start the MySQL Agent please invoke: /opt/mysql/enterprise/agent/etc/init.d/mysql-monitor-agent start Press [Enter] to continue : ---------------------------------------------------------------------------- Setup has finished installing MySQL Enterprise Monitor Agent on your computer.
Finally, you can read the supplied
READMEfile when prompted. The file is provided within theshare/doc/README_en.txtfile within the agent installation directory if you would like to read this file separately.
For information on starting the agent, see Section 5.3.5.3, “Starting/Stopping the Agent on Unix”.
The MySQL Enterprise Agent can be started and stopped at any time. When not running, information about the current status of your server is not available, and MySQL Enterprise Service Manager provides a warning if an agent and the MySQL server that it monitors is unavailable.
If you use Query Analyzer, turning off the agent prevents your applications from communicating with the MySQL server. See Section 2.6, “The Query Analyzer Tab”.
You have the option of starting the Monitor Agent from the final
installation screen. Otherwise you can do this by going to the
Start Menu and under
Programs find MySQL and
then the MySQL Enterprise Agent entry. Simply select
the Start MySQL Enterprise Agent option.
On Windows Vista or later, starting the agent requires
administrative privileges—you must be logged in as an
administrator. To start or stop the agent right click the menu
item and choose the
menu option. The same restriction applies to starting the
agent from the command line. To open an administrator
cmd window right-click the
cmd icon and choose the menu option.
To report its findings, the agent needs to be able to connect
to the dashboard through the port specified during
installation. The default value for this port is
18080; ensure that this port is not
blocked. If you need help troubleshooting the agent
installation see,
Section 5.3.10, “Troubleshooting the Agent”.
Alternately, you can start the agent from the command line by entering:
shell> sc start MySQLEnterpriseMonitorAgent
or:
shell> net start MySQLEnterpriseMonitorAgent
You can also start the agent by issuing the command,
agentctl.bat start. Stop the agent by passing
the argument, stop. This batch file is found
in the Agent directory.
For confirmation that the service is running you can open the
Microsoft Management Console Services window. To do this go to
the Control Panel, find Administrative Tools
and click the link to Services. Locate the
service named MySQL Enterprise Monitor Agent
and look under the Status column.
You may also start the agent from this window rather than from
the Start menu or the command line. Simply
right-click MySQL Enterprise Agent and choose
Start from the pop-up menu. Starting the
agent from this window opens an error dialog box if the agent
cannot connect to the MySQL server it is monitoring. No error is
displayed if the agent is unable to connect to the
MySQL Enterprise Service Manager.
The pop-up menu for starting the agent also offers the option of stopping the agent. To stop the agent from the command line you only need type:
shell> sc stop MySQLEnterpriseMonitorAgent
or:
shell> net stop MySQLEnterpriseMonitorAgent
MySQLEnterpriseMonitorAgent is the default
name of the Monitor Agent service. If you have added an
additional agent as described in
Section C.2.2, “MySQL Server (agent-instance.ini) Configuration”, replace
MySQLEnterpriseMonitorAgent with the
appropriate agent name.
The script to start the agent on Mac OS X is located in the
/Applications/mysql/enterprise/agent/etc/init.d
directory. To start the agent navigate to this directory and at
the command line type:
shell> ./mysql-monitor-agent start
To stop the agent, use the stop command:
shell> ./mysql-monitor-agent stop
If the agent cannot be stopped because the
pid file that contains the agent's process ID
cannot be found, you can use kill to send a
TERM signal to the running process:
shell> kill -TERM PID
If you run more than one agent on a specific machine, specify
the path to the ini file when you stop the
agent. Executing mysql-monitor-agent stop
without an ini file only stops the agent
associated with the default ini file.
To verify that the agent is running, use the following command:
shell> ./mysql-monitor-agent status
The resulting message indicates whether the agent is running or not. If the agent is not running, use the following command to view the last ten entries in the agent log file:
shell> tail /Applications/mysql/enterprise/agent/log/mysql-monitor-agent.log
For further information on troubleshooting the agent see Section 5.3.10, “Troubleshooting the Agent”.
Installation creates the directory
/Applications/mysql/enterprise/agent with
the settings stored in the
mysql-monitor-agent.ini file located directly
below this directory in the etc directory.
The log directory is also located
immediately below the agent directory.
To see all the command-line options available when running the
monitor agent, navigate to the
/Applications/mysql/enterprise/agent/etc/init.d
directory and execute mysql-monitor-agent
help. You should see the message:
Usage: ./mysql-monitor-agent {start|stop|restart|status} [ini-file-name]
The ini-file-name option is only needed if
the ini file is not installed at the
default location, or you changed the name of the
ini file. Use this option if you install
more than one agent on the same machine. Pass the full path to
the ini file. For example, after navigating
to the
/Applications/mysql/enterprise/agent/etc/init.d
directory, issue the command:
shell> ./mysql-monitor-agent start /Applications/mysql/enterprise/agent/etc/new-mysql-monitor-agent.ini
If you install the agent as root, on reboot
the mysql-monitor-agent daemon starts up
automatically. If you install the agent as an unprivileged user,
manually start the agent on reboot or write a script to perform
this task. Likewise, if you add an additional agent as described
in Section C.2.2, “MySQL Server (agent-instance.ini) Configuration”, to start this agent on
reboot, create a system initialization script appropriate to
your operating system. To determine whether the agent is
running, navigate to the init.d directory
and issue the command ./mysql-monitor-agent
status.
To report its findings, the agent connects to the dashboard
through the port specified during installation. The default
value for this port is 18080; ensure that
this port is not blocked. If you need help troubleshooting the
agent installation, see
Section 5.3.10, “Troubleshooting the Agent”.
When installation is finished, start the monitor agent from the command line by typing:
shell> /opt/mysql/enterprise/agent/etc/init.d/mysql-monitor-agent start
For a non-root installation, the command is:
shell> /home/<user name>/mysql/enterprise/agent/etc/init.d/mysql-monitor-agent start
To stop the agent, use the stop command:
shell> ./mysql-monitor-agent stop
If the agent cannot be stopped because the
pid file that contains the agent's process ID
cannot be found, use kill to send a
TERM signal to the running process:
shell> kill -TERM PID
If you run more than one agent on a specific machine, specify
the path to the ini file when you stop the
agent. Executing mysql-monitor-agent stop
without an ini file only stops the agent
associated with the default ini file.
Likewise, when checking the status of an agent, specify its
ini file.
To verify that the agent is running, use the following command:
shell> ./mysql-monitor-agent status
The resulting message indicates whether the agent is running. If the agent is not running, use the following command to view the last ten entries in the agent log file:
shell> tail /opt/mysql/enterprise/agent/log/mysql-monitor-agent.log
For further information on troubleshooting the agent, see Section 5.3.10, “Troubleshooting the Agent”.
Installation creates the directory
/opt/mysql/enterprise/agent. The
etc subdirectory contains the
mysql-monitor-agent.ini file with the
configuration settings. The log
subdirectory holds log information.
To see all the command-line options available for the monitor
agent, navigate to the
/opt/mysql/enterprise/agent/etc/init.d
directory and issue the command
mysql-monitor-agent
help, bringing up this help message:
Usage: ./mysql-monitor-agent {start|stop|restart|status} [ini-file-name]
You only need the ini-file-name option if the
ini file is not installed at the default
location, or you changed the name of the
ini file. Use this option if you install
more than one agent on the same machine. Pass the full path to
the ini file. For example, after navigating
to the
/opt/mysql/enterprise/agent/etc/init.d
directory, issue the command:
shell> ./mysql-monitor-agent start /opt/mysql/enterprise/agent/etc/new-mysql-monitor-agent.ini
If you installed the agent as root, on reboot
the mysql-monitor-agent daemon starts up
automatically. If you installed the agent as an unprivileged
user, manually start the agent on reboot or write a script to
perform this task. Likewise, if you added an additional agent as
described in Section C.2.2, “MySQL Server (agent-instance.ini) Configuration”, to start this
agent on reboot, create a system initialization script
appropriate to your operating system. To determine whether the
agent is running, navigate to the init.d
directory and issue the command ./mysql-monitor-agent
status.
To report its findings, the agent connects to the dashboard
through the port specified during installation. The default
value for this port is 18080; ensure that
this port is not blocked. If you need help troubleshooting the
agent installation see,
Section 5.3.10, “Troubleshooting the Agent”.
You can monitor multiple MySQL servers (either on the same machine, or across different machines) using two different methods:
By using a single agent instance to monitor multiple MySQL servers. You can use this method if you want to monitor multiple servers, but do not want or need to support Query Analysis on the additional servers.
By using multiple copies of the MySQL Enterprise Agent to monitor each server individually. Using this method requires additional overhead to monitor each server, while also allowing you to supply Query Analyzer data.
Using a Single Agent Instance
Do not use the single agent instance method if you want to use Query Analyzer. If you set your application to use the proxy port provided by the single instance then the queries may not be directed to the correct server. Using Query Analyzer, the proxy, and the single agent instance method is not supported.
When using the single agent instance method, the agent attempts to determine the right information about the backend server that it is monitoring to use the information when applying rule and advisor information. Currently, this operation is performed for only one of the servers in the list of configured servers. If the servers being monitoring are using different MySQL versions then the rules applied to the servers may be incorrect, and you could get wrong or misleading advice about issues or problems on a given server.
To use a single agent to monitor multiple instances, you can
create additional directories and configuration files within the
instances directory for the agent. For
example, you can see the default structure of the agent
configuration directory:
./init.d ./init.d/mysql-monitor-agent ./instances ./instances/agent ./instances/agent/agent-instance.ini ./mysql-monitor-agent.ini
Within the instances directory, you can add
further directories, one for each monitored server. Each
additional directory must have a suitable
agent-instance.ini file containing the
connection information for the new MySQL server instance. For
example, the following structure demonstrates an agent monitoring
four MySQL servers:
./init.d ./init.d/mysql-monitor-agent ./instances ./instances/agent ./instances/agent/agent-instance.ini ./instances/mysql2 ./instances/mysql2/agent-instance.ini ./instances/mysql-rep ./instances/mysql-rep/agent-instance.ini ./instances/mysql-backup ./instances/mysql-backup/agent-instance.ini ./mysql-monitor-agent.ini
To add another MySQL monitored server, follow these steps:
Make sure that the MySQL instance that you want to monitor has a suitable user to use for connecting to the server. For more information, see Section 5.3.1, “Creating a MySQL User Account for the Monitor Agent”.
Copy an existing configuration directory and configuration files to the new directory:
shell> cp -R etc/instances/agent etc/instances/
mysql2Edit the configuration file within the new directory, for example
mysql2/agent-instance.ini, and set theuser,passwordand either thehostnameandport, orsocketparameters.Restart the agent:
shell> mysql-monitor-agent restart
Using Multiple Agent Instances
To use multiple agents to monitor multiple MySQL servers you need to create a new configuration structure for both the agent and the MySQL server instances you need to monitor, including the binaries and configuration files, and then update the configuration to set the corresponding parameters to monitor the new server. Using this method lets you enable query analysis by redirecting requests to the target server using the built-in proxy service within the agent.
For example, the directory structure below shows the configuration directory for two agents monitoring a single MySQL server each:
./init.d ./init.d/mysql-monitor-agent ./instances ./instances/agent ./instances/agent/agent-instance.ini ./instances-second/agent ./instances-second/agent/agent-instance.ini ./mysql-monitor-agent.ini ./mysql-second-agent.ini
The mysql-monitor-agent.ini file contains the
configuration for the first agent, with the MySQL servers
monitored defined within the instances
directory. The mysql-second-agent.ini file
contains the configuration information for the second agent, with
the MySQL servers monitor defined within the
instances-second directory.
To set up multiple agents:
Make sure that the MySQL instance that you want to monitor has a suitable user to use for connecting to the server. For more information, see Section 5.3.1, “Creating a MySQL User Account for the Monitor Agent”.
You need to generate a new UUID for the new agent:
shell> /opt/mysql/enterprise/agent/bin/mysql-proxy --plugins-agent --agent-generate-uuid ee9296d7-f7cd-4fee-8b26-ead884ebf398 2009-03-05 11:49:37: (critical) shutting down normally
Keep a record of the UUID to update the configuration file.
Note, the agent should not be running when the UUID is generated.
Copy the main agent configuration file, which is by default in
/opt/mysql/enterprise/agent/etc/mysql-monitor-agent.ini:shell> cp mysql-monitor-agent.ini
mysql-second-agent.iniEdit the new configuration file, changing the following settings:
Change the
mysqld-instance-dirto the new directory that contains the individual MySQL server configuration files.Change the
proxy-addressto a different value than the first agent configuration.Change the
proxy-backend-addressesto specify the IP address and MySQL port number for the MySQL server.Change the
agent-uuidto the new value obtained in an earlier step.Change the
log-fileparameter to specify a different file to use when logging errors and problems. You cannot log to the same file from two different agents.Change the
pid-fileparameter to specify the file that holds the process ID of the agent.
Copy an existing configuration directory and configuration files to the new directory:
shell> cp -R etc/instances etc/
instances-secondEdit the configuration file,
instances/second/agent/agent-instance.iniwithin the new directory, and set theuser,passwordand either thehostnameandport, orsocketparameters.With multiple instances, you must start each agent individually, specifying the location of the main configuration file. For example, to start the original (default) service:
shell> /opt/mysql/enterprise/agent/etc/init.d/mysql-monitor-agent start /opt/mysql/monitor/agent/etc/mysql-monitor-agent.ini
To start the second instance:
shell> /opt/mysql/enterprise/agent/etc/init.d/mysql-monitor-agent start /opt/mysql/monitor/agent/etc/mysql-second-agent.ini
Typically, the agent runs on the same machine as the MySQL server it is monitoring. Fortunately, this is not a requirement. If you want to monitor a MySQL server running on an operating system for which there is no agent available, you can install the agent on a machine other than the one hosting the MySQL server.
The process for installing an agent to monitor a MySQL server on a
remote machine is identical to the process described in
Section 5.3, “Monitor Agent Installation”. Follow the directions given
there, being careful to specify the correct IP address or host
name for the MySQL Enterprise Service Manager and likewise for the MySQL
server—since the agent is not running on the same machine as
the MySQL server, it cannot be the default,
localhost.
Don't forget that the agent must be given rights to log in to the
MySQL server from a host other than localhost
and that the port used by the MySQL server, typically
3306 must be open for remote access. For more
information about the database credentials required by agents see,
Section 5.3.1, “Creating a MySQL User Account for the Monitor Agent”.
The agent also needs to be able to log in to the MySQL Enterprise Service Manager,
typically using port 18080, so ensure that the
appropriate port is open.
Remote agents do not report the OS information for either the host or the agent.
If your subscription level entitles you to replication automated discovery, do not use remote monitoring with replication slaves or masters. The agent must be installed on the same machine as the server you are monitoring in order for discovery to work properly. For more information, see Section 2.7, “The Replication Tab”.
If you run an SSH server on the machine that hosts the
MySQL Enterprise Service Manager and an SSH client on the machine that hosts the
agent, you can create an SSH tunnel so that the agent can bypass
your firewall. First, you need to make an adjustment to the
hostname value specified in the
[mysql-proxy] section of the
.ini file. (For more information about the
contents and location of the .ini file see
Section C.2.1, “MySQL Enterprise Agent Configurable Options”.) Stop the
agent and change the hostname value as shown in
the following:
hostname = http://agent_name:password@localhost:18080/heartbeat
Replace the agent_name and
password with suitable values. Likewise replace
port 18080 if you are not running the dashboard
on this port. Use localhost for the host name,
since the agent is connecting through an SSH tunnel.
Next, execute the following command on the machine where the agent is running:
shell> ssh -L 18080:Dashboard_Host:18080 -l user_name -N Dashboard_Host
When prompted, enter the password for
user_name.
If you are not running the MySQL Enterprise Service Manager on port
18080, substitute the appropriate port number.
Likewise, replace Dashboard_Host with the
correct value. user_name represents a valid
operating system user on the machine that hosts the
MySQL Enterprise Service Manager.
Be sure to restart the agent so that the new value for the
hostname takes effect. For instructions on
restarting the agent see:
Under Windows see, Section 5.3.5.1, “Starting/Stopping the Agent on Windows”.
Under Unix see, Section 5.3.5.3, “Starting/Stopping the Agent on Unix”.
Under Mac OS X see, Section 5.3.5.2, “Starting/Stopping the Agent on Mac OS X”.
For MySQL Enterprise Monitor to operate correctly, each agent must have a unique UUID in order to uniquely identify the agent with the MySQL Enterprise Service Manager.
Ensure that you do not reuse or duplicate a UUID. Running two agents with the same identification number yields unpredictable results
Go to the Agent installation directory and enter the following command:
shell> bin/mysql-proxy --plugins=agent --agent-generate-uuid
This should display a line similar to the following:
ee9296d7-f7cd-4fee-8b26-ead884ebf398
Paste this line into the [mysql-proxy] section
of the mysql-monitor-agent.ini file for the
agent-uuid parameter:
[mysql-proxy] ... agent-uuid=ee9296d7-f7cd-4fee-8b26-ead884ebf398
In Windows, go to the command line and change to the MySQL Enterprise Agent installation directory and update the UUID by executing:
C:\> cd C:\Program Files\MySQL\Enterprise\Agent C:\> mysql-monitor-agent -uf mysql-monitor-agent.ini
This updates the configuration file directly with the new UUID.
The first step in troubleshooting the agent is finding out whether it is running or not. To do this see:
Some additional tips are noted below:
If incorrect credentials are specified for the agent login to the MySQL server that it is monitoring, then the agent cannot run on startup. Log in to the monitored MySQL server and check the agent's credentials. Compare the values of the
Host,User, andPasswordfields in themysql.usertable with the values shown in the[mysqld]section of theetc/instances/mysql/agent-instance.ini. If incorrect credentials are specified in theinifile, correct them and restart the agent. Remember, changes to theinifile only take effect when the agent is restarted.The agent cannot start up if incorrect credentials are specified for the service manager login. Using incorrect credentials for logging into the service manager creates an entry in the agent log file. For the location of this log file see Section C.2.3, “Agent Log and
pidFiles”.If the agent starts up but no server appears in the dashboard, check the
hostnamespecified in the[mysql-proxy]portion of themysql-monitor-agent.inifile. Incorrect credentials, IP address, or port all cause the MySQL server to fail to appear in the dashboard. Also, ensure that the port specified in this file is not blocked on the machine hosting the MySQL Enterprise Service Manager.To confirm that the agent can log in to the service manager, type
http://into the address bar of your web browser, substituting the appropriate host name and port. When the HTTP authentication dialog box opens, enter the agent user name and password. If you log in successfully, you should see the following message:Dashboard_Host:18080/heartbeat<exceptions> <error>E1031: Agent payload parameter NULL.</error> </exceptions>
NoteDespite the fact that the preceding listing shows an error, you have logged in successfully. This error appears because you have logged in but with no “payload”.
If you can log in successfully in the way described above and the agent is running, then there are errors in the
mysql-monitor-agent.inifile. Compare the host name, port, agent name, and password found in theinifile with the values you entered into the address bar of your web browser.If HTTP authentication fails, you are using incorrect credentials for the agent. Attempting to log in to the service manager using incorrect credentials creates an entry in the agent log file. For the location of this log file, see Section C.2.3, “Agent Log and
pidFiles”.If no HTTP authentication dialog box appears, and you cannot connect at all, you might have specified an incorrect host name or port. Confirm the values you entered against those described as the
Application hostname and port:in theconfiguration_report.txtfile. Failure to connect could also indicate that the port is blocked on the machine hosting the MySQL Enterprise Service Manager.To check if a blocked port is the problem, temporarily bring down your firewall. If the agent is then able to connect, open up the port specified during installation and restart the agent. If necessary you can monitor outside the firewall using an SSH tunnel. For more information, see Section 5.3.8, “Monitoring Outside the Firewall with an SSH Tunnel”.
You can also check the agent error log file to help determine any problems. An error such as the following might indicate a blocked port:
(critical) connection to merlin-server 'http://
agent:test@172.11.1.1:18080/heartbeat' failed: "connect() timed out!" error.For the location of the agent error log file see, Section C.2.3, “Agent Log and
pidFiles”.Setting the
log-levelentry in yourinifile is also a good debugging technique. For more information on this subject see, Section C.2.1, “MySQL Enterprise Agent Configurable Options”.Running the agent from the command line sometimes displays errors that fail to appear in the log file or on the screen when the agent is started from a menu option. To start the agent from the command line see the instructions given at the start of this section.
If you have more than one agent running on the same machine, the
UUIDmust be unique and thelog-fileandpid-filevalues must be different. For more information, see Section C.2.2, “MySQL Server (agent-instance.ini) Configuration”.If the agent is not running on the same machine that hosts the MySQL server it is monitoring, then you must ensure that the correct
hostis specified for the agent account. The correct port, typically 3306, must also be open for remote login. For more information about remote monitoring see, Section 5.3.7, “Configuring an Agent to Monitor a Remote MySQL Server”.The MySQL Enterprise Agent and MySQL Enterprise Service Manager use the hostid, stored within the
mysql.inventorytable on the monitored MySQL Server to determine whether the instance being monitored is a clone. The hostid of the current server is checked against the stored value when the agent starts. If the generated hostid and stored hostid do not match, you get an error similar to the following in the agent log file:%s: [%s] the hostid from mysql.inventory doesn't match our agent's host-id (%s != %s) We assume that this is a cloned host and shutdown now. Please TRUNCATE TABLE mysql.inventory on this mysql-instance and restart the agent. If this is a master for replication, please also run SET SQL_LOG_BIN = 0; first.
To fix the problem, connect to the MySQL server using the credentials configured when you installed the agent, then truncate the
mysql.inventorytable:mysql> TRUNCATE mysql.inventory;
Now restart the agent, which recreates the
mysql.inventorytable with the updated instance UUID and hostid information.If the MySQL Enterprise Agent has been ungracefully terminated and restarted (for example after being terminated using kill), then you may see a
DuplicateAgentUuidExceptionerror until the original registration of the previous instance of the agent has expired.
It is possible to install or upgrade the MySQL Enterprise Service Manager and MySQL Enterprise Agent components without any direct user interaction. This can be useful if you want to perform an automated installation, or if you need to perform an installation across multiple machines.
To perform an unattended installation, you need to specify the
installation mode as unattended by using the
mode command line option. Using this mode, you
specify the installation parameters, such as the installation
directory, and user, password, and network options, by using
additional command-line options. Alternatively, it is usually more
convenient to save your options in a text file and invoke the
installer using the optionfile option. This is a
more reusable and less error-prone solution.
Before performing an unattended installation, it is recommended that you install MySQL Enterprise Monitor interactively at least once. Failing this, as a minimum, read the regular installation instructions since some tasks still remain after an unattended installation; you must configure the MySQL Enterprise settings, import the advisors, and start up all the services/daemons.
The basic process for performing an unattended installation is the same for both the MySQL Enterprise Agent and MySQL Enterprise Service Manager installers, with the only difference being the options supported by each installer. For information on the options for MySQL Enterprise Service Manager, see Section 5.4.2, “MySQL Enterprise Service Manager Options”; for information on the options for MySQL Enterprise Agent, see Section 5.4.3, “MySQL Enterprise Agent Options”.
There are two methods for installation, you can either specify the option on the command line, or use an options file that details the options and their values that you want to be used during installation.
For example, using the command-line method you could install the MySQL Enterprise Agent using:
shell> mysqlmonitoragent-version-linux-glibc2.3-x86-64bit-installer.bin
--installdir /data0/mysql/agent
--mysqlhost 127.0.0.1 --mysqlport 3306 --mysqluser agent --mysqlpassword mysql --checkmysqlhost yes
--managerhost localhost --managerport 48080 --agentuser AGENTUSER --agentpassword PASSWORD
--proxyport 44044 --mode unattended --enableproxy 1
--createaccount 1 --rootuser ROOTUSER --rootpassword PASSWORD
For unattended installation using an option file, you must create
a text file that contains the definition for the installation. For
this example, the file will be named
options.server.txt. An example of the options
configuration file is shown below:
debugtrace=/opt/mysql/enterprise/install.debugtrace.monitor.log mode=unattended installdir=/opt/mysql/enterprise/monitor tomcatport=8080 tomcatshutdownport=8005 tomcatsslport=8443 adminpassword=myadminpassword dbport=3300
This file identifies a directory and file name for a log file,
sets the mode to unattended,
and uses the installdir option to specify an
installation directory.
Set the installdir and
debugtrace options to values appropriate to
your locale and operating system.
The only options that must be specified in an option file when
installing the MySQL Enterprise Service Manager are mode (if
not specified at the command line),
installdir, and
adminpassword.
Check the options in your option file closely before installation; no warnings will be issued if there are errors.
Ensure that the monitor installer file and the options file are in the same directory, you can start the unattended installation from the command line.
On Windows within a command shell:
C:\> mysqlmonitor-version-windows-installer.bin --optionfile options.server.txt
On Unix you would use a command-line of the form:
shell> mysqlmonitor-version-installer.bin --optionfile options.server.txt
On Mac OS X, you must locate the
installerbuilder.sh within the installation
package directory. For example:
shell> ./mysqlmonitoragent-version-osx-installer.app/Contents/MacOS/installbuilder.sh --optionfile options.server.txt
When installing MySQL Enterprise Agent, the same basic process can be followed using the MySQL Enterprise Agent installer and the corresponding agent options.
As a minimum for the MySQL Enterprise Agent installation, you must specify
the mode (if not specified at the command
line), mysqluser,
installdir, mysqlpassword,
and agentpassword options. Create a file
containing these values and use it with the
optionfile option for unattended agent
installation.
The options for the installation for MySQL Enterprise Service Manager are detailed below. The MySQL Enterprise Service Manager supports using a bundled MySQL server, or a separate MySQL server provided by the user. If you are using your own MySQL server, the server must be installed and running before installation. For more information, see Section 5.2.1, “Service Manager Installation Common Parameters”.
Table 5.1. MySQL Enterprise Service Manager Installer Options
| Format | Option File | Description | Introduction | Deprecated | Removed |
|---|---|---|---|---|---|
| --adminpassword | Password for the database repository | ||||
| --adminuser | Username for the database repository | ||||
| --dbhost | Hostname or IP address of the MySQL server | ||||
| --dbport | TCP/IP port for the MySQL server | ||||
| --debuglevel | Set the debug information level | ||||
| --debugtrace | File for a debug trace of the installation | ||||
| --forceRestart | Forces the server to be restarted | 2.2.3 | |||
| --help | Display the list of valid options | ||||
| --installdir | Installation directory | ||||
| --installer-language | Language selection | ||||
| --mode | Installation mode | ||||
| --mysql_installation_type | MySQL server to be used by the MySQL Enterprise Monitor | ||||
| --optionfile | Installation option file | ||||
| --tomcatport | Server port for the Tomcat component | ||||
| --tomcatshutdownport | Shutdown TCP/IP port for the Tomcat component | ||||
| --tomcatsslport | SSL TCP/IP port for the Tomcat component | ||||
| --unattendedmodeui | Unattended mode user interface | ||||
| --usessl | Enable SSL support | ||||
| --version | Display the product information |
Command-Line Format --helpDisplay the list of valid installer options.
Display product and version information.
Command-Line Format --optionfileThe path to the option file containing the information for the installation.
The installation mode to be used for this installation.
Command-Line Format --debugtracePermitted Values Type stringThe filename to be used for a debug trace of the installation.
Command-Line Format --debuglevelPermitted Values Type numericDefault 2Range 0-4Set the debug information level for log data written to the file specified by
debugtrace.Command-Line Format --installer-languagePermitted Values Type stringDefault enValid Values enEnglish jaJapanese The installer language.
The installation directory for MySQL Enterprise Service Manager.
Command-Line Format --tomcatportPermitted Values Type numericDefault 18080The TCP/IP port for the MySQL Enterprise Service Manager. This port will be used by MySQL Enterprise Agent and as the port for the interface to the MySQL Enterprise Dashboard
Command-Line Format --tomcatshutdownportPermitted Values Type numericDefault 18005The MySQL Enterprise Service Manager Tomcat shutdown port.
Command-Line Format --tomcatsslportPermitted Values Type numericDefault 18443The TCP/IP port to be used for SSL communication to the MySQL Enterprise Service Manager
Command-Line Format --usesslPermitted Values Type booleanDefault 0Enable support for SSL communication between MySQL Enterprise Agent and MySQL Enterprise Service Manager.
Command-Line Format --adminuserPermitted Values Type stringDefault service_managerThe user name to be used for connecting to the database repository used by MySQL Enterprise Service Manager. If you are installing the bundled MySQL server, this is the username that will be configured. If you are using an existing MySQL server, this should be the username of the user with rights to access the database.
WarningThe repository user name and password are stored in unencrypted form in the
config.propertiesfile. To locate this file on your operating system see Section C.1.5, “Theconfig.propertiesFile”.Command-Line Format --unattendedmodeuiPermitted Values Type stringDefault noneValid Values noneNo dialogs minimalCritical dialogs minimalWithDialogsMinimal UI with dialogs The UI elements to use when performing an unattended installation. The options are
none, show no UI elements during the installation;minimal, show minimal elements during installation;minimalWithDialogs, show minimal UI elements, but include the filled-dialog boxes.Command-Line Format --adminpasswordPermitted Values Type stringThe MySQL Enterprise Service Manager password for connecting to the MySQL database repository.
Command-Line Format --mysql_installation_typePermitted Values Type stringDefault bundledValid Values bundledUse the bundled MySQL server existingUse an existing (user supplied) MySQL server Specifies whether the installer should configure MySQL Enterprise Service Manager to install the bundled MySQL server, or use a MySQL server that you have already installed to store the repository data.
Command-Line Format --dbportPermitted Values Type numericDefault 13306The TCP/IP port for the MySQL database used to store MySQL Enterprise Service Manager repository data. If you are installing the bundled MySQL server, this is the port that the MySQL server will be configured to use to listen for connections. If you are using an existing MySQL server, this should be the port for the MySQL server that you want to connect to.
Command-Line Format --dbhostPermitted Values Type stringDefault 127.0.0.1The hostname for the MySQL database. When installing MySQL Enterprise Service Manager to use an existing MySQL server, this should be the hostname of the server that will store the database repository.
Version Introduced 2.2.3 Command-Line Format --forceRestartPermitted Values Type booleanDefault 0Force a restart of MySQL Enterprise Service Manager, even if there is a change to the configuration file that would normally prevent the automatic restart of the server.
To view all the options available for an unattended
agent installation, invoke the agent
installer file passing in the help option. The
available options are detailed in the table below.
Table 5.2. MySQL Enterprise Agent Installer Options
| Format | Option File | Description | Introduction | Deprecated | Removed |
|---|---|---|---|---|---|
| --agentpassword | Password of the agent user for connecting to the monitored MySQL server | ||||
| --agentuser | Username of the agent for connecting to the monitored MySQL server | ||||
| --checkmysqlhost | Validate the supplied MySQL hostname | ||||
| --createaccount | Create an account on the monitored MySQL server to be used by the agent | ||||
| --debuglevel | Set the debug information level | ||||
| --debugtrace | File for a debug trace of the installation | ||||
| --enableagent | Enable the agent to monitor a MySQL server | ||||
| --enableproxy | Enable query analyzer data to be captured using the proxy service | ||||
| --help | Display the list of valid options | ||||
| --installdir | Installation directory | ||||
| --installer-language | Language selection | ||||
| --managerhost | Hostname of IP address of the MySQL Enterprise Monitor server | ||||
| --managerport | TCP/IP port of the MySQL Enterprise Monitor server | ||||
| --managersslport | TCP/IP port of the MySQL Enterprise Monitor server for SSL communication | ||||
| --mode | Installation mode | ||||
| --mysqlconnmethod | Connection method to the monitored MySQL server | ||||
| --mysqlhost | MySQL hostname/IP address | ||||
| --mysqlpassword | MySQL password for the monitored MySQL server | ||||
| --mysqlport | TCP/IP port for the monitored MySQL server | ||||
| --mysqlsocket | Unix socket/Named pipe for the monitored MySQL server | ||||
| --mysqluser | MySQL username for the monitored MySQL server | ||||
| --optionfile | Installation option file | ||||
| --proxyport | TCP/IP port for the Proxy module | ||||
| --proxyuser | User account for the proxy service | ||||
| --rootpassword | Password for root user | ||||
| --rootuser | User with root privileges on the monitored MySQL server | ||||
| --servicename | Service name | ||||
| --unattendedmodeui | Unattended mode user interface | ||||
| --usessl | Enable use of SSL communication with MySQL Enterprise Monitor server | ||||
| --version | Display the product information |
Command-Line Format --agentpasswordPermitted Values Type stringSpecify the agent password to be used when communicating with the MySQL Enterprise Service Manager.
Command-Line Format --agentuserPermitted Values Type stringDefault agentSpecify the agent username to be used when communicating with the MySQL Enterprise Service Manager.
Command-Line Format --checkmysqlhostPermitted Values Type stringDefault yesValid Values yesCheck host noDo not check host Validate the MySQL hostname or IP address
Command-Line Format --createaccountPermitted Values Type booleanDefault 1Create the user account specified by the
agentuserandagentpasswordoptions to be used when the agent connects to the monitored MySQL server. To use this option you must also specify a suitablerootaccount with privileges to create the new user using therootuserandrootpasswordoptions.The user create will have the correct privileges for the agent to collect all the necessary information. For more information, see Section 5.3.1, “Creating a MySQL User Account for the Monitor Agent”.
Command-Line Format --debuglevelPermitted Values Type numericDefault 2Range 0-4Set the debug information level for log data written to the file specified by
debugtrace.Command-Line Format --debugtracePermitted Values Type stringSet the filename to use when recording debug information during the installation.
Command-Line Format --enableagentPermitted Values Type booleanDefault 1Enable the agent to monitor a MySQL server. If this option is set to false, the agent will be installed without enabling the monitoring of MySQL server. You can use this to configure a proxy service using an agent for collecting Query Analyzer information.
Command-Line Format --enableproxyPermitted Values Type booleanDefault 1Enable the Proxy service. The proxy service can be used to collect query data to be used through the Query Analyzer. For more information, see Section 3.1.3, “Using the Agent Proxy”.
Command-Line Format --installdirPermitted Values Type (windows) stringDefault C:\Program Files\MySQL\Enterprise\AgentPermitted Values Type (macosx) stringDefault /Applications/mysql/enterprise/agent/Permitted Values Type (unix) stringDefault /opt/mysql/enterprise/agent/Specify the directory where the software will be installed.
Command-Line Format --installer-languagePermitted Values Type stringDefault enValid Values enEnglish jaJapanese Set the language to be used for the installation process.
Command-Line Format --managerhostPermitted Values Type stringThe hostname or IP address of the MySQL Enterprise Service Manager.
Command-Line Format --managerportPermitted Values Type numericDefault 18080The port number of the MySQL Enterprise Service Manager.
The port number of the MySQL Enterprise Service Manager to be used for SSL-based communication
Command-Line Format --modePermitted Values Type (macosx) stringDefault osxValid Values osxMac OS X (native) textText (command-line) unattendedUnattended (no dialogs/prompts) Permitted Values Type (linux) stringDefault gtkValid Values gtkGTK (X Windows) xwindowX Windows (native) textText (command-line) unattendedUnattended (no dialogs/prompts) Permitted Values Type (unix) stringDefault xwindowValid Values xwindowX Windows (native) textText (command-line) unattendedUnattended (no dialogs/prompts) Permitted Values Type (windows) stringDefault win32Valid Values win32Windows (native) unattendedUnattended (no dialogs/prompts) Specify the installation mode to use for this installation.
Command-Line Format --mysqlconnmethodPermitted Values Type stringDefault tcpipValid Values tcpipUse TCP/IP socketUse Unix Socket/Named Pipe Specify the connection method to use to connect to MySQL. If you specify
tcpip, the value of themysqlportoption will be used. If you specifysocket, the value of themysqlsocketoption will be used to connect to the MySQL server to be monitored.Command-Line Format --mysqlhostPermitted Values Type Default 127.0.0.1Hostname or IP address of the MySQL server to be monitored.
Command-Line Format --mysqlpasswordPermitted Values Type stringSpecify the password to use when connecting to the monitored MySQL instance.
Command-Line Format --mysqlportPermitted Values Type numericDefault 3306The TCP/IP port to use when connecting to the monitored MySQL server.
Command-Line Format --mysqlsocketPermitted Values Type stringSpecify the filename of the MySQL socket to use when communicating with the monitored MySQL instance.
Command-Line Format --mysqluserPermitted Values Type stringSpecify the username to use when connecting to the monitored MySQL instance.
Command-Line Format --optionfileSpecify the location of an option file containing the configuration options for this installation.
Command-Line Format --proxyportPermitted Values Type numericDefault 6446Specify the TCP/IP port to use for the proxy interface.
Command-Line Format --proxyuserPermitted Values Type stringDefault rootThe user account for the management component of the proxy service.
Command-Line Format --unattendedmodeuiPermitted Values Type stringDefault noneValid Values noneNo dialogs minimalCritical dialogs minimalWithDialogsMinimal UI with dialogs The UI elements to use when performing an unattended installation. The options are
none, show no UI elements during the installation;minimal, show minimal elements during installation;minimalWithDialogs, show minimal UI elements, but include the filled-dialog boxes.Command-Line Format --usesslPermitted Values Type booleanDefault 0Specifies whether SSL should be used to communicate with the MySQL Enterprise Service Manager.
Command-Line Format --versionDisplay product information, including the version number of the installer.
Command-Line Format --rootpasswordPermitted Values Type stringThe password of a root account to be used to create the agent user by the installer.
Command-Line Format --rootuserPermitted Values Type stringDefault rootThe root account to be used to create the agent user by the installer.
Command-Line Format --servicenamePermitted Values Type stringDefault mysql.monitor.agentWhen the MySQL Enterprise Agent is installed, a new service is created (Windows), or on Unix a new startup script is created within the corresponding startup directory (for example
/etc/init.d). If you want to install multiple agents on the same host you can use this option to create each agent installation with a unique identifier. During an upgrade installation, you then use this identifier to specify which installation of the agent should be updated.Command-Line Format --helpDisplay the list of valid options to the installer.
Depending upon how you plan to use the MySQL Enterprise Monitor, there are some tasks you may want to perform after installation. Find some suggestions in the following list:
Email settings: Test email notification by deliberately triggering an alert.
Auto Startup: On Unix systems, the MySQL Enterprise Service Manager does not automatically restart when the system is rebooted. You may wish to create a system initialization script appropriate to your operating system.
Log files: Check the log files for any irregularities. For the locations of the various log files see Files Associated with The MySQL Enterprise Monitor.
Agent Log file rotation: Implement log file rotation for the monitor agent.
Back up the repository: For a back-up strategy suitable to your circumstances, see the MySQL reference manual documentation.
Configuration backup: Back up the
mysql-monitor-agent.inifile and the associatedinstancesdirectory and contents.For more information about the
mysql-monitor-agent.inifile see Section C.2, “MySQL Enterprise Agent Reference”.Configuration file: Store the
configuration_report.txtin a safe place. There is no mechanism for retrieving the password stored in this file.Repository credentials: The repository user name and password are stored in unencrypted form in the
config.propertiesfile. Take care to protect this file.Disk management: Remove installation files, and monitor the space used by the repository. Ensure that you have adequate disk space by regularly purging data. For more information, see Data Purge Behavior.
Firewall changes: You may want to limit or expand access to the MySQL Enterprise Service Manager.
Open ports: As with firewall changes, you may want to limit or expand access to the MySQL Enterprise Service Manager. The dashboard uses nonstandard ports, none of which are usually open by default.
Server upgrades: See Section 5.6.2.1, “Upgrading the Monitored MySQL Server” for instructions on upgrading a server.
Repository access: You may want to add other users.
You can upgrade MySQL Enterprise Monitor in a number of different ways:
For instructions on upgrading your existing installation, see Section 5.6.1, “Upgrading MySQL Enterprise Monitor”.
For more information on re-installing an existing installation, see Reinstalling MySQL Enterprise Monitor.
To change an existing installation, such as changing the monitored server, see Section 5.6.2, “Changing Your MySQL Enterprise Monitor Installation”.
From time to time there may be updates to the MySQL Enterprise Service Manager or the MySQL Enterprise Agent. This section describes how to perform an update for either of these components.
You cannot use the update installers to change to a different operating system or chip architecture. For example, you cannot update a 32-bit Linux installation to a 64-bit version using an update installer—in cases such as this you must do a fresh installation.
You also cannot use the upgrader if you have configured the MySQL server for the MySQL Enterprise Service Manager instance to be located away from the rest of the MySQL Enterprise Service Manager and installation directory.
The installation and configuration of MySQL Enterprise Agent must be standard before you start the installation. The update installer will not upgrade agents where you have changed or modified the filenames or directory layout of the installed agent, configuration files, or the startup files.
The name of the update file varies but it shows the target
operating system and the version the update applies to. If a
specific component is being updated it may also appear in the file
name. For example, a file named
mysqlenterprisemanager-2.2.0-windows-update-installer.exe
You may install an update in the same way that you initially
installed the service manager or the agent; in
win32 or unattended mode on
Windows in gtk, text,
xwindow, or unattended mode
on Unix and in osx, text ,
or unattended mode on OS X.
The method you use for upgrading MySQL Enterprise Monitor components will depend on the upgrade you are performing.
If you are upgrading between major versions (for example, from MySQL Enterprise Monitor 1.3 to merlin 2.0), you should shutdown the MySQL Enterprise Service Manager and each connected MySQL Enterprise Agent. Once you have shutdown each component, start by updating the MySQL Enterprise Service Manager, and then updating the MySQL Enterprise Agent on each monitored client.
If you are upgrading between the same major version, for example, MySQL Enterprise Monitor 2.0 to MySQL Enterprise Monitor 2.1, or a minor version, such as MySQL Enterprise Monitor 2.1.1 to MySQL Enterprise Monitor 2.1.2, you can shutdown only the component (agent, or server) you are updating. Using this method, you can perform a 'rolling' upgrade, where you shutdown a single MySQL Enterprise Agent, upgrade it to the latest agent version, and then restart the agent before moving on to the next monitored instance.
The upgrade installer overwrites
items-mysql-monitor.xml. On Windows, this
file is in the C:\Program
Files\MySQL\Enterprise\Agent\share\mysql-monitor-agent
directory and on Unix, in the
/opt/mysql/enterprise/agent/share/mysql-monitor-agent
directory. Back this file up if you have made any changes to it.
If you use the Upgrade installer to update MySQL Enterprise Service Manager and
you have made any changes to the my.cnf
within your MySQL Enterprise Service Manager installation, any changes will be
lost. You should copy the existing my.cnf
file before starting the upgrade installer.
Otherwise, updating is a fairly straightforward process. Run the installation file and choose the directory of your current installation and whether or not you wish to back up your current installation. The time required to complete the process varies depending upon the nature of the update.
If you chose to back up your current installation, a directory
named backup will be created in the current
installation directory. This directory will contain copies of the
directory or directories that were replaced during the update. In
cases where only specific files are replaced, the
backup directory may contain only these
files. If you are unhappy with the update simply overwrite the new
files or directories with the originals found in the
backup directory. Be sure to stop both the
MySQL Enterprise Service Manager and MySQL Enterprise Agent before restoring the original
files. You can delete or archive this directory when you are
satisfied that the update was successful.
If you choose to back up your current installation, the installer checks that there is adequate disk space for your repository backup. If there is not enough space, you are given the option of choosing another location; you may also choose not to back up the repository.
To update your Advisors see, Section 5.2.7.3, “Installing, Updating or Upgrading Advisors After Initial Login”.
To upgrade your existing installation from MySQL Enterprise Monitor 1.3 to MySQL Enterprise Monitor 2.0, you need to upgrade both your MySQL Enterprise Service Manager and your MySQL Enterprise Agent on each machine that you are monitoring.
To perform the update process you must use an
update installer. This ensures that your
current configuration information is migrated to the new version
of MySQL Enterprise Service Manager.
Before you start the migration, shutdown your MySQL Enterprise Service Manager and MySQL Enterprise Agent on each monitored host. Then install the updated MySQL Enterprise Service Manager application to migrate the configuration and data of the main application and repository. Once the new MySQL Enterprise Service Manager is running, you can start to update and migrate each agent.
For more information on upgrading your MySQL Enterprise Service Manager, see Section 5.6.1.1.1, “Upgrading to MySQL Enterprise Service Manager 2.0”. For more information on upgrading an MySQL Enterprise Agent, see Section 5.6.1.1.2, “Upgrading to MySQL Enterprise Agent 2.0”.
Upgrading MySQL Enterprise Service Manager requires you to use on of the update installers. The update installer performs a number of operations during installation:
A new database, required to support 2.0 functionality, is created.
You core dashboard, user, and rule information is migrated from the old database to the new database.
The core configuration parameters for the MySQL Enterprise Service Manager are migrated from MySQL Enterprise Monitor 1.3 are migrated to MySQL Enterprise Monitor 2.0.
The installation of the new software using the update installer follows this basic sequence:
Request the installation language.
Confirm the location of the current MySQL Enterprise Service Manager installation.
Specify whether you want to keep a copy of the old server, application, and database files.
Configure the Tomcat server settings, including whether the new server should support SSL connections from agents.
If requested, the application and database information is backed up and upgraded, before the new application is installed.
The installation process is consistent for all platforms. A sample of the process for Max OS X has been provided below:
Double-click the update installer. The update installer will have
updatein the file name. For example,mysqlmonitor-2.0.0.7101-osx-update-installer.app.Confirm the language you want to use when installing the software.
Click
You will be presented with an information screen showing the application you are installing. Click to continue.
Specify, or locate, the previous installation of MySQL Enterprise Service Manager. If you installed the server within the default location, the current version of the application should be located automatically.
The installer can keep a backup copy of your existing application, including keeping a complete backup of the data stored within your MySQL Enterprise Monitor repository database.
Specify the location of the backup (default is to use the
backupdirectory within your installation directory). Note that backing up the database in addition to the main application will increase the installation time as the files have to be copied. The larger the size of your repository data, the longer the installation process will take.Specify the Tomcat Server options. The Tomcat Server Port is the default port you will use to access the MySQL Enterprise Dashboard. If you want to support agents using SSL to communicate to MySQL Enterprise Service Manager, you must check the Is SSL support required?
Confirm that you want to continue the installation. Once installation has started, the backup of you existing application (and database) will start, although the process may take some time. Wait until the process completes.
Once the process has completed you will be provided with a notification of the installation process, including how to uninstall the application if you want to do so in the future. If any errors occurred, they will be reported here.
The installation has now completed. You can automatically start the MySQL Enterprise Service Manager and view the attached Readme file by ensuring the checkboxes on this page are selected.
You can now quit the installer.
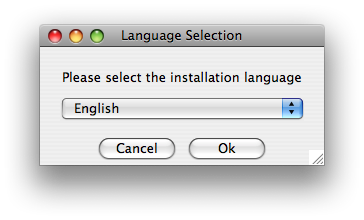
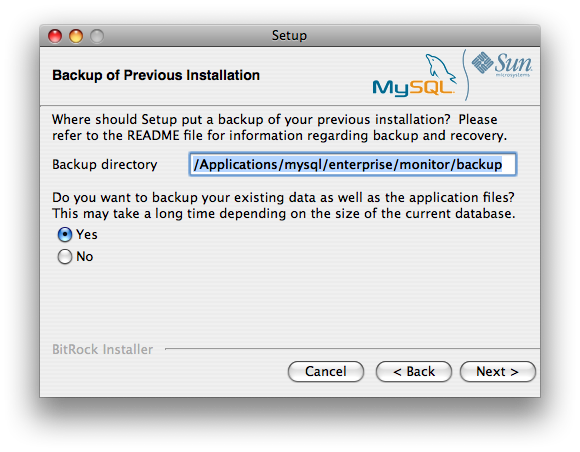

Once the installation has completed, the first time you login to MySQL Enterprise Dashboard you will be asked to provide your login credentials, if they do not already exist in the server configuration, or to provide a copy of the Advisor jar suitable for your MySQL Enterprise Service Manager version.
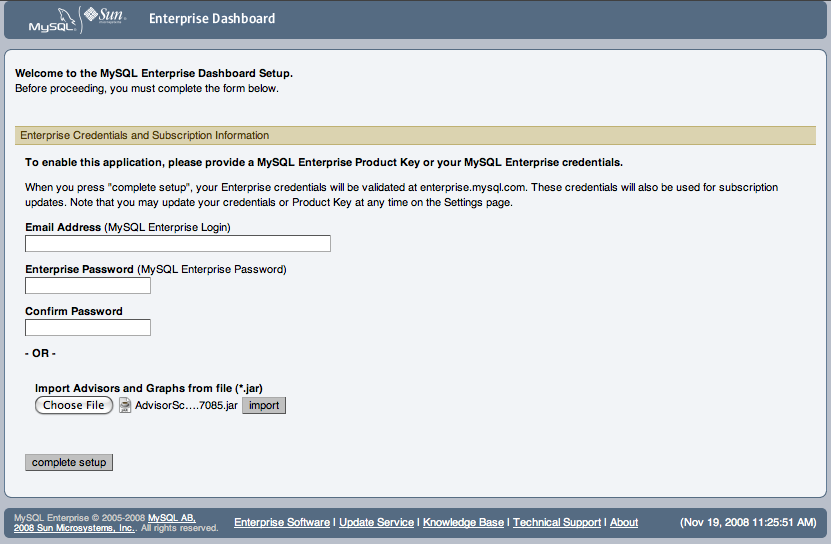
MySQL Enterprise Monitor has now been updated. You must update each of your agents to MySQL Enterprise Agent 2.0 to ensure that they are providing the correct information to MySQL Enterprise Service Manager
To upgrade an agent you should use a update
installer. This will migrate your configuration information,
simplifying the upgrade process significantly.
The agent log file,
mysql-monitor-agent.log, if it exists,
will be retained during the upgrade. A new log file,
mysql-monitor-agent.log is used by
MySQL Enterprise Agent 2.0.
The core sequence is the same on all platforms, the update process on Linux is shown below:
Start the update installer.
shell> ./mysqlmonitoragent-2.0.0.7101-linux-glibc2.3-x86-32bit-update-installer.bin
For MySQL Enterprise Agent 2.2 and higher, If you have multiple instances of MySQL Enterprise Agent installed, you can specify a unique name for the agent, which will be used to identify the agent startup script (in
/etc/init.dand other configuration information. To specify the installation, use the--servicename=option.mysql-monitor-agentSet the language for the installation process.
Language Selection Please select the installation language [1] English [2] Japanese Please choose an option [1] :
Confirm or update the location of the installation directory of the previous version.
---------------------------------------------------------------------------- Welcome to the setup wizard for the MySQL Enterprise Monitor Agent Update ---------------------------------------------------------------------------- Please specify the directory that contains the previous installation of the MySQL Enterprise Monitor Agent Installation directory [/opt/mysql/enterprise/agent]:Specify whether you want to create a backup of the current application and configuration information, and if so, where the backup directory should be created.
---------------------------------------------------------------------------- Current installation backup Do you want to create a backup during the update process? Backup the current installation [Y/n]: Y Backup directory [/opt/mysql/enterprise/agent/patchbackup]:You will be asked whether you want to enable the Query Analyzer. The Query Analyzer lets you monitor the execution statistics for individual queries executed through your MySQL servers. To enable, you must specify the proxy port, MySQL server and MySQL server port that you want to use. If you do not enable Query Analyzer now, you can enable it later. See Section 2.6, “The Query Analyzer Tab”.
---------------------------------------------------------------------------- Query Analyzer Configuration MySQL Proxy enables query monitoring and analysis by listening on the port specified below for client connections that are then passed through to a backend MySQL database server. It is not needed for basic monitoring functionality, but is required for query monitoring and analysis. Visit the following URL for more information: https://enterprise.mysql.com/docs/monitor/2.0/en/mem-query-analyzer.html Enable Proxy (recommended) [Y/n]: Proxy Port [
6446]: Backend Host: 127.0.0.1 (cannot be changed) Backend Port: 3306 (cannot be changed)You are now ready to complete the installation. Confirm that you want to continue.
---------------------------------------------------------------------------- Setup is now ready to begin installing MySQL Enterprise Monitor Agent Update on your computer. Do you want to continue? [Y/n]: ---------------------------------------------------------------------------- Please wait while Setup installs MySQL Enterprise Monitor Agent Update on your computer. Installing 0% ______________ 50% ______________ 100% ######################################### ---------------------------------------------------------------------------- Setup has finished installing MySQL Enterprise Monitor Agent Update on your computer. Restart MySQL Enterprise Monitor Agent now [Y/n]: View Readme File [Y/n]: n
Before connecting your MySQL Enterprise Agent to your MySQL server you must update the grants for the MySQL Enterprise Agent. Connect to the MySQL server and run this statement to update the required grants:
GRANT CREATE, INSERT ON mysql.* TO 'mysqluser'@'localhost' IDENTIFIED BY 'agent_password';
Replacing the mysqluser and
agent_password parameters with the values
used for connecting your agent to your MySQL server.
Once the update agent has communicated with the MySQL Enterprise Service Manager the core information about the agent and the MySQL server it is monitoring will be migrated to the new data format required by MySQL Enterprise Service Manager 2.0. To migrate the existing stored data, see Section B.6, “Migrating 1.3.x Historical Data to MySQL Enterprise Monitor 2.0”.
When upgrading to MySQL Enterprise Monitor 2.1 you should be aware of the following issues:
During the upgrade process, if you had previously set a Query Analyzer data purge value that was greater than the standard data purge value, the historical data collection purge period will be set to the Query Analyzer purge period. This will be logged in the upgrade log with the following notice:
getDataCollectionPurgeLifespan now: 4 weeks (was: 2 weeks)
When upgrading to MySQL Enterprise Monitor 2.2 you should be aware of the following issues:
If you are upgrading to MySQL Enterprise Monitor 2.2 you should upgrade from MySQL Enterprise Monitor 2.0 or higher. If you are using MySQL Enterprise Monitor 1.3 or lower, you should upgrade to MySQL Enterprise Monitor 2.0 first before upgrading to MySQL Enterprise Monitor 2.2.
Rules and advisors in MySQL Enterprise Monitor 2.2 now support auto-close functionality if the issue that raised the notification is no longer causing a problem. You should review all your existing rules schedules and confirm whether the auto-close feature is useful in each case.
The MySQL Enterprise Service Manager supports the use of a separate, self-managed, MySQL server in place of the MySQL server bundled with the MySQL Enterprise Service Manager installation for storing repository data. For more information, see Section 5.2.1, “Service Manager Installation Common Parameters”.
If you are upgrading MySQL Enterprise Service Manager which uses a remote, self-managed MySQL database to store the MySQL Enterprise Monitor repository data, then you should perform the installation as follows:
Shutdown MySQL Enterprise Service Manager.
Shutdown the MySQL instance supporting your MySQL Enterprise Monitor repository.
Upgrade the MySQL server as you would any other MySQL server instance. See Upgrading MySQL.
Ensure when performing the upgrade that the MySQL server instance is configured with support for InooDB and that the InooDB storage engine has been disabled. Also ensure that support for partitioning is available within the server.
Run the mysql_upgrade to ensure that the system tables have been correctly updated.
Restart the MySQL repository instance.
Restart MySQL Enterprise Service Manager and confirm that it was able to connect to the MySQL server.
When upgrading MySQL Enterprise Service Manager, the installer tries to determine if you are using a local MySQL server (as bundled with the MySQL Enterprise Service Manager) or a remote and self-managed MySQL server instance to store your repository data.
To determine whether the existing installation is using a local MySQL server, the installer examines the existing MySQL Enterprise Service Manager configuration file. If the value of the
mysql.serverconfiguration parameter is set to127.0.0.1orlocalhost, the installer assumes the MySQL server is local. If any value is identified, then it is assumed that the server is remote/self-managed and the installer will not upgrade the MySQL server component.If the correct MySQL server version and supported functionality (partitioning) are not supported by the MySQL server you are using, the installer will terminate.
The storage tables used for storing MySQL Enterprise Service Manager data, and the rules and methods required for purging old information, have changed in MySQL Enterprise Service Manager 2.2. You can improve the purging and disk space usage for these data tables by using the techniques shown in Section B.7, “Improving Disk Space Usage with Purge in 2.1 and 2.2”.
For MySQL Enterprise Agent installations, the installer can now create a user on your MySQL server with suitable credentials. To perform this operation, the installer will request the root login and password for your MySQL server so that the user and other details can be updated.
This section describes the best practices to employ when changing your MySQL Enterprise Monitor installation.
When upgrading a monitored MySQL server first stop the agent. To stop the agent see:
Stop the MySQL server and perform the upgrade. For instructions on stopping and restarting the MySQL service under Windows see Section 5.2.5, “Starting/Stopping the MySQL Enterprise Monitor Service on Windows”.
To stop and restart the MySQL daemon under Unix and Mac OS X, see, Section 5.2.6, “Starting/Stopping the MySQL Enterprise Monitor Service on Unix and Mac OS X”.
Once the service/daemon is stopped you may upgrade your server. For instructions on upgrading your MySQL server see the reference manual pertaining to your server version. When the upgrade is complete restart the MySQL server.
The agent's log file will show that the server was down.
You need not reinstall the MySQL Enterprise Agent in order to change the MySQL server that it monitors. It is possible to adapt an existing agent so that it monitors a different server.
To do this you must stop the monitor agent and then remove the server that it is monitoring. To stop the agent see:
For instructions on removing a server see, Section 2.8.3.3, “Removing a Server From the Dashboard”.
Once the agent is stopped and the server is removed from the
Dashboard, changes may be made to the
mysql-monitor-agent.ini, or the
agent-instance.ini file within the agent
instances instances directory. You can find
the location of the directory by examining the content of the
mysql-monitor-agent.ini and checking the
value of the mysqld-instance-dir parameter.
If you want to make changes to the monitored MySQL server, edit
the agent-instance.ini file. Change the
user, password,
hostname, and port values
if required. For more information, see
Section C.2.2, “MySQL Server (agent-instance.ini) Configuration”.
To change other settings, such as enabling proxy support
(required for Query Analyzer), the management host, or the port
number used by the agent, modify the
mysql-monitor-agent.ini file. For more
information, see
Section C.2.1, “MySQL Enterprise Agent Configurable Options”.
To restart the agent see:
If you are adapting an existing agent to monitor a remote server make sure that the agent has the credentials for remote access and that the port on the remote MySQL server instance is open. For more information, see Section 5.3.7, “Configuring an Agent to Monitor a Remote MySQL Server”.
If you experience difficulties starting the agent, check Section 5.3.10, “Troubleshooting the Agent”.
Log in to the Dashboard and you should find your new server in
the All Servers group.
In some situations you may need to bring down a monitored server. When this is necessary, it is good practice to stop the agent first—doing so will avoid generating a “Server is unreachable” event.
For instance, suppose you need to stop the server in order to do a backup. The steps to follow are:
Stop the agent
Stop the service/daemon
Perform the backup
Restart the service/daemon
Restart the agent
To stop or start the agent see:
To stop the MySQL service/daemon see the MySQL reference manual for your server version. You can find the manual online at http://dev.mysql.com/doc.
Follow these steps and there will be no “noise” associated with backing up your server. In contrast, if you leave the agent running while bringing down the server, you will generate a “Server is unreachable” event.
As an alternative to stopping the agent, you can change the logic associated with a rule. For instance, you could alter the threshold of the rule “Server is unreachable”:
%server.reachable% == THRESHOLD
to:
%server.reachable% == THRESHOLD && CURTIME() NOT BETWEEN '22:00:00' AND '23:00:00'
This would effectively blackout the rule between 10 and 11 pm, during which time you could perform a backup.
For more information about editing rules see Section 2.3.3, “Editing Built-in Rules”. To blackout all events associated with a specific server or group of servers see Section 4.4, “Advisor Blackout Periods”.
Removal of the MySQL Enterprise Monitor requires removal of the MySQL Enterprise Service Manager and the MySQL Enterprise Agent Service. In some circumstances, when running multiple agents on one machine for instance, you may not want to remove the entire MySQL Enterprise Agent Service but only a single monitored server.
Removing the MySQL Enterprise Service Manager
Remove the MySQL Enterprise Service Manager by going to the Control
Panel and choosing Add or Remove
Programs. Find the entry for MySQL Enterprise
Monitor and remove it. During the uninstall process you
will be given the option of saving existing data and log files.
Choose this option if you plan to reinstall the MySQL Enterprise Monitor.
If you are not saving existing data, after MySQL Enterprise Service Manager has
been removed you may delete the C:\Program
Files\MySQL\Enterprise\Monitor directory.
If you chose not to remove existing data and log files when
uninstalling MySQL Enterprise Service Manager do
not remove the
C:\Program
            Files\MySQL\Enterprise\Monitor
directory. Doing so will delete these files.
If you added the Tomcat/Apache web server to the list of Windows
firewall exceptions, remove this service by opening the
Windows Firewall from the Control
Panel. Choose the Exceptions tab and
delete the Tomcat/Apache entry.
Removing MySQL Enterprise Monitor Services Only
When the MySQL Enterprise Service Manager is installed, the Tomcat/Apache and MySQL server services are started. It is possible to remove these services without also removing your MySQL Enterprise Service Manager installation. For more information about these services see, Section 5.2.5, “Starting/Stopping the MySQL Enterprise Monitor Service on Windows”.
Do this by finding the MySQL Enterprise Monitor menu option and
choosing Services and then Uninstall
MySQL Enterprise Monitor Services. This will remove all the services
associated with MySQL Enterprise Service Manager.
You can confirm that these services have been removed by checking services in the Microsoft Management Console Services window.
If you wish to reinstall these services you can do this by using
the Install MySQL Enterprise Monitor Services menu option.
It is also possible to remove services using the
mysqlmonitorctl.bat file found in the
C:\Program
          Files\MySQL\Enterprise\Monitor
directory. To see the available options, go to the command line
and type: myqlnetworkctrl help. This batch
file is discussed in more detail in
Section 5.2.5, “Starting/Stopping the MySQL Enterprise Monitor Service on Windows”.
To remove the Monitor Agent itself, open the Control
Panel and choose Add or Remove
Programs. Find the entry for MySQL Enterprise
Monitor Agent and remove it. This will execute the
uninstall program located in the C:\Program
Files\MySQL\MySQL\Enterprise\Agent directory.
If you are running more than one agent on the same machine and
wish to remove only one of the agents, do
not remove the MySQL
Enterprise Monitor Agent entry from the Add
or Remove Programs menu. To remove a single agent see
Removing a
Single Agent.
After removing the Monitor Agent you may also need to remove the
directories, C:\Program
Files\MySQL\Enterprise and C:\Program
Files\MySQL\Enterprise\Agent.
Removing the Monitor Agent in this fashion will remove the default
service. However, if you are running additional Monitor Agents as
described in Section C.2.2, “MySQL Server (agent-instance.ini) Configuration”, you will have to
remove those agents manually. See the next section for
instructions on doing this.
If you are running more than one agent on the same machine and
wish to remove only one of the agents, do
not remove the MySQL
Enterprise Monitor Agent entry from the Add or
Remove Programs menu. To remove a single agent and leave
other agents intact follow these steps:
Stop the agent
Confirm the location of the log files
Remove the agent as a service
Remove/Archive the associated files
It is best to stop the agent before removing it; for instructions on stopping an agent see, Section 5.3.5.1, “Starting/Stopping the Agent on Windows”.
You can confirm the location of the agent log files by checking
the ini file. For more information on this
topic see Section C.2.1, “MySQL Enterprise Agent Configurable Options”.
Go to the command line and remove the MySQL Enterprise Agent as a Windows service by typing:
shell> sc delete AgentName
You can confirm that the agent has been removed by checking the Microsoft Management Console Services window. There should no longer be an entry for the removed agent.
You should also remove or archive any log or configuration files associated with this agent. If you have installed any additional agents, remove them in the same fashion.
Removing the MySQL Enterprise Service Manager
To remove the MySQL Enterprise Service Manager, find the
uninstall file in the
/opt/mysql/enterprise/monitor directory.
Execute this file by typing:
shell> ./uninstall
During the uninstall process you will be given the option of saving existing data and log files. Choose this option if you plan to reinstall the MySQL Enterprise Monitor.
If you are not saving existing data, after uninstalling the
MySQL Enterprise Service Manager you may remove the
/opt/mysql/enterprise/monitor directory.
If you chose not to remove existing data and log files when
uninstalling the MySQL Enterprise Monitor do
not remove the
/opt/mysql/enterprise/monitor directory;
doing so will delete these files.
On Red Hat Enterprise Linux 4 and Fedora Core 4, the uninstall script may not stop the Tomcat server. Do this manually if necessary. To do this see, Section 5.2.6, “Starting/Stopping the MySQL Enterprise Monitor Service on Unix and Mac OS X”.
There may be other Java processes running on your system. Be careful not to accidentally stop them.
On some Unix platforms, including HP-UX, you may have to manually
delete the uninstall application and the
installation directory after you have execute the uninstall
process.
Prior to removal of the Monitor Agent Service you should stop any
agents. Do this by changing to the init.d
directory and issuing the command, ./mysql-monitor-agent
stop.
You will find the uninstall file in the
/opt/mysql/enterprise/agent directory.
Execute this file by navigating to this directory and typing:
shell> ./uninstall
After uninstalling the Monitor Agent you may remove the
/opt/mysql/enterprise/agent directory.
Removing the Monitor Agent in this fashion will remove the default service, and all the configuration files for different instances.
If you are running more than one agent on the same machine and wish to remove only one of the agents, do not run the uninstall program. To remove a single agent and leave other agents intact follow these steps:
Stop the agent
Confirm the location of the log files
Remove the agent as a service
Remove/Archive associated files
It is best to stop the agent before removing it; for instructions on stopping an agent see Section 5.3.5.3, “Starting/Stopping the Agent on Unix”.
You can confirm the location of the agent log files by checking
the ini file. For more information on this
topic see Section C.2.1, “MySQL Enterprise Agent Configurable Options”.
You may then remove the agent as a daemon by removing its entry in
the init.d directory. You should also remove
or archive any log or configuration files associated with this
agent.
If you have installed any additional agents, remove them in the same fashion.
Removing the MySQL Enterprise Service Manager
To remove the MySQL Enterprise Service Manager, run the
uninstall.app located in the
/Applications/mysql/enterprise/monitor/
directory, or the root directory of your MySQL Enterprise Service Manager
installation.
During the uninstall process you will be given the option of saving existing data and log files. Choose this option if you plan to reinstall the MySQL Enterprise Monitor.
If you are not saving existing data, after uninstalling the
MySQL Enterprise Service Manager you may remove the
/Applications/mysql/enterprise/monitor
directory.
If you chose not to remove existing data and log files when uninstalling the MySQL Enterprise Monitor do not remove the /Applications/mysql/enterprise/monitor directory; doing so will delete these files.
Prior to removal of the MySQL Enterprise Agent you should stop any agents.
Do this by changing to the init.d directory
and issuing the command:
shell> ./mysql-monitor-agent stop
Run the uninstall.app file located in the
/Applications/mysql/enterprise/agent
directory.
After uninstalling the MySQL Enterprise Agent you may remove the
/Applications/mysql/enterprise/agent
directory.
Removing the MySQL Enterprise Agent in this fashion will remove the default service, and all the configuration files for different instances.
If you are running more than one agent on the same machine and wish to remove only one of the agents, do not run the uninstall program.
To remove a single agent and leave other agents intact follow these steps:
Stop the agent
Confirm the location of the log files
Remove the agent as a daemon
Remove/Archive associated files
It is best to stop the agent before removing it; for instructions on stopping an agent see Section 5.3.5.2, “Starting/Stopping the Agent on Mac OS X”.
You can confirm the location of the agent log files by checking the ini file. For more information on this topic see Section C.2.1, “MySQL Enterprise Agent Configurable Options”.
You may then remove the agent as a daemon by removing its entry in
the init.d directory.
You should also remove or archive any log or configuration files associated with this agent.
If you have installed any additional agents, remove them in the same fashion.