Campaigns and campaign templates are deployed to the target servers specified in the ATG Outreach project workflow. After you have configured your ATG Outreach Production/Staging modules as deployment targets in ATG Content Administration, you must add the targets to the deployment-related elements in the workflow definitions for campaigns and campaign templates.
Note: As mentioned earlier in Defining the Deployment Topology, you can omit this step if you used the default values “staging” and “production” as the names you gave your ATG Outreach deployment targets in ATG Content Administration.
ATG Outreach includes two campaign workflows, a single-target workflow that is typically used to deploy campaigns to a production site, and a dual-target workflow that can be used to deploy to both a staging site and a production site.
Before you begin the steps below, make sure you started the ATG Outreach server with the appropriate commands. The startup commands determine the workflow (staging and production, or production only) that appears in the ACC and the corresponding tasks that appear in the Business Control Center. See Starting ATG Outreach for more information. (You can identify the workflow that is being used either by looking at the workflow itself in the ACC, as described below, or by looking at the tasks that appear for the workflow in the project area of the Business Control Center. See Managing Campaign Workflows for more information.)
Start the ACC.
Select Workflow > Publishing > Campaigns > Project. Note: Do not open the Internal folder. The workflows you need to modify are located in the top-level Project folder, as shown:
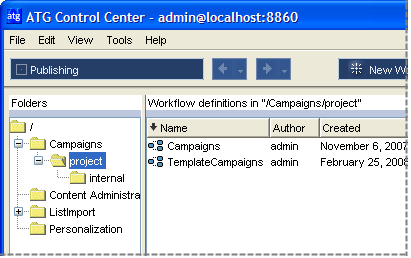
Select Campaigns to open the workflow that manages campaign projects.
Edit the deployment-related elements so they include the ATG Outreach Production/Staging deployment targets. Unless you used the default names for your deployment targets, all these elements appear in red to indicate they are incomplete.

Partial view of Campaigns workflow: incomplete deployment element

Partial view of Campaigns workflow: editing the deployment element

Partial view of Campaigns workflow: deployment element complete
For information on which server (staging or production) to add to each deployment element, refer to the table at the end of this procedure.
For more information on editing workflow elements, refer to the ATG Personalization Guide for Business Users.
Save the workflow.
Repeat for the TemplateCampaigns workflow, which manages projects for campaign templates.
The table below shows which target to add to each part of the workflow.
Workflow elements | Add this target |
|---|---|
All deployment elements in Staging Approval task (task 3) | Staging server |
All deployment elements in first Wait for Deployment to Complete task (task 4) | Staging server |
Deployment elements in Reject branch of Production Approval task (task 6) | Staging server |
All other (non Reject) deployment elements in Production Approval task (task 5) | Production server |
All deployment elements in second Wait for Deployment to Complete task (task 7) | Production server |
