32 Exploring the Home Space
This chapter provides basic information to get you started in the Spaces application Home space. It includes the following sections:
-
Section 32.2, "Registering Yourself with WebCenter Portal: Spaces"
-
Section 32.5, "Setting Page Creation Defaults for Personal Pages"
-
Section 32.6, "Exposing a Space Page in Your View of the Home Space"
-
Section 32.9, "Accessing WebCenter Portal: Spaces Online Help"
This chapter is intended for users minimally assigned the role Authenticated-User; that is, any user who is logged in, who wants to understand basic information about Spaces application self-registration, Home spaces, page access, and online help. To create and manage pages in a Home space, you must be granted, minimally, Pages: Create, Edit, and Delete Pages.
32.1 What You Can Do In the Home Space
The Home space is available to all users of a Spaces application. The application administrator may also provide you with options for creating and managing your own personal pages in the Home space.
Having page create and manage privileges in the Home space makes almost all of the information in this guide useful to you, no matter your position in your company's hierarchy. For example, you can use the information in Section 32.4, "Working with Pages in the Home Space" to create and manage your personal pages and to share such pages with the users you specify.
Note:
Application administrators may choose to prohibit the creation of personal pages in the Home space, allowing only the display of business role pages and system pages, over which you have less control.
You can use the information in Chapter 17, "Creating and Managing Pages," to add content to your pages and to configure that content.
You can use the information in Part X, "Working with Content", Part XIII, "Searching WebCenter and Other Sources", Part XV, "Services: Announcements through Links", and Part XVI, "Services: Lists through Worklist" to take advantage of the many services and their associated task flows provided out of the box.
Tip:
Some services are active only in spaces other than the Home space. These include such services as Discussions, Events, Announcements, and Lists.
This chapter provides a basic orientation to the types of actions you can take in the Home space. Note that the actions discussed here and in the chapters cited earlier apply primarily to the personal pages you create in the Home space. There are other types of pages, too, over which you have fewer default permissions.
For example, the Home space may contain business role pages, that are provided to you by your application administrator. Business role pages are pushed to your view of the Home space based on your assigned application role. For example, if you are part of the Sales team, there may be a business role page in your view of the Home space that you and all the members of the Sales team can access.
Additionally, there are system pages. System pages are typically utility pages that, in the Home space, either expose your personal view onto a given service, such as the Documents page or the Activity Stream page, or provide an application-wide function, such as the Self-Registration page.
Keep this in mind: though you own and operate your personal pages in the Home space, your application administrator sees all, and can access anyone's personal pages, no matter the security settings you put in place.
32.2 Registering Yourself with WebCenter Portal: Spaces
Your Spaces application administrator may provide the opportunity to self-register to the Spaces application. Self-registration enables you to create your own login credentials and enter the Spaces application from there forward as an authenticated user. The privileges of authentication are many: your own view of the Home space, access to other features based on your assigned user role, a broader range of available interactive features, to name a few.
Note:
Whether self-registration is available depends on how your Spaces application administrator configures the application.
To register yourself as a Spaces application user:
-
Open the Spaces application.
For example:
http://host:port/webcenter
Where
<host>:<port>refers to the host name and port number of the system where WebCenter Portal: Spaces is installed. By default, the Spaces application is installed on port 8888. -
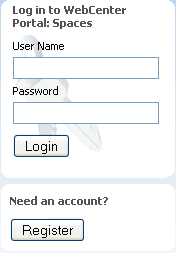
Click the Register button on the application Welcome page (Figure 32-1).
Note:
Your Spaces application administrator can customize the look and feel of the Login page, but the information depicted in Figure 32-1 is essentially the same whatever the customization.
See Also:
Advanced users can extend the Spaces application by customizing, for example, where the Login fields and buttons appear. For more information, see Section 7.3.2, "Customizing System Pages."
Figure 32-1 The Register Button on the Welcome Page
Description of "Figure 32-1 The Register Button on the Welcome Page"
-
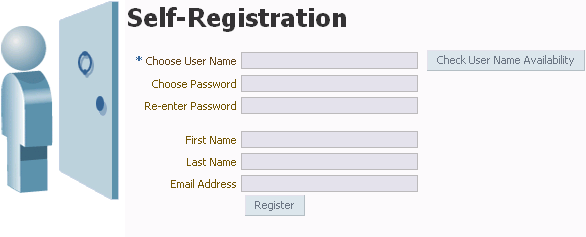
On the resulting Self-Registration page (Figure 32-2), enter your user information:
Note that fields marked with an asterisk require a value.
Tip:
Your application administrator can customize the Self-Registration page, so it may not appear as depicted in Figure 32-2.
Figure 32-2 WebCenter Portal: Spaces Self-Registration Page
Description of "Figure 32-2 WebCenter Portal: Spaces Self-Registration Page"
Before you begin, you should know that the user name and password policy is set by the underlying identity store. Your application administrator may customize the Self-Registration page to include information that explains your organization's user name and password policy.
-
Enter your preferred user name in the Choose User Name field.
-
Click the Check User Name Available button to ensure the uniqueness of your chosen user name.
If the name you entered is in use, provide another user name and test that. Continue this cycle until the check assures you that your entry is unique.
-
Provide a password in the Choose Password field.
-
Reenter the password in the Re-enter Password field.
-
Enter your first name in the First Name field.
-
Enter your last name (that is, your surname) in the Last Name field.
-
Enter your company email address in the Email Address field.
-
-
Click the Register button.
If the data you entered is accepted, a log-in dialog opens, enabling you to log in to the Spaces application.
Note:
By default, if a user name with the same mail ID exists, when you click Register, a dialog opens informing you that the mail ID exists. The dialog includes a button for sending a message to the mail ID associated with the existing user name.
Because you are not yet authenticated, your message is sent to a public mail box, provided your application administrator has configured public mail credentials.
Note that this default behavior may be overridden by customizations provided by your portal developers.
32.3 Accessing the Home Space
Depending on the navigation model, you may have a number of ways to access the Home space. The following are examples of some of these ways:
-
Use the following URL:
http://host:port/webcenter/spaces/home
-
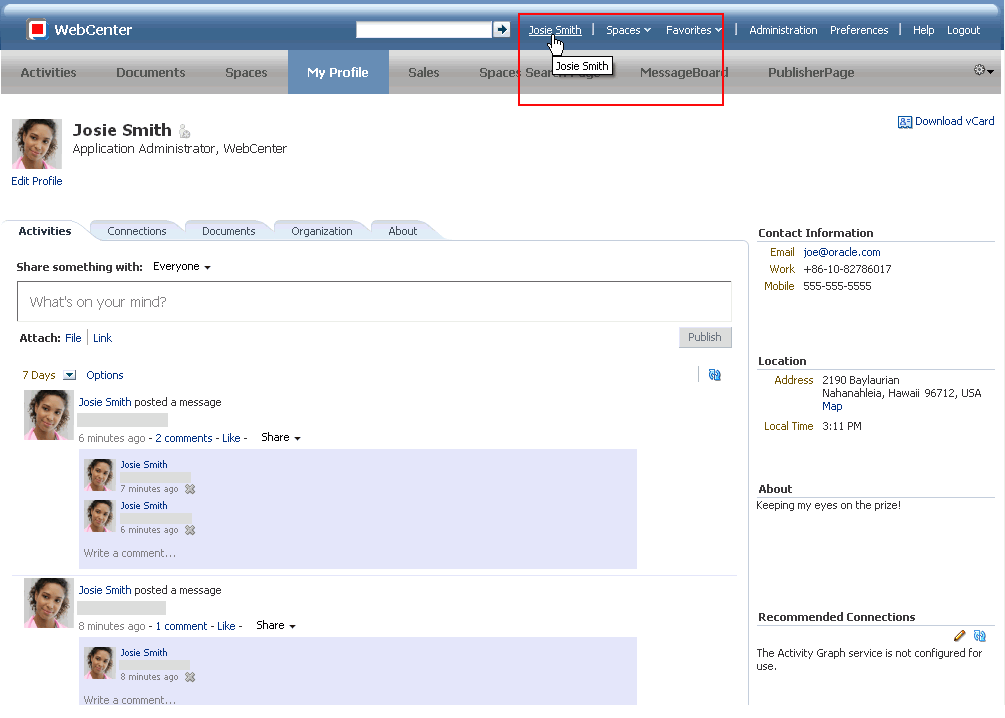
Click your user name where it appears as a link in the application, as shown in Figure 32-3.
Figure 32-3 Example of a User Name as a Link

Description of "Figure 32-3 Example of a User Name as a Link"
This takes you to the My Profile page in the Home space.
-
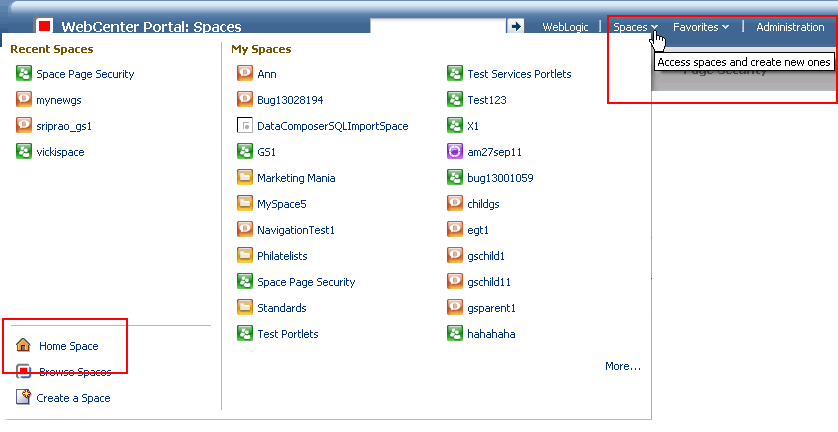
Click the Spaces menu, and select Home Space (Figure 32-4).
Figure 32-4 Home Space Option on the Spaces Switcher Menu
Description of "Figure 32-4 Home Space Option on the Spaces Switcher Menu"
32.4 Working with Pages in the Home Space
Your application administrator can grant you permissions to create and manage pages in the Home space. Pages that you create in the Home space are your personal pages. You may also have access to pages created by others users, or by the application administrator, if you have been granted permissions by the page owners.
Working with personal pages in the Home space is no different than working with pages in any space. Refer to the tasks described in Section 51.11, "Working with Pages in a Space" to manage your view of pages in the Home space, and create and edit your personal pages.
32.5 Setting Page Creation Defaults for Personal Pages
If your Spaces application administrator has made the option available, you can set page creation defaults to reduce the number of steps required to create a personal page in the Home space. That is, you can specify the page style that is selected by default when you open the Create Page dialog. You can also select to bypass the Create Page dialog, which enforces the default page style.
Note:
The page creation defaults an application administrator sets for business role pages also affect personal pages. For more information about application-level page creation defaults, see Section 7.1.2, "Setting Page Creation Defaults for Business Role Pages."
The settings you establish for your personal pages override any page creation settings that the application administrator sets.
To set personal page creation defaults:
-
Go to the Home space.
For more information, see Section 32.3, "Accessing the Home Space."
-
In the Home space, open the Personalize Pages page.
Tip:
The way you access this page depends on the page template in use. For example, you may access it through an Actions
 menu.
menu. -
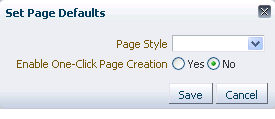
On the Personalize Pages page, click Set Page Defaults to open the Set Page Defaults dialog (Figure 32-5).
See Also:
For information about each page style, see Section 15.1, "What You Should Know About Page Styles."
-
Select a page layout from the Page Style dropdown list.
See Also:
For information about the seeded page styles, see Section 15.1, "What You Should Know About Page Styles." Your application administrator may provide additional custom page styles or restrict page styles to a shorter list.
-
Select an option next to Enable One-Click Page Creation:
Yes: Bypass the Create Page dialog, and create all of your personal pages using the specified Page Style.
Tip:
When you skip the Create Page dialog, the new page has a generic name. For information about renaming pages, see Section 17.6, "Renaming a Page."
No: Display the Create Page dialog, with the specified Page Style selected as the default in the Create Page dialog for all of your personal pages. You can select a different style for your new personal pages
-
Click Save to save your changes and exit the dialog.
32.6 Exposing a Space Page in Your View of the Home Space
You can expose some space pages within your view of the Home space. For example, if you would like to keep close track of a space page named Sales Results, you can specify that this page should be available in your view of the Home space. See Section 17.9, "Exposing a Space Page in Your View of the Home Space."
32.7 Previewing and Printing an Application Page
Use the Print Preview option to preview and print pages that largely contain text. Print options are useful for pages where content is mainly text, such as the Announcements page, wiki and blog pages, and other custom pages comprised primarily of text.
Note that the Print Preview link may not be present if your application designer has not made it available.
See Also:
For information about the Print Preview link, see Section 21.2.27, "Print Preview."
To preview and print an application page:
-
Go to the space that contains the page of interest.
See Also:
For more information, see Section 51.4, "Viewing and Accessing Available Spaces."
-
Click the page's Print Preview link.
A printable version of the page opens in a new browser tab or window. Print the page by pressing Ctrl-P, or simply preview the page.
32.8 Viewing Your Personal Profile Gallery
When you log in to the Spaces application, you may notice your user name at some position in the application user interface. Click this to open your personal profile gallery (Figure 32-6).
Your personal profile gallery presents a series of tabs, each devoted to information of interest to you:
-
Activities—Provides a Publisher, which you can use to make statements about your personal status and provide links to external or internal objects; and an Activity Stream, which streams information about the activities of you and your connections. For more information, see Chapter 35, "Tracking Your Connections' Activities," and Chapter 37, "Liking, Commenting On, and Sharing Objects."
-
Connections—Provides a view of all of your connections and features for managing your connections. Chapter 34, "Creating Your Social Network."
-
Documents—Provides a view of your personal document library. For more information, see Part X, "Working with Content".
-
Organization—An organization chart that depicts you and the organization members directly associated with you. For more information, see Chapter 33, "Managing Your Profile."
-
About—Your personal profile details. For more information, see Chapter 33, "Managing Your Profile."
32.9 Accessing WebCenter Portal: Spaces Online Help
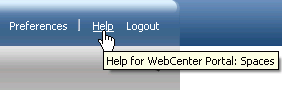
Wherever you see a Help link or a Help button, click it to access help.
The Help link (Figure 32-7) opens the application's main help page. From there, you can navigate to topics of interest.
Help icons, located throughout the application, open help topics that describe what is currently shown.
