| Skip Navigation Links | |
| Exit Print View | |

|
Oracle Solaris Cluster 4.1 Hardware Administration Manual Oracle Solaris Cluster 4.1 |
| Skip Navigation Links | |
| Exit Print View | |

|
Oracle Solaris Cluster 4.1 Hardware Administration Manual Oracle Solaris Cluster 4.1 |
1. Introduction to Oracle Solaris Cluster Hardware
2. Installing and Configuring the Terminal Concentrator
Configuring the Terminal Concentrator
How to Configure the Terminal Concentrator
How to Set Terminal Concentrator Port Parameters
How to Correct a Port Configuration Access Error
How to Establish a Default Route for the Terminal Concentrator
Using the Terminal Concentrator
How to Connect to a Node's Console Through the Terminal Concentrator
How to Reset a Terminal Concentrator Port
3. Installing Cluster Interconnect Hardware and Configuring VLANs
4. Maintaining Cluster Interconnect Hardware
5. Installing and Maintaining Public Network Hardware
6. Maintaining Platform Hardware
7. Campus Clustering With Oracle Solaris Cluster Software
This section describes the procedure for installing the terminal concentrator hardware and for connecting cables from the terminal concentrator to the administrative console and to the cluster nodes.
This procedure provides step-by-step instructions for rack-mounting the terminal concentrator in a cabinet. For convenience, you can rack-mount the terminal concentrator even if your cluster does not contain rack-mounted nodes.
To rack-mount your terminal concentrator, go to the first step of the following procedure.
If you do not want to rack-mount your terminal concentrator, place the terminal concentrator in its standalone location, connect the unit power cord into a utility outlet, and go to How to Connect the Terminal Concentrator.
Thread the screws into holes 8 and 29, as shown in Figure 2-1. The locator screws accept the slotted holes in the hinge piece.
Tighten these screws, and the screws in holes 8 and 29, as shown in Figure 2-1.
Figure 2-1 Installing the Terminal Concentrator Bracket Hinge to the Cabinet
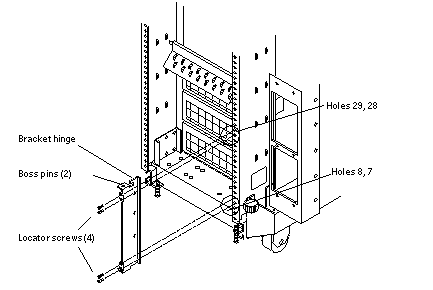
Figure 2-2 Installing the Terminal Concentrator Into the Bracket
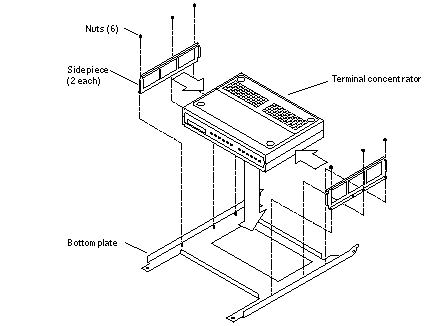
Figure 2-3 Terminal Concentrator Bracket Installed on the Hinge
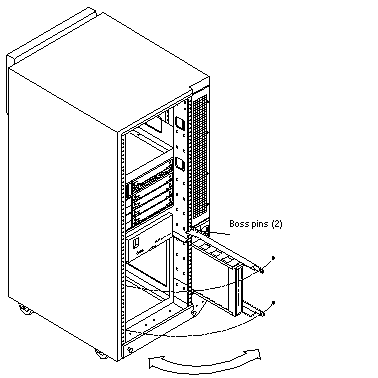
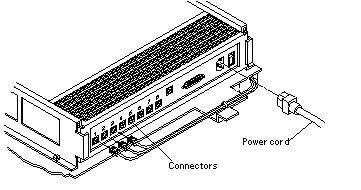
Figure 2-4 Terminal Concentrator Cable Connector Locations
See Also
To cable the terminal concentrator, go to How to Connect the Terminal Concentrator.
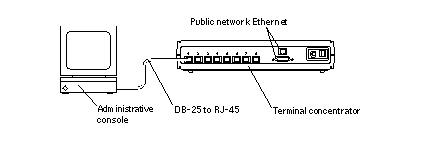
This cable connection from the administrative console enables you to configure the terminal concentrator. You can remove this connection after you set up the terminal concentrator.
Figure 2-5 Connecting the Administrative Console
The cable connections from the concentrator to the nodes enable you to access the ok prompt or OpenBoot PROM (OBP) mode on a SPARC based system or a boot subsystem on an x86 based system by using the pconsole utility. For more information, see Chapter 4, Booting and Shutting Down an Oracle Solaris System, in Oracle Solaris Administration: Common Tasks.
Note - The terminal concentrator requires a 10 Mbyte/second Ethernet connection.
Next Steps