Whenever you create a user segment, the system assigns a new property with the same name as the segment to every profile of that type in the repository. It sets that property to “true” or “false” according to whether the profile meets the criteria for that segment. For example, if you create a segment called High Earners for profiles of type Investor, the system gives every Investor profile a new property called HighEarners. If a profile fits the criteria for that segment, the system sets the HighEarners property in that profile to “true.” If a profile does not fit the segment criteria, the HighEarners property is set to “false.” The system uses this method to determine which profiles belong to each user segment.
To create a segment:
From the Home page, select Commerce Merchandising > Targeting and Segmentation.
Specify a name and an optional description for the project that will manage the creation and versioning of the new segment.
Select User Segments from the Show list.
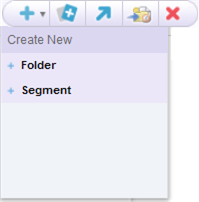
Click the Create New… icon and select Create New > Segment.
Complete the fields in the General tab as follows.
Name: Enter a name for the new segment. The name is required and can include spaces.
Description: Enter some descriptive text to help identify the new segment.
Profile Type: Select the profile type that corresponds to the users you want to belong to the segment (assuming they meet the additional criteria you define). The options that appear are the item descriptor types in the profile definition file being used by your system, including any sub-types of those items.
The example shown in the previous section assumes your profile definition includes a base type, User, with two sub-types, Investor and Broker. Using the example, if you wanted all site visitors to be able to qualify for a segment called New Members, you would specify the base type of profile, User. For a segment called High Earners that you knew would apply exclusively to visitors who were investors, you could specify the sub-type Investor as the profile type for that segment. By constraining the potential membership of a segment to a specific sub-type of profile, you can minimize the number of profiles that the system must change as a result of creating the segment.
Note that you cannot edit the profile type after you have clicked the Create button to create the segment. Switching to the Rules tab also makes these settings permanent for this segment.
By default, segments are stored as files with the extension
.propertiesin/atg/registry/RepositoryGroups. To change the folder in which the new segment is stored, click Select Parent and specify the new folder.Note: If you need to change the location after the segment has been created, use the Move icon.
When you have completed the fields in the General tab, click Create. The new segment is added to the project as an asset.
Click Rules to display the Rules tab, and then follow the procedure in the next section, Defining User Segment Rules.
