Install VMware ESXi Using Local or Remote Media
Before you begin, review the installation prerequisites in Before You Begin.
-
Access the host console.
For instructions, see Accessing the Host Console.
-
Ensure that the installation media is available to boot.
For instructions, see Preparing the Boot Media.
-
Power on or reset the server.
For example, to reset the server, do one of the following:
-
From the local server, press the Power button on the front panel of the server (for approximately 1 second) to power off the server, and then press the Power button again to power on the server.
-
From the Oracle ILOM web interface, select Host Management → Power Control, and then select Reset from the Select Action list box.
-
From the Oracle ILOM command-line interface, type reset /System.
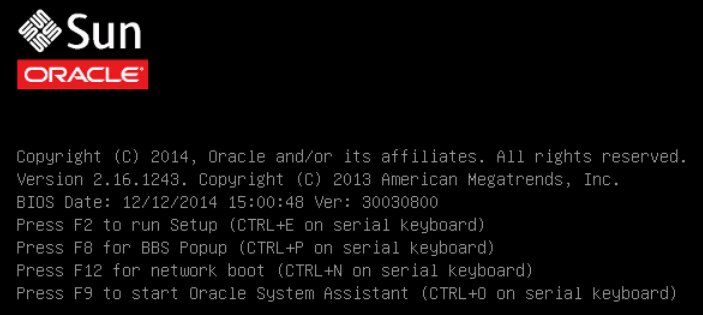
The server begins the boot process, and the BIOS screen appears.

Note - The next events occur very quickly; therefore, focused attention is needed for the following steps. Watch carefully for these messages as they appear on the screen for a brief time. -
-
In the BIOS screen, press the F8 key to specify a temporary boot device for the VMware installation.
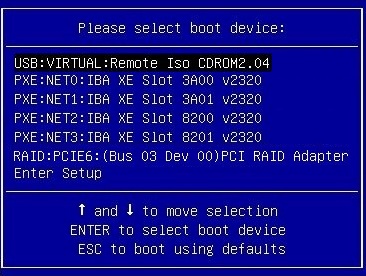
The Please Select Boot Device menu appears.

-
In the Please Select Boot Device menu, select either the external or
virtual CD/DVD device as the boot device, and then press Enter.
The device strings listed in the Boot Device menu are in the following format: device type, slot indicator, and product ID string.
After a few seconds, the splash screen for the VMware installation program appears.
-
To complete the installation, refer to the VMware ESXi installation documentation.
You can access the VMware ESXi installation documentation at http://pubs.vmware.com/vsphere-55/index.jsp.
-
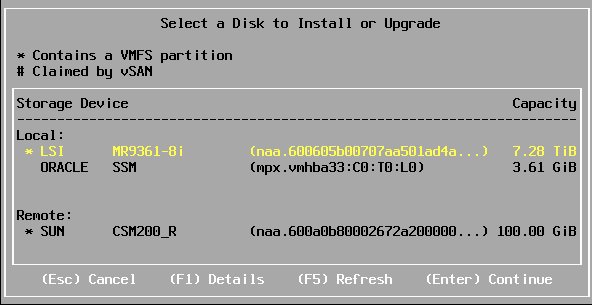
When the following screen appears, select the storage drive on which to install the ESXi software.


Caution - In the screen shown above, the Oracle SSM drive is the Oracle System Assistant USB flash drive. You might have to scroll to the bottom of the screen to see this drive. You should never select the Oracle SSM drive as the software installation drive. Installing VMware ESXi to the Oracle SSM drive will overwrite the Oracle System Assistant software and Oracle System Assistant will have to be restored. For instructions for restoring Oracle System Assistant, refer to the Oracle X5 Series Servers Administration Guide at http://www.oracle.com/goto/x86AdminDiag/docs.
- After completing the VMware ESXi installation, proceed to Post-Installation Tasks for VMware ESXi.