Configuring Oracle BI Mobile
You use the Settings view in Oracle BI Mobile to manage your server configurations, choose the view you want the application to start on, or set your email-sending preference.
You access the Settings view by tapping the Options icon in the Branding bar. Another way to access the Settings view is by swiping right twice from the left side of the screen.
There are other configuration tasks your organization can perform:
Adding, Modifying, and Removing Server Connections
If you need to connect to more than one Oracle BI Presentation Services instance, you must configure multiple server connections.
You can use the Settings view to add, modify, and remove server connections.
To add a server connection:
-
If you are viewing BI content, tap the Previous icon to go back to the Recent, Favorites, Dashboards, Local, or Search views.
-
In the Branding bar, tap the Options icon, then tap Settings.
The Settings view is displayed.
-
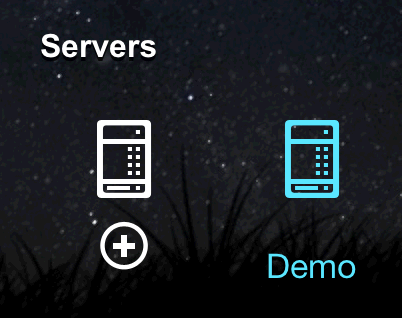
In the Servers section of the Settings view, tap the Add Server icon (the one with the plus sign).

-
In the Server Settings screen, complete the fields. See the Server Settings screen fields described in Launching Oracle BI Mobile for the First Time.
-
Tap Save.
To modify or remove a server connection:
-
If you are viewing BI content, tap the Previous icon to go back to the Recent, Favorites, Dashboards, Local, or Search views.
-
In the branding bar, tap the Options icon, then tap Settings.
The Settings view is displayed.
-
In the Servers section of the Settings view, double-tap the icon for the server connection that you want to modify.
-
In the Server Settings screen, do one of the following:
-
To modify the server connection, make your changes. When finished, tap Save.
-
To remove a server connection, scroll down to see the Delete Server button, then tap it.
-
Switching Between Servers
You can change the server you connect to by default, which re-launches the application.
Sharing Connections
You can share your connections with other users of the Oracle BI Mobile app.
Use the Share Connection button when editing or creating connections. This shares an URL that enables another user to add that same connection to their app
Configuring Start-up Content
Configure a setting to select a default view or a specific dashboard to display when you log in to the Oracle BI Mobile application.
In this way, you or your organization's end users navigate automatically and directly to preferred BI content.
To set your start-up content:
- In the Branding bar, tap the Options icon.
- Tap Settings.
- In the Start On section of the Settings view, do one of the following:
- To set the Start-up view as your Recent Items, Favorites, Dashboards, Local Content, or the Search view, tap its associated icon. (Optional) If your start-up choice is Recent or Favorites, then select your preferred view type as Carousel, List, or Grid.
- To set a specific catalog object as your start-up content, tap the Start-up Content icon.

- In the list of your dashboards, scroll to find the dashboard of your choice, then tap it.
- Tap Done.
- Log out (tap the Options icon, and then tap Logout).
Considering Security When Using Oracle BI Mobile
You can take certain measures to address security of your BI content.
Topics:
Understanding Mobile Device Management
When using the Oracle BI Mobile application, you connect to an Oracle BI Server and benefit from the same security platform provided by the infrastructure of Oracle Fusion Middleware.
Oracle BI Mobile allows mobile users to connect to the Oracle BI Server using Single Sign-On (SSO) and Secure Sockets Layer (SSL) technologies for secure and automated passing of credentials. For servers behind a firewall, you can connect with Oracle BI Mobile through a VPN. To better protect your BI content saved locally, you can use the passcode lock on your iPad.
If your organization requires greater levels of mobile device security, you may work with a mobile device management (MDM) vendor. MDM software can be used for monitoring and securing mobile devices beyond what is currently available with native operating systems. Your MDM vendor might provide additional capabilities such as enhanced data encryption, restricted sharing, wiping of data in case of loss or theft, geo-fencing, and management of local data. The Oracle BI Mobile Security Toolkit is designed to allow MDM vendors to work with the Oracle BI Mobile application to provide a solution that can be readily consumed by end users. See Using the Security Toolkit for Mobile Device Management.
Using the Oracle BI Mobile Security Toolkit for Mobile Device Management
The Oracle BI Mobile Security Toolkit provides a repackaged, unsigned, and uncertified version of the Oracle BI Mobile application, delivered at the library level.
If your organization works with a security vendor or a mobile device management (MDM) vendor, you can consider using an additional security layer available for Oracle BI Mobile: the Oracle BI Mobile Security Toolkit. This toolkit can be integrated with other options that an MDM vendor builds into your security package.
The Oracle BI Mobile Security Toolkit allows organizations to combine the Oracle BI Mobile application with their chosen third-party mobile security solution. When the application is combined by the MDM vendor into one mobile security solution, it gets signed with your organization's corporate signature. You then have a fully functioning version of Oracle BI Mobile, which is certified for distribution outside of the Apple App Store, and which can be delivered internally as part of the chosen mobile application delivery mechanism.
The security toolkit for Oracle BI Mobile is delivered through Oracle Technology Network. It includes a license agreement for software vendors, and a FAQ with instructions for use.
Using Passcode Lock to Protect Content Saved Locally
As a user of Oracle BI Mobile, it is important to remember that any network security that your iPad connects through to access the Oracle BI Server has no bearing on BI content saved locally onto your device.
For that reason, using Passcode Lock (in the General section of your iPad's Settings screen) is vital for protecting local BI content in case of device loss or theft. See Saving Content Locally and Disabling Local Content.
Disabling Access to Oracle BI Mobile
Administrators can disable access to the Oracle BI Mobile application.
In the desktop version of Oracle BI EE, in the Manage Privileges page, an administrator disables access by restricting the privilege called Access to Mobile. See Default Presentation Services Privilege Assignments in Security Guide for Oracle Business Intelligence Enterprise Edition.
Implementing Server Provisioning Through URL
Server provisioning through URL is the facility to seed the Oracle BI Mobile application with one or more servers and their settings by accessing a URL that the administrator provides.
This allows the Oracle BI Mobile application to configure itself for a user, by making use of the URL launch mechanism supported in iOS. Using Oracle BI Mobile, this launch mechanism can work for you when either you tap on a URL link within an email, when you type the URL into the Safari browser on the iPad, or when you tap a URL link on a web page. The mechanism then launches Oracle BI Mobile on your iPad and configures the required settings with the settings in an XML file that your administrator has edited and referenced as a URL in the syntax for the launch URL.
Where the Oracle BI Mobile schema on the device is oraclebimobile, the syntax for the launch URL is the following:
oraclebimobile://com.oracle.obimobile/configure?xml=http://myserver:myport.mycompany.com/conf.xml
Another example of the syntax, with variables for your organization's server configuration details in brackets, is the following:
oraclebimobile://com.oracle.obimobile/configure?xml=http://[server]:[port]/[path]/[filename].xml
Note:
In the syntax examples, make sure to replace the variables with your own host server name and port number, as well as the name of your configuration file if you have given it a name other than conf.xml
Use the sample provided in the example as a model to create your own conf.xml file. Your own version of the configuration file can be used to send configuration details to Oracle BI Mobile. When launched on the device, the file's properties are then applied to the user's Oracle BI Mobile application.
| Item | Details |
|---|---|
|
URL Identifier |
com.oracle.obimobile |
|
URL Schema |
oraclebimobile |
|
Share application launch syntax |
oraclebimobile:// |
|
Server configuration URL |
oraclebimobile://com.oracle.obimobile/configure?xml=http://<server:port>/conf_file.xml |
The XML file you create should use Apple's standard property list (plist) format.
Example: Sample conf.xml File
<plist version="1.0">
<dict>
<key>obim</key>
<dict>
<key>servers</key>
<array>
<dict>
<key>analyticsPath</key>
<string>/analytics/saw.dll</string>
<key>host</key>
<string>hostname.company.com</string>
<key>locale</key>
<true/>
<key>name</key>
<string>Friendly Server Name</string>
<key>port</key>
<integer>7780</integer>
<key>ssl</key>
<false/>
<key>sso</key>
<false/>
<key>xmlpPath</key>
<string>/xmlpserver</string>
</dict>
<dict>
<key>analyticsPath</key>
<string>/analytics/saw.dll</string>
<key>host</key>
<string>newhostname.company.com</string>
<key>locale</key>
<true/>
<key>name</key>
<string>Friendly Server Name 2</string>
<key>port</key>
<integer>7780</integer>
<key>ssl</key>
<false/>
<key>sso</key>
<false/>
<key>xmlpPath</key>
<string>/xmlpserver</string>
</dict>
</array>
<key>settings</key>
<dict>
<key>debug</key>
<false/>
<key>optimized</key>
<true/>
</dict>
</dict>
</dict>
</plist>
Setting Up Access to the Oracle BI Presentation Services Server Through a Reverse Proxy Server
Use of a reverse proxy server can make content served by different servers appear as if coming from one single server.
Use of a reverse proxy can also be an effective way of protecting your enterprise web infrastructure. Your organization may consider configuring access to the Oracle BI Presentation Services server through a reverse proxy to protect it without the requirement of a VPN. To do this, you must first make your Oracle HTTP Server port open and available for public access—for example, by using port 80.
This topic explains how to set up controlled access to your web tier so that content from your Oracle BI Presentation Services folder is delivered instead by reverse proxy. You do this by modifying an Oracle HTTP Server web server configuration file.
Before you begin this procedure, ensure that you are familiar with the information in Using a Text Editor to Update Oracle Business Intelligence Configuration Settings in System Administrator's Guide for Oracle Business Intelligence Enterprise Edition.
To set up the reverse proxy access:
Setting Console Logging
If you want to capture console logs, for example to troubleshoot authentication issues, you can enable console logging for your iPad or iPhone in the device's settings.
Console logging can be useful when it is necessary to debug issues on mobile devices. Console logging can slow down the performance of the Oracle BI Mobile application, however, since it requires that numerous messages are written to console logs on the device. You can access these device logs using the iPhone Configuration Utility available from Apple. Search Apple's developer website for the utility.
As the console logging impacts application performance, the default setting is OFF.
To enable or disable console logging:
