Install Oracle Linux 6.6 OS Manually Using Local or Remote Media
This procedure describes how to install the Oracle Linux operating system from local or remote media. The procedure assumes that you are booting the Oracle Linux installation media from one of the following sources:
-
Oracle Linux 6.6 ISO image on a DVD
-
Oracle Linux 6.6 ISO DVD image in a network repository
If you are booting the installation media from a PXE environment, refer to Install Oracle Linux 6.6 or 7.1 Using PXE Network Boot for instructions.
-
Ensure that the installation media is available to boot.
-
If you are using a DVD, insert the DVD into the local or remote DVD-ROM drive.
-
If you are using an ISO image on the network, ensure that the ISO image is available and that the ISO image has been mounted in the Oracle ILOM Remote System Console Plus application using the KVMS menu.
For additional information about how to set up the installation media, see Local or Remote Installation Options.
-
-
Reset or power on the server.
For example, do one of the following:
-
From the local server, press the Power button (approximately 1 second) on the front panel of the server to power off the server, and then press the Power button again to power on the server.
-
From the Oracle ILOM web interface, click Host Management > Power Control , select Reset from the Select Action list box, and then click Save.
-
From the Oracle ILOM CLI, type: reset /System
The server begins the boot process and the BIOS screen appears.
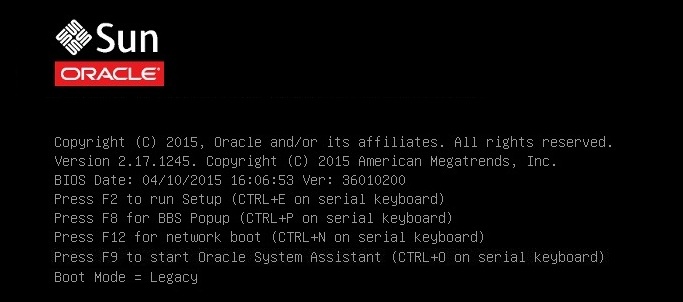
Note - The next event occurs very quickly; therefore, attention is needed for the following steps. You might want to enlarge the size of your screen to eliminate scroll bars. -
-
In the BIOS screen, press the F8 key to specify a temporary boot device
for the Linux OS installation.
[Boot Pop Up Menu Selected] appears at the bottom of the BIOS screen, and then the Please Select Boot Device menu appears. The screen that appears might differ depending on whether you have the UEFI/BIOS Boot Mode configured for Legacy BIOS or UEFI.
-
For Legacy BIOS Boot Mode, a screen similar to the following appears:

-
For UEFI Boot Mode, a screen similar to the following appears:
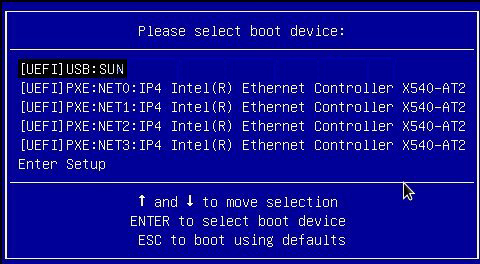
Note - The Please Select Boot Device menu that appears in your installation might differ depending on the type of disk controller and other hardware, such as PCIe network cards, installed in your server. -
-
In the Please Select Boot Device menu, select the menu item according to
the Linux OS media installation method and the BIOS boot mode you elected to
use, and then press Enter.
For example:
- If you elected to use the Oracle ILOM Remote System Console Plus application delivery method in Legacy BIOS Boot Mode, select USB:SUN from the Legacy BIOS screen.
- If you elected to use the Oracle ILOM Remote System Console Plus application delivery method in UEFI Boot Mode, select [UEFI]USB:SUN from the UEFI screen.
-
The next screen displayed by the installation program depends on whether
you selected the Legacy BIOS Boot Mode or the UEFI Boot Mode.
-
If you selected Legacy BIOS Boot Mode, the Welcome to Oracle Linux Server boot screen appears.
-
If you selected UEFI Boot Mode, the Booting Oracle Linux Server boot screen appears.
-
-
For the purposes of this installation, do one of the following:
-
If you elected to do the installation in the Legacy BIOS Boot Mode, accept the default and press Enter.
-
If you elected to do the installation in the UEFI Boot Mode, press Enter or allow the screen to timeout.
The Disc Found screen appears.

-
-
If this is the first time that you are doing an install from this media,
you should consider selecting OK to test the media;
otherwise, select Skip and press Enter.
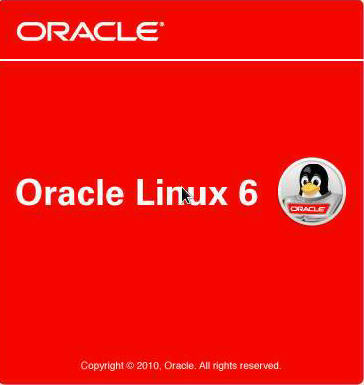
Note - If you have used this disc to do installs before, select Skip; otherwise select OK and test the disc.The Oracle Linux 6 splash screen appears.
-
Scroll to the bottom of the Oracle Linux 6 splash screen,
and click Next.
The "What language would you like to use during the installation process?" screen appears.
-
Select the appropriate language, and click Next.
The "Select the appropriate keyboard for the system" screen appears.
-
Select the appropriate keyboard configuration, and click
Next.
The "What type of devices will your installation involve?" screen appears.

-
In the above screen, select Specialized Storage Devices, scroll to the
bottom of the screen, and then click Next.
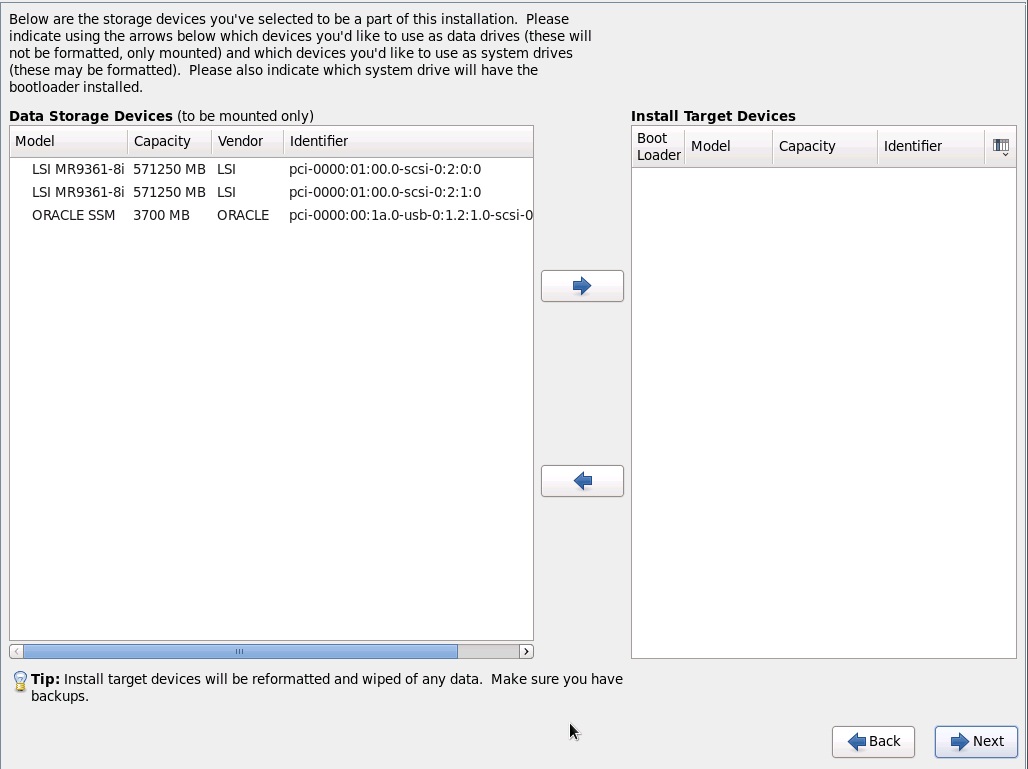
Note - Selecting Specialized Storage Devices allows you to deselect the Oracle SSM in the following screen. This makes the rest of this manual installation easier to perform.The "Please select the drive you'd like to install the operating system on" screen appears.
-
Select the storage drive on to which you want to install the operating
system, scroll to the bottom of the screen, and click
Next.

Caution - Loss of functionality. Using the Oracle System Assistant flash drive as an installation target overwrites the contents of the drive. Do not use the Oracle System Assistant drive as a boot or storage drive. For more information about the Oracle System Assistant flash drive, see Installation Target Options.
The "Please name this computer" screen appears.

-
Enter the host name, and click Next.
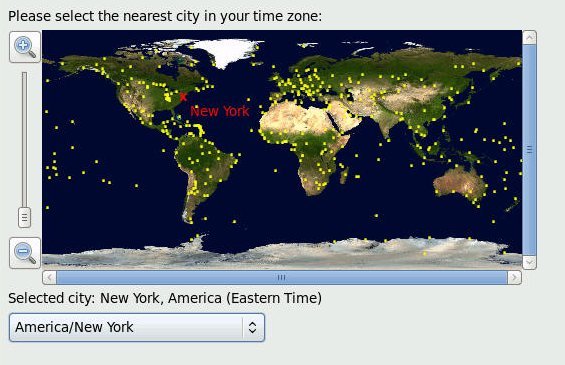
The Select Time Zone screen appears.
-
Select the appropriate region and city and, click
Next.
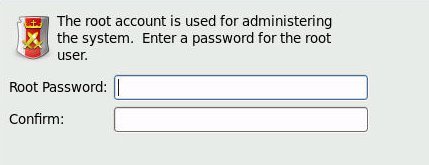
Note - If you want NTP Service, you can set that up after the operating system is installed.The Root Password screen appears.
-
Enter root password, and click Next.
The "What type of installation would you like?" screen appears.

-
In the above screen, select the appropriate option, and click
Next.
For example, if the storage drive on which you are installing operating system is blank and you select Create Custom Layout, the "Please Select a Device" screen appears.

-
To create partitions, do the following:
-
Scroll to the bottom of the screen, and click Create.
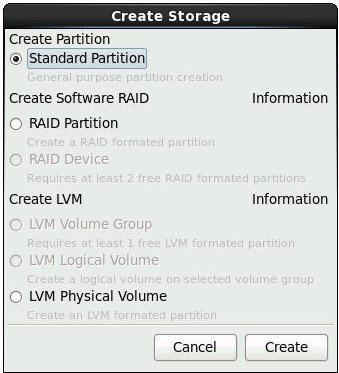
The Create Storage dialog appears.
-
Select Standard Partition, and click Create.
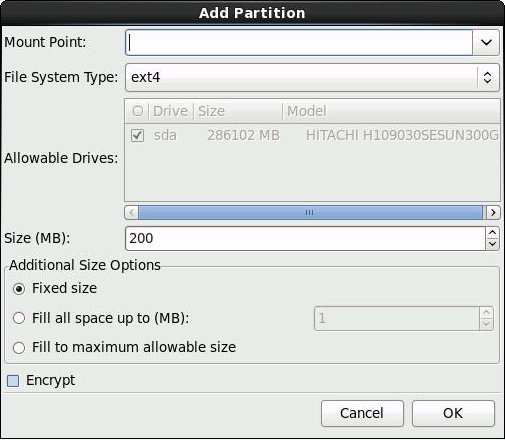
The Add Partition dialog appears.
-
In the dialog, set the Mount Point to /boot and
leave the File System Type set to ext4 and the
Size (MB) set to 200.
Here is the updated Add Partition dialog.

-
Click OK.
The partition is created.
-
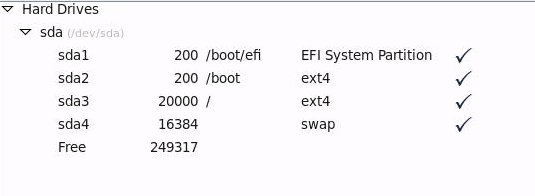
Repeat Step a through Step d above to create the following
additional partitions.
Mount PointFile System TypeSize (MB)/boot/efi
Note - This partition can only be created if you selected the UEFI Boot Mode. It is not supported in Legacy BIOS Boot Mode.
EFI System Partition200/ext420000Noneswap16384The updated partitions screen appears.
-
Scroll to the bottom of the screen, and click Create.
-
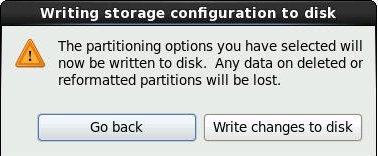
Click Next to apply the partitions.
The following dialog appears.
-
Click Write changes to disk.
If there are no disk partitioning errors, the install boot loader screen appears and you should proceed to Step 21. If there are disk partitioning errors, proceed to Step 20.

-
If there is a problem with the data format on the installation target
disk, the Automatic Partitioning Errors screen appears.
Note - The following screen appears if you are installing the operating system in UEFI Boot Mode, in which case GUID Partition Table (GPT) formatted disks are required. If you encounter disk formatting errors when you install the operating system in Legacy BIOS Boot Mode, a similar screen would be displayed indicating the Master Boot Record (MBR) formatted disks are required.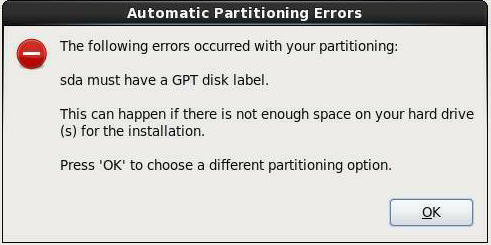
If the above screens appears, the disk to which you are attempting to install Oracle Linux is formatted incorrectly and it needs to be reformatted.
Note - This error occurs if you attempt to do a UEFI Boot Mode OS install to a storage drive that was previously used to store data in Legacy BIOS format or vice versa. UEFI uses the GPT format, while Legacy BIOS formats storage drives in the MBR format. The storage drives that ship with the server are new, so they are unformatted. You do not encounter this error when installing to an unformatted disk.To recover and reformat the disk without aborting the install, click the keyboard Back button on the install screen several times to return to the initial Oracle Linux splash screen shown in Step 7 and perform these steps:
-
To start the recovery shell, type
Ctrl+Alt+F2.
The shell appears.
-
To reformat the disk in GPT format or MBR format as appropriate
for this installation, enter the shell commands as shown on the
following screen:
anaconda root@localhost /]# parted /dev/sda
GNU Parted 2.1
Using /dev/sda
Welcome to GNU Parted! Type ???help' to view a list of commands.
(parted) p
Model: LSI MR9361 (scsi)
Disk /dev/sda: 300GB
Sector size (logical/physical): 512B/512B
Partition Table: msdos (or gpt for Legacy BIOS Boot Mode)
Number  Start   End     Size    Type    File system Flags
 1      1049kB  21.5GB  21.5GB  primary ext2
(parted) mklabel
New disk label type? gpt (or msdos for Legacy BIOS Boot Mode)
Warning: The existing disk label on /dev/sda will be destroyed and all data will be lost.
Do you want to continue?
Yes/No? yes
(parted) p
Model: LSI MR9361 (scsi)
Disk /dev/sda: 300GB
Sector size (logical/physical): 512B/512B
Partition Table: gpt
Number  Start  End  Size  File system  Name  Flags
(parted) g
Information: You may need to update /etc/fstab.
anaconda root@localhost /]#
-
Type Ctrl+Alt+F6 to return to the graphical
installation screen and continue the installation from the point of
the Oracle Linux splash screen (go to Step 7).
Note - In most cases, the values that you entered for this installation have been saved, so you do not have to reenter them.
-
To start the recovery shell, type
Ctrl+Alt+F2.
-
In the install boot loader screen, select Install boot loader on
/dev/sda1, and click Next.
The "Select server software to install" screen appears.
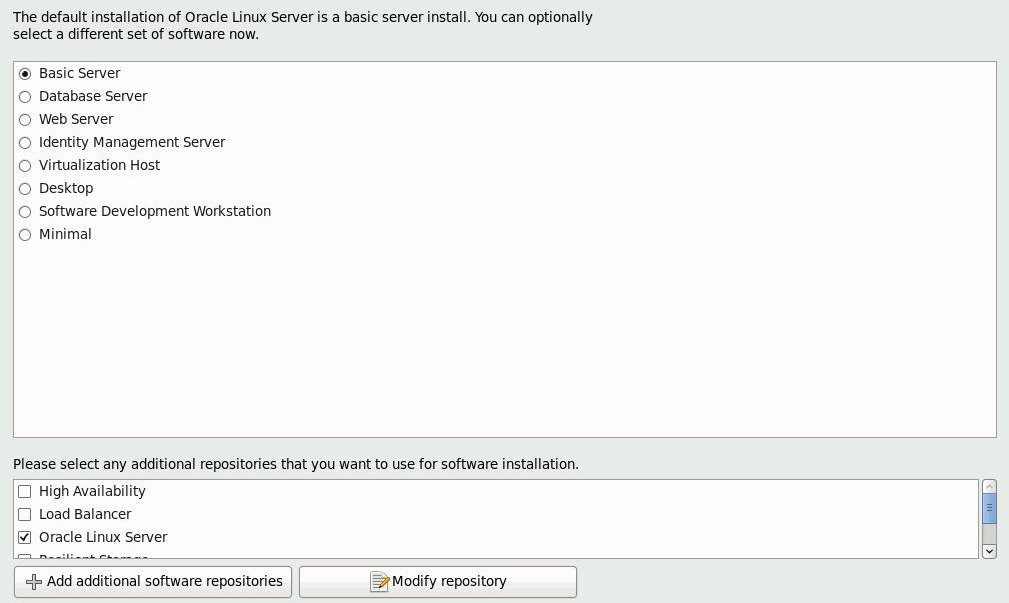
While Basic Server is the default server software to install, you can select a different set of software. Additionally, at the bottom of this screen you can select Customize Now to do a custom install of the selected software.
-
Accept the Basic Server default and then click
Next.
The Starting Installation Process screen appears.
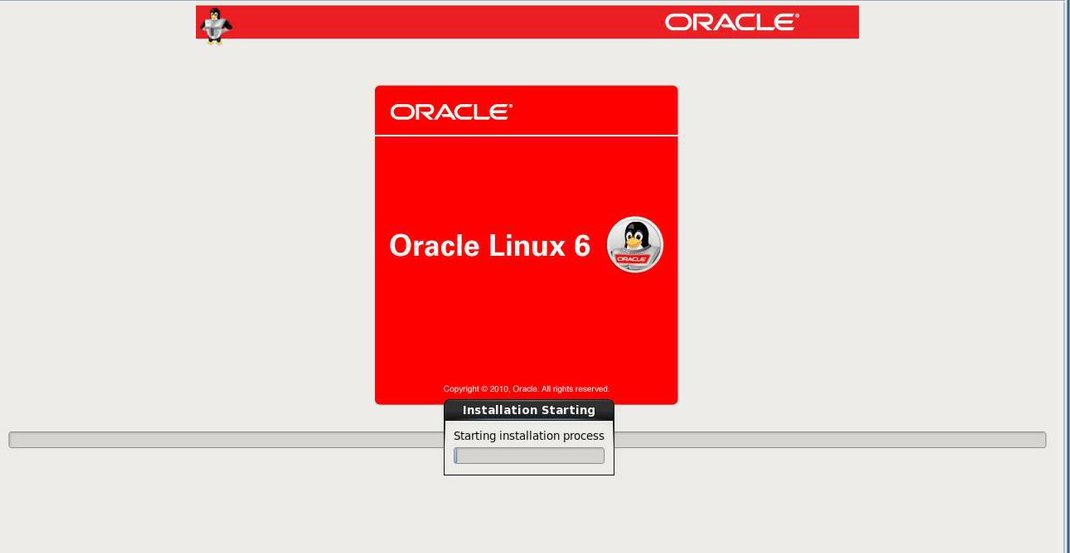
-
Wait until the Oracle Linux OS installation completes.
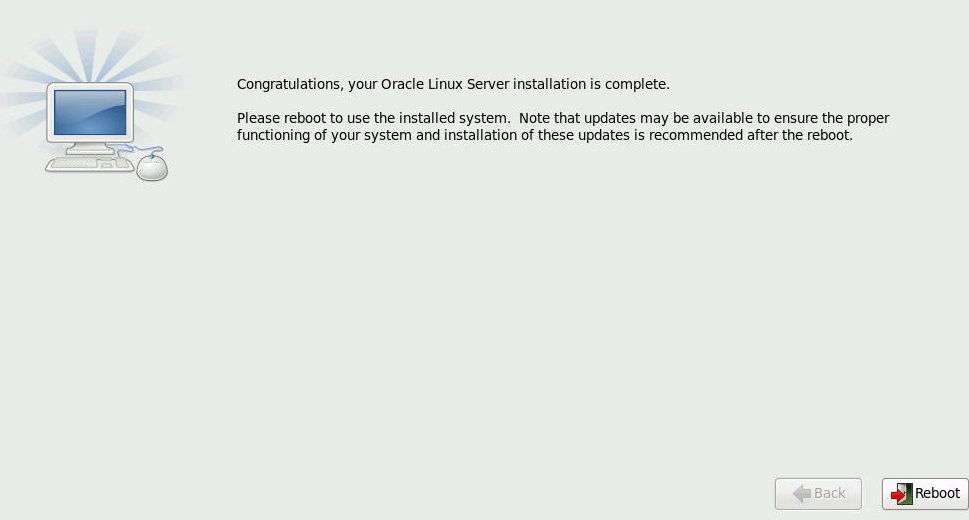
When the installation completes, the following screen appears.
-
To reboot the Oracle Linux installation, click Reboot.
The server reboots and the BIOS screen appears.

-
To access the BIOS Setup Utility so that you can set the server to boot
from the operating system you just installed, press the F2 key.
A BIOS Setup Utility screen appears with the Boot Menu selected. The BIOS screen displayed and the actions required to proceed with installation depend on the UEFI/BIOS Boot Mode you selected for installing the OS.
-
If you installed the OS in Legacy BIOS Boot Mode, perform these steps and
proceed to Step 28.
-
In the BIOS Setup Utility screen shown below, use the down arrow
key to select [USB:SUN] under the Legacy Boot Option Priority field,
and press Enter.
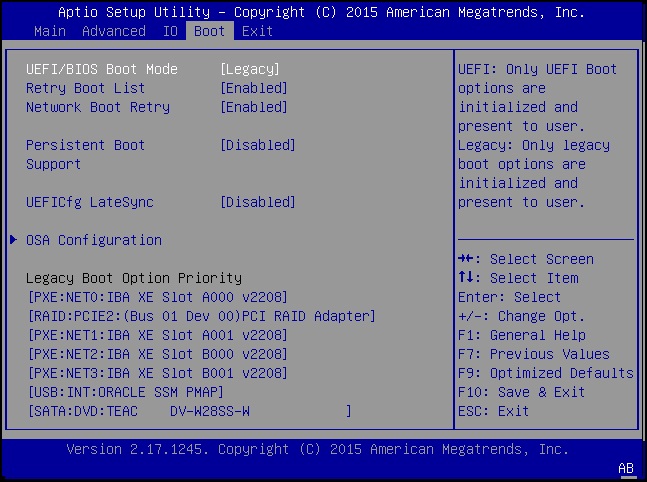
Note - The BIOS Boot screen that appears for your installation might differ depending on the type of disk controller and other hardware, such as PCIe network cards, installed in your server.The Boot Option #1 dialog appears.
-
Select [RAID: PCIE2: (...) PCI RAID Adapter], and press
Enter.
[RAID: PCIE2: (...) PCI RAID Adapter] moves to the top position.
- Press the F10 key to save the change and exit the BIOS Setup Utility, and then proceed to Step 28.
-
In the BIOS Setup Utility screen shown below, use the down arrow
key to select [USB:SUN] under the Legacy Boot Option Priority field,
and press Enter.
-
If you installed the OS in UEFI Boot Mode, perform these steps:
-
In the BIOS Setup Utility screen shown below, verify that [Oracle
Linux Server (RAID: PCIE2: (...) PCI RAID Adapter)] is listed as the
first option under UEFI Boot Option Priority field.
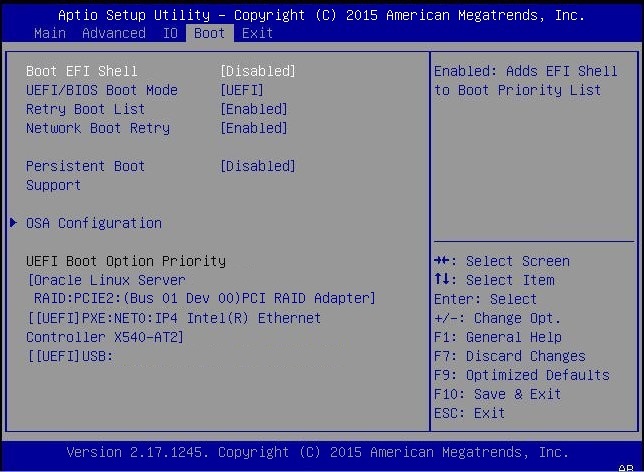
Note - The BIOS Boot screen that appears for your installation might differ depending on the type of disk controller and other hardware, such as PCIe network cards, installed in your server. - Press the F10 key to exit the BIOS Setup Utility.
-
In the BIOS Setup Utility screen shown below, verify that [Oracle
Linux Server (RAID: PCIE2: (...) PCI RAID Adapter)] is listed as the
first option under UEFI Boot Option Priority field.
-
Wait while the reboot continues.
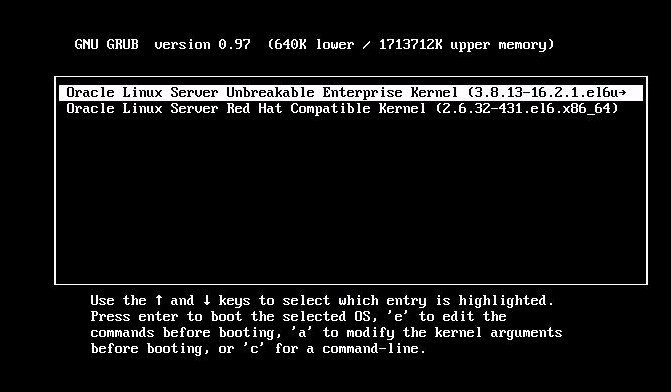
The following kernel screen appears.
Press any key to enter the menu
Booting Oracle Linux Server Unbreakable Enterprise Kernel (3.8.13-16.2.1.el6uek.x86_64) in 2 seconds...
The Oracle Unbreakable Enterprise Kernel Release 3 for Linux is the default kernel.
- If you do not want to change the default Kernel, proceed to Step 31; otherwise, proceed to Step 30.
- (Optional) If you are installing Oracle Linux 6.6 and you want to switch to the Red Hat compatible kernel, do the following.
- After completing the Oracle Linux installation and rebooting the server with the desired Linux kernel, proceed to Post Installation Tasks for Oracle Linux 6.6 or 7.1 OS.
