Setting Up Academic Requirement Groups
This section discusses how to:
Set up a requirement group.
Establish requirement group parameters.
Define the requirement group detail.
Set up the requirement group detail parameters.
Specify required plans and subplans.
Identify appended requirement group.
|
Page Name |
Definition Name |
Navigation |
Usage |
|---|---|---|---|
|
Requirement Group |
ADVIS_RQRMNT_GROUP |
|
Establish the institution, career, program, plan, and subplan information for a new requirement group. |
|
Parameters |
ADVIS_RQ_GRP_PARM |
|
Establish the requirement group parameters or filters for this requirement group. |
|
Detail |
ADVIS_RQ_GRP_DET |
|
Assign the detail for a specific requirement group. You can view all detail lines, including connector types, that affect the requirement group. |
|
Detail Parameters |
ADVIS_RG_DET_PARM |
|
Establish course validation parameters. This page is blank unless the group line type on the Detail page is Course or Wild Card Course. |
|
Plans Required |
ADVIS_RQRMNT_PLANS |
|
Define plans and subplans that are required for a specific requirement group. |
|
Plans Appended |
ADVIS_RQRMNT_SUBST |
|
Point to established requirement groups (by academic structure) and append those groups to the requirement group identified on this page. Established requirement groups can be appended to another requirement group. |
Access the Requirement Group page ().
Image: Requirement Group page
This example illustrates the fields and controls on the Requirement Group page. You can find definitions for the fields and controls later on this page.
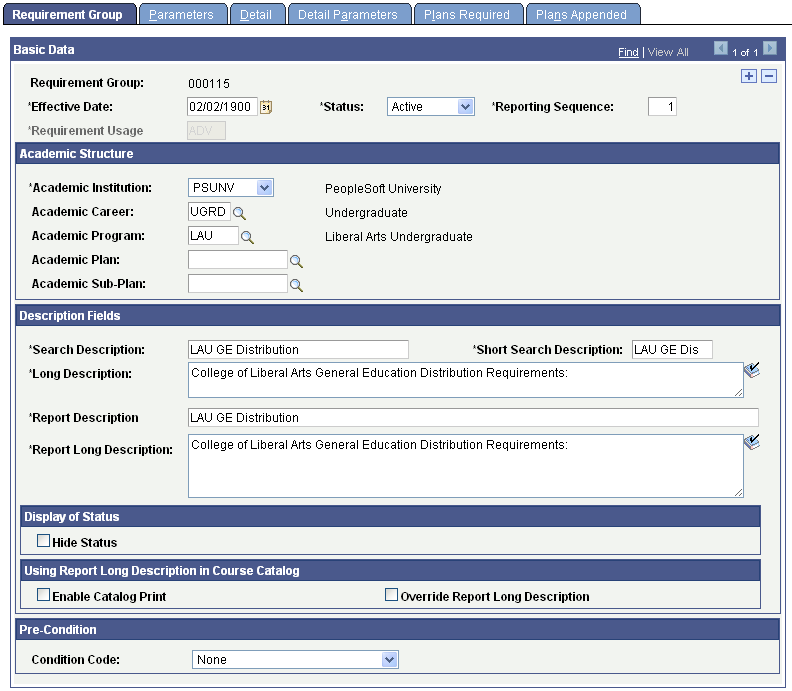
Several fields on this page affect the order in which requirement groups appear on a degree audit report. The academic structure (as reflected by the Academic Career, Academic Program,Academic Plan,and Academic Sub-Plan fields) and the Reporting Seq (reporting sequence) field define the audit order of requirement groups. For example, requirement groups that are established at the career level are printed before requirement groups that are set up at the program level.
The system assigns a unique, sequential identifying number to each requirement group. However, you can assign the number, if necessary. Each requirement group consists of detail lines that point to conditions, courses, or requirements, as well as parameters that include unit and course requirements.
In Add mode only, the Copy button appears on the first page of the Academic Requirement Groups component. Requirement groups that are eligible to be copied are academic requirement groups with a usage value of Academic Advisement or a user-defined usage value. This feature copies all field values in a requirement group except for course share sets. To copy an eligible requirement group, click the Copy button and enter the requirement group that you want to copy. Then, enter the appropriate copy mode field value. Select Copy last record to specify that only the last effective-dated record is copied. Select Copy all records to specify that all effective-dated records are copied. Use this field value only when the requirement group to be copied has multiple effective-dated rows. If you select None, the value converts to Copy last record.
Click OK to copy the specified requirement group.
Note: You can copy a requirement group with a usage value of Academic Advisement and then change the usage value of the new copy to Student Individualized Plan. Also, if you use the copy feature to create a new requirement group, you cannot assign a specific requirement group number to the new group. When you click the Copy button and save, the system automatically assigns the next sequential number to the new requirement group. If you must assign a specific, unused number to the new requirement group, do not click the Copy button. Instead, create the new requirement group by re-entering all of the field values.
|
Field or Control |
Definition |
|---|---|
| Effective Date |
Enter an effective date to define when the status that you select is valid. This date reflects the student's requirement term as determined by the requirement group. Add a new effective-dated row if any of the requirement group information changes. When you apply a requirement group to a student, the requirement term begin date of the requirement group academic structure determines which effective-dated row is current for the student. For example, if you define a requirement group to the plan level, then the system uses the student's plan requirement term to determine the effective date for the requirement group. You define the requirement terms in the Student Program/Plan component. The system uses this requirement term to evaluate the current effective-dated row for all requirements and course lists that the requirement group uses. As an example, suppose that you apply a requirement group defined at a program level to a student. It has two effective-dated rows, 01/01/1900 and 01/01/2000. The student's academic program requirement term is fall 1999, so the current effective-dated row for the requirement term of fall 1999 is 01/01/1900. The 01/01/1900 requirement group points to a requirement with effective-dated rows of 01/01/1900 and 01/01/1980. The system uses the student's program requirement term because that was the academic structure of the requirement group that uses this requirement, so the current effective-dated row for requirement term fall 1999 is now 01/01/1980. The 01/01/1980 requirement uses a course list with two effective-dated rows, 01/01/1900 and 01/01/1990. Once again, the system uses the student's program requirement term to evaluate the current effective-dated row to be used, which is 01/01/1990. |
| Status |
Select a value to indicate the status of the requirement group. Values are: Active: Select when adding a new requirement group. Inactive: Select only if your institution will no longer use this requirement group. Add a new effective-dated row if any of the requirement group information changes Values for this field are delivered with your system as translate values. Do not modify these values in any way. Any modifications to these values will require a substantial programming effort. |
| Requirement Usage |
Select the value that specifies how data in this requirement group will be used. The page must be in Add mode to enter a field value. These requirement group usage values are delivered with the system and should not be modified in any way: Academic Advisement: Select to have the system use this requirement group during the regular degree audit process. Student Individualized Plan: Select to have the system use this requirement group as a substitute requirement group for a student or group of students. You assign this requirement group on the Authorize Student Exceptions pages. You can also define a special usage for a requirement group on the Requirement Usage page. You use special usage values to isolate or point to specific groups of students with common characteristics and to isolate special requirement groups that you can attach to a transcript type, which you can run against any student. After you assign this special usage to a requirement group, use the Transcript Type component to specify a special report. Identify the special report by the requirement group usage. See Setting Up Special Requirement Usage Values. Note: A requirement group with a usage of Student Individualized Plan can point to requirements with a usage of Student Individualized Plan and Academic Advisement. |
| Reporting Sequence |
Enter the sequence or order, within a specific level of the academic structure, in which the audit engine analyzes and reports a requirement group. The default value is 1. The difference between reporting order and processing order is that reporting order refers to the order in which courses, requirements, and requirement groups are printed in the audit report; processing order refers to the order in which the audit engine processes courses. Academic structure, requirement group number, and reporting sequence number affect the processing order. |
Each of the following requirement groups is identified by the level to which it is defined (for example, career, program, plan, and subplan), the requirement group number, and the reporting sequence number. The requirement groups are listed in order of reporting sequence number within each level:
Career Level
Requirement Group #1111, Reporting Sequence = 1
Requirement Group #1100, Reporting Sequence = 2
Requirement Group #1000, Reporting Sequence = 900
Program Level
Requirement Group #2001, Reporting Sequence = 1
Requirement Group #2010, Reporting Sequence = 5
Requirement Group #2050, Reporting Sequence = 5
Plan Level
Requirement Group #4700, Reporting Sequence = 1
Requirement Group #3000, Reporting Sequence = 900
Requirement Group #2005, Reporting Sequence = 901
Requirement Group #1200, Reporting Sequence = 999
Sub-plan Level
Requirement Group #700, Reporting Sequence = 1
The default value in the Reporting Seq field is 1, which results in the engine reporting requirement groups in requirement group number order within each section of the academic structure. If the requirement groups in the previous list all had a reporting sequence number of 1, the groups would be reported in this order:
Career Level
Requirement Group #1000, Reporting Sequence = 1
Requirement Group #1100, Reporting Sequence = 1
Requirement Group #1111, Reporting Sequence = 1
Program Level
Requirement Group #2001, Reporting Sequence = 1
Requirement Group #2010, Reporting Sequence = 1
Requirement Group #2050, Reporting Sequence = 1
Plan Level
Requirement Group #1200, Reporting Sequence = 1
Requirement Group #2005, Reporting Sequence = 1
Requirement Group #3000, Reporting Sequence = 1
Requirement Group #4700, Reporting Sequence = 1
Sub-plan Level
Requirement Group #700, Reporting Sequence = 1
If you change the value in the Reporting Seq field, the advisement engine reports the requirement groups by reporting sequence number. If you assign two or more requirement groups the same reporting sequence number (for example, 5, 10, or 900) within the same section of the academic structure, the groups are sorted by requirement group number.
If the Reporting Seq value is greater than 1, the reporting sequence number applies across career-level and program-level requirement groups. For example, a career-level requirement group with a Reporting Seq value of 3 would be processed and reported after a program-level requirement group with a Reporting Seq value of 2. This interaction of sequence numbers affects only career-level and program-level requirement groups. Program-level requirement groups do not interact with plan-level requirement groups, and plan-level requirement groups do not interact with subplan-level requirement groups. If the requirement groups in the previous list all had different reporting sequence numbers, then the groups would be reported in this order:
Career and Program Levels
Requirement Group #1111, Reporting Sequence = 1
Requirement Group #2001, Reporting Sequence = 1
Requirement Group #1100, Reporting Sequence = 2
Requirement Group #2010, Reporting Sequence = 5
Requirement Group #2050, Reporting Sequence = 5
Requirement Group #1000, Reporting Sequence = 900
Plan Level
Requirement Group #4700, Reporting Sequence = 1
Requirement Group #3000, Reporting Sequence = 900
Requirement Group #2005, Reporting Sequence = 901
Requirement Group #1200, Reporting Sequence = 999
Sub-plan Level
Requirement Group #700, Reporting Sequence = 1
Academic Structure
|
Field or Control |
Definition |
|---|---|
| Academic Career |
Enter the academic program for this requirement group. An academic career can have any number of academic programs. |
| Academic Program |
(Optional) Enter the program to which a student applies, is admitted, and ultimately graduates. The academic plan is active within this program. An academic program can contain any number of academic plans. If you do not enter a value, then the requirement group applies to all programs within the specified career. |
| Academic Plan |
(Optional) Enter an area of study (for example, major or minor) within the academic program. Some plans are subdivided into subplans. If you do not enter a value, then the requirement group applies to all plans within the specified career or the specified program, if a program is entered on this page. The system ensures that the program or career values are valid for the plan; error messages occur when necessary. If an academic plan is defined only to a career, a program is not necessary. |
| Academic Sub-Plan |
(Optional) Enter a further specialization within the academic plan. An academic plan can have any number of academic subplans. If you do not enter a value, then the requirement group applies to all subplans within the specified career or the specified plan, if a plan is entered on this page. Important! The system uses the Academic Career, Academic Program, Academic Plan, and Academic Sub-Plan fields on this page during analysis to search for requirements that match a student's record. (These fields are not just prompt values.) The system ignores blank fields and uses a requirement group for a particular career, program, plan, or subplan only if all the nonblank fields match exactly. Fields are matched in hierarchical order. For example, if the requirement group reflects an entire career, then a value appears in the Academic Career field, while the Academic Program, Academic Plan, and Academic Sub-Plan fields are left blank. |
Description Fields
|
Field or Control |
Definition |
|---|---|
| Search Description, Short Search Description, and Long Description |
Enter a description of the requirement group that is meaningful as a search key in the Search Description field. This description appears in search results for requirement groups. For example, a description of 1998 req for PSYCH (1998 requirement for psychology) helps to identify this requirement group. The Short Search Description appears only on this page. The Long Description appears on the degree audit report generated from the Student Advisement Report component. If your institution has purchased and licensed PeopleSoft Campus Self Service, the Long Description appears on the degree audit report generated from the View Degree Progress Report and the Evaluate My Transfer Credit self-service components. See Applying for Graduation Using Self-Service Pages. See Viewing Transfer Credit Reports Through Self-Service Pages. Note: You can alter the academic structure processing of requirement groups by evaluating plans before programs, evaluating subplans before plans, or both. |
| Report Description and Report Long Description |
Enter a description and a long description that you want to appear on the advisement report that is generated using the Request Advisement Report or Generate Advisement Reports components (SAA_RPT_RQST or SAA_RC_RPTGEN). Use the long description to further explain the requirement group. |
Display of Status
|
Field or Control |
Definition |
|---|---|
| Hide Status |
This check box is for use with informational-only type of requirement groups --where the requirement group setup is such that it does not make sense to display on the advisement report the status of Satisfied or Not Satisfied. Select the check box if you do not want the status (Satisfied or Not Satisfied) to appear on the advisement report next to the requirement group. Note: The option to hide the status also exists for the requirement and requirement line. |
Using Report Long Description in Course Catalog
|
Field or Control |
Definition |
|---|---|
| Enable Catalog Print |
This check box has no effect in the delivered software. However, you can write your own program that uses it to report on requirement groups. |
| Override Report Long Description |
This check box has no effect in the delivered software. |
Pre-Condition
|
Field or Control |
Definition |
|---|---|
| Pre-Condition |
Enter a precondition to restrict the use of a requirement group to a particular type of student. For example, if a requirement group has a precondition of Academic Standing Equal Good Standing, then this requirement group applies only to a student in good academic standing. If the precondition is false for a student, then the system does not consider the requirement group during analysis. The audit engine evaluates and reports the requirement group and student information only if the precondition is true for the student. The default value is None, indicating that the field is clear. If this field contains a value other than None, then additional fields are available to complete the precondition statement. Possible operators for a precondition statement are Less or Equal, Greater or Equal, Equal, Greater Than, Less Than, Not Equal, In,and Not In.None is the same as Equal. Operators are not used if the precondition is Dynamic Condition. If the precondition is Dynamic Condition, then select one of the dynamic conditions that you previously created in the Define Dynamic Condition component. Note: A student with a null set of entities is always considered true for all plurals of that entity for both in and not in because the null set is included in all entity groups and all entity group complements. Basic precondition values for this field are delivered with your system as translate values. Do not modify these values in any way. Any modifications to these values will require a substantial programming effort. However, you can use a condition specification as a precondition on the Requirement Group page. You use the Define Dynamic Condition component to define new condition specifications. After you create a condition specification, you can use it as a condition line type in an academic requirement; as a condition group line type in an academic requirement group; or as a precondition on the Requirement Group, Requirement, or Requirement Line Item page. Warning! Preconditions can be a powerful tool that the system uses to determine whether it should apply a particular requirement group to a student. However, complex condition and multiple condition processing take processing time; therefore, use them only when needed. For example, rather than setting up one requirement group at the program level that points to requirements with preconditions of specific plans within the program, consider establishing requirement groups for each requirement and define the requirement group at the plan level. The system retrieves only the requirement groups that correspond to a student's academic record. Retrieving a requirement group with a few requirements attached takes less time than processing one requirement group with many requirements that are all attached with preconditions. Note: A precondition of Academic Plan, Academic Plans, Academic Program, Academic Programs, Primary Academic Plan, Primary Academic Program, Academic Sub-Plan, Academic Sub-Plans, Student Group, or Student Groups uses an entity group value to complete the statement. In addition, the operators In and Not In are used with an entity group value. See Defining Academic Entity Groups. Select a precondition value: None: No precondition. Academic Level: Select to specify a student's year of study. For example, valid values include freshman and sophomore. The system evaluates this value against the student based on the as-of date that you specify at runtime. Academic Plan: Select to specify a student's academic plan. If the student has only one plan, Academic Plan and Primary Academic Plan reference the same plan. Academic Plans: Select to specify that all of a student's plans are part of the equation. Academic Program: Select to specify a student's academic program. If the student has only one program, Academic Program and Primary Academic Program reference the same program. Academic Programs: Select to specify that all of a student's academic programs are part of the equation. Academic Standing: Select to specify a student's standing at the institution. For example, values might include good standing, probation, and dismissal. Values are defined on the Academic Standing Table page. The system evaluates this value against the student based on the as-of date that you specify at runtime. Academic Sub-Plan: Select to specify a student's academic subplan. Academic Sub-Plans: Select to specify that all of a student's subplans are part of the equation. Cumulative Grade Point Average: Select to specify a student's cumulative grade point average, which is derived from the student's term history cumulative statistics in conjunction with the processing as-of date. Dynamic Condition: Select to specify a dynamic condition that you previously created in the Define Dynamic Condition component. You can select only dynamic conditions that share the same requirement usage value as the requirement group. Primary Academic Plan: Select to specify a student's primary academic plan, which is the plan designated by the lowest plan sequence number on the Student Plan page. For example, under a program of LAU, a student might have two plans, PSYCH and CLASSICS MINOR. If PSYCH has a plan sequence number of 10 and CLASSICS MINOR has a plan sequence number of 20, then PSYCH is the primary academic plan. On the Student Plan page, the primary career is designated as Student Career Nbr 0 (student career number 0). Important! The primary academic plan is the plan designated by the lowest plan sequence number on the Student Plan page, and the primary academic program is the program designated by the lowest career sequence number on the Student Program page. However, if a student has multiple programs (containing multiple plans), the primary academic plan is not necessarily the lowest plan sequence number under a given program, but it is the plan with the lowest plan sequence number under the program with the lowest student career number. For example, suppose that under a program of LAU (attached to a student career number of 0) a student has a plan of PSYCH with a plan sequence number of 10. The same student has a plan of ART with a plan sequence number of 10 under a program of FAU (attached to a student career number of 1). Both plans have a plan sequence number of 10, but the plan under the program with the lower career number is the primary plan. In this example, the primary plan is PSYCH, which is tied to a student career number of 0 through the LAU program. Primary Academic Program: Select to specify a student's primary academic program. The primary academic program is the program designated by the lowest career sequence number. On the Student Program page, the primary career is designated as Student Career Nbr 0. Student Group: Select to specify a grouping of students. For example, values might include athlete and veteran. You define values in the Student Group table. Student Groups: Select to specify that all student groups containing a student are part of the equation. Test Score: Select to specify a test score. Upon selecting this value, the following fields become available according to the setup on the Define Tests for Advisement page: Test ID, Test Component, Condition Operator, Test Score, Months Valid, and Test Score Method. |
Access the Parameters page ().
Image: Parameters page
This example illustrates the fields and controls on the Parameters page. You can find definitions for the fields and controls later on this page.
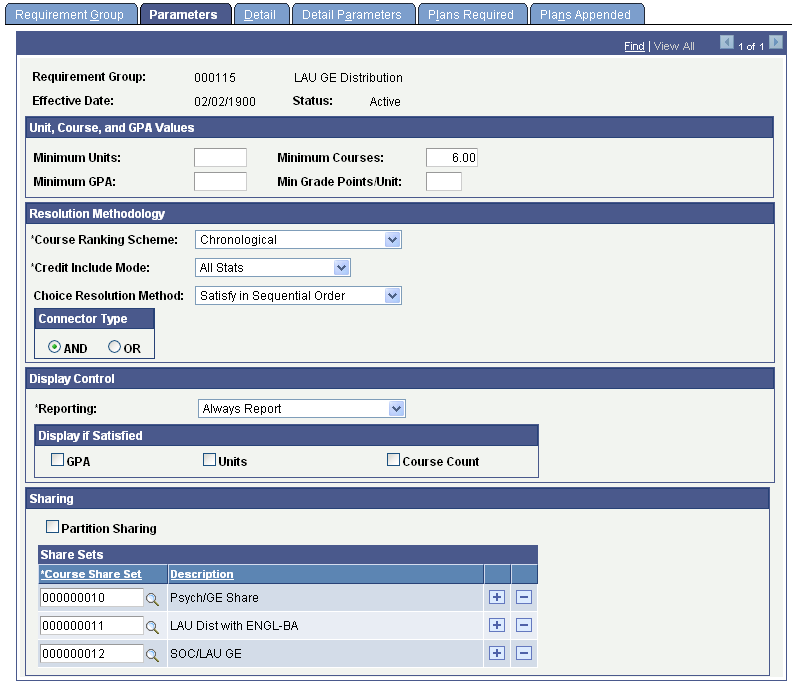
Note: For requirement group parameters to work, you must define detail lines on the Detail page. You can set up the parameters first, but detail lines are necessary for the parameters to be effective.
The fields on this page are identical to the fields on the Requirement Parameters page. If the field values that you enter on the Requirement Parameters page are greater than the field values that you enter on the Requirement Group Parameters page, then the parameters that you specify at the requirement level override those at the requirement group level.
You should always insert required parameters at the lowest level possible. For example, if the requirement specifies that the minimum number of units is 24 and the requirement group specifies that the minimum number of units is 18, then the audit attempts to find 24 units. However, the reciprocal is also true. If the requirement needs 6 units but the requirement group needs 10 units, then the audit engine searches for 10 units.
If a requirement (or a requirement group) needs a minimum number of units and courses that is greater than the sum of the specific line requirements and the Credit Include Mode field value is All Stats at the requirement (or requirement group) level, then the audit engine first uses as many units or courses as needed at the lowest parameter level. For example, if a single requirement line needs one course and a requirement group also points to that single requirement, then you should set the minimum course parameter at the requirement line level.
For more information about how parameters at the requirement group and requirement levels interact, refer to the Credit Include Mode diagram and the supporting text.
Unit, Course, and GPA Values
|
Field or Control |
Definition |
|---|---|
| Minimum GPA (minimum grade point average) |
Enter the minimum overall GPA requirement for classes selected to satisfy this requirement group. For example, if a student needs to take four Math 100-level classes with an overall GPA of 2.500 for a total of 12 units with a grade of C or better in each class, then enter 2.500 in this field.) In-progress courses or grades that are not included in GPA (for example, pass/no pass or transfer credit grades) satisfy the minimum GPA requirement. |
| Minimum Units |
Enter the minimum total units for all of the courses selected to satisfy this requirement group. |
| Min Grade Points/Unit (minimum grade points/unit) |
Enter the minimum grade points per unit for each class that is selected to satisfy this requirement. The system uses this value as the default value for each detail line, where you can override it. |
| Minimum Courses |
Enter the minimum course grade that satisfies this requirement group. This value appears by default in each detail line. |
Resolution Methodology
|
Field or Control |
Definition |
|---|---|
| Credit Include Mode |
Select how courses in the requirement group are included in the degree audit: All Stats: Select to specify that all course statistics are reported. A course captured by an All Stats requirement group is used for that requirement group and cannot be counted toward any other All Stats requirement group. Excl GPA: Select to specify that courses in this requirement group are excluded from GPA. You use this value at the lower level of requirement or at the requirement line level to prevent the system from using the GPA from certain courses at the higher level of requirement or requirement group. A course captured by an Excl GPA requirement is used for that requirement group and cannot be counted toward any other All Stats or Excl GPA requirement group. Verify: Select to specify that the application checks and verifies that the course was taken, but does not record the credit, so the course can be used elsewhere in the audit. A course captured by a Verify requirement group can be used by another Verify requirement group, Excl GPA requirement group, or All Stats requirement group. However, the course is counted toward requirement group completion. For example, for a graduate program electives requirement group, verify that all graduate students in the School of Education master's degree program complete at least two courses numbered 400 or higher in an academic area or plan other than their own. You use this value more commonly in requirements that have overall unit requirements, such as completion of 120 units to graduate, required term unit loads, or required academic standing status. Values for this field are delivered with your system as translate values. Do not modify these values in any way. Any modifications to these values will require a substantial programming effort. Important! When the credit include mode value is Verify, the parameters (Minimum Units and Maximum Units Allowed field values) act as boundaries for determining a truth value. For example, if the Minimum Units value is 6.0, the Maximum Units Allowed value is 15.0, and the student has fewer than six or more than 15 units, then the truth value is false. If the student is within this range, then the truth value is true. Verify accepts and reports all courses that match the course list and transcript, whereas the All Stats and Excl GPA lines use the minimum courses in order to free additional courses to be used elsewhere. |
In the following example, the requirement group requires a total of four courses for 12 units with a combined minimum GPA of 3.5. The three detail lines (requirements) contribute to these parameters according to the credit include mode value assigned at each level:
Image: Example of Credit Include Mode
The diagram illustrates how the assigned credit include mode value at every level impacts requirements and parameters.

Requirement 1 has one detail line. The line requires one course of three units with a minimum GPA of 2.0. Credit include mode for this line is set to All Stats, which allows units, course count, and GPA to be passed to the requirement level. The requirement credit include mode is set to Excl GPA, which allows only units and course count to contribute to the minimum parameters required at the requirement group level.
Requirement 2 requires a minimum of three courses for a total of nine units. Line 1 requires two courses with a minimum of six units and a minimum GPA of 3.5. Credit include mode for this line is set to All Stats, so all information is passed to the requirement level. Because this is the only line that contributes to the GPA at the requirement level, the GPA required at the requirement group level is derived from the courses captured here. Line 2 requires three courses, but the credit include mode at this level is set to Verify, so no course information is passed to the requirement level. No courses used here contribute to the three courses or nine units at the requirement level. This line only helps to satisfy the overall requirement by passing a true (if the three courses are found) or false. Line 3 requires one course of three units. The credit include mode for this line is set to Excl GPA, which prohibits the line from contributing to the minimum 3.5 GPA at the requirement group level. Only course count and units are passed to the requirement level.
Requirement 3 has one detail line that requires two courses. Credit include mode for this line is set to All Stats, so courses are used to satisfy this line, and course count, units, and GPA are passed to the requirement level. However, the credit include mode for the requirement is set to Verify, so no course information is passed to the requirement group level. This requirement passes a true or false value to the requirement group level and is used in determining the completion status of the overall requirement group.
|
Field or Control |
Definition |
|---|---|
| Choice Resolution Method |
This is the preferred method of analyzing multiple partitions in an AND or OR statement. Values for this field are delivered with your system as translate values. Do not modify these values in any way. Any modifications to these values will require a substantial programming effort. Values are: Satisfy in Sequential Order: Select to specify that the system evaluates detail lines in sequential order, except for limits that are analyzed first. For example, if the requirement consists of Line 10 OR Line 20 OR Line 30 OR Line 40 where partition sharing is allowed and the minimum partitions to complete is two, then any two partitions must be satisfied, although Line 10 and Line 20 are analyzed first. In another example, if a requirement consists of Line 10 OR Line 20, then a course that can satisfy both Line 10 or Line 20 is used to satisfy Line 10 if Line 10 is not already satisfied. If a student has completed Math 1 and Math 5, and Line 10 requires Math 1 and Math 2 and Line 20 requires Math 1 and Math 5, then Math 1 is used to satisfy Line 10, not Line 20. When the field value is Satisfy in Sequential Order, a student can satisfy Line 20 before Line 10 if the lines require different courses and the student has completed the required courses for Line 20. Investigate All Combinations: Select to specify that after the system analyzes limits, it sorts detail lines to find the best combination in regard to the requirement group. For example, if the requirement consists of Line 10 OR Line 20 OR Line 30 OR Line 40 where partition sharing is allowed and the minimum partitions to complete is two, then any two of the lines must be satisfied. In another example, Line 10 requires Math 1 and Math 2 and Line 20 requires Math 1 and Math 5. The student has completed Math 1 and Math 5. Line 20 is satisfied. Important! Regardless of which Choice Resolution Method field value you select, if the student does not meet the requirements of any of the lines, then the audit lists the courses that are available to fulfill each of the partitions. If the student meets the requirements for the minimum number of partitions, then the audit lists only the courses for the satisfied partitions. |
| Connector Type |
Select the main (default) Boolean operator to use in the equation that contains the detail lines. Detail lines joined by the opposite of the main connector type are grouped into one partition. Detail lines joined by the main connector are considered as individual components (or partitions) of the equation. A partition is each detail line in the equation or each set of detail lines grouped by parentheses. For example, if the connector type is AND and the detail lines are A OR B AND C OR D AND E, then the detail appears on the page as (A OR B) AND (C OR D) AND E. The first partition is (A OR B), the second partition is (C OR D), and the third partition is E. The main connector (that is, the connector that joins the partitions) is AND. (The connector that joins components within a partition is always the opposite of the main connector type.) In another example, if the main connector is OR and the detail lines are A OR B AND C OR D, then the detail appears on the page as A OR (B AND C) OR D. The first partition is A, the second partition is (B AND C), and the third partition is D. The system uses this field as the connector default on the Detail page when you insert rows. |
Display Control
|
Field or Control |
Definition |
|---|---|
| Reporting |
The Reporting field values, Report Only When Satisfied and Report Only When Not Satisfied, suggest that only display of data is suppressed. However, the selection of a Reporting field value other than Always Report changes the processing logic for the requirement group. The audit engine checks the Reporting field value after all other processing is completed. The requirement group status (Satisfied or Not Satisfied) is compared against the Reporting field value (Report if Satisfied or Report if Not Satisfied). If the values do not agree (that is, both are satisfied or both are unsatisfied), the requirement group and all requirements and requirement lines attached to the requirement group are deleted from the report results. Consequently, the requirement group will not appear on the report. Always Report: Select to specify that the requirement group is always reported, regardless of the completion status. Note: To ensure consistent results, use the Reporting field value of Always Report. Report Only When Not Satisfied: Select to specify that the requirement group is reported only if the student did not successfully complete it. For example, you could use this value to report probationary status. Use this reporting value with the Credit Include Mode of Verify. Using the Credit Include Mode of All Stats may result in unexpected report results when the requirement group is satisfied and the requirements under the requirement group are satisfied. When this occurs, the courses captured in the requirements and requirement lines are released because they are not to be reported. Report Only When Satisfied: Select to specify that the requirement group is reported only when the student successfully completes it. For example, you could use this value to report honors status. Select this value when the requirement group will be satisfied upon satisfaction of the requirements within the requirement group. If the requirements are satisfied and the requirement group is not satisfied, the requirement group results will be deleted and the requirement group and all associated requirement results will not be displayed in the report. The process will treat the non-displayed requirement group as satisfied even though it was not. Values for this field are delivered with your system as translate values. Do not modify these values in any way. Any modifications to these values will require a substantial programming effort. |
Display If Satisfied
|
Field or Control |
Definition |
|---|---|
| GPA (grade point average) |
If this check box is cleared, the report displays the GPA value based on the print control matrix in the product documentation. Note: Previously, if a GPA were required, the actual GPA would appear if a processing level were satisfied. This functionality will not change, even if this check box is cleared. If this check box is selected and a minimum GPA is entered, the report displays the required GPA and the calculated GPA for the specific processing level if it is satisfied. If this check box is selected and no minimum GPA is entered, the report displays the calculated GPA for the specific processing level if it is satisfied. |
| Units |
If this check box is cleared, the report displays the appropriate units values based on the print control matrix in the product documentation. If this check box is selected and minimum units are entered, the report displays the required units and the calculated units for the specific processing level if it is satisfied. If this check box is selected and no minimum units are entered, the report displays the calculated units for the specific processing level if it is satisfied. |
| Course Count |
If this check box is cleared, the report displays the appropriate course count values based on the print control matrix the product documentation. If this check box is selected and a minimum course count is entered, the report displays the required course count and the calculated course count for the specific processing level if it is satisfied. If this check box is selected and no minimum course count is entered, the report displays the calculated course count for the specific processing level if it is satisfied. |
Sharing
|
Field or Control |
Definition |
|---|---|
| Partition Sharing |
Select to specify that partitions can share courses. For example, the statement (A OR B) AND (B OR D) has two partitions. If the student took course B, then only one or both partitions are satisfied, depending on whether sharing is allowed. The default for this check box is clear. If the credit include mode value is Verify, you do not need to activate partition sharing. However, if a history course that satisfies both the general education requirement and the writing requirement is available, you can select this check box to share courses on those two requirement lines. |
If the connector type is OR, then these fields are available:
|
Field or Control |
Definition |
|---|---|
| Min Partitions to Complete (minimum partitions to complete) |
Enter the minimum number of partitions that must be completed to satisfy the requirement group. For example, in the statement A OR B OR (C AND D), if the value in this field is 2, then the audit engine searches for two of the three partitions. |
| Max Partitions to Allow Credit (maximum partitions to allow credit) |
Enter the maximum number of partitions that can be credited toward meeting a requirement group. For example, you might use this feature in a distribution requirement where a student must meet five of seven partitions, but cannot get credit for more than five partitions. |
Example
Suppose that the statement is (A AND B) OR (C AND D) OR (A AND F) OR (C AND G). The Min Partitions to Complete is 2 and the Partition Sharing check box is selected. If the student took courses A, B, and F or courses C, D, and G, then the statement is satisfied.
Enter the appropriate course share set. (Prompt contains values that were established using the Course Share Sets page.) The course share set is a tag that defines a set of requirement groups that can share courses. A course share set enables two or more requirement groups to use the same courses. By using a course share set, one course can be used to satisfy all requirement groups that are tagged by the course share set number.
Note: The course share set is used only at the academic requirement group level and is established on the Course Share Sets page. To share courses at the requirement level, use the partition sharing option on the Requirement Parameters page.
Access the Detail page ().
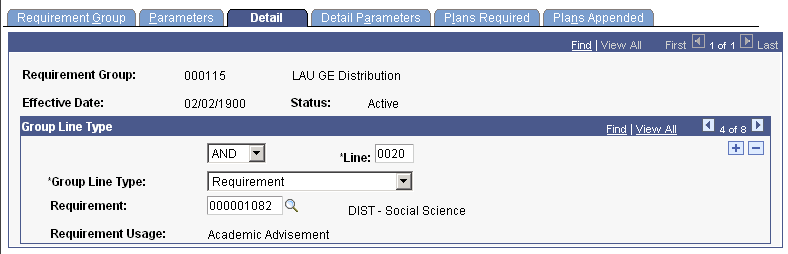
Image: Detail page
This example illustrates the fields and controls on the Detail page. You can find definitions for the fields and controls later on this page.
|
Field or Control |
Definition |
|---|---|
| (Connector Type) |
The system displays this field on all line numbers subsequent to the first line. Select a value to specify how a detail line connects to the previous detail line. If you select NONE, then the field value automatically populates the connector type on the Parameters page. |
| Line |
The system generates this sequential line number. However, you can change the value. (Computer-generated line numbers are assigned in increments of 10.) This field value determines the order in which the system evaluates detail lines. When you insert a line, the system replaces the field value of NEW with the next sequential line number. |
| Group Line Type |
Select the type of requirement group line to define. Values for this field are delivered with your system as translate values. Do not modify these values in any way. Any modifications to these values will require a substantial programming effort. Values are: Course: Select to specify a course that a student must take. This selection is less robust than using a requirement line that points to a course list. Requirement: Select to specify a requirement that a student must satisfy. Multiple requirement groups can point to a single requirement that was created only one time. As a result, for example, History 101 could satisfy a political science requirement as well as a history major requirement. Wild Card Course: Select to specify a course range based on values of the subject area and course catalog number using special wildcard characters. Equivalent courses are not included in this match. Condition: Select to specify a condition (or conditions) that the student must satisfy. For example, you can require the completion of a specific milestone. |
Warning! Condition processing can be a powerful tool. However, complex condition processing and multiple condition processing take considerable processing time; therefore, you should use them only when needed.
If the group line type is Condition, then these fields are available:
|
Field or Control |
Definition |
|---|---|
| Institution |
This field is display-only. Each requirement group is associated with only one academic institution. |
| Condition Code |
Select a condition code that indicates which field in the database you want the system to evaluate. For example, Academic Level, Academic Plan, Academic Program, and Academic Sub-Plan are condition codes. Values for this field are delivered with your system as translate values. Do not modify these values in any way. Any modifications to these values will require a substantial programming effort. Values are: None: No field value. Academic Level: Select to specify a student's year of study (for example, freshman, sophomore, junior, senior). The system evaluates this value against the student's level (defined in term statistics) based on the as-of date that you specify at runtime. Academic Plan: Select to specify a student's plan (for example, major or minor) within the academic program. Academic Plans: Select to specify that all of a student's plans are part of the equation. Academic Program: Select to specify a student's program of study. Academic Programs: Select to specify that all of a student's programs are part of the equation. Academic Standing: Select to specify a student's academic standing at the institution. For example, values might include good standing, probation, and dismissal. You define values on the Academic Standing Table page.) The system evaluates this value against the student's standing (defined in term statistics) based on the as-of date that you specify at runtime. Academic Sub-Plan: Select to specify a student's subplan. Academic Sub-Plans: Select to specify that all of a student's subplans are part of the equation. Cumulative Grade Point Average: Select to specify a student's cumulative grade point average (derived from the student's term history cumulative statistics, in conjunction with the processing as-of date). Dynamic Condition: Select to specify a dynamic condition that you previously created in the Define Dynamic Condition component. You can select only dynamic conditions that share the same requirement usage value as the requirement group. Primary Academic Plan: Select to specify a student's primary academic plan, the plan designated by the lowest plan sequence number on the Student Plan page. For example, under a program of LAU, a student might have two plans, PSYCH and CLASSICS MINOR. If PSYCH has a plan sequence number of 10 and CLASSICS MINOR has a plan sequence number of 20, then PSYCH is the primary academic plan. On the Student Plan page, the primary career is designated with the lower student career number.) Important! The primary academic plan is the plan designated by the lowest plan sequence number on the Student Plan page, and the primary academic program is the program designated by the lowest career sequence number on the Student Program page. However, if a student has multiple programs (containing multiple plans), the primary academic plan is not necessarily the lowest plan sequence number under a given program, but it is that plan with the lowest plan sequence number under the program with the lowest student career number. For example, suppose that under a program of LAU (attached to a student career number of 0), a student has a plan of PSYCH with a plan sequence number of 10. The same student has a plan of ART with a plan sequence number of 10 under a program of FAU (attached to a student career number of 1). Both plans have a plan sequence number of 10, but the plan under the program with the lowest career number is the primary plan. In this example, the primary plan is PSYCH, which is tied to a student career number of 0 through the LAU program. Primary Academic Program: Select to specify a student's primary academic program, the program designated by the lowest career sequence number. Student Group: Select to specify a student's academic group, such as athlete or veteran. You define values on the Student Group Table page. Student Groups: Select to specify that all of the student groups to which the student belongs are part of the equation. Test Score: Select to specify a test score. Upon selecting this value, the following fields become available according to the setup on the Define Tests for Advisement page: Test ID, Test Component, Condition Operator, Test Score, Months Valid, and Test Score Method. Note: Generally, when you enter a condition code value, the Condition Operator and Condition Data fields appear on the page. If the condition code is Dynamic Condition, then only the Condition Data field is available for entry. If the condition code is Test Score, then additional fields are presented as indicated above. |
| Condition Operator |
Enter the type of comparison to apply to the condition data. Condition operators include Less or Equal, Greater or Equal, Equal, Greater Than, Less Than, Not Equal, In, and Not In. Use an operator that makes sense in the equation. Values for this field are delivered with your system as translate values. Do not modify these values in any way. Any modifications to these values will require a substantial programming effort. |
| Condition Data |
Enter the value to check against the condition code. For example, specific academic plans and programs, as well as dynamic conditions, are condition data values. If the condition code value is Dynamic Condition, then select a dynamic condition that you created previously. |
If the Group Line Type is Course, then these fields are available:
|
Field or Control |
Definition |
|---|---|
| Course ID |
Enter the ID of the course needed to satisfy this requirement. |
| Include Equivalent Courses |
Select to have the system to include in its evaluation both the course ID that you specify and all courses that are set up as equivalent to the selected course ID for this requirement, as established on the Course Equivalencies page. If you select this check box, then the following fields become unavailable: Term, Associated Class, and Topic ID. Warning! The audit engine must search the database for any valid course equivalency, even if no equivalencies exist for this course. Therefore, clear the check box if the course ID has no equivalencies. Clear this check box to further narrow your course parameters with the Term, Associated Class, and Topic ID fields. For example, you can specify not only the course ID, but also the term in which the student must take the course. |
| Term |
Enter the term in which the student must take the course that you specify for the course to be used in this requirement group. Leave this field blank to return all values. |
| Associated Class |
Enter the associated class number (of the course that you specify) that the student must take for the course to be used in this requirement group. For class associations, indicate a term to prompt from valid values. Leave this field blank to return all values. Note: You cannot enter 9999 because this special associated class number can be associated with any other associated class number and is never an enrollment section. |
| Topic ID |
Enter the topic ID (of the course that you specify) that the student must take for the course to be used in this requirement group. This field prompts from the topics defined in the course catalog. Leave this field blank to return all values. |
If the Group Line Type is Requirement, then the following fields are available:
|
Field or Control |
Definition |
|---|---|
| Requirement |
Enter the requirement to associate with this requirement group. |
| Requirement Usage |
The system displays the requirement's usage. Requirement usage values are Academic Advisement, Student Individualized Plan, and Requisite/Restriction. |
If the Group Line Type is Wild Card Course, then the following fields are available:
|
Field or Control |
Definition |
|---|---|
| Academic Institution |
This is a display-only field. Each requirement group is associated with only one academic institution. Important! If you do not enter an academic group, subject, or catalog number, the system returns all values. |
| Academic Group and Subject |
Enter the appropriate academic group and subject of the course. |
| Catalog Nbr (catalog number) |
Select the catalog number using a combination of real numbers, letters, pound sign symbols, and asterisks. The pound sign (#) is a wild card for the numeric portion of the catalog number, and the asterisk (*) is a wild card for the alphabetic portion of the catalog number. The catalog number field format is NNNNAAAAAA, where N indicates a numeric value and A indicates an alphanumeric value. For example, a catalog number of 3## indicates that any 300 level course is acceptable, including 301A, because suffixes are ignored when you specify a numeric wild card unless you exclusively indicate a suffix value. In another example, a catalog number field value of 3##B would exclude 301A. In a third example, a catalog number field value of 321* indicates that 321, 321A, and 321B (but not 321AB) are acceptable. You can use the wild card for any position in the field. When you use wild cards, courses that are equivalent to the wild card course that you specify are not evaluated. (This is an efficiency constraint.) In addition, requirement groups with a group line type of Wild Card Course act like requirements with a line detail type of CLST on the Line Item Detail page; they do not pull courses with no earned credit into the evaluation of the requirement group. Important! The Catalog Nbr field does not support ranges. Instead, you must insert multiple detail lines. For example, in one detail line you can use the wild card for all 100-level courses. In a second detail line, you can use the wild card for all 200-level courses. Then you can connect the two detail lines with the AND connector. |
Access the Detail Parameters page ().
Image: Detail Parameters page
This example illustrates the fields and controls on the Detail Parameters page. You can find definitions for the fields and controls later on this page.
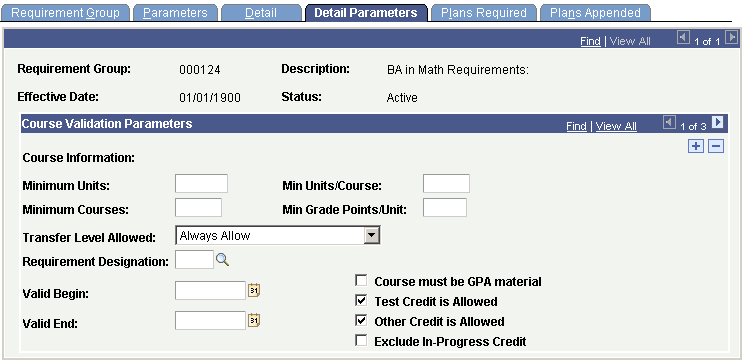
Course Validation Parameters
|
Field or Control |
Definition |
|---|---|
| Course Information |
Displays course information from the Detail page. Course information appears only if you entered a group line type of Course or Wild Card Course. |
| Minimum Units |
Enter minimum units for the class. |
| Min Units / Course (minimum units per course) |
Enter the minimum number of units that each course or wildcard course must provide to satisfy the requirement group. |
| Minimum Courses |
Enter the minimum number of courses required for this detail line. |
| Min Grade Points / Unit (minimum grade points per unit) |
Enter the minimum number of grade points per course unit that the student must attain for a course to be included in this detail line. |
| Transfer Level Allowed |
Enter the allowed type of transfer credit (if any) for the course. Values for this field are delivered with your system as translate values. Do not modify these values in any way. Any modifications to these values will require a substantial programming effort. Values are: Always Allow: Select to specify that all applicable transfer credit can satisfy the requirement. Four-Year Institution Only: Select to specify that only transfer credit from four-year institutions can be used to satisfy the requirement. Never Allow: Select to specify that transfer credit can never satisfy the requirement. Two-Year Institution Only: Select to specify that only transfer credit from two-year institutions can be used to satisfy the requirement. None: Select to specify that all applicable transfer credit can satisfy the requirement. When selected, the value converts to Always Allow Note: On the School Data page, you can define an external organization as a two- or four-year institution. The Advisement School Type field on the School Type Table page contains the value that drives the derived lists in academic advisement. Each school type may belong to an advisement school type. |
| Requirement Designation |
Select to specify the course as valid only if it has this requirement designation associated with it. Typically, you attach this designation to a course, and it affects one section of that course. A requirement designation may reflect additional work that a student needs to complete in addition to the regular course. For example, the requirement designation might indicate that the course is valid only if it was taken with an optional extra credit requirement designation of architecture design credit. Depending on the setup data in the Requirement Designation Table page, a separate course grade may or may not be required for designation credit to be earned. If a separate requirement designation grade is required, then you must enter an RD (requirement designation) grade of Satisfied on the Grade Roster 2 page or the Student Enrollment 4 page for academic advisement to include the course. If a separate requirement designation grade is not required, then the student must earn a passing grade in the course to which the requirement designation is attached for designation credit to be granted. (You define the minimum grade needed.) If a requirement designation is required, then an RD grade of Unsatisfied (or no RD grade at all) causes the course to be rejected. If a separate requirement designation grade is required but the course is still in progress, then the degree audit records the requirement designation as if it were satisfied. |
| Valid Begin and Valid End |
Enter a date range to specify when the student must take this course to satisfy the requirement. Leave these fields blank to specify that the student can take the course during any time period. The system uses the start date of the term in which the student takes the course. |
| Course Must Be GPA Material (course must be grade point average material) |
Select to specify that the course taken to satisfy this requirement group needs to be applied toward the student's career grade point average calculation. The student cannot take the course on a pass/no pass or audit basis, but only for a grade. Important! Only courses with grades for which you select the Include in GPA check box on the Grading Scheme Table page are eligible. |
| Test Credit is Allowed |
Select to specify that the course can originate from the test credit portion of the student's academic record. |
| Other Credit is Allowed |
Select to specify that the course can originate from the other credit portion of the student's academic record. Note that the system marks and treats internal transfer credit as enrolled credit. |
| Exclude In-Progress Credit |
Select to specify that the course must be fully graded for the system to consider it valid. If you do not select this check box, then the system includes a no graded course, a course with a grade of incomplete, or a course in progress as part of the academic analysis and the course satisfies all parameters. Typically, you use this check box for enrollment requisites on the Enrollment Requirement Group component. You do not usually use it for academic advisement reports. |
Example
In this example, the Exclude In-Progress Credit check box is selected. To fulfill the honors requirement, a student must have a minimum 3.5 verifiable cumulative GPA. To build this requirement, create an academic requirement group with the following two detail lines:
Detail line 1: Condition line type of cumulative GPA >= 3.5
AND
Detail line 2: Wild Card Course line type.
On the Parameters page, enter a Minimum Courses field value of 1. On the Detail page, create a detail line with a Group Line Type field value of Condition. On the same page, create a second detail line with a Group Line Type value of Wild Card Course. On the Detail Parameters page for detail line 2, select the Exclude In-Progress Credit check box. Now the system verifies that the student has a cumulative GPA of >= 3.5 and is not a first semester student with only in-progress courses.
Remember, if the Exclude In-Progress Credit check box is not selected, then even those students who have no course work completed, but who have at least one course in progress, will meet this requirement.
Click the links at the bottom of this page to access other pages in this component.
Access the Plans Required page ).
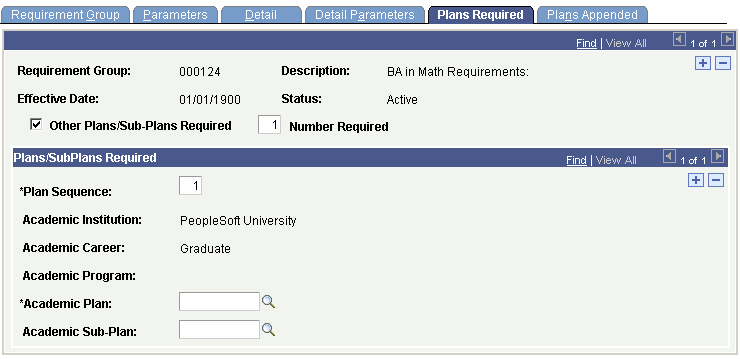
Image: Plans Required page
This example illustrates the fields and controls on the Plans Required page. You can find definitions for the fields and controls later on this page.
|
Field or Control |
Definition |
|---|---|
| Other Plans/Sub-Plans Required |
Select to require that students in this career, program, or both declare a plan or subplan. If you select this check box, then you do not have to enter information on the Detail page. The Detail page is not required because the system considers the required plans and subplan information as the requirement group detail. |
| Number Required |
Enter number of plans or subplans (from the list that you specify) that the student must declare. If you leave this field blank, then all plans and subplans that you list are required. For example, if this were a business major requirement group, then you could insert subplans here for each business major area of specialization, then enter a number required value of 1 to specify that all business majors must declare at least one subplan in one of the areas that you define. |
Plans/SubPlans Required
|
Field or Control |
Definition |
|---|---|
| Plan Sequence |
Enter the search order of multiple plans or subplans, if any. The system first determines whether the student has the item that you list with the lowest sequence number, and continues searching until it finds a match. |
| Academic Institution, Academic Career, and Academic Program |
Display-only fields. These values reflect the data on the Requirement Group page. Note: If you do not enter an academic program on the Requirement Group page, then the system populates the Academic Program field when you enter an Academic Plan (if the academic plan is tied to a program). |
| Academic Plan |
Enter the required plan (for example, major or minor) for students in the academic program, the career, or both that you specify on the Requirement Group page. |
| Academic Sub-Plan |
Enter the required subplan (for example, specialization or concentration) for students in the academic plan or career that you specify on the Requirement Group page. |
Example
To graduate with a Bachelor of Arts degree in English, a student must declare a career of UGRD, a program of LAU, and a plan of ENGLISH. This student must also satisfy one of three subplans: CREATIVE WRITING, LITERATURE, or CLASSICS.
Use this page to specify that a subplan is necessary for graduation. Select the Other Plans/Sub-Plans Required check box. Enter 1 in the Number Required field. For Plan Sequence 1, enter an academic plan of ENGLISH and an academic subplan of CREATIVE WRITING. For plan sequence 2, enter an academic plan of ENGLISH and an academic subplan of LITERATURE. For plan sequence 3, enter an academic plan of ENGLISH and an academic subplan of CLASSICS.
When the student declares a subplan on the Student Program page, the degree audit report lists the requirement groups that are satisfied or that need to be satisfied for the subplan. Until the student declares a subplan, the degree audit report indicates that a required subplan has not been satisfied, so the entire advisement report is not satisfied.
You can click the links at the bottom of this page to access other pages in this component.
Access the Plans Appended page ().
Image: Plans Appended page
This example illustrates the fields and controls on the Plans Appended page. You can find definitions for the fields and controls later on this page.
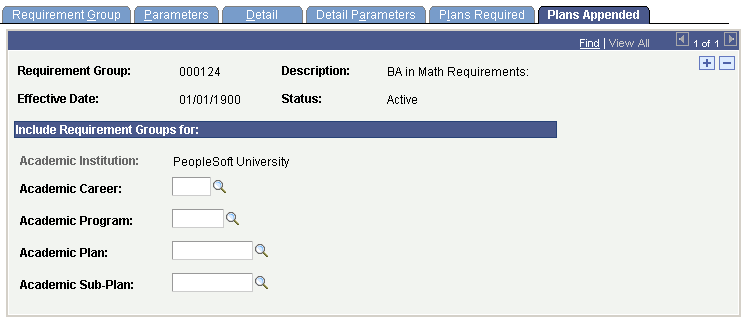
You can attach requirement groups from a different academic structure (career, program, plan, and subplan) to the single requirement group identified by this page. For example, a mathematics pre-major requirement group might contain the same requirements as the computer science certificate academic plan. Use this page to append the computer science plan requirements to the mathematics pre-major requirement group. In most instances, this functionality is used to minimize duplication of academic requirement groups. If you have two careers, programs, plans, or subplans that have virtually identical requirements, you can create them for one of the two groups and then append the requirements to the other group through the Plans Appended page.
If you use this page, then the Detail page is not required because the appended requirement group plans are considered as the requirement group detail.
Appended requirement group information prints on the audit report with the requirement group to which it is attached. Therefore, if a requirement group is appended to a career-level requirement group, then the appended group information is printed with the career-level requirement groups.
Include Requirement Groups for
|
Field or Control |
Definition |
|---|---|
| Academic Career, Academic Program, Academic Plan,and Academic Sub-Plan |
Enter the data that matches the existing requirement groups that you want to append. The system uses this data during analysis to search for requirement groups that match the structure defined on this page. The system ignores blank fields, and a requirement group is appended only if all the nonblank field values match exactly. |