| Oracle® Retail Xstore Point-of-Service Mobile User Guide Release 18.0 F12257-04 |
|

 Previous |
 Next |
| Oracle® Retail Xstore Point-of-Service Mobile User Guide Release 18.0 F12257-04 |
|
Previous |
Next |
During a transaction you may need to search for a particular item.
To search your store inventory, see Searching for Items Using Item Lookup below.
To search other stores, see Locating Items: Inventory Lookup.
To print a Rain Check, see Printing a Rain Check.
Use the item lookup function to search for an item based on many criteria (SKU, style, department, and so on) and retrieve detailed information about the item. For kits, you can use item lookup to view the component items that make up the kit. If item lookup is initiated from a sale, you can add the item to the sale directly from the lookup screen if all eligibility parameters have been met.
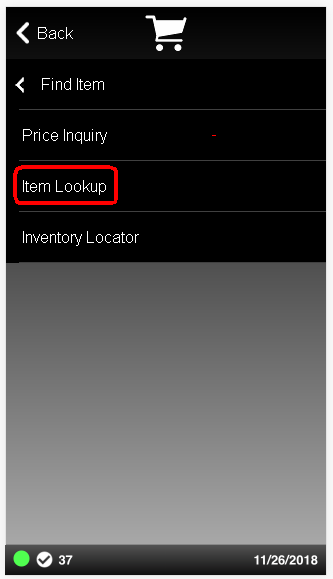
At the Register Sale screen, select the Find Item button from the Register Sale context menu:
Select Item Lookup in the Find Item menu.
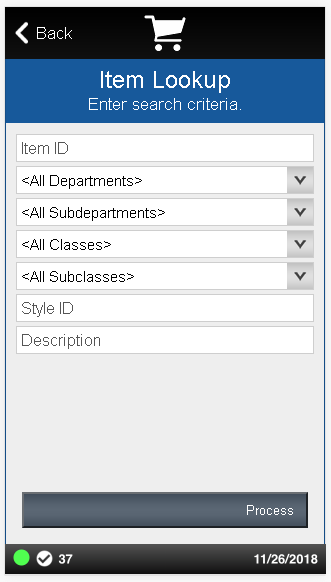
Scan an item to proceed directly to the item detail screen or enter the item search criteria:
Item ID: ID of the item.
Department: Department to which the item belongs.
Subdepartment: Subdepartment to which the item belongs.
Class: Class to which the item belongs.
Subclass: Subclass to which the item belongs.
Style ID: ID of the style assigned to the item.
Description: Content in the description of the item.
If advanced search options are configured on your Mobile Tablet system, use the advanced options to further refine the search such as specifying season, gender, material, line, and so on:
Select the value for any search criteria you are using.
Select Exclude for any unused search criteria.
After you have entered your search criteria, select Process to continue.
|
Note: If you enter only a few lookup criteria, the result will be a longer list of items. Entering more criteria narrows the scope of the search and results in fewer items being listed. You do not have to make an entry in every criteria field. |
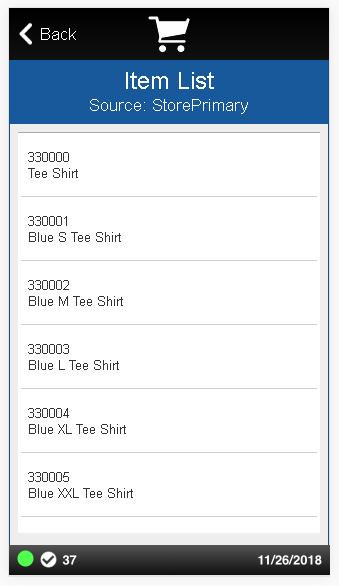
If several items match the criteria you entered, select an item in the list.
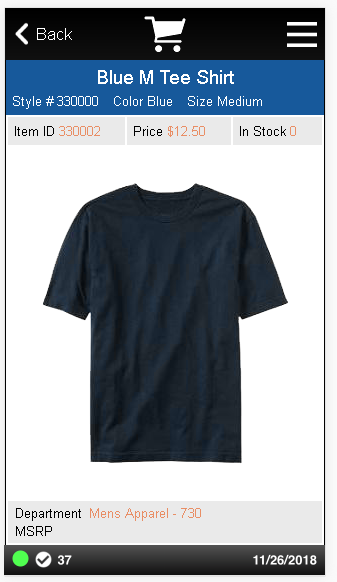
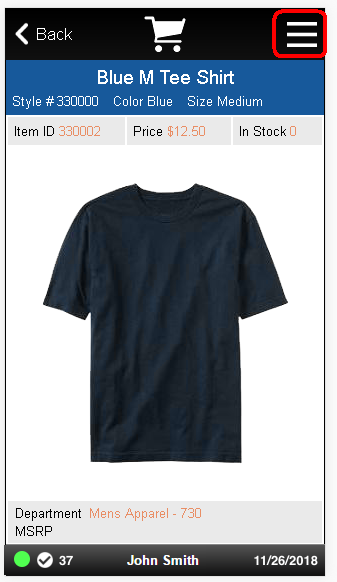
Xstore Mobile displays detailed information about the selected item
Select Back to return to the sale screen.
<OR>
Continue with the appropriate procedure:
Add Item: You can add the displayed item to the current sale in progress. This option is only available if item lookup was accessed from a sale transaction. See Add Item to Transaction.
Order Item: You can place an order for the displayed item. This option is only available for items that can be ordered and if item lookup was accessed from a sale transaction. See Order Transactions Through Order Broker Cloud Service for more information.
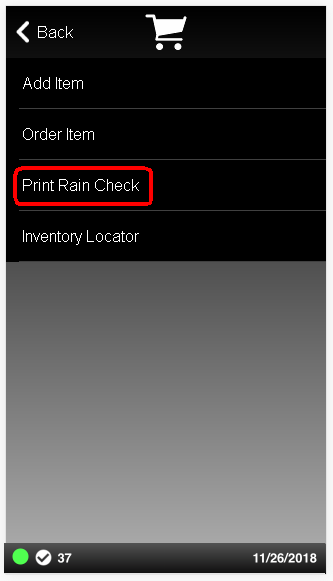
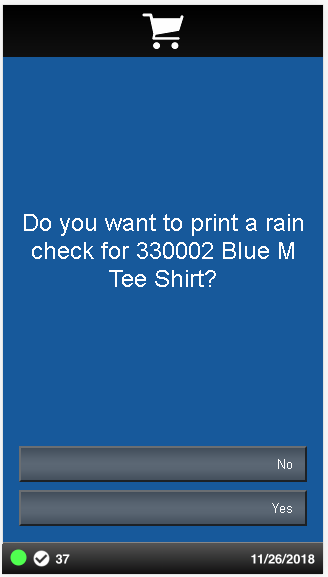
Print Rain Check: If available, you can print a rain check to purchase out of stock items for the same price at a later date. See Printing a Rain Check.
Special Order: You can place a special order for the displayed item. This option is only available for items that can be special ordered and if item lookup was accessed from a sale transaction.
Layaway Item: You can create a layaway account for the displayed item or place it on an existing account. This option is only available for items that are eligible for layaways and if item lookup was accessed from a sale transaction.
Inventory Locator: You can search for stores with the item in stock.
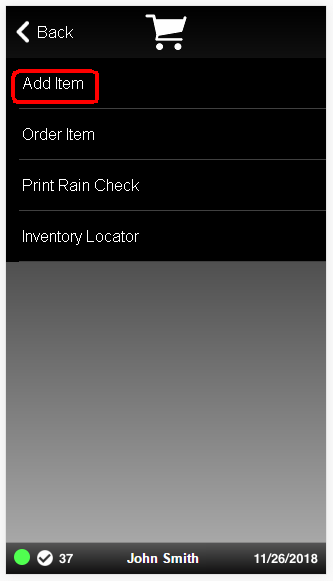
To add the searched-for item to a transaction:
Select the Context Menu Button in the Item Detail screen.
Select Add Item in the Context Menu.
The item is added to the transaction. Return to the sale screen.
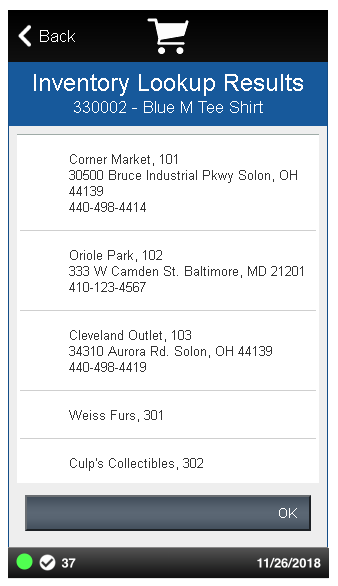
Occasionally an item may not be available in your store inventory, but the customer would like to see which stores in your chain have the item in stock. You can use the inventory lookup process to search a centralized database to locate these items within a set parameter range. For example, you could locate a specified item at a store within 25 miles of your location that has at least three of the specified item on hand.
At the Register Sale screen, select the Find Item button from the Register Sale menu (Figure 7-1).
At the Item Finder menu, select Inventory Lookup (Figure 7-2). The system prompts for the Inventory Locator criteria.
Enter the information as needed and select Process to perform the inventory locator search:
Figure 7-8 Inventory Locator Lookup Form
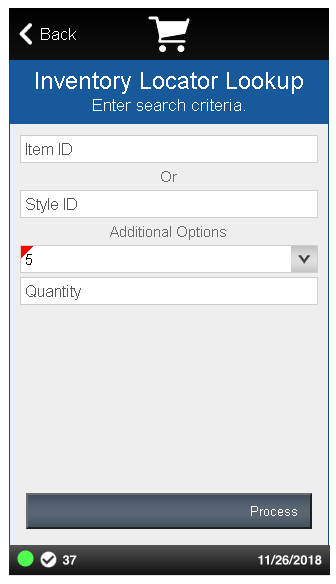
REQUIRED Information:
Item ID or Style ID: You must enter either an item ID or a style ID.
OPTIONAL Information:
Distance: Select the distance from your store (for example, all locations with this item in stock within 25 miles of the current store).
Quantity: Enter the minimum quantity of the item that the target store has in stock. For example, you may use this option if the customer needs a specific quantity of this item.
Xstore Mobile returns a list of locations matching the search criteria.
This list includes the quantity of this item in stock at each store, the address and telephone number for the store, and the distance from this store to each target location.
Select OK to close the Inventory Locator.