| Oracle® Retail Xstore Point-of-Service Mobile User Guide Release 18.0 F12257-04 |
|

 Previous |
 Next |
| Oracle® Retail Xstore Point-of-Service Mobile User Guide Release 18.0 F12257-04 |
|
Previous |
Next |
Oracle Retail Xstore Mobile is a mobile point-of-sale (POS) extension of the Xstore register software. Using Xstore Mobile, many of the actions that employees normally performed on a register can now be performed out on the sales floor.
Xstore Mobile is built utilizing the existing Xstore core frameworks and work flows to ensure a consistent experience for the associate. It is platform independent and runs on iOS, Android, and Windows 10 based Oracle Workstation 610 UI. The application is built as a thin client, enabling speed of deployment and without operating system dependencies. The UI on the Mobile Tablet is simple to use and takes advantage of the look and feel of the current desktop application where relevant.
|
Note: The appearance of Xstore Mobile differs depending upon the operating system and the specific device on which it runs. Therefore, your screens may differ from the screens that appear in this manual. Also, screen shots are taken from a variety of devices. |
The Oracle Retail Xstore Point-of-Service Mobile User Guide describes how to perform the functions available in Xstore Mobile Handheld and Mobile Tablet. These functions are described in the following chapters:
Chapter 2, "Custom Branding"- Describes how to customize the Xstore Mobile user interface for your brand.
Chapter 3, "Sale" - Describes the sale transaction process.
Chapter 4, "Return Transactions"- Describes the return transaction process.
Chapter 5, "Processing Tenders" - Describes the tendering process.
Chapter 6, "Customer Maintenance" - Includes activities that relate to entering new customers into the customer database and updating customer information.
Chapter 7, "Searching for Items" - Describes how to look up an item to view information about it.
Chapter 8, "Discounts"- Describes the transaction and group discount process.
Chapter 9, "Modifying a Transaction" - Explains each of the adjustments that can be made to sale items in Xstore Mobile.
Chapter 10, "Send Sale Transaction" - Describes the process of sending an item to a customer-specified offsite location after it is purchased.
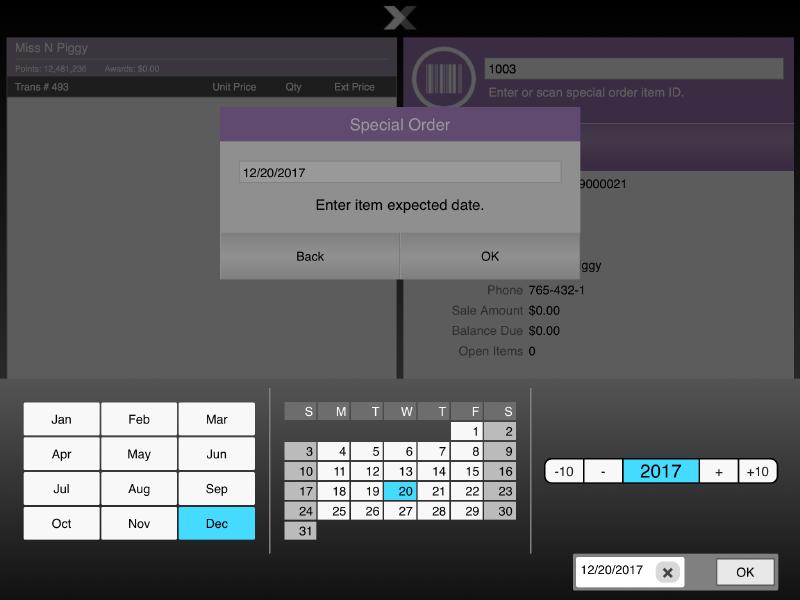
Chapter 11, "Special Orders (Mobile Tablet Only)"- A special order transaction is typically performed when an item is currently not available at store.
Chapter 12, "Layaway Transactions (Mobile Tablet Only)" - A layaway item is a sale item that cannot be taken from a store when it is purchased because the customer does not pay the entire cost of the item at that time. Instead, the store reserves the item for the customer until the customer pays for the item in full.
Chapter 13, "Work Order Transactions" - Work orders are labor services such as repairs and alterations.
Chapter 14, "Warranty and Service Plan Transactions" - Describes the process of purchasing a warranty/service plan to support the product after its purchase.
Chapter 15, "Order Transactions Through Order Broker Cloud Service" - Describes the order transaction process and inventory availability across all sales channels.
Chapter 16, "Pre-Sale Transactions" - Pre-sale transactions must be paid in full at setup and associated with a customer.
Chapter 17, "Hold Account Transactions"- A hold account transaction is typically performed when customers plan to purchase merchandise but would like the store to hold the item for a short period.
Chapter 18, "Xcommerce" - Xstore Xcommerce provides the ability to pull items from a guided selling website and sell in the store or create an Omni-Channel order.
Chapter 19, "Gift Registry" - The gift registry tool assists the customer in purchasing gifts for someone registered.
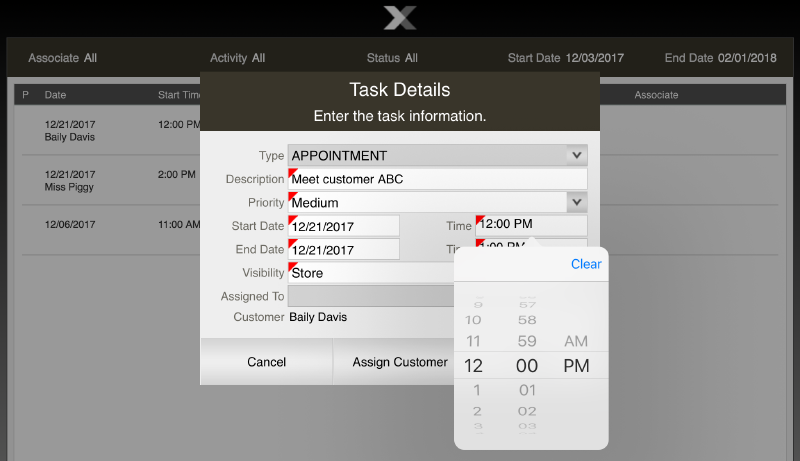
Chapter 20, "Task Management (Mobile Tablet Only)" - Displays tasks assigned to associates in a store for completion such as appointments.
Chapter 21, "Register Open and Close" - Describes the procedures for opening and closing a register.
Chapter 22, "Airside Store Transactions" - Describes the procedures for associating a flight number to a transaction and performing airside sales.
Chapter 23, "View Schedule and Time (Mobile Tablet Only)" - To review timecard and schedules.
Chapter 24, "Actions Menu" - Describes the processes for Changing Passwords, Item Lookup, Clock In/Out, Balance Inquiry, and Price Inquiry.
Chapter 25, "Till Management" - Describes the till options and maintenance functions.
Chapter 26, "Hardware" - Describes using Reinitialise Hardware to reset peripheral hardware devices.
Chapter 27, "Receiving" - Describes inventory receiving.
Chapter 28, "Shipping" - Describes inventory shipping.
Chapter 29, "Physical Inventory Counting" - Describes how to create, perform, update, and submit inventory counts. Also covers Store Layout maintenance for the Mobile Tablet.
Chapter 30, "Inventory Adjustment"- Describes how to make adjustments to inventory counts.
Chapter 31, "Item Transfer" - Describes how to transfer items between inventory buckets.
Chapter 32, "Inventory Replenishment" - Allows stores to review suggested inventory orders and create their own inventory replenishment orders.
Chapter 33, "Shelf Labels" - Describes the process to print shelf labels.
Chapter 34, "Reporting" - Describes the process to view and print reports.
|
Note: The appearance of Xstore Mobile differs depending upon the operating system and the specific device on which it runs. Therefore, your screens may differ from the screens that appear in this manual. |
This section describes the Main Menu.
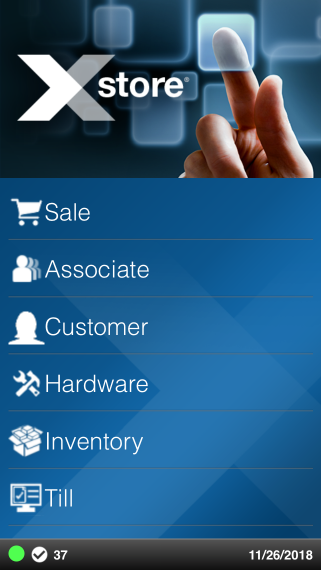
The main menu for Xstore Mobile is the first screen displayed when opening the application. This screen displays a list of buttons, each of which accesses certain areas of Xstore Mobile.
Select the respective option to access the appropriate functionality.
Sale - Perform transactions.
Associate - Change Password
Customer - Balance Inquiry, Customer Maintenance, Order Options, Receipt Reprint Options
Hardware - Reinitialize Hardware
Inventory - Perform inventory actions such as Inventory Adjustment, Inventory Counts Options, Inventory Replenishments, Item Transfer, Item Lookup, Receiving, and Shipping. Also includes Print Shelf Labels and Exchange Serial Number options.
Till - Lock Register, Open/Close Register, Till Maintenance, Till Options
Actions - Balance Inquiry, Change Password, Clock In /Out, Item Lookup
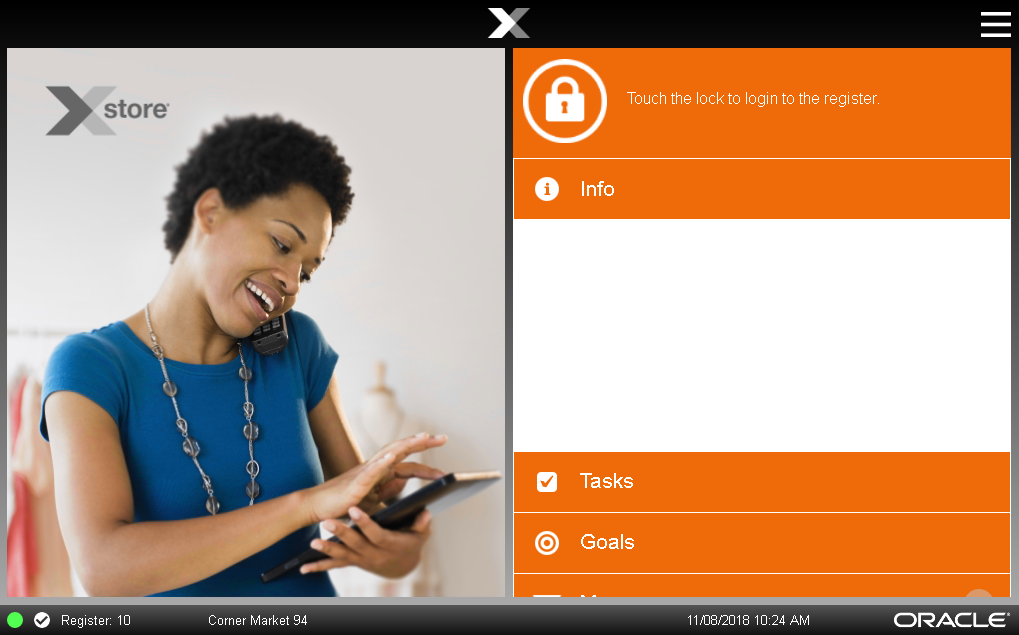
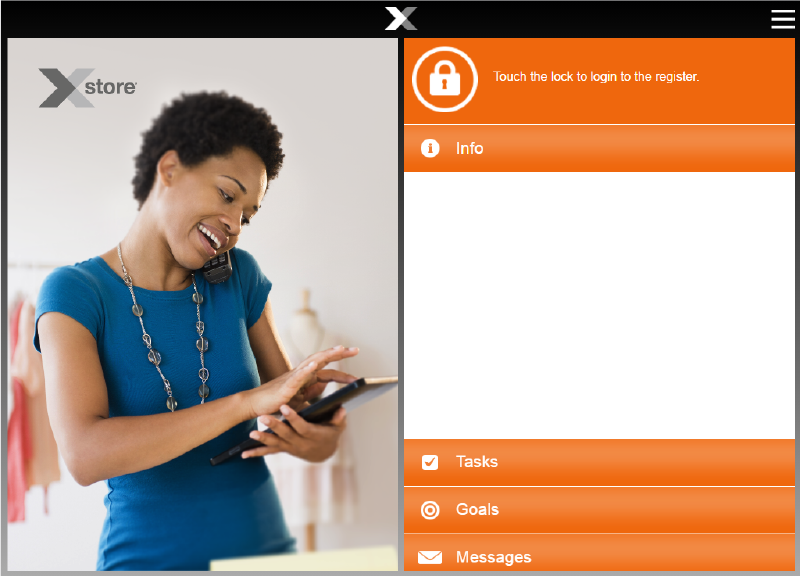
The main menu for Xstore Mobile Tablet is the first screen displayed when opening the application. It has been designed specifically for use with tablets and has the look and feel of the Mobile Handheld and desktop versions. An example of the home screen on a tablet is shown below:
The tabs (now known as a scrolling list), are shown on the right hand side rather than the left. This is because most associates will hold a tablet in their left hand and naturally drive the device with their right hand. This is a configurable option so for left-handed users the format can be transversed. See Scrolling List /Tabs.
Rolling your finger up and down the tab section will give you access to the list selection. Select an option to put it in the focus area.
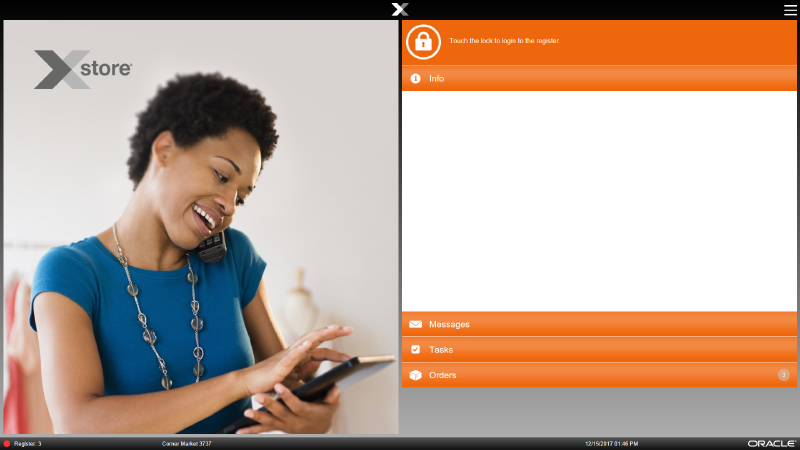
The Context Menu Button in the upper-right hand corner of the screen has the following options when in the Login screen.
Figure 1-3 Tablet Login Screen Context Menu
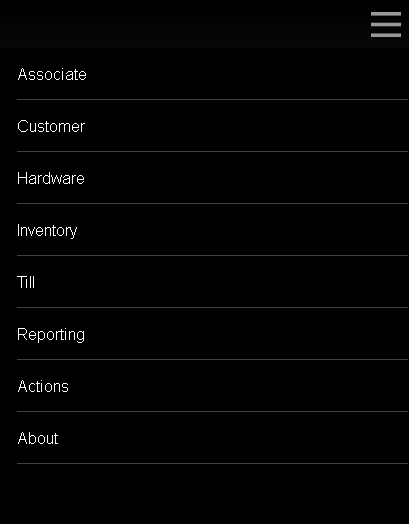
Select the respective option to access the appropriate functionality.
Table 1-1 Mobile Tablet Context Menu Options Outside Sale Mode
| Context Menu Option | Sub-Menu Options | |
|---|---|---|
|
Associate |
Change Password |
|
|
My Tasks |
||
|
View Schedule & Time |
View Schedule |
|
|
View Timecard |
||
|
Customer |
Balance Inquiry |
Gift Card Balance |
|
Gift Certificate Balance |
||
|
Gift Receipt Inquiry |
||
|
Loyalty Balance |
||
|
Store Credit Balance |
||
|
Customer Maintenance |
||
|
Receipt Reprint Options |
Rebate Receipt |
|
|
Reissue Gift Receipt |
||
|
Reprint Document |
||
|
Reprint Last Receipt |
||
|
Work Order Options |
Receive Work Orders |
|
|
Ship Work Orders |
||
|
Work Order Invoice History |
||
|
Work Order Invoicing |
||
|
Work Order Maintenance |
||
|
Hardware |
Reinitialize Hardware |
|
|
Inventory |
Inventory Adjustment |
|
|
Inventory Counts Options |
Inventory Count |
|
|
Store Layout Maintenance |
||
|
Inventory Replenishment |
||
|
Item Lookup |
||
|
Item Transfer |
||
|
Print Shelf Labels/Tickets |
||
|
Receiving |
||
|
Serial Number Exchange |
||
|
Shipping |
||
|
Till |
Lock Register |
|
|
Register Open/Close |
||
|
Till Maintenance |
Attach Cash Drawer Till |
|
|
Cash Pickup |
||
|
Cash Transfer |
||
|
Remove Cash Drawer Till |
||
|
Till Options |
Change Float |
|
|
No Sale |
||
|
Paid In |
||
|
Paid Out |
||
|
Post Void |
||
|
Reporting |
Airport Reports |
|
|
Customer Account Activity Summary Reports |
||
|
Customer List Report |
||
|
Dashboard |
||
|
Employee Reports |
||
|
Flash Sales |
||
|
Inventory Reports |
||
|
Journal Report |
||
|
Layaway Reports |
||
|
Price Change Report |
||
|
Sales Report |
||
|
Saved Reports |
||
|
Special Orders Report |
||
|
Store Locations Report |
||
|
Till Reports |
||
|
Actions |
Balance Inquiry |
Gift Card Balance |
|
Gift Certificate Balance |
||
|
Gift Receipt Inquiry |
||
|
Change Password |
||
|
Clock In/Out |
||
|
Item Lookup |
||
|
Price Inquiry |
||
|
About |
Privacy Policy |
|
|
EULA |
||
Table 1-2 Mobile Tablet Context Menu Options Within Sale Mode
| Context Menu Option | Sub-Menu Options | |
|---|---|---|
|
Return Item |
||
|
Sell Non-Merch |
Sell Non-Merch |
|
|
Sell Gift Card |
||
|
Sell Gift Certificate |
||
|
Extended Transaction |
Send Sale |
|
|
Warranty |
||
|
Layaway |
||
|
Special Order |
||
|
Work Order |
||
|
Pre-Sale |
||
|
Hold |
||
|
Register Options |
Balance Inquiry |
|
|
Reissue Gift Receipt |
||
|
House Account payment |
||
|
House Account Reversal |
||
|
Redeem Rain Check |
||
|
Assign Gift Registry |
||
|
Lock Register |
||
|
Customer Options |
Assign Customer |
|
|
Remove Customer |
||
|
View Customer |
||
|
Find Item |
Price Inquiry |
|
|
Item Lookup |
||
|
Inventory Locator |
||
|
Resume/Suspend Transaction |
||
Xstore Mobile POS can be installed as a thin client on a Workstation 610. In addition to all the functions available on the tablet version of Xstore Mobile POS, the thin client also provides the following functionality:
Count a cash drawer
Perform a mid-day deposit
Perform a till audit
Attach a till
Remove a till
The interface for Xstore Mobile is made up of common elements in any mobile application. These elements include text fields, buttons, links, lists, and menus used to select options, enter data, or open new screens.
There is a consistent use of color for key associate functions such as blue for sales, teal for orders, red for returns and so on.
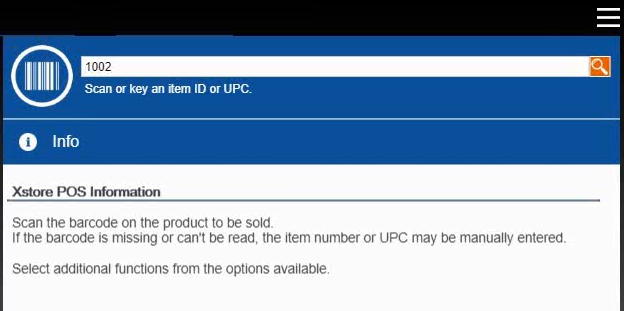
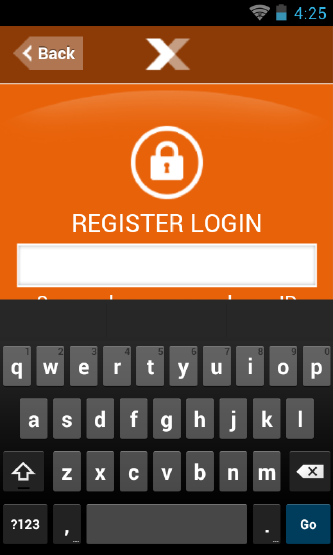
A text field is used for keying in information. When a text field is selected, an on-screen keyboard opens on the mobile device, which you can use to enter the requested information.
The appearance of the keyboard will depend upon the device on which you run Xstore Mobile.
Figure 1-6 Text Field with Keyboard Example
By selecting a button on the screen, you select the action that button performs. Buttons can take many forms, depending on their use.
Table 1-3 Buttons
| Buttons | Description |
|---|---|
 |
Standard Buttons |
|
|
Back Button |
|
|
Context Menu Button |
|
|
Item Lookup Button |
The Back button exits out of the current activity and returns to the previous activity. You are prompted whether to save current work before canceling an action. The text in a Back button may differ and the activity to which it returns depends upon its location in the application.
The Context Menu Button opens a context menu.
When it is present, the Context Menu Button (touch icon) will always be in the upper-right hand corner of the screen.
The Context Menu Button will not be present on all screens.
The options in the context menu itself will depend upon the screen in which it is located.
The options available are equivalent to the Function buttons shown on the desktop.
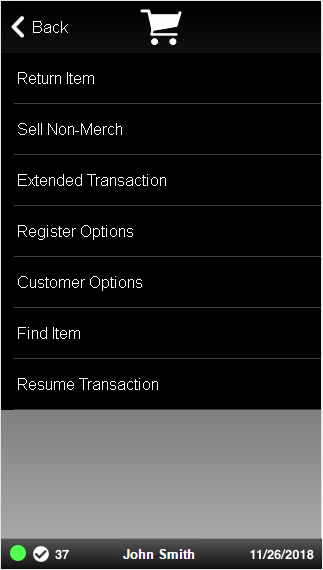
Examples of the Context Menu for the Mobile Handheld and Mobile Tablet are shown below:
Figure 1-8 Context Menu on Mobile Tablet
Figure 1-9 Context Menu on Mobile Handheld
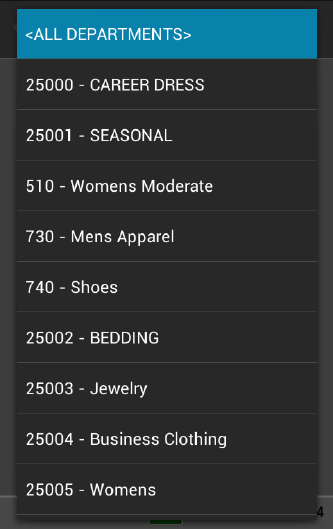
A selection menu displays a list of options among which one item can be picked. Selection menus are generally used as part of a set of entry fields within a form.
A closed selection menu displays the option that has been selected (below).
Figure 1-10 Selection Menu Displaying Selected Option

To change the option selected, select the selection menu to display the list of possible options (right), then select the correct option in the list.
A list displays a series of items. Each item in the list can be selected to open it.
Lists are frequently used to display search results, such as customers returned by a Change Country, or documents returned when you Search for a Receiving Document.
Lists are also used for standard menus throughout the Xstore Mobile application.
The status bar is shown on the bottom of the screen. It is divided into three parts, each displaying information about the system.
The status bar has the following organization:
On the left, the register number and whether the register is open or closed.
If the register is open, the first indicator will be green and a check mark next to it.
If the register is closed, the first indicator will be red and a cross next to it.
In the center, the name of the logged-in user. If no user is currently logged in, nothing will be displayed in the middle.
On the right, Xstore Mobile displays the business date.
The Date/Time Picker is used on all date entry fields in both the Mobile Handheld and Mobile Tablet. Select the Month, Day and Year as required.
Figure 1-14 Mobile Tablet Date Picker Example
Select the Hour, Minute and AM/PM as required.
Figure 1-15 Mobile Tablet Time Picker Example
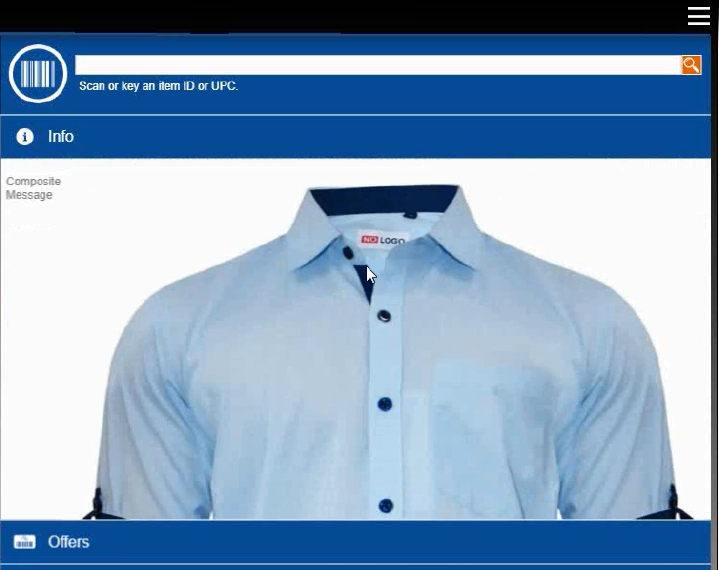
This window displays different messages that are selected by the options and they are equivalent to the tabs at the top of the window on the desktop version of Xstore.
In a base implementation, Xstore Mobile Tablet displays the following options:
Info Tab: The Info tab may display product-specific information for an item-entry scenario, customer/item detail information for a layaway transaction, or instructions for recording a repair or alteration selection.
Only one message displays per item in the Info tab. This may be a text message, an image or a composite message (graphic and text). This information may relate to the item directly or to recommend other products that relate to the item being purchased. A couple examples of this would be a customer purchasing a shirt that has a coordinating jacket and tie. These two items, the jacket and tie, could be set up to display on the Information Tab in Xstore for the associate to recommend to the customer. Another example would be the purchase of an item that would require another purchase, for instance a watch that does not come with a battery.
If DisplayMessageAsNotify setting is configured, then multiple item text messages pop up in Xstore during the sales process.
Customer Tab: Shows customer detail.
Tasks Tab: The Tasks tab displays open and in progress tasks with start date/time prior to the current date and end date/time equal to the current date or in the future. Tasks shown here are view only.
The following information is displayed for each task:
Activity - The type, status, and description associated with the task.
Associate - The assigned associate, appointment start date and time, and end date and time.
Goals Tab: The Goals tab displays information from the corporate office about the goals set for your store for a specified date range. You are not required to log in to view store goals. These goals are visible to all employees.
The goals are listed in the following order:
Completed goals
Active goals
Future goals
The goals are displays in color, based on their status:
Green - Goals completed and met.
Red - Goals completed but not met.
Black - Active, current, and future goals.
Each goal has an effective date and an end date. The store goal is shown in the Goal column and the current amount achieved toward the goal is shown in the % To Date column.
|
Note: Future goals display ”N/A”' in the % To Date column until they become active. |
Sales Goal to date progress is calculated using net sales. Progress toward store goals can also be found in the Store Goals report and on the Dashboard.
Offers Tab: The Offers tab displays e-awards, coupons and entitlements that are available and whether they have been applied to the transaction. When a customer is linked to a transaction, the number of offers is displayed. As qualifying items are added to the transaction, entitlements are automatically applied to the basket. Coupons need to be scanned or entered to be applied to the transaction. The different offer types are represented by distinguishing icons on both the offers tab and the sales display panel.
The following information is displayed for each offer:
Offer ID - ID for the e-award, coupon or entitlement.
Description - Description of the coupon.
Expires - Expiration of offer.
Applied? - Indicates whether the coupon has been applied to the transaction.
If a customer decides they do not want to use an offer for that transaction, it can be removed manually. To remove an offer, select the discount from the sales display panel and void the line from the transaction. The offer shows as canceled under the applied column.
Associated Items Tab: This tab allows users to call customers' attention to items they may be interested in, based upon their purchases. Oracle Retail Xstore Point of Service displays a picture of each item, with a description of the item beneath it.
Messages Tab: You are not required to log in to view messages. These messages are visible to all employees. The information shown on the Messages tab may be from the corporate office, or from your store management.
Messages require no action, and may be store-specific (only displayed in your store, not corporate-wide) or register-specific (only displayed on a designated register).
These messages are time-based and do not display after the expiration date has passed.
|
Note: If the message contains a URL, click the link icon to open the URL. |
Messages use icons to indicate priority:
Exclamation Point - High priority
No icon - Medium priority
Down Arrow - Low Priority
Keypad Tab: The keypad option displays a numeric keyboard for entering numbers. The keypad automatically displays when you are in a field requiring a numeric value such as the Tender field.