In each preview session, the Preview toolbar appears at the top-of the browser window.

Use these controls to change preview options while you are in the preview session:
User/Site - Displays the Preview Launcher dialog, where you can select a different landing page, user profile, and optionally, site for the preview session.
Date/Time - Displays the Preview by Date/Time dialog, where you can select a different date and time for the preview session.
Promotions - Displays the Promotions Visibility window. For more information, see Previewing and Testing Promotions.
Note: Changes to Preview options are not saved when you log out of Merchandising.
Changing the Date and Time for a Preview Session
You can choose to preview how your site would look if your changes were deployed right now or at a future date and time. For example, suppose you are working on a seasonal microsite that will not go live until next month. If you set the preview date to the go-live date (specified by the assets’ Start Date property), you can see how your site will look on the day of the launch.
To change the date and time for a preview session, complete the following steps:
Click the Date/Time icon in the Preview toolbar to display the Preview by Date/Time dialog.
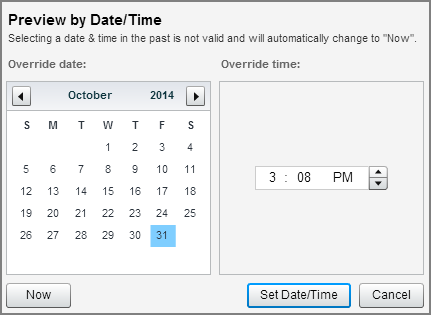
To preview assets as they will appear at a future date and time, click the calendar and select a date. Use the up and down arrows to set the hour, minute, and AM/PM portions of the time.
Note: The date and time are evaluated based on the date and time on the server.
To preview assets as they appear right now, click the Now button.
Click Set Date/Time.
The Preview toolbar changes to show the new preview date and time and to remind you that you are previewing assets as they will appear on that future date.

(Optional) To set the Preview date and time back to Now, click the X icon in the Date/Time control.
