3 Templates
Templates provide modified STA screen views that can be saved, reused, and shared with other users. This chapter describes the concepts and detailed procedures for creating, using, and managing templates.
This chapter includes the following sections:
Using Templates
Templates are available for the Dashboard and all screens on the Tape System Hardware and Tape System Activity tabs. They are not available for screens on the Setup & Administration tab.
Templates are screen-specific; a template for the Drives – Overview screen can be applied to that screen only and cannot be applied to the Drives – Analysis screen, for example. Each screen has a default template, which is the one that is automatically applied when you first navigate to that screen in a login session.
To apply a different template to a screen, you simply select the template you want to use from the Templates menu in the Templates toolbar. If you leave the screen and later return, the last-used template remains applied.
Template Defaults
In any given login session, the first time you navigate to a screen, the screen is displayed using the default template. Each screen has its own default, which you can designate. The default templates for each screen are user-specific, so each STA username may have its own set of assigned defaults. Each screen can have only one default.
You can assign defaults for your current STA username only. See "Set the Default Template for a Screen" and "Clear the Default Template for a Screen" for instructions.
The predefined templates provided with STA include a set of initial screen defaults. These templates are all named "STA-Default," one for each screen.
Predefined Templates
STA is delivered with a set of predefined templates that provide frequently used information about library resources (such as libraries, drives, media) and events (such as exchanges and cleaning activities). To make predefined templates easy to identify, their names are prefixed "STA-".
Predefined templates are available to all users, but only users with Operator or Administrator privileges can make changes to them. You cannot modify the predefined templates directly; instead, you must save any changes to a new, custom template. You can, however, delete predefined templates that you do not use and then later restore them.
Custom Templates
Any number of custom templates can be created for each screen. Only users with Operator or Administrator privileges can create or modify custom templates.
You create a custom template by modifying the current screen—such as changing graphed attributes, re-ordering columns in a list view table, or applying filter criteria—and then saving the new display as a template. When you save a template you assign it a name and designate its visibility (public or private) setting.
Note:
STA predefined templates are always prefixed "STA–"; therefore Oracle recommends that you not use this prefix when naming custom templates.Once you have saved a custom template, it is immediately available for the current and future login sessions.
User Roles for Template Usage Activities
Some template activities can be performed by all user roles, whereas others are available only to users with Administrator or Operator privileges. The following table provides a summary of activities available to each role.
Note:
Regardless of user role, you have access to all public templates and private templates owned by your current STA username. You cannot use private templates owned by another STA username.| User Roles | Template Activity | Screen or Toolbar |
|---|---|---|
| Viewer and above | Apply a template to the current screen
Set the current template as the screen default for your STA username |
Template toolbar |
| Viewer and above | Display a list of all templates available to your STA username
Navigate to a screen with the selected template applied |
Select Home, then select Quick Links. |
| Operator and above | Display a list of all templates available to your STA username
Change the default screen template for your STA username |
Select Setup & Administration, then select Template Management. |
Defining and Managing Templates
Templates include a variety of screen display characteristics, such as graph and table layouts and filter criteria. Applying a template to a screen updates the screen display so it matches the characteristics defined in the template.
STA provides a default template for each screen, as well as a set of predefined templates, which are available to all STA usernames. You can also create your own custom templates tailored to your needs and optionally share them with other users.
STA templates exhibit sticky behavior, in that once a template is applied to a screen, that template continues to be displayed whenever you access that screen during the remainder of the current login session, until you explicitly apply a different template.
Screen Characteristics Included in the Template Definition
Changes to the following screen characteristics are saved as part of the template definition:
-
Graph display details, such as:
-
Wide versus narrow view
-
Graphed attributes
-
Percent versus actual value display
-
Date range
-
Whether the Graphics Area is visible or collapsed (See the STA Screen Basics Guide for details.)
-
-
Table display details, such as:
-
Hidden and visible columns
-
Column order
-
Column width
-
-
Filter criteria
Screen Characteristics Not Included in the Template Definition
Changes to the following screen characteristics are not saved as part of the template definition:
-
Table resource selections applied to graphs
-
Table sort criteria
-
Specific data content
Template Ownership and Visibility
Ownership and visibility for available templates are displayed on the Templates Management screen, which is available to all users with Operator or Administrator privileges. The two concepts are explained below.
Ownership
A template is owned by the STA username that created it, and the ownership cannot be changed. In the case of STA predefined templates, the owner is always "STA". If you have Operator or Administrator privileges, you can use, modify, rename, delete, and assign default status to any templates you own.
Visibility
A template's visibility determines who can see and use the template. A template's visibility can be changed only by the owner. Visibility is either public or private, as follows:
-
Public – The template is available to all STA usernames. STA predefined templates are always public. If you have Operator or Administrator privileges, you can use, modify, and delete any templates that have public visibility, even if they are owned by another STA username.
-
Private – The template is available only to the STA username that owns it.
Note:
When an STA username is deleted, all private templates owned by that username are automatically deleted or made public, according to the selection made by the Administrator user performing the deletion. See "Delete an STA Username" for details.
Sharing Templates
You can share custom templates with other users through the STA import and export functions. For example, you can save a custom template, export it as an XML file to your local computer, and then email the XML file to another user. The other user can then log in to STA with their STA username, import the XML file, and begin using the template immediately.
See "Export a Template" and "Import a Template" for instructions. These activities require Operator or Administrator privileges.
User Roles for Template Management Activities
Template management template activities are available only to users with Administrator or Operator privileges. The following table provides a summary of activities available to each role.
Note:
You can manage public templates and private templates owned by your current STA username. You cannot manage private templates that are owned by another STA username.| User Roles | Template Activity | Screen or Toolbar |
|---|---|---|
| Operator and above | Create a template
Modify the appearance of a template—custom templates only Save a template to a new name—custom templates only Change the public or private visibility settings of a template—custom templates owned by your STA username only |
Template toolbar |
| Operator and above | Rename a template—custom templates only
Change the public or private visibility settings of a template—templates owned by your STA username only Export a template—custom templates only Import a template Delete a template Restore the STA predefined templates |
Select Setup & Administration, then select Templates Management |
Template Toolbars and Screens
This section describes the following toolbars and screens, which allow you to use and manage templates:
Templates Toolbar
For screens that have templates, the Templates Toolbar appears at the top of the main window area. It provides direct access to frequently used commands for applying and managing templates.
Description of the illustration ''if_toolbartemplates.jpg''
| Icon | Name | Description |
|---|---|---|
| Help | Displays help for template functions.
Related Topic: "Help" |
|
| Templates menu | Menu lists all available templates for this screen. The first entry is always "STA-Default". The list includes all predefined and custom templates available to the current user. Select a template to apply it to the current screen.
Related Topic: "Apply a Template" |
|
| Save Template | Allows you to save the current screen configuration, either as a new template or as a modification of an existing template (if you are the owner).
Note: This icon is available only for Operator and Administrator users. Related Topic: "Create a Template" and "Modify a Template" |
|
| Default Template | Allows you to set the current template as the screen default for the current STA username.
Related Topic: "Set the Default Template for a Screen" |
Template Quick Links Screen
The Quick Lists screen provides links to templates available to your STA username. Following is a sample of the default Quick Links screen provided with STA. Because the list is specific to the current STA username, your display may differ if other templates are available to your STA username.
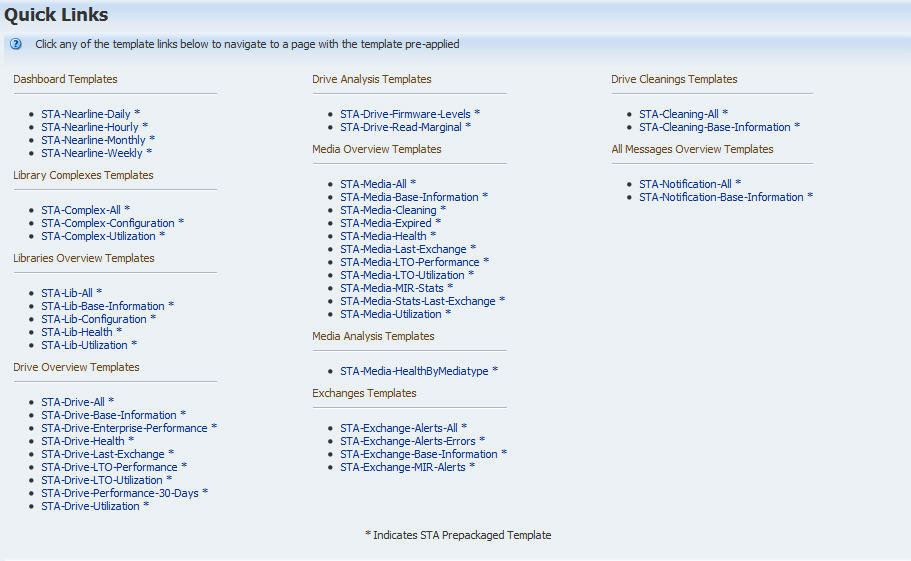
Description of the illustration ''if_quicklinkdef.jpg''
As shown in the following screen sample, each template name is a hot link, which you can click to navigate to that screen with the selected template automatically applied.
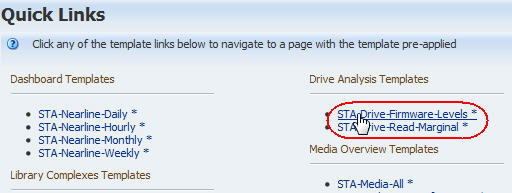
Description of the illustration ''if_quicklinklink.jpg''
The templates are grouped by screen, such as Libraries Overview Templates, Drive Analysis Templates, Exchanges Templates, and so on. Within each screen group, the templates are listed in alphabetical order. The list is automatically updated with new templates or template name changes.
Quick links are available for the following template types:
-
All predefined templates – These are identified with an asterisk (*) after the name
-
All custom public templates
-
All custom private templates owned by the current STA username
Note:
The Quick Links screen does not include the templates named "STA-Default" for each screen group. Therefore, if the only template available to your STA username for a particular screen is the one named "STA-Default," that group is not listed. It is added to the screen as soon as an available custom template is added.Templates Management Screen
The Templates Management screen, which is found on the Setup & Administration tab, is available only to Operator and Administrator users.
Following is a sample of the default Templates Management screen provided with STA. Because the list is specific to the current STA username, you may see different templates listed on your display.
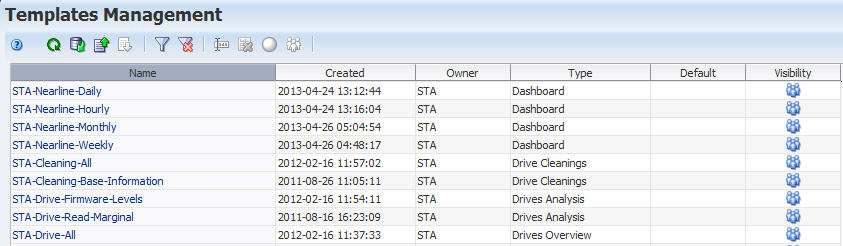
Description of the illustration ''if_tmptmgtdef.jpg''
As shown in the following screen sample, each template name is a hot link, which you can click to navigate to that screen with the selected template automatically applied.
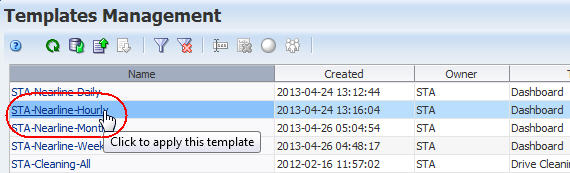
Description of the illustration ''if_tmptmgtlink.jpg''
Best Practices for Templates
This section provides tips for defining and using custom templates.
- Predefined template reserved names
-
When naming templates, do not start the name with "STA-". This prefix is used by STA for all predefined templates distributed with the STA package.
See "Custom Templates".
- Use consistent template names and prefixes
-
Include the first part of the template type consistently as part of the name. This makes it easier to know the purpose of imported or exported XML files. For example, if the template type is "Media Overview", then a good template name would be "Media-Exception".
- Create custom templates
-
Create custom templates that can be used to address the top three tape operation concerns at your site. Identifying your top uses for STA gives you a smaller, more understandable and manageable focus within its vast data mine.
See "Create a Template".
- Specific views and data
-
Using templates to create specific views that show only the items that interest you will speed up your use and navigation in the user interface by many times.
- Modify existing templates
-
When creating custom templates, there are probably already templates very close to what you need; modify existing ones rather than starting from scratch.
See "Modify a Template".
- Templates and filters
-
Remember to use filters to separate different parts of your operations. A Dashboard that allows you to compare and contrast the same attributes but in different parts of your library environment is invaluable. You must create them yourself onsite.
To create templates that are as flexible as possible, use general, rather than specific, filtering criteria; for example, when creating a template that filters by a time period, use "Number of Days" attributes instead of "Date" attributes.
- Exporting templates
-
After you have created a significant set of templates, be sure to export them to XML file format and save them outside of STA. Exporting and importing templates can also be a useful way of circulating and exchanging templates both on- and off-site.
See the following sections:
Template Usage Tasks
Apply a Template
Use this procedure to apply a template to the current screen. When you initially navigate to a screen in a login session, the default template for your STA username is applied automatically.
You can perform this procedure with any of the following methods:
Using the Templates Toolbar
Note:
This option can be performed by any user.-
In the current screen, select the Templates menu.
The menu displays all templates that are available to your STA username. The currently displayed template is identified in the dark area of the Templates field.
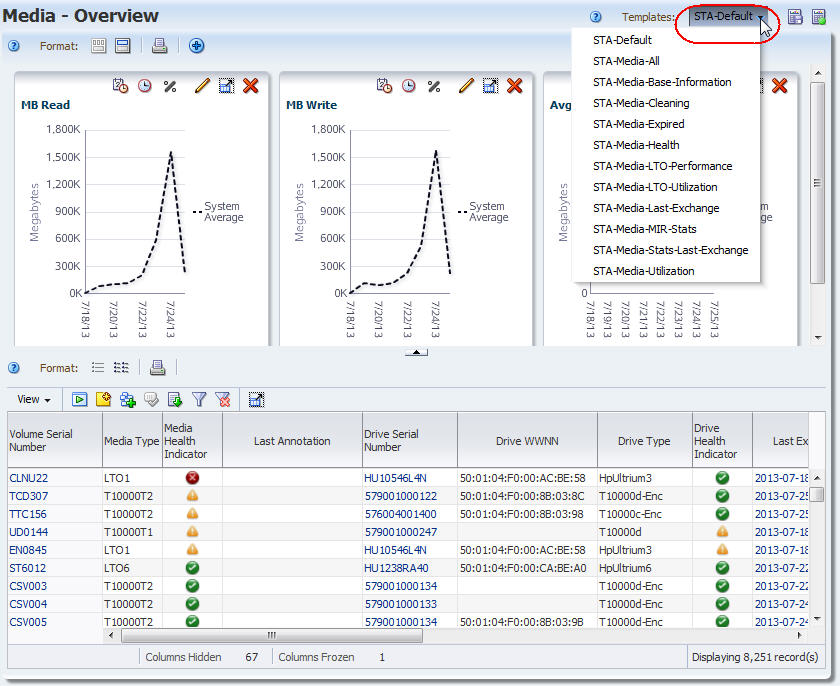
Description of the illustration ''if_tmptapply1.jpg''
-
In the Templates menu, select the template you want to apply.
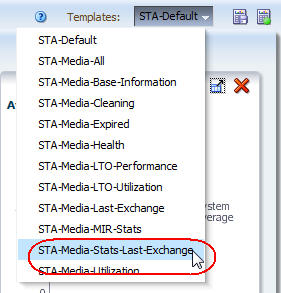
Description of the illustration ''if_tmptapplyselect.jpg''
The new template is applied.
Note:
You can always verify the currently applied template by viewing the name displayed in the Templates field.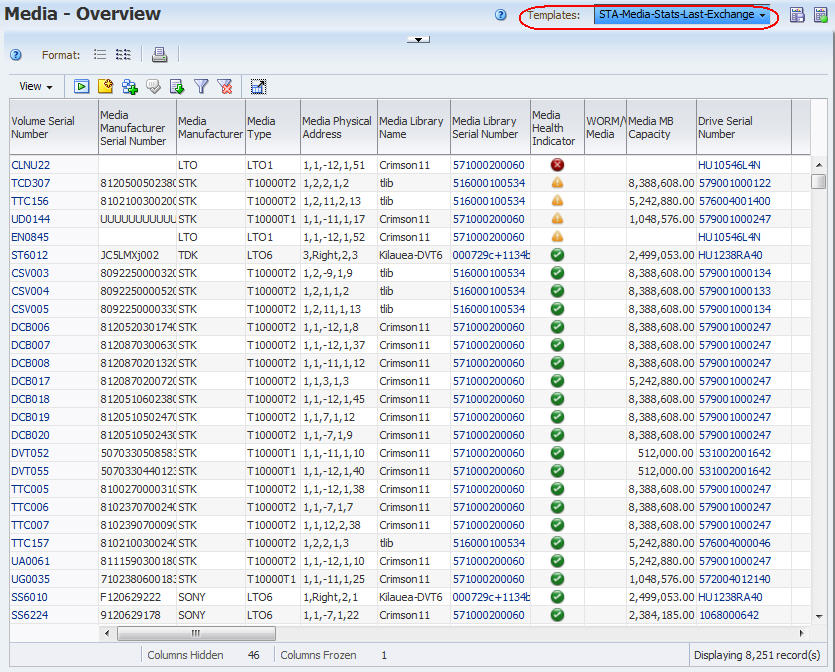
Description of the illustration ''if_tmptapplyafter.jpg''
From the Quick Links Screen
Note:
This option can be performed by any user.-
In the Navigation Bar, select Home, then select Quick Links
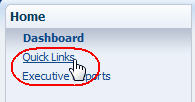
Description of the illustration ''if_navquicklink.jpg''
The screen displays templates available to your STA username.
Note:
The templates named "STA-Default" are not included in the list. -
Select the text link of the template you want to use.
-
You are taken to the screen with the selected template applied.
From the Templates Management Screen
Note:
This option requires Operator or Administrator privileges.-
In the Navigation Bar, select Setup & Administration, then select Templates Management.
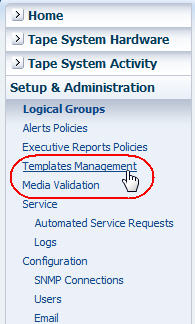
Description of the illustration ''if_navtmptmgt.jpg''
The screen displays all templates available to your STA username.
Note:
The templates named "STA-Default" are not included in the list. -
Select the text link of the template you want to use.
-
You are taken to the screen with the selected template applied.
Set the Default Template for a Screen
Use this procedure to assign a template as the screen default for your STA username. You can set only one default per screen, although each STA username can have its own set of defaults.
Note:
You cannot assign default templates for other STA usernames.You can perform this procedure with either of the following methods:
From the Templates Toolbar
-
In the current screen, from the Templates menu select the template you want to be the default.
Description of the illustration ''if_tmptapplyselect.jpg''
The template is applied.
-
In the Templates menu, click Default Template.
The template is updated to be your default for this screen.
From the Templates Management Screen
Note:
This option requires Operator or Administrator privileges.-
In the Navigation Bar, select Setup & Administration, then select Templates Management.
-
Select the template you want to be the default for the selected screen.
-
Click Set Default in the Templates Management toolbar.
The template is updated to be your default for the selected screen. This update does not take effect until your next login session.
Clear the Default Template for a Screen
Use this procedure to clear the default template setting for a screen and re-assign the "STA-Default" template as the screen default for your STA username.
Note:
You cannot clear default templates for other STA usernames.Note:
This procedure requires Operator or Administrator privileges.-
In the Navigation Bar, select Setup & Administration, then select Templates Management.
-
Select the template you want to be the default for the indicated screen type.
-
Click Clear Default in the Templates Management toolbar.
The "STA-Default" template is re-assigned as your default template for the selected screen.
Template Management Tasks
Create a Template
Use this procedure to create and save a new template for the current screen. You can designate whether the template will be available to your STA username only or to all.
Note:
This procedure requires Operator or Administrator privileges.-
Apply the desired changes to the current screen.
Note:
See "Screen Characteristics Included in the Template Definition" for the types of screen changes that can be included in a template.In the following example, the Media – Overview screen has been modified by collapsing the graphics pane so that only the tables area is visible.
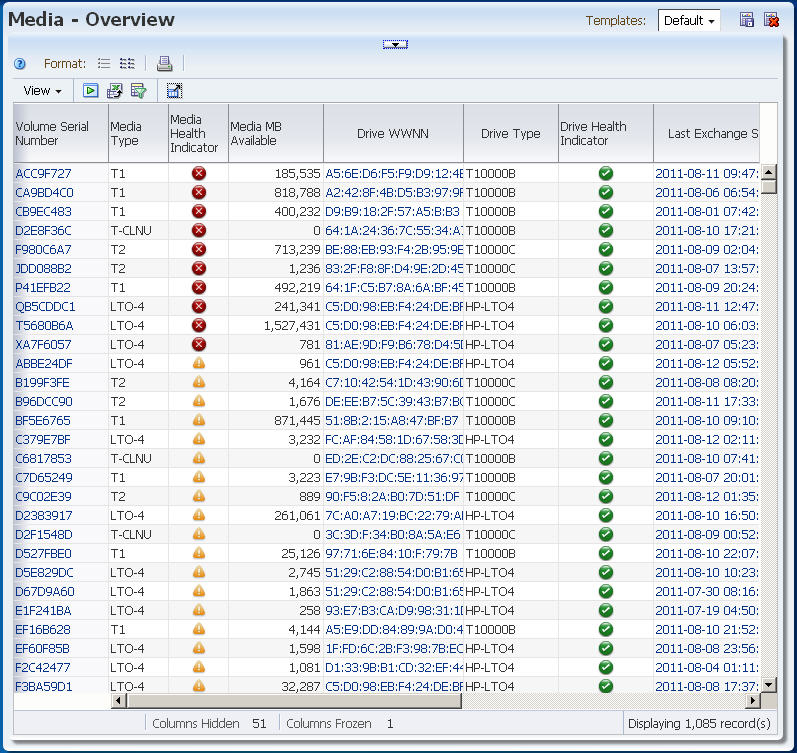
Description of the illustration ''if_tmpttableonly.jpg''
-
When you have made all the modifications you want, click Save Template.

Description of the illustration ''if_tmptsave.jpg''
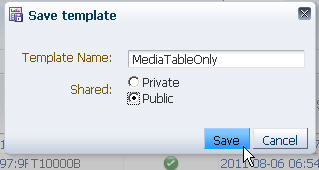
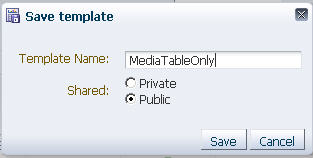
The Save Template dialog box appears.

Description of the illustration ''if_tmptsaved.jpg''
-
Complete the Save Template dialog box, as follows:
-
In the Template Name field, type a new, unique name.
Note:
If the name already exists, when you click Save, depending on your user Confirmations preferences, you may be asked to confirm whether you want to overwrite the existing template. See "Modify a Template" for instructions. -
In the Shared field, select a visibility option. See "Template Ownership and Visibility" for additional information.
-
Private – The template will be available to the current STA username only.
-
Public – The template will be available to all STA usernames.
-
-
-
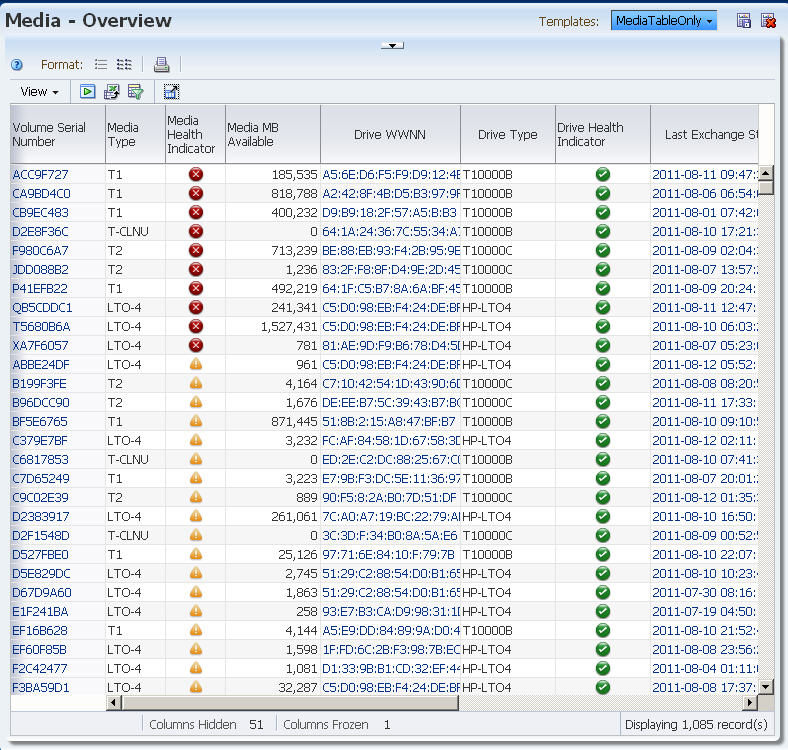
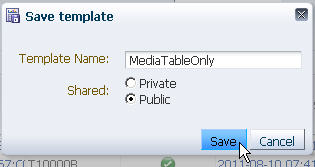
Click Save.
Description of the illustration ''if_tmptsavedsave.jpg''
The template is saved and the name is displayed in the Templates menu.

Description of the illustration ''if_tmptnewsaved.jpg''
Modify a Template
Use this procedure to modify an existing template for the current screen. You can modify any custom template owned by your STA username.
You must be the owner of the template to modify it directly. To modify an STA predefined template or public template owned by another STA username, you must save the modifications to a new name. See "Create a Template" for instructions.
Note:
This procedure requires Operator or Administrator privileges.-
In the Templates menu, select the template you want to modify.
The template is applied to the screen.
Description of the illustration ''if_tmptmodify1.jpg''
-
Make the screen changes you want to include in the template.
Note:
See "Screen Characteristics Included in the Template Definition" for the types of screen changes that can be included in a template.In this example, the screen is modified by applying the filter, "Media Type=TCLNU".
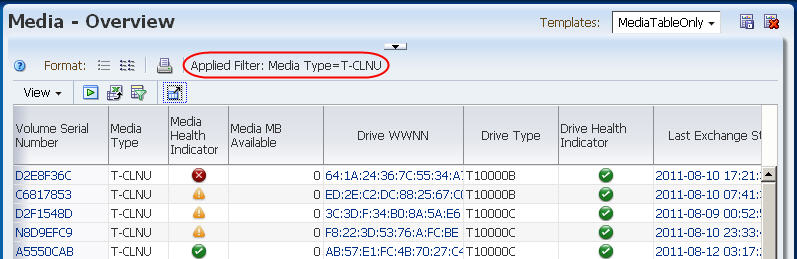
Description of the illustration ''if_tmptmodify2.jpg''
-
Verify your changes, and then click Save Template in the Templates Toolbar.

Description of the illustration ''if_tmptmodifysave.jpg''
The Save Template dialog box appears, and the current template name is supplied in the Template Name field.
Description of the illustration ''if_tmptmodifysaved.jpg''
-
Complete the Save Template dialog box, as follows:
-
Leave the Template Name field as is.
-
Depending on whether you want to modify the visibility of the template, either select an option in the Shared field or leave the field as is:
-
Private – The template will be available to the current STA username only.
-
Public – The template will be available to all STA usernames.
-
-
-
Click Save.
Description of the illustration ''if_tmptmodifysavesave.jpg''
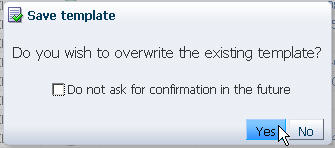
The Template Overwrite Confirmation dialog box appears.
Note:
This dialog box does not appear if it has been turned off. See the STA Screen Basics Guide for details.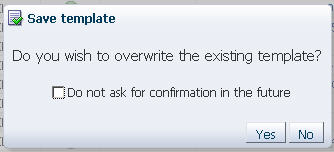
Description of the illustration ''if_tmptmodifyoverwrite.jpg''
-
Click Yes to confirm the modification.
Description of the illustration ''if_tmptmodifyoverwritey.jpg''
The template is updated with the changes you have specified.
Rename a Template
Use this procedure to rename an existing custom template. You can rename any custom template available to your STA username, even if you are not the owner. You cannot rename STA predefined templates.
Note:
This procedure requires Operator or Administrator privileges.-
In the Navigation Bar, select Setup & Administration, then select Templates Management.
-
Select the custom template you want to rename.
-
Click Rename in the Templates Management toolbar.
The Rename Template dialog box appears.
-
In the New Name field, type the name you want to assign. Your entry must be unique; you cannot enter a name that has already been assigned.
-
Click OK.
The name is updated.
Change the Visibility (Public or Private) Settings for a Template
Use this procedure to assign public or private visibility to a template owned by your STA username.
Note:
This procedure requires Operator or Administrator privileges. In addition, your STA username must be the owner of the template.-
In the Navigation Bar, select Setup & Administration, then select Templates Management.
-
Select the template you want to modify.
If the template is currently private, the Make Template Public icon in the Templates Management toolbar becomes active. If the template is currently public, the Make Template Private icon becomes active.
-
Click Make Template public/ private.
The template is updated to according to your selection.
Export a Template
Use this procedure to export a custom template from the STA application to your computer in XML format. This allows you to share custom templates with other users.
You can export any custom template available to your STA username, even if you are not the owner. You cannot export STA predefined templates.
Note:
This procedure requires Operator or Administrator privileges.-
In the Navigation Bar, select Setup & Administration, then select Templates Management.
-
Select the custom template you want to export.
-
Click Export in the Templates Management toolbar.
The file is downloaded to your computer according to your browser settings. See your browser documentation for details. Following is a sample dialog box you might see on a computer running Windows. Note that the file will be saved with a .xml extension.
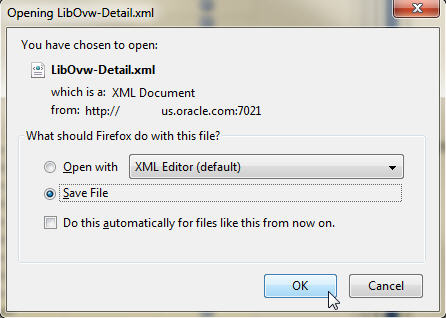
Description of the illustration ''if_tmptexportd.jpg''
Import a Template
Use this procedure to import an STA template received from another source so it is available to your STA username. This allows another user to export and email a custom template to you for your use. See "Sharing Templates" for additional information.
Note:
This procedure requires Operator or Administrator privileges.The template you want to import must be located on a drive accessible to your computer, such as a local drive, network drive to which you are connected, or a flash drive mounted on your computer.
-
In the Navigation Bar, select Setup & Administration, then select Templates Management.
-
Click Import Template in the Templates Management Toolbar.
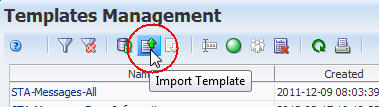
Description of the illustration ''if_tmptimport.jpg''
The Import Template dialog box appears.
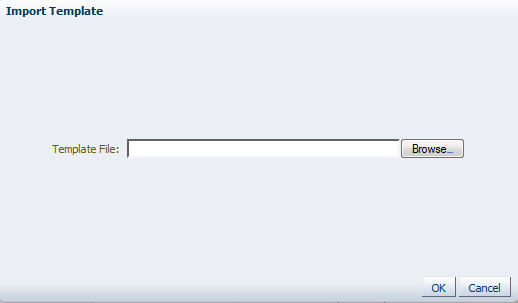
Description of the illustration ''tmpt_importd.jpg''
-
Click Browse and navigate to the location of the template file you want to import.
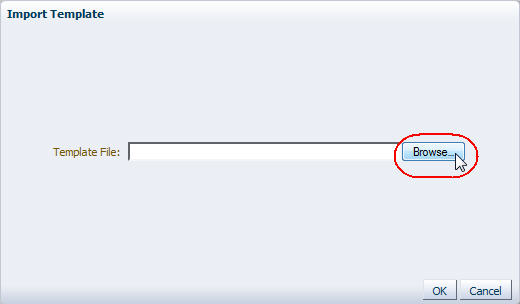
Description of the illustration ''tmpt_importdbrowse.jpg''
A navigation dialog box appears according to your browser settings. See your browser documentation for details.
-
Use the navigation dialog to locate the template file and upload it. The file must have a .xml extension.
-
The template is added to the list. The assigned Owner is your STA username, and the Visibility is set to Private.

Description of the illustration ''tmpt_importdone.jpg''
Delete a Template
Use this procedure to delete a template from the STA application. The template is deleted for all STA usernames.
You can delete any custom template available to your STA username, even if you are not the owner. You can also delete STA predefined templates, except for the templates named "STA-Default."
Note:
This procedure requires Operator or Administrator privileges.Note:
If you delete STA predefined templates, you can later restore them. See "Restore the STA Predefined Templates" for details.Note:
If the deleted template was the screen default for any STA usernames, then the "STA-Default" template for that screen becomes their new default.-
In the Navigation Bar, select Setup & Administration, then select Templates Management.
-
Select the template you want to delete.
-
Click Delete in the Templates Management toolbar.
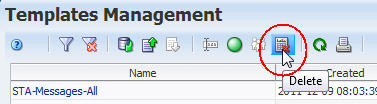
Description of the illustration ''if_tmptdelete.jpg''
The Delete Template confirmation dialog box appears.
Note:
This dialog box does not appear if it has been turned off. See the STA Screen Basics Guide for details.
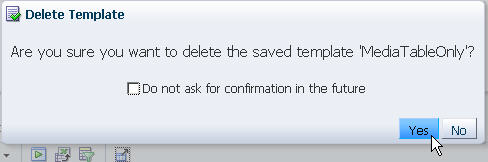
Description of the illustration ''if_tmptdeleteconf.jpg''
-
Click Yes to confirm the deletion.
Description of the illustration ''if_tmptdeleteconfy.jpg''
The template is deleted and the Templates Management list is updated.
Restore the STA Predefined Templates
Use this procedure to restore the STA predefined templates after deleting them.
Note:
This procedure requires Operator or Administrator privileges.Note:
This procedure does not affect custom templates you have created.-
In the Navigation Bar, select Setup & Administration, then select Templates Management.
-
Select Restore Predefined Templates from the Templates Management toolbar.
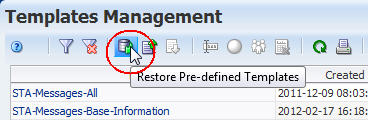
Description of the illustration ''tmpt_restore.jpg''
The template Reset dialog box appears.
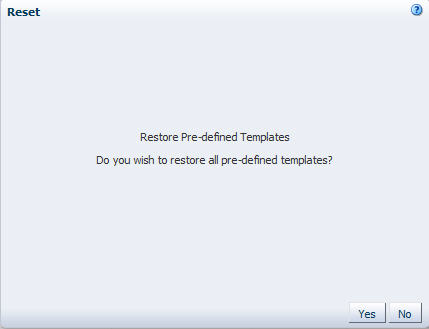
Description of the illustration ''if_resettemplates.jpg''
-
Click Yes.
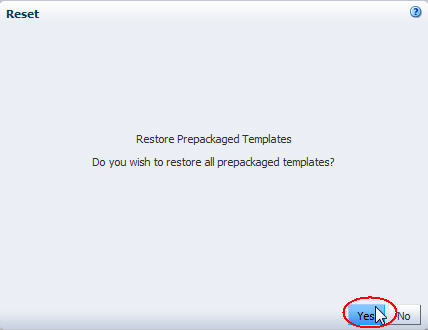
Description of the illustration ''if_resetyes.jpg''
The predefined templates are immediately restored to the STA application and available to all users. Any custom templates you have created are also still available. The Templates Management list is updated.