Define Alert Policies
An administrator user can define and enable alert polices.
Create, Copy, or Modify an Alert Policy
Use the Alert Policies Wizard to create, copy, or modify an alert policy.
Caution:
The STA sample policies are not write-protected. You cannot restore the original versions once they are modified. Copy the original version before making modifications.-
You must have Administrator privileges.
-
In the left navigation, expand Setup & Administration, then select Alerts Policies.
-
Use the toolbar to:
-
Create a new policy: Click New Alert Policy
 .
. -
Copy a policy: Select a policy in the list, and then click Copy Alert Policy
 .
. -
Modify a policy: Select a policy in the list, and then click Edit Alert Policy
 .
. -
Delete a policy: Select a policy in the list, and then click Delete Alert Policy
 .
.
-
-
Use the wizard to configure the policy. Proceed to Alert Policy Wizard.
Alert Policy Wizard
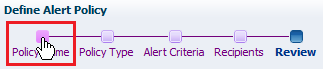
The policy wizard appears whenever you create, modify, or copy an alert policy.
Within the wizard, you can select the breadcrumb links to go directly to any screen you have already visited.
-
On the Policy Name screen of the wizard, enter:
-
Policy Name — a unique name using any alphanumeric characters up to 250 characters in length. All sample alert policies beginning with "STA," so you should not start with this prefix.
-
Policy Description (optional) — This information is included in alert emails. You may want to use this field to specify recommended corrective actions for alerts generated by this policy.
-
-
On the Policy Type screen of the wizard, select:
-
Entity Type — The type of library system component for which this policy may generate alerts. Options include libraries, drives, media, exchanges, and media validations. See Alert Entities for a complete list.
-
Severity — The severity level of the alert policy. Determines the frequency with which alerts may be generated whenever the criteria defined by this policy are met. See Alert Severities for information about severity levels.
-
-
On the Alert Criteria screen of the wizard, specify filters you wish to apply.
See Filter Using the Dialog Box.
You can define alerts based on any attribute available for the selected alert Entity. However, not all attributes create events that will actually trigger an alert. In addition, for Media Validation alert policies, alerts are triggered by final validation results only, not intermediate results.
-
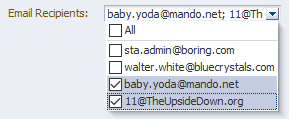
On the Recipients screen of the wizard, select the Email Recipients.
-
On the Review screen:
-
Verify that all the policy information is correct.
-
Use the Enable Alert Policy checkbox as follows:
-
Select the check box to create the policy and enable it immediately.
-
Deselect the check box to create the policy but leave it disabled for now.
-
-
Modify Email Recipients for an Alert Policy
Add or remove email recipients for an alert policy. Recipients receive a notification for all alerts generated by the policy.
-
You must have Administrator privileges.
-
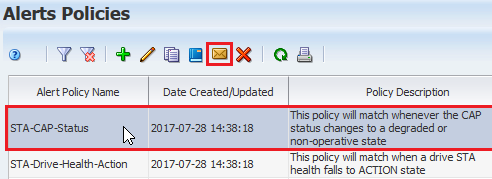
In the left navigation, expand Setup & Administration, then select Alerts Policies.
-
Select a policy in the list, and then click Edit Email Recipients
 .
.
-
From the Email Recipients drop-down, select addresses that you want to receive alerts. Deselect the addresses you do not want to receive alerts.
-
Click OK.
See Also:
Enable or Disable an Alert Policy
Choose to enable or disable an alert policy. Only enabled policies generate alerts.
-
To ensure email recipients are notified of all alerts generated by a particular policy, you should add the recipients to the policy before enabling it.
-
You must have Administrator privileges.
-
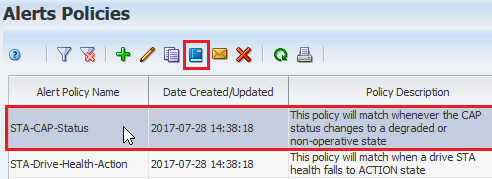
In the left navigation, expand Setup & Administration, then select Alerts Policies.
-
Select the policy in the list, and then click Enable Alert Policy
 or Disable Alert Policy
  .
.-
If enabled, the corresponding tape library resources or events are immediately evaluated against the policy criteria, and alerts are generated.
-
If disabled, alerts are no longer generated for the policy.
-