The My Activities view is your main work area. Use this area to view your assigned activities. When you select an activity in the activity pane, all panels on the right, which include the progress panel, Steps panel, and Codes and UDFs panel, display information for the activity. Use the progress panel to update your activities to show progress.
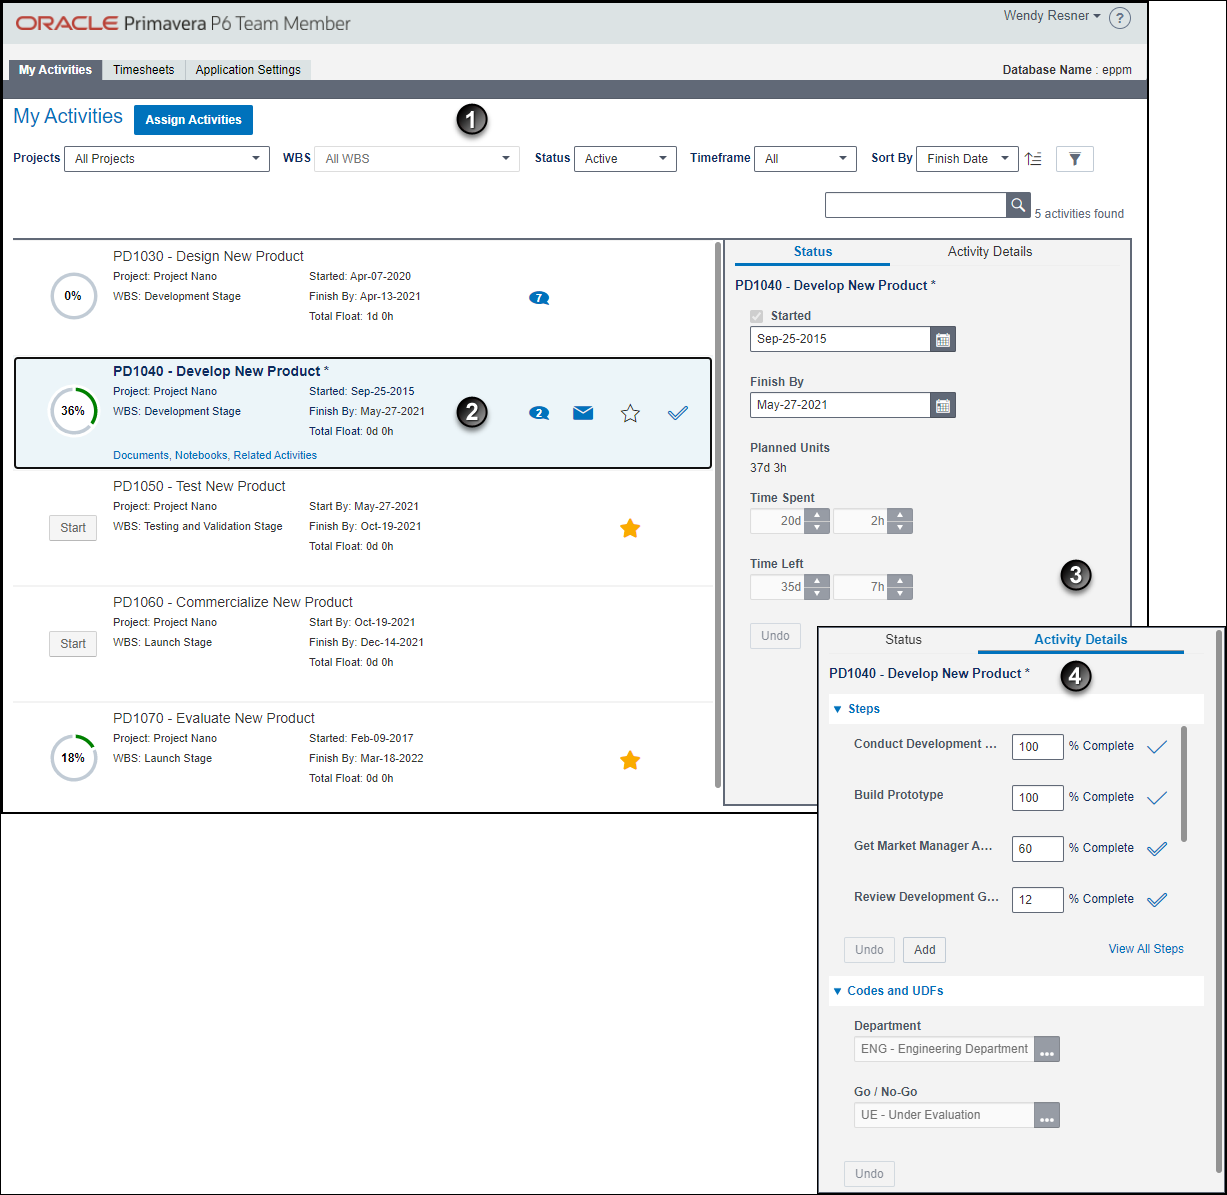
Table of Screen Highlights
Item | Description |
|---|---|
| Control bar: In this area you can assign yourself to activities, filter the tasks in your view, and search for tasks. When you make changes to activities, you can see a count of the number of activities you have updated. The count is reset when you select Save or Cancel. Changed activities that have not yet been saved show with an asterisk * and italicized text. Note: WBS (work breakdown structure) is a project management term used for the logical breakdown and arrangement of activities in a project. The WBS path helps you to understand exactly where your activity fits within the scope of the project. |
| Activity cards: Each activity is represented by an activity card in the main area of the screen. The activity card provides important status information and allows you to perform actions for the activity. Here you can see whether you are assigned to the activity via an Assignment or as the Owner. A project level administrative setting controls whether you see an activity multiple times on the My Activities page depending on whether you are a resource, primary resource or the owner. A progress indicator for each activity provides a visual representation of your progress. The indicators are color coded to allow you to view your progress at a glance. A green indicator shows the finish date for the activity has not been reached and a red indicator shows that the finish date is in the past and the activity is now overdue. On the activity card you can:
|
| Status tab: Use this area to communicate dates and time worked. The fields available in your view are set by your project manager. Status Other Resources link: Opens a dialog box showing other resources' assignments on the selected activity. This link only appears if the system is set up to allow you to update status for other resources. Baseline Dates: Allows you to view the baseline dates for an activity. This section only appears if the system is set up to allow you to see baseline dates.
|
| Activity Details tab: Use this area to view and update more detailed information about the activity. The fields available in your view are set by your project manager. Steps: Allows you to see and update steps for the activity. The project manager can configure the system to allow you to add new steps. This section only appears if the system is set up to allow you to see steps. Codes and UDFs: Allows you to see codes and UDFs assigned to an activity. The project manager can determine the codes and UDFs you can see and whether you are allowed to edit them. This section only appears if the system is set up to allow you to see codes and UDFs. |