Importing and Exporting Components
You can import and export both integrations and lookups to share them between Integration Cloud Service environments.
See the following topics:
Exporting an Integration
Once you create an integration, you can export that integration as a JAR file for use in other Integration Cloud Service environments or import the integration into Oracle JDeveloper to perform an advanced XSLT mapper task (for example, creating variables or using templates) that you cannot perform in the Integration Cloud Service mapper. After mapper editing in Oracle JDeveloper is complete, the mapper file can then be imported back into Integration Cloud Service. You can export an integration from either the Integration Designer or from the Integrations list.
To export an integration:
- On the toolbar, click Designer.
- On the Designer Portal, click Integrations.
- Do one of the following:
- Select the integration in the Integration Designer, click Actions, and then select Export.
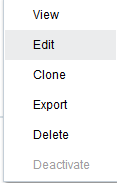
- Locate the integration to export in the Integrations list on the left side of the page. Click the vertical lines icon to the right in the integration’s row, and then select Export.
- In the dialog that appears, select Save File, and then click OK.
- Save the file to the location you want.
Importing an Integration
You can import integrations that were previously exported as a JAR file from Integration Cloud Service.
Note:
Even though the Activate button is enabled after you import an integration, you must first configure your connection endpoints. If you do not, you receive an error when trying to activate the integration. For information about editing connections, see Editing a Connection and Adapter Configuration Reference.Exporting a Lookup
Once you create a lookup, you can export that lookup for use in other Integration Cloud Service environments. You can export a lookup from either the Lookup Designer or from the Lookups list.
- On the toolbar, click Designer.
- On the Designer Portal, click Lookups.
- Do one of the following:
- Locate the lookup to export in the Lookups list on the left side of the page. Click the vertical lines icon to the right in the lookup’s row, and select Edit. In the upper right corner, click Actions, and select Export.
- Locate the lookup to export in the Lookups list on the left side of the page. Click the vertical lines icon to the right in the lookup’s row, and select Export to CVS.
- In the dialog that appears, select Save File, and then click OK.
- Save the file to the location you want.
Importing a Lookup
You can import lookups that were previously exported from Integration Cloud Service.
DVM,table_name
The second row contains the names of the adapters that are being mapped. Use the following case-sensitive IDs for each adapter:
| Adapter Name | Identifier to Use in the Import File |
|---|---|
| Oracle Eloqua Cloud | eloqua |
| Oracle Sales Cloud | osc |
| Oracle Messaging Cloud Service | oms |
| Oracle RightNow Cloud | rightnow |
| Oracle HCM Cloud | hcm |
| Oracle ERP Cloud | erp |
| Salesforce Cloud | salesforce |
