18 Workspaces
Workspaces are containers for organizing your notebooks and workflows.
About Workspaces
Workspaces are isolated logical containers that organizes your Oracle AI Data Platform Workbench notebooks, files, folders, workflows and compute clusters.
A workspace establishes a mapping between the file-like resources you need (e.g. notebooks, files, folders) with corresponding workflow resources (e.g. jobs, job runs) and corresponding compute clusters.
One AI Data Platform Workbench instance can have multiple workspaces. A default workspace is created while creating your AI Data Platform instance. You can create additional workspaces within the same AI Data Platform Workbench instance depending on your business needs. For example, you can create different workspaces for different teams or business units (e.g. Sales, Marketing, Engineering).
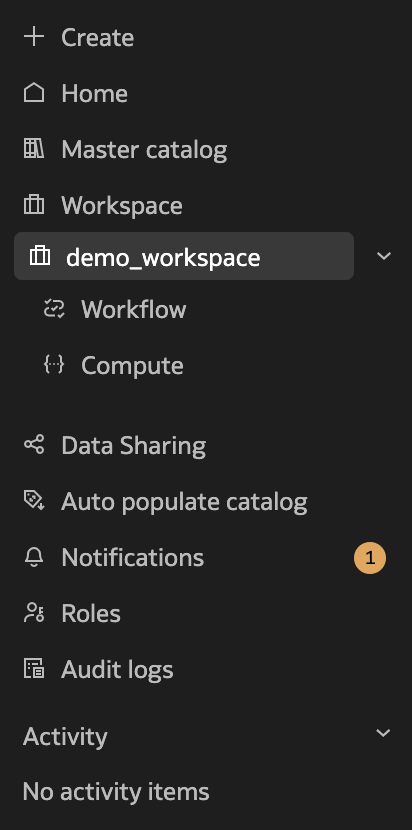
From OCI console, clicking on your AI Data Platform Workbench instance takes you to the AI Data Platform Workbench Homepage. At the left-most navigation pane of the Homepage, you need to select a specific workspace before accessing the workspace files, folder, notebooks, workflows and compute clusters.

Adding Resources to Workspaces
Within a workspace, new files, folders, notebooks and jobs can be created
from scratch using the ![]() button.
button.
New files, folders or notebooks can also be uploaded from the local machine. Multi-file upload is coming soon.
Folders
You can use folders in your workspaces to help organize files and other folders containing code, libraries, configurations, metadata or data.
When you create a new workspace, it automatically begins with a Shared folder. You can create additional folders to help organize your files.
You can manage permissions to your folders and assign who can view and modify the content of each folder. For more information, see Workspace Folder Permissions.
When you delete a folder, you will delete all data and metadata contained in that folder.
Editing and renaming workspace resources
You can edit the contents of and rename the files, folders, notebooks or jobs within a workspace.
When you click on a workspace resource, depending on the resource type, the corresponding editor will open where they can be edited and renamed inline. For example, notebooks will open in a notebook editor.
You can rename folder names and descriptions inline at the top of the workspace details page.
Create a Workspace
You create a workspace as a container for your files, folders, notebooks, workflows and compute clusters.
- On the Home page, click Workspace.
- Click
 Create Workspace.
 - Fill in the required details and select the default catalog you want your workspace to pull data from.
- Click Create.
Create a Workspace with Private Network Access Enabled
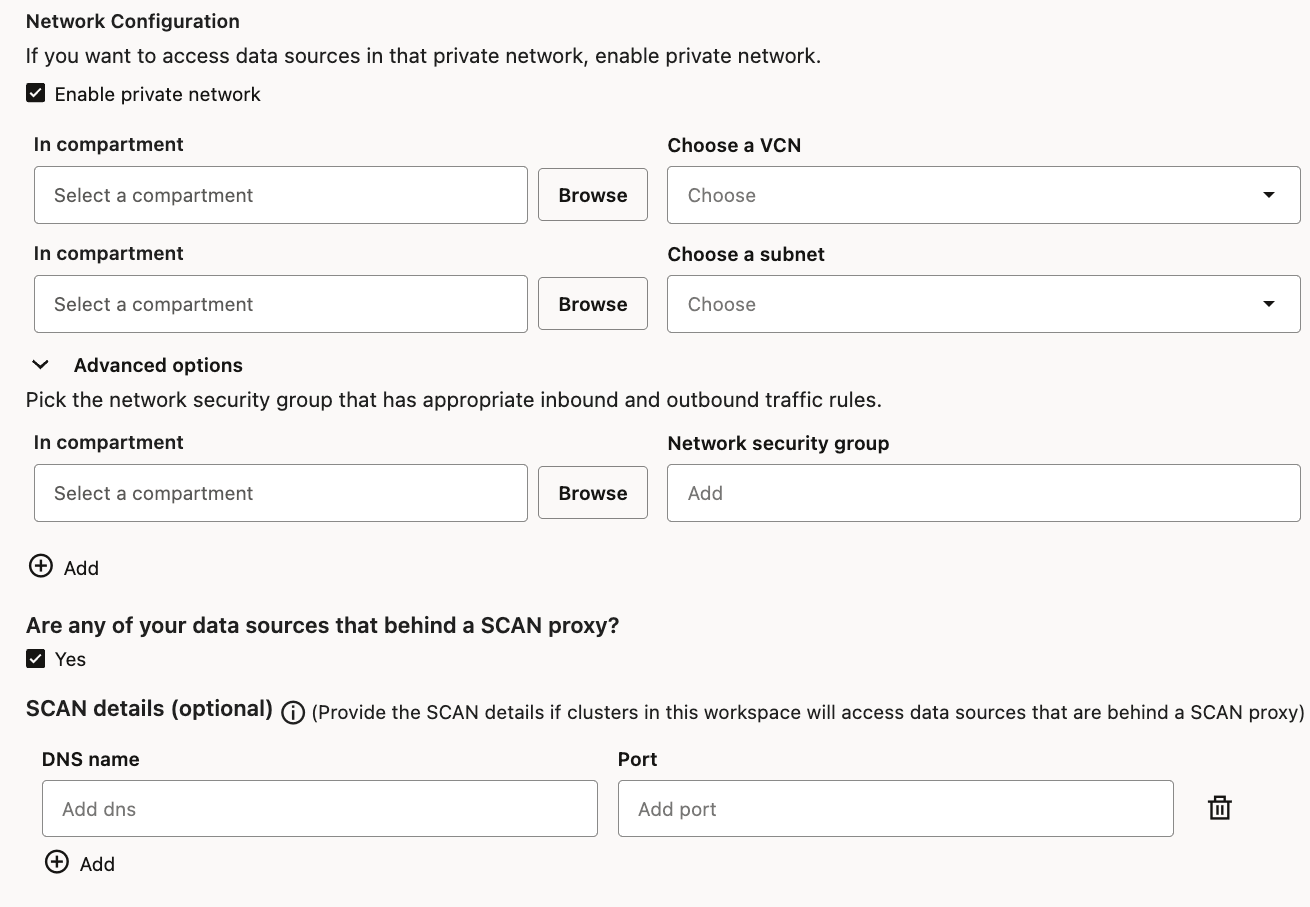
You can create a workspace that can access data assets in a private network. By default, a workspace is not enabled for accessing data assets in a private network and can only access data assets that are not in a private network. A workspace can only access data assets residing in one private network at a time.
In order to create a Workspace that can access existing data assets in an existing private network, you need to have the IAM policies to inspect the VCN of the data asset, the subnet of the data asset, and, if network-security-group is used, to inspect the network-security-group of the data asset within their respective compartments. For more information, see IAM Security Policies.
Workspaces, External Catalogs, and Data Assets in a Private Network
In order to create an external catalog for a data asset that is in a private network, you will first need to create a workspace enabled for the same private network.
During the creation of an external catalog, you need to pick the workspace that is enabled for the private network of the data asset. For more information, see Create an External Catalog for Private Networks.
Clusters in a workspace can read-write to this external catalog only if the workspace is already enabled for the private network of the data asset.
In order to access data assets in a private network, the VCN of that private network needs to have security rules allowing ingress traffic from all source IP inside that VCN to all destination ports. If that security rule is not already configured, you need to create a new Ingress security rule. For more information, see Security Rules.
If your data asset is in another VCN within the same region, the two VCN needs to be configured with Local VCN peering (within region) using Local Peering Groups or using Local VCN Peering through an upgraded Dynamic Routing Gateway (DRG).
If your data asset is in another VCN in a different region, the two VCN needs to be configured with Remote VCN peering (across regions) using Remote Peering Connections (RPCs) or using Remote VCN Peering through an Upgraded Dynamic Routing Gateways (DRG).
Edit a Workspace
Workspace attributes can be changed after the workspace is created.
- On the Home page, click Workspaces.
- Next to the workspace you want to edit, click
 Actions and click Edit.
 - Make your changes to the workspace and click Edit.
Delete a Workspace
Deleting your workspace removes it and all your contained jobs, tasks, and compute clusters.
- On the Home page, click Workspaces.
- Next to the workspace you want to delete, click
 Actions and click Delete.
 - On the confirmation page, click Delete.
Create a Folder
You can create folders in workspaces where you have appropriate permissions.
- In the workspace you want to create a folder, click
 Create then
Folder.
 - Provide the folder name and a folder description. Click Create.
Delete a Folder
You can delete folders and their contained data and metadata.
- Navigate to the folder you want to delete in your workspace.
- Click
 Actions then click Delete.
 - Click Delete.
