Add an Assign Variable Action
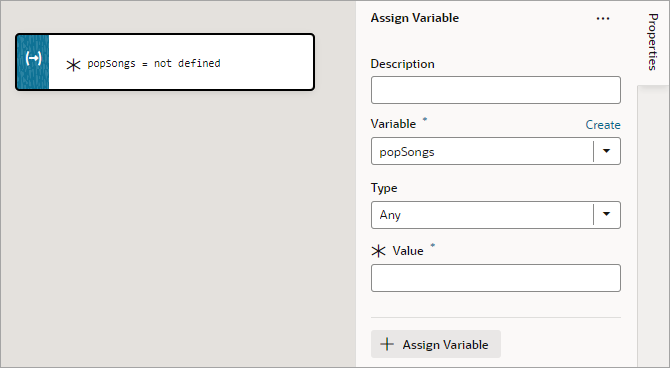
You use an Assign Variable action to assign a local, page, flow, or application variable a value. This action can also be used to create a local variable.
For example, if your action chain sends a request to a GET endpoint, you can use the Assign Variable action to map the response to a page variable that's bound to a page component. Or, suppose you want to capture the ID of an item selected in a list. You could use a Selection event to start an action chain that assigns the selected item’s ID to a variable.
To use an Assign Variable action to create a local variable:
- For Variable, enter its name and hit Enter on your keyboard.
- For Type, select its data type.
- If necessary, use the Value field to assign it a value.
To use an Assign Variable action for a value assignment:
- Add the action in one of three ways, as explained at the end of Built-In Actions.
- If you need to create a variable for the assignment, click the Variable property's Create link, otherwise, start to type the variable's name in the field and select it when it appears. You could also select the variable from the list.
- To set the variable's value, hover over the far-right side of the Value property and click
 to choose the variable that holds the value, or click fx to create an expression for the value.
In this example, the page variable
fullNameis assigned the result from a module function:
Description of the illustration jsac-assign-variables-action.jpg
If you need to do another assignment, click the + Assign Variable button in the Properties pane: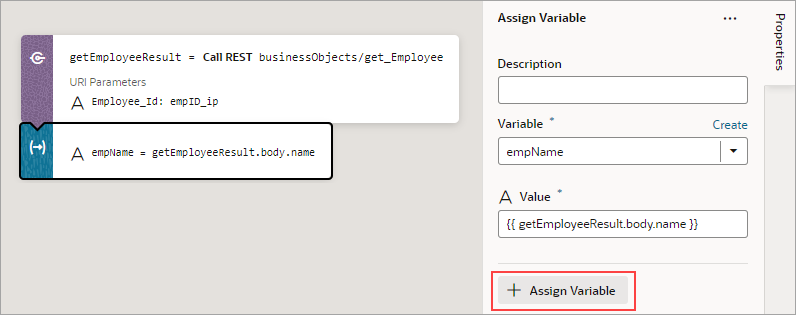
Description of the illustration jsac-assign-another-var.png
Then make the assignment using the Variable and Value fields that appear for the new variable assignment: 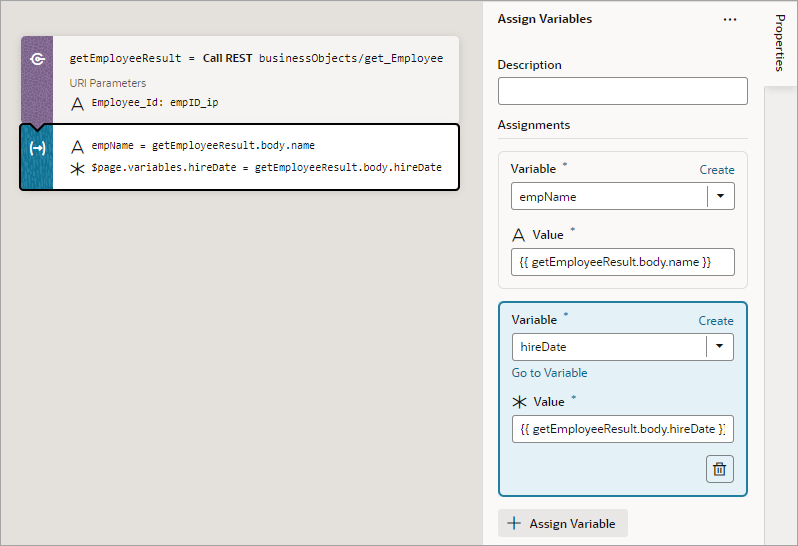
Description of the illustration jsac-assign-another-var2.png
If you'd like to move a variable assignment to a different position, in the Properties pane, click and hold an assignment, then move it to its new position.
Use Filter Builder to Create Filter Criteria for an SDP
If you're using an SDP to provide a table or list's data, and you'd like to filter out rows, you can use the Assign Variable action to create and assign the filter criteria to the SDP's filterCriterion property. For further details about using an SDP to filter a table or list's rows, see Filter Data by Filter Criteria.
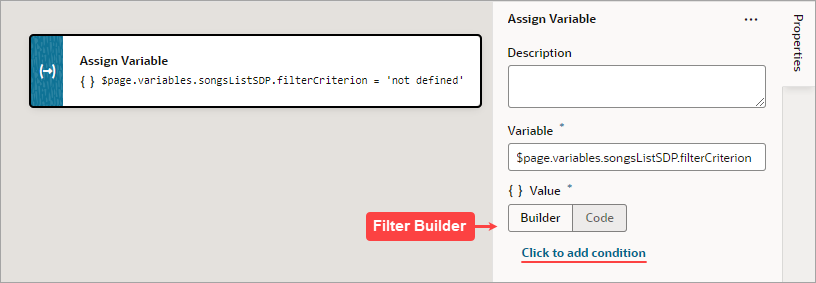
When the Assign Variable action's Variable property is set to an SDP's filterCriterion property, the Filter Builder appears under the Variable property for you to create the filter criterion. To directly work with the code, click the Code button. For details, see Filter Builder's Code Editor.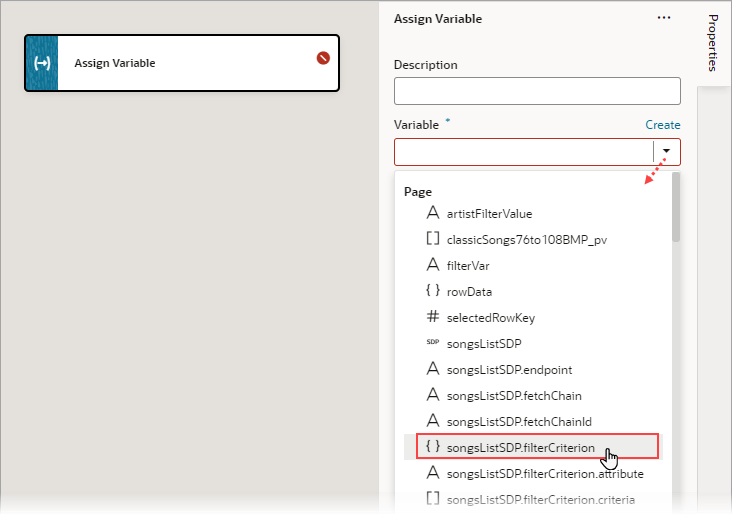
Description of the illustration jsac-assign-action-pick-sdp.png
To use the Assign Variable action's Filter Builder to create the filter criterion for an SDP:
- Click the Filter Builder's Click to add condition link:
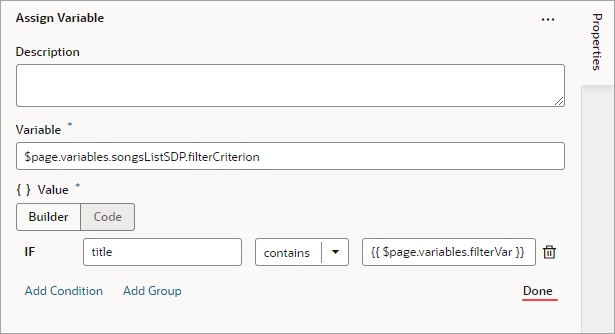
- For the first Attribute textbox, enter the name of the column (field in record, like "city") that you want compared against a specific value (like "Tokyo").
- For the Operator list, select the operator for the criterion.
- For the second Attribute textbox, enter the specific value to compare against, or select the variable that contains the value. For instance, the value could be stored by a page variable that was bound to an Input Text component for a user to enter the value.
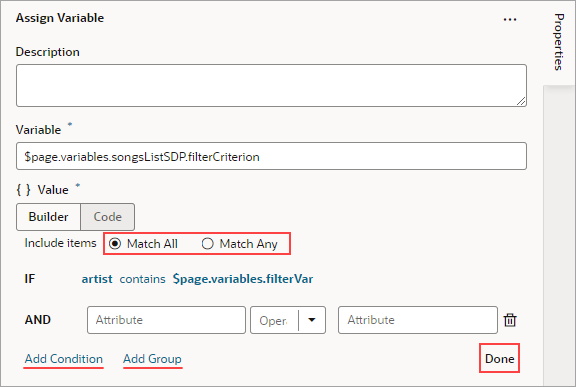
- To add another condition, click the Add Condition link to add one with an AND or OR operator, or click the Add Group link to add a group of conditions that are to be evaluated together (conditions enclosed in brackets). To combine conditional expressions with the AND operator, select Match All, and to combine them with the OR operator, select Match Any:
- Click Done when you're finished.
Filter Builder's Code Editor
You can use the Filter Builder's Code tab to view and edit the filter's code. After defining a condition on the Builder tab, you will see that the Code tab contains an attribute, op and value property.
Here's an example of a filter with two conditions combined by an AND operator:
{
 "op": "$and",
 "criteria": [
  {
   "op": "$eq",
   "attribute": "name",
   "value": "{{ $variables.filterVar }}"
  },
  {
   "op": "$eq",
   "attribute": "id",
   "value": "{{ $variables.idVar }}"
  }
 ]
}- The Oracle JET operator is "
$eq" (it must include the dollar sign (“$”)). - The
attributeproperty is set to the name of the field (column) that you want to be evaluated against thevalueproperty. - The
valueproperty ($variables.customerListSDP.filterCriterion.criteria[0].value) is mapped to a page variable ($variables.filterVar) that holds the value to be evaluated against each field (column) value.
