Use Oracle JDeveloper to Deploy an Application

You can use Oracle JDeveloper to deploy a SOA composite application or Oracle Service Bus application to an Oracle SOA Cloud Service instance.

Add an Ingress/Access Rule to Allow the JDeveloper Connection

After provisioning the Oracle SOA Cloud Service instance, you must set up your JDeveloper environment before you can use it to deploy applications.

To set up JDeveloper for deploying to Oracle SOA Cloud Service:

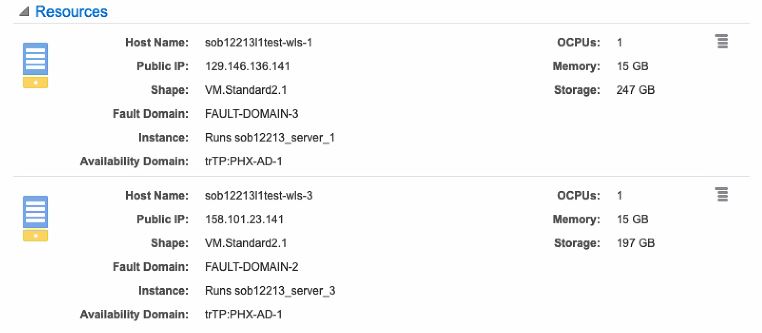
  1. On the Instance Overview page of the provisioned Oracle SOA Cloud Service instance, make a note of the public IP address (or addresses in the case of a multinode cluster) associated with each SOA server.

    SOA Cloud Service Instance Overview page

  2. In the Oracle SOA Cloud Service Console, click menu icon for the instance and select Open WebLogic Server Administration Console.
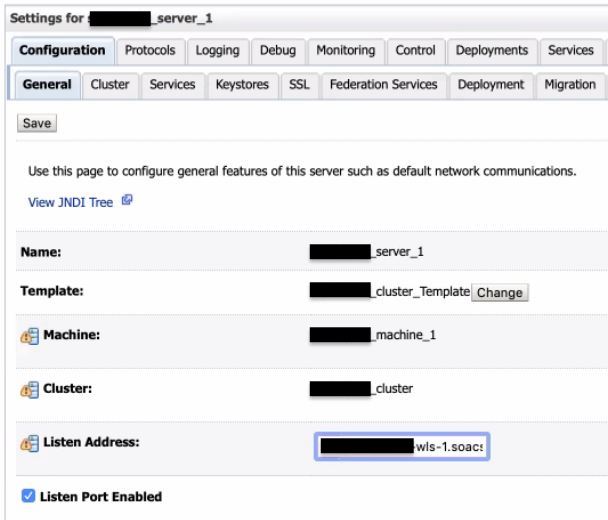
  3. On the Summary of Servers page, click each Managed Server name and make a note of the Listen Address value:

    Managed Server settings

    Be sure to capture the listen addresses for all Managed Servers.

  4. On the host on which JDeveloper is running, map the listen address of each Managed Server to the associated SOA server public IP address in the hosts file. For Windows, the hosts file is typically located at C:\Windows\System32\Drivers\etc\hosts. For example:
    129.146.136.141 sob12213l1test-wls-1.soacsp2pubsubne.soacsp2vcn.oraclevcn.com
    158.101.23.141  sob12213l1test-wls-3.soacsp2pubsubne.soacsp2vcn.oraclevcn.com
    129.146.136.141 sob12213l1test-wls-1
    158.101.23.141  sob12213l1test-wls-3
  5. (Does not apply to Oracle Cloud Infrastructure Classic) Add the ingress rule to permit traffic from JDeveloper to the SSL listener port of the Managed Server:
    1. Sign in to your Oracle Cloud Service account and navigate to the Oracle Cloud Infrastructure Console.
      See Sign In to Your Cloud Account in Getting Started with Oracle Cloud.
    2. Open the navigation menu, click Networking, and then click Virtual Cloud Networks.
    3. Select the compartment where you created the new instance.
    4. In the list of VCNs, select your VCN.
    5. On the Virtual Cloud Network Details page, click Security Lists in the left pane.
    6. Select a security list, and click Add Ingress Rules to open the Add Ingress Rules dialog.
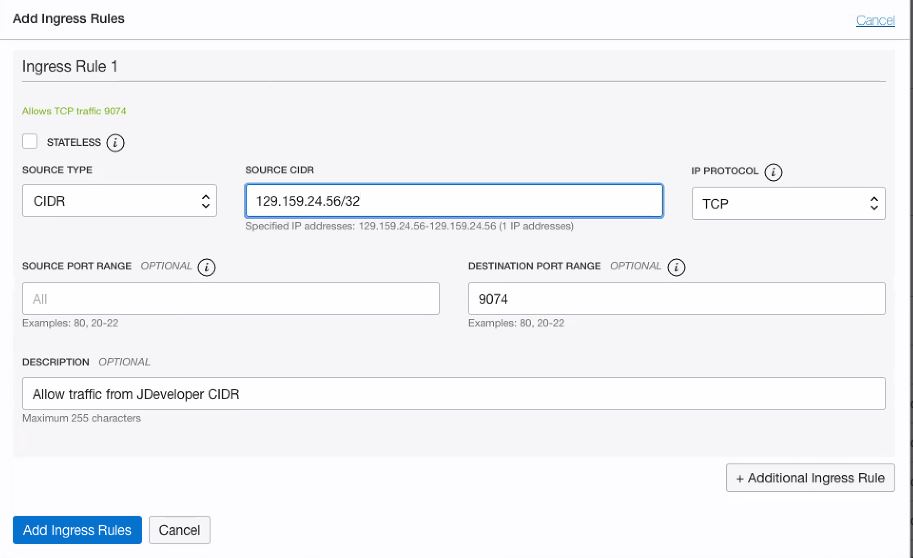
    7. In the Add Ingress Rules dialog, create an ingress rule for port 9074 to access JDeveloper as shown in the following screenshot:

      Add Ingress Rules dialog

      Note:

      The source CIDR is the CIDR of the machine where JDeveloper is running.
    8. Add another ingress rule for port 9072, with the same source CIDR as port 9074.

      Important:

      By adding this ingress rule, be aware that you are allowing traffic from the internet (known CIDRs) into WebLogic Server. You must be extra cautious and open traffic to known CIDRs only.
  6. (For Oracle Cloud Infrastructure Classic only) Add the access rule to permit traffic from JDeveloper to the SSL listener port of the Managed Server:
    1. In the Oracle SOA Cloud Service Console, click menu icon for the service instance and select Access Rules.
    2. In the Create Access Rule dialog, create an access rule for port 9074 to access JDeveloper as shown in the following screenshot. The value in the Destination Port(s) field is the SSL listener port of the Managed Server.

      Create Access Rule dialog

    3. Add another access rule for port 9072, with the same source as port 9074.

      Important:

      By adding this access rule, be aware that you are allowing traffic from the internet (known CIDRs) into WebLogic Server. You must be extra cautious and open traffic to known CIDRs only.

Create an Application Server Connection in JDeveloper

To create a new application server connection in JDeveloper:
  1. Before you test the connection, clear your JDeveloper cache:
    1. In JDeveloper, click the Help menu and select About.
    2. In the About dialog, on the Properties tab, find ide.user.dir and note its value, which is the name of the cache directory.
    3. Back up the cache directory, then delete it.

      Note:

      All JDeveloper database connections and integrated WebLogic Server settings are lost when you delete the cache.
  2. Restart JDeveloper.
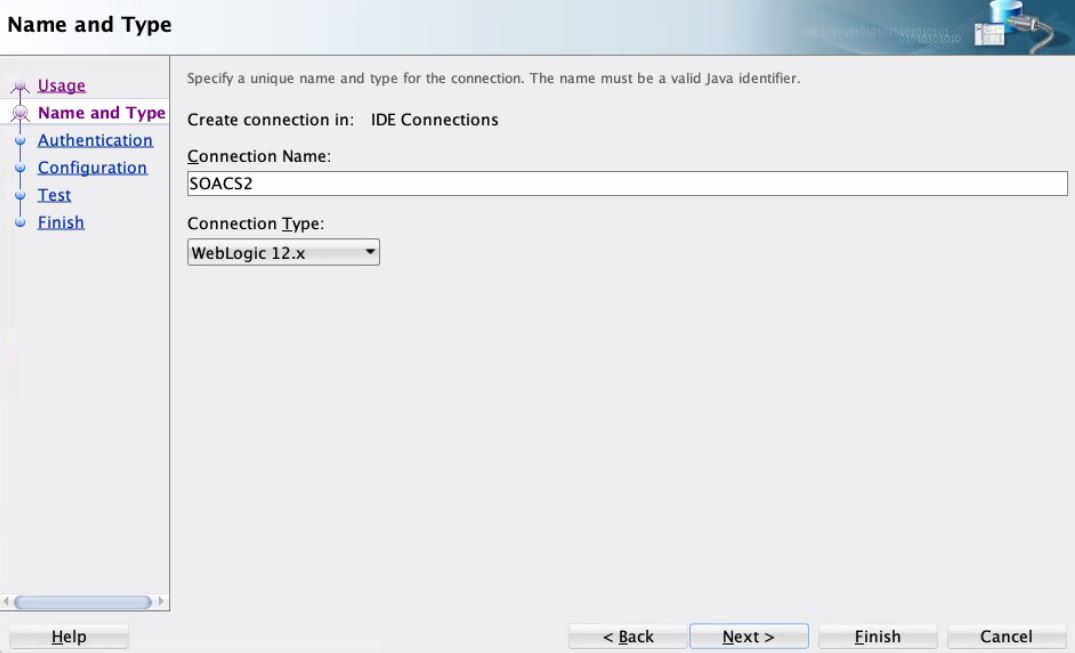
  3. On the Name and Type page, in the Connection Name field, enter a name for the connection, and select a Connection Type of WebLogic 12.x.

    JDeveloper Name and Type page

  4. On the Authentication page, enter your WebLogic Server credentials.
  5. On the Configuration page:
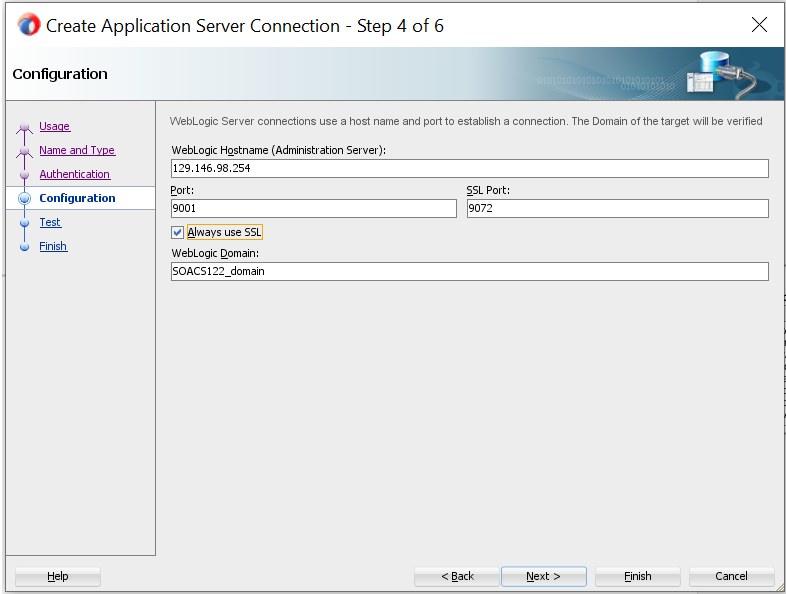
    • In the WebLogic Hostname (Administration Server) field, enter the public IP address of the Administration Server that you noted down for the provisioned Oracle SOA Cloud Service instance.
    • Enter a Port value of 9001 and an SSL port value of 9072.
    • Select Always use SSL when the instance is using a public IP address. For instances with a private IP address only, leave this unchecked.
    • Enter the name of your WebLogic Domain.

    JDeveloper Configuration page

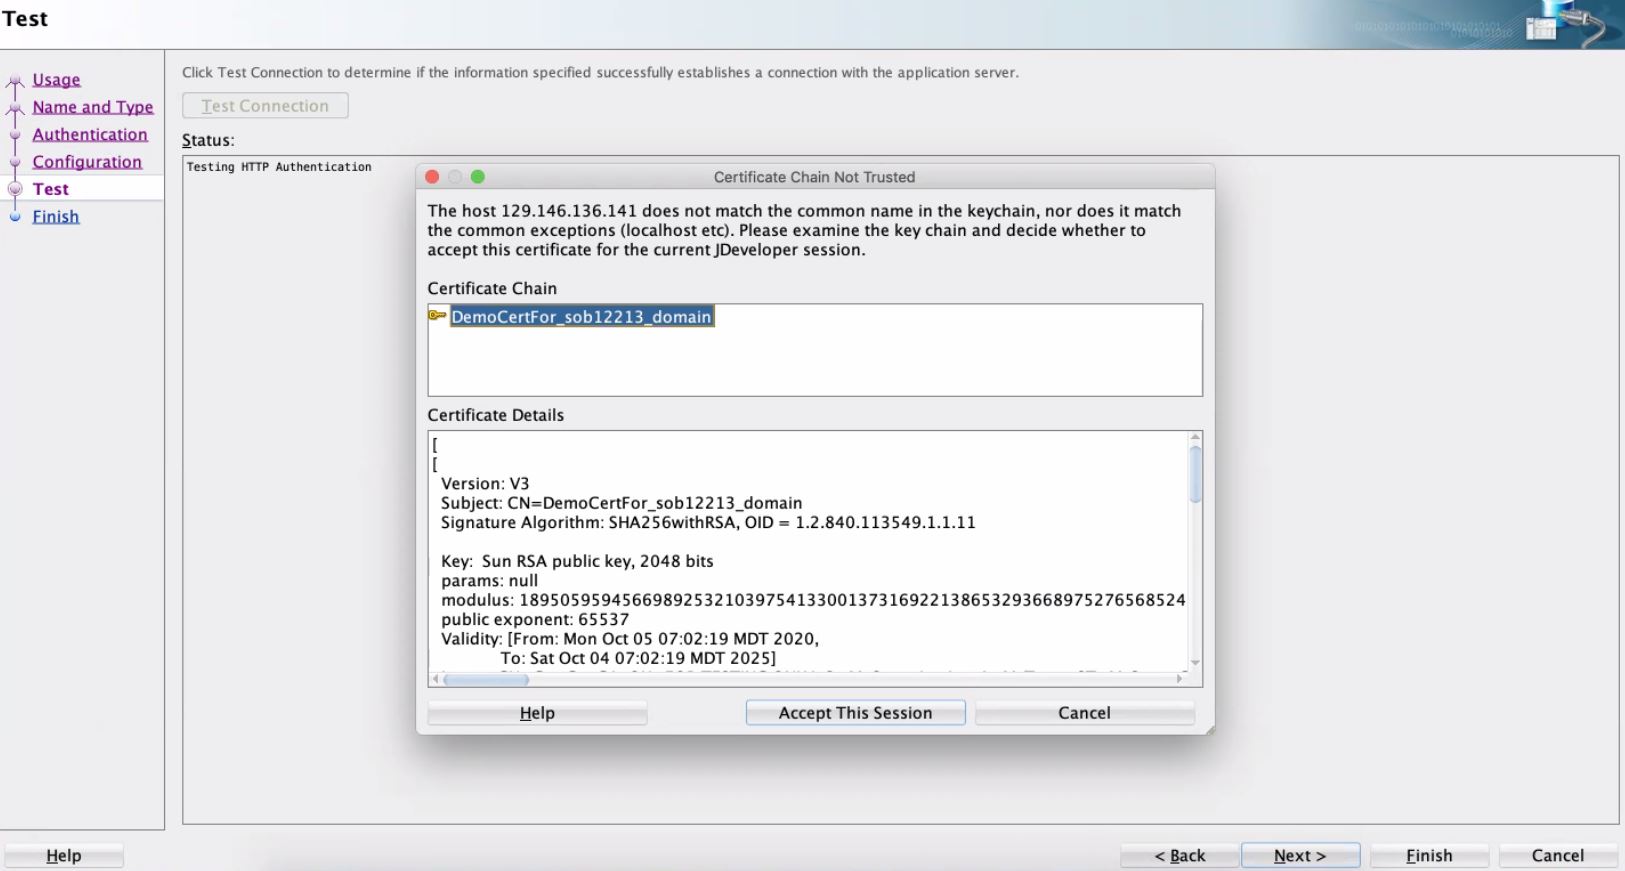
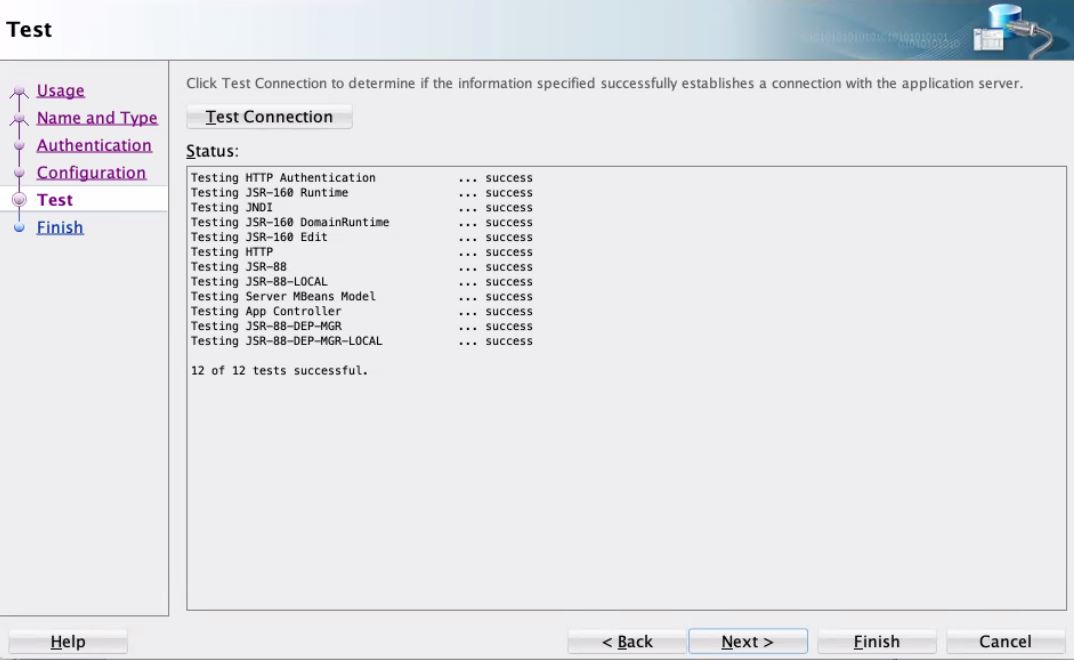
  6. On the Test page, click Test Connection. If the instance is using a public IP address, then click Accept This Session to accept the certificates in the dialog that is displayed.

    Note:

    If the Certificate Chain Not Trusted dialog does not display, you must clear your JDeveloper cache as described in step 1 and try again.

    JDeveloper Test page: Certificate Chain Not Trusted dialog


    JDeveloper Test page

    Notes:

    • If Test Connection has failures, then ensure that /etc/hosts has the required entries and ports 9072/9074 allow inbound traffic from the JDeveloper host.
    • Do not proceed without accepting the certificates when using instances with a public IP address.
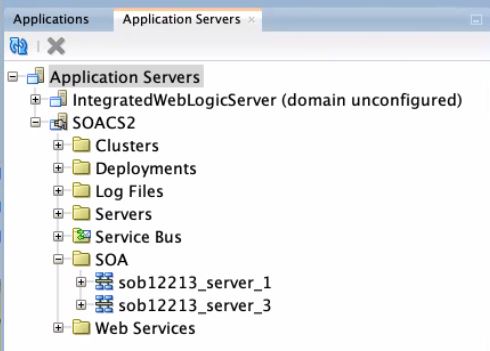
  7. In JDeveloper, on the Application Servers tab, expand the connection name, then SOA (or Service Bus), and confirm that the names of the Managed Servers are listed, indicating that the connection is established from JDeveloper to the servers. If servers are not displayed, then check the /etc/hosts file has both host name and fully qualified domain name entries.

    JDeveloper Test page

Deploy a SOA Composite Application to Oracle SOA Cloud Service from JDeveloper

SOA composite applications are deployed to Managed Servers.

To deploy a SOA composite application to Oracle SOA Cloud Service from JDeveloper:

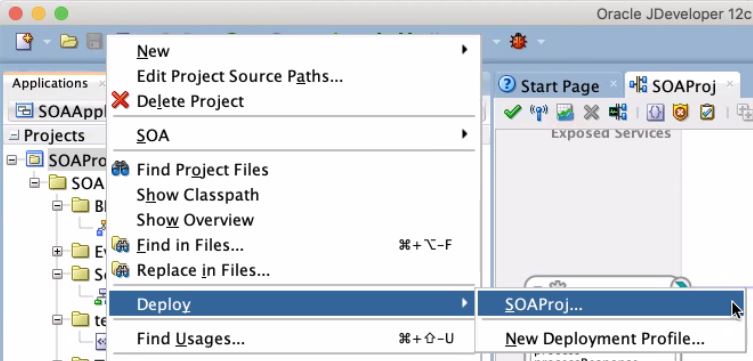
  1. In JDeveloper, right-click the SOA project you want to deploy and select Deploy, then the name of the project.

    JDeveloper Deploy menu

    The deployment wizard is displayed.
  2. On the Select Server page, select the application server connection that you created.

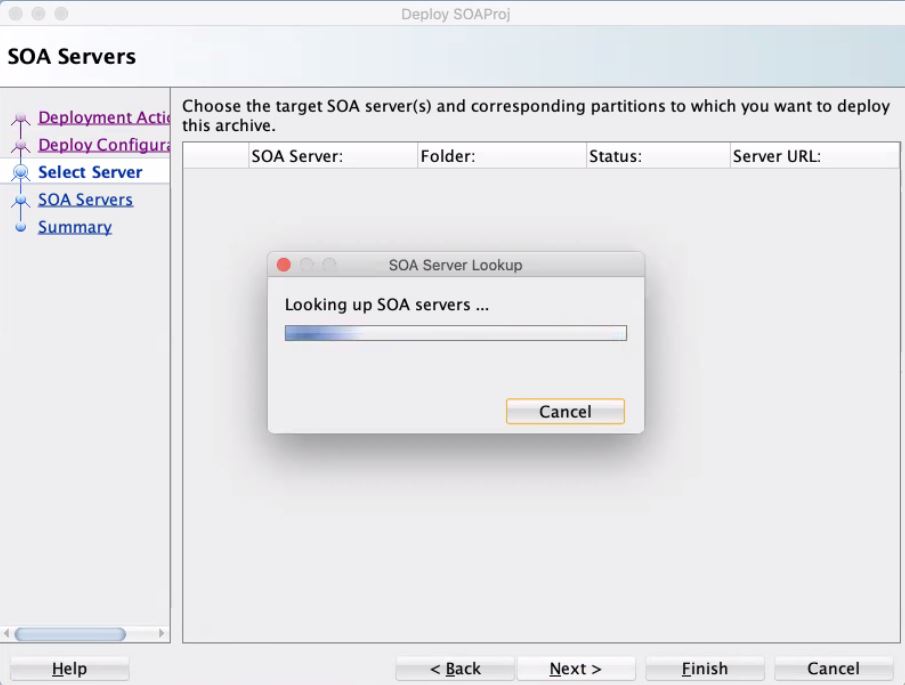
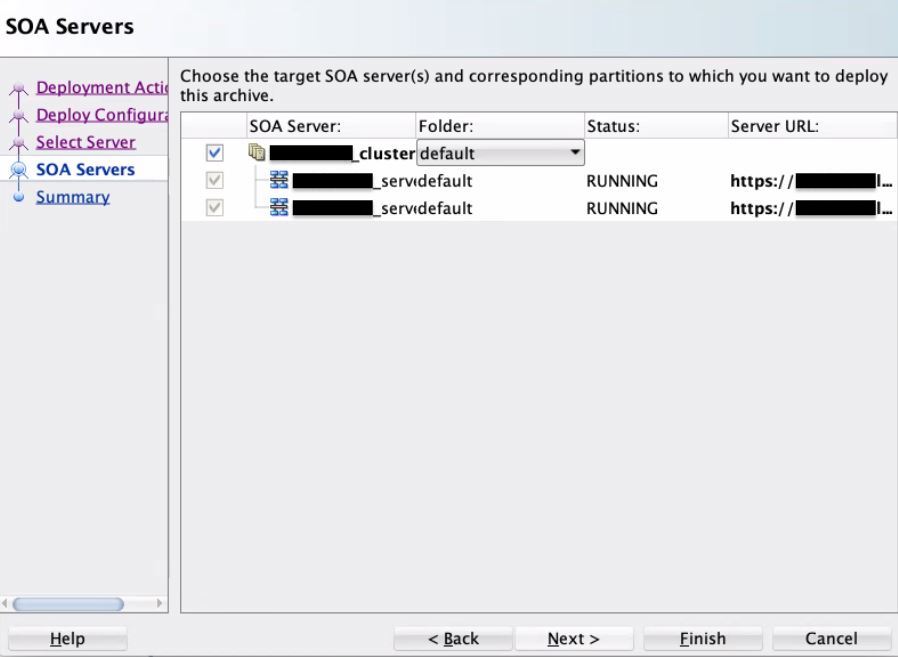
    If the server is configured correctly, the deployment wizard looks up the SOA servers and shows the SOA servers to which to deploy the SOA composite application.


    JDeveloper Select Server page: SOA Server Lookup


    JDeveloper SOA Servers page

    Note:

    If the SOA Server lookup has failures, then ensure that /etc/hosts has the required entries and ports 9072/9074 allow inbound traffic from the JDeveloper host.
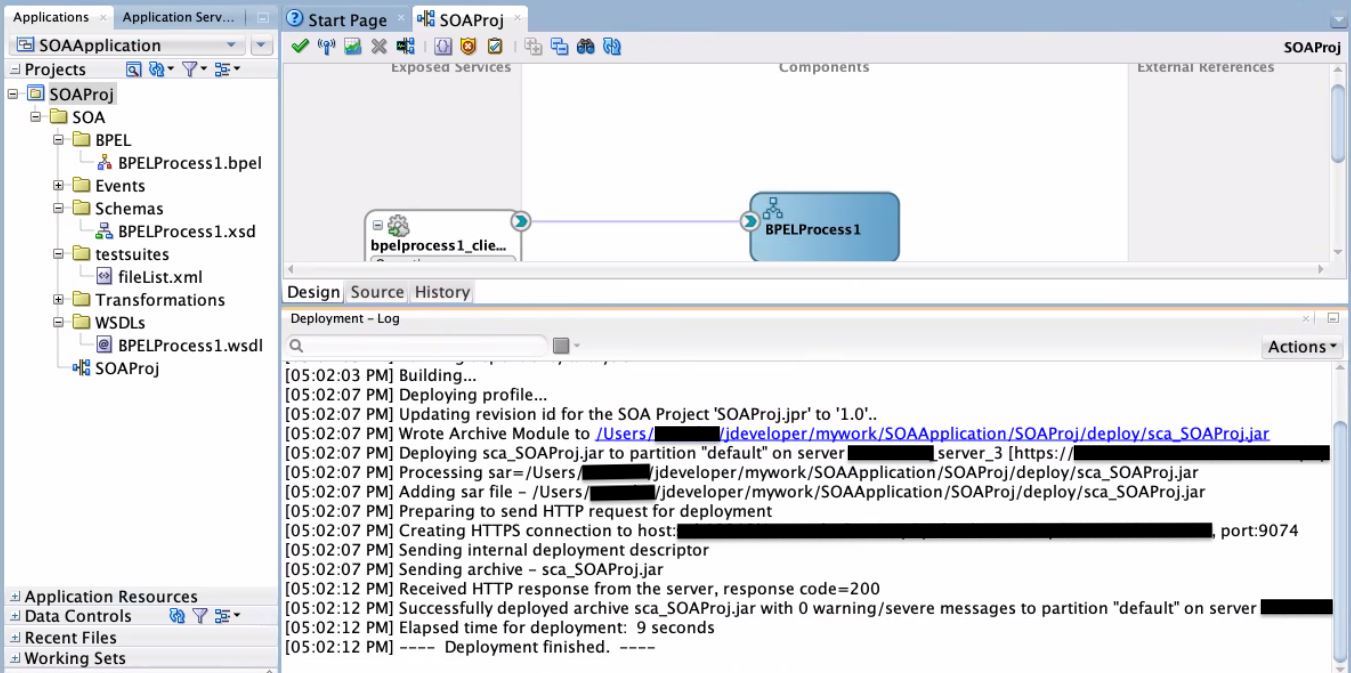
  3. Click Finish and verify that the deployment completes successfully as shown in the following screenshot.

    JDeveloper SOA composite application deployment

    The JDeveloper Console logs indicate that the composite application was deployed successfully.

Deploy an Oracle Service Bus Application to Oracle SOA Cloud Service from JDeveloper

Oracle Service Bus applications are deployed to the Administration Server.

To deploy an Oracle Service Bus application to Oracle SOA Cloud Service from JDeveloper:

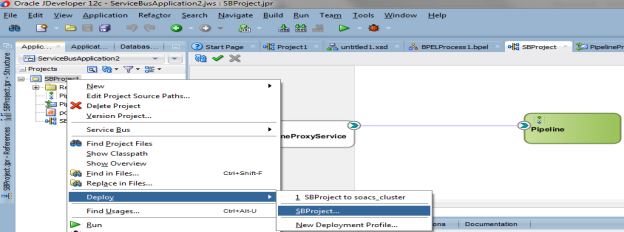
  1. In JDeveloper, right-click the Oracle Service Bus application you want to deploy and select Deploy, then the name of the application.

    JDeveloper Deploy menu

    The deployment wizard is displayed.
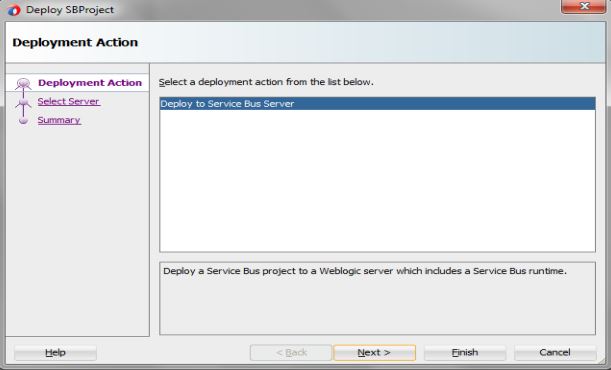
  2. On the Deployment Action page, select Deploy to Service Bus Server.

    JDeveloper Deployment Action page

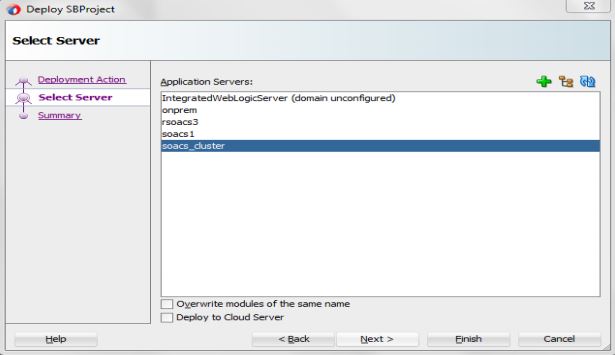
  3. On the Select Server page, select the application server connection that you created.

    JDeveloper Select Server page

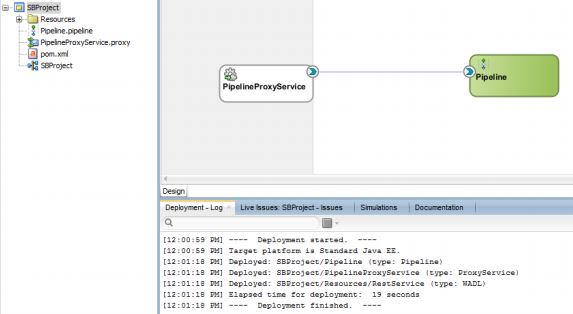
  4. Click Finish and verify that the deployment completes successfully as shown in the following screenshot.

    JDeveloper Oracle Service Bus application deployment

    The JDeveloper Console logs indicate that the application was deployed successfully.