Add a Dynamic Container to a Page

A dynamic container lets you display content in individual sections, or logical regions of the page based on conditions that are evaluated at runtime. You define the UI elements or components displayed in each section, and then set the display logic conditions to determine which sections are displayed.

The display logic for determining what's displayed in a dynamic container is defined using cases. A case is similar to the rule sets used in dynamic forms and tables, but instead of selecting which fields to display, you select which sections to display. When you define a case, you specify the conditions for the case, and the sections you want displayed in the container when that condition is met. For each case, you can display any number of sections, so if a case defined two sections, you’d see two sections in the container.

The easiest way to learn how to configure a dynamic container is to examine a real use case. Let's say you want to create a page that lets users toggle two layouts, one showing a form for adding a contact and another showing a table of assets. To do this, you'd create a dynamic container with two sections: one for a dynamic form and another for a dynamic table. You'd then add a button that the user can click to toggle the sections displayed in the dynamic container.

Before you begin, make sure you've defined a service connection that lets you access external REST services, so your App UI can retrieve and send data to and from its REST endpoints. See Work With Services.

To add a dynamic container component to a page:
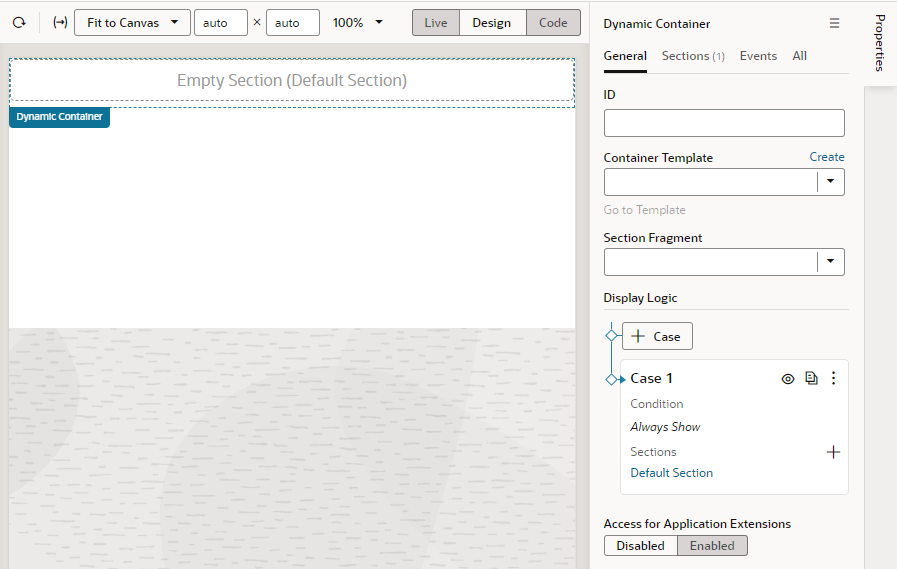
  1. With your page open in the Page Designer, drag the Dynamic Container from the Components palette onto your canvas.

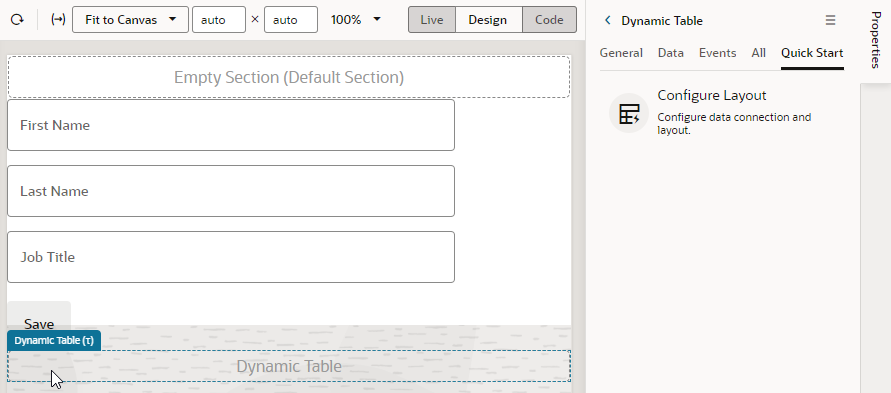
    In this image, you can see one section (Default Section) was created for you automatically when you added the dynamic container. The Default Section section doesn't have any content yet, so you see the section's name on the canvas instead.
    Description of dynamic-container.png follows
    Description of the illustration dynamic-container.png

  2. Create sections for the dynamic container. In our example, we'll create two sections, one for a dynamic form and another for a dynamic table.
    1. In the Container Rule Set 1 section in the Properties pane, click + Section, then select + New Section in the dropdown list.
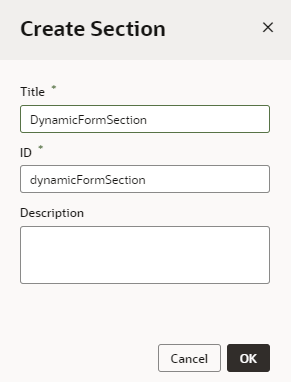
    2. In the New Section's properties pane, give the section a name (for example, Dynamic Form). Return to the Dynamic Container pane.

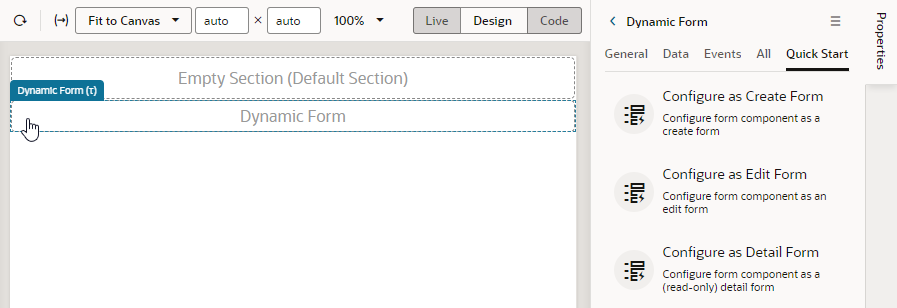
    3. From the Components palette, drag a Dynamic Form and drop it onto the section on the canvas, select the Quick Start you want to use in the Properties pane, and follow the prompts to associate the dynamic form with a data source and a rule set. Click Finish.

      Tip:

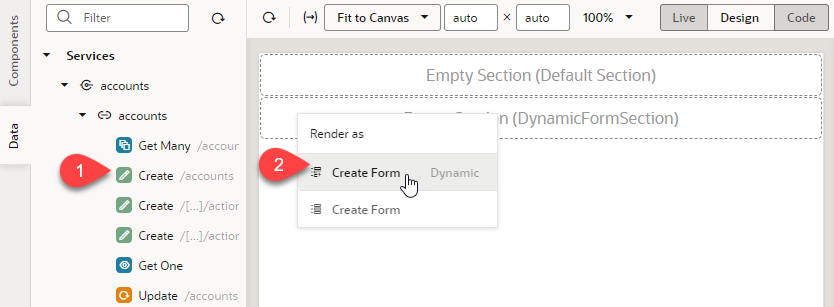
      Use the Data palette to try an alternative design approach, where you start with your data source's REST endpoints and leverage components that VB Studio deems best to optimally display your data. For example, to display a create account form, you can drag the Create endpoint from the Data palette onto the canvas. When the Render as pop-up appears, select an option (in this case, Create Form Dynamic), then follow the steps in the Configure as Create Form quick start to set up your form.

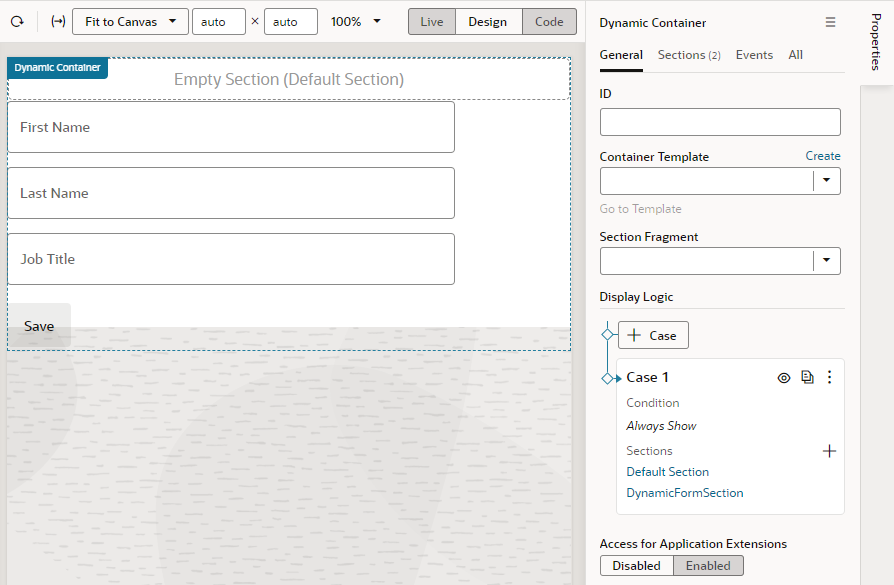
      If you used the quick start to bind your dynamic form to a data source, the form will be rendered on the page with the fields you selected. You can change the form's fields by editing the dynamic form's layout in its rule set. If the form isn't bound to a data source, the section will contain a placeholder for the form because there won't be any data to render the form.

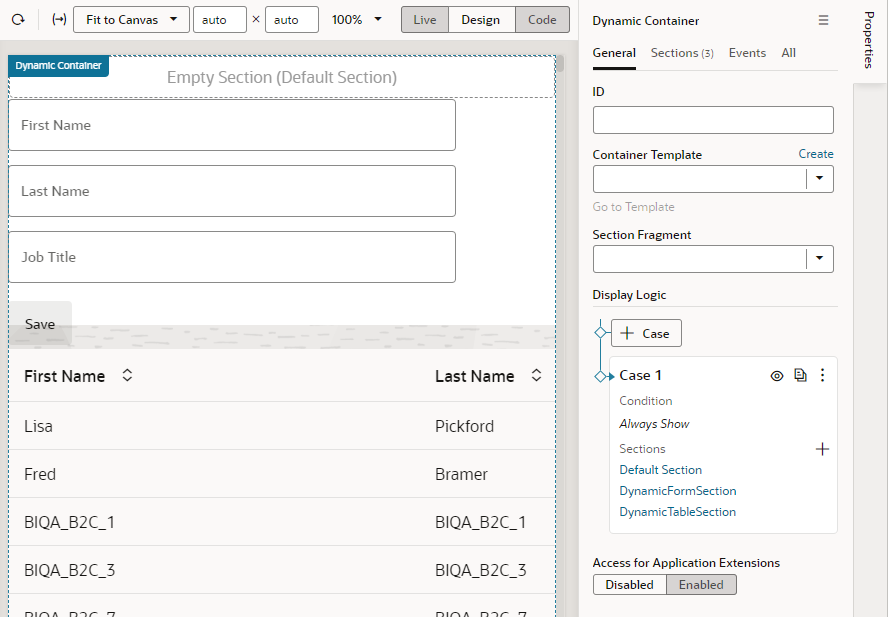
      Click Dynamic Container in the Structure view to see the dynamic form added as a component to the page and its properties displayed in the Properties pane:


      In the Properties pane, the Displayed Sections lists the sections currently displayed in the container. You can rearrange the order of sections by grabbing the handle next to the section name and moving it into the position you want.

      The Properties pane also lists all the sections that you can display in the container under Available Sections. These sections are usually defined in dependencies, but also includes sections defined in your extension.

    4. In the Container Rule Set 1 section, click + Section again, and then select + New Section in the dropdown list to create another section; in our case, a section for a dynamic table.
    5. In the New Section's properties pane, give the section a name (for example, Dynamic Table). Return to the Dynamic Container's properties pane.
    6. Drag the Dynamic Table from the Components palette onto the new section, click the Configure Layout quick start in the Properties pane, and follow the prompts to complete the setup. Click Finish.

      Tip:

      Similar to using the Create endpoint to display a create form, you can use the Get Many endpoint to display your employee data in a dynamic table. From the Data palette, drag the Get Many endpoint onto the canvas, choose Table Dynamic in the Render as pop-up, then follow the steps in the Configure Layout wizard to set up your table.

      After using the quick start to bind the dynamic table to a data source, the Page Designer will render the table with the fields you selected. Again, if you don't bind the component to a data source, your dynamic table won't have any data to actually render on the page. Click Dynamic Container in the Structure view to see the newly added section:


  3. Set up the UI component and add the case logic to display your sections. Here, we'll add a Button component and a page variable to toggle the sections in the dynamic container.
    1. In the Variables tab, create a variable that you can use in your conditions. For example, a Boolean-type variable called layoutFlag, with the default value set to true.
    2. In the Page Designer tab, drag a Button component from the Components palette and drop it just above the Dynamic Container. Change its Text in the Properties pane to Toggle Layout.
    3. In the Button's Events tab, add an event listener for the ojAction event.
    4. Set the name of the new action chain as ToggleLayout, then add the following actions:
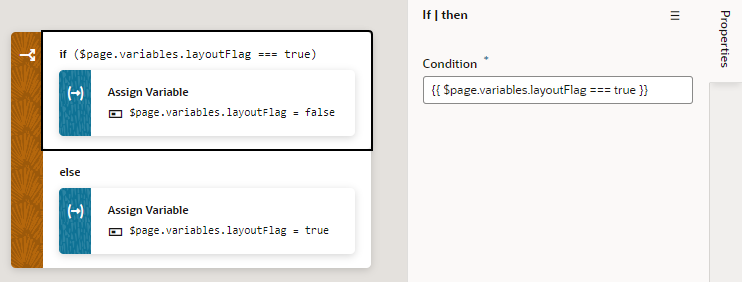
      • Drag and drop an If action onto the canvas and set its Condition to [[ $page.variables.layoutFlag === true ]] in the Properties pane.
      • Drag and drop an Assign Variable action onto the Add Action area of the if {{ $page.variables.layoutFlag === true }} block. Select layoutFlag from the Variable list and set the Value to false.
      • Drag another Assign Variable action and drop it onto the Create Branch area at the bottom of the if {{ $page.variables.layoutFlag === true }} block (the Create Branch area appears when you hover over the If action with another action). Select Assign Variable in the else block, then select layoutFlag from the Variable list and set the Value to true.


  4. Return to the Page Designer to create another case in the dynamic container.
    1. Select the Dynamic Container component to view its properties in the Properties pane.
    2. In the container's General tab, click Rules to open the Container Rule Set editor.

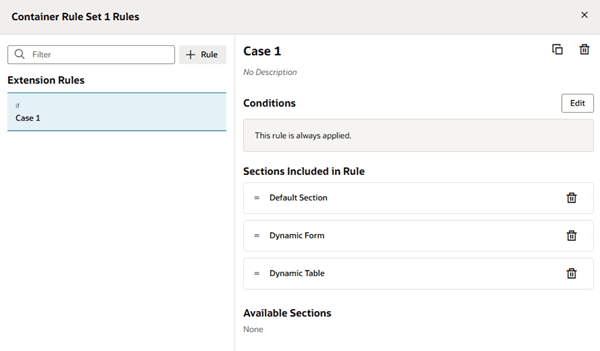
      The Container Rule Set editor contains one rule named Case 1, which is the default name. Sections Included in Rule lists the sections in Case 1. You can see that it lists the default section and the two sections you created:


    3. In the Container Rule Set editor, click + Rules to create a new rule called Case 2. You can edit the rule name as required.

      You can also duplicate a case if you want to create a new case containing the same sections.

      When you create the new case, it is added before Case 1 in the list of rules. Remember, cases are evaluated from the top down. So in our example, at runtime the conditions for Case 2 will be evaluated first.

    4. Select Case 2, and then add the sections you want to display by clicking + next to the section under Available Sections (Dynamic Table in our example).
    5. Select Case 1, and then remove the sections you don't want to display by clicking Remove Item next to the section under Sections Included in Rule (Dynamic Table in our example).
    6. Click X in the corner of the editor to close it.

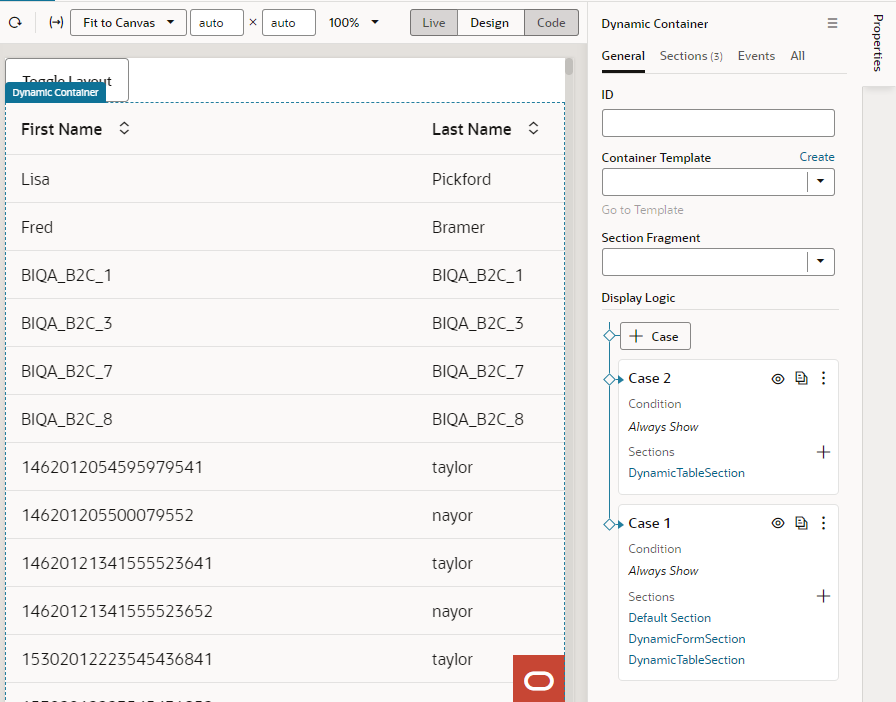
      When you do this, you'll only see Case 2 rendered in the Page Designer, so in the dynamic container you'll only see Dynamic Table, which contains the table:
      Description of dynamic-container-case2.png follows
      Description of the illustration dynamic-container-case2.png

      Notice that in the Properties pane, the Section Rules Editor panel displays "2 Rules". This because there are now two rules governing what is displayed in the container.
  5. Now let's edit the conditions of the two rules so that the button toggles between Case 1 and Case 2.
    1. Click Rules in the Properties pane to open the Container Rule Set editor.
    2. In the editor, select Case 1 and then click Edit to open the condition builder.
    3. Click Code to open the Expression Editor and enter $variables.layoutFlag == true. Click Done.
    4. For Case 2, open the condition builder and enter $variables.layoutFlag == false in the Expression Editor. Click Done.
  6. Click Preview Preview to preview the page, then click Toggle Layout to toggle between the two rules and change the sections displayed in the dynamic container.