Create and Add a Fragment to a Page

Create one or more fragments to define sections of a page, then add them to your App UI's pages. Say your page has separate tabs for employees and managers; you can create two fragments, one for either tab's content. Deciding how many fragments to create depends on your App UI, the degree to which you wish to reuse portions of a page between multiple pages, and the extent to which you want to simplify complex pages.

You can create fragments using the + Fragment option in the App UIs pane or the Create Fragment option under the Menu (Menu icon), as shown here and described in Create an App UI or Fragment:
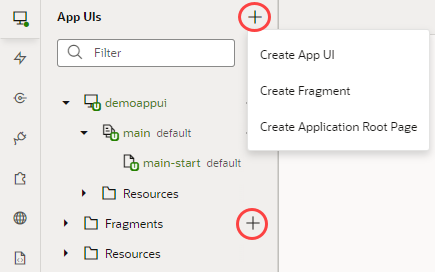
Description of fragment-create.png follows
Description of the illustration fragment-create.png

Alternatively, create a fragment when designing a page by clicking Create Fragment icon next to Fragments in the Components palette. You can also start with a fragment container on a page and add a fragment to it—which is what we'll do here:

  1. Open your App UI, then go to the page where you want to use fragments. Fragments are most commonly embedded in pages, other fragments, form and field templates, dynamic containers, and list item and foldout panel components.
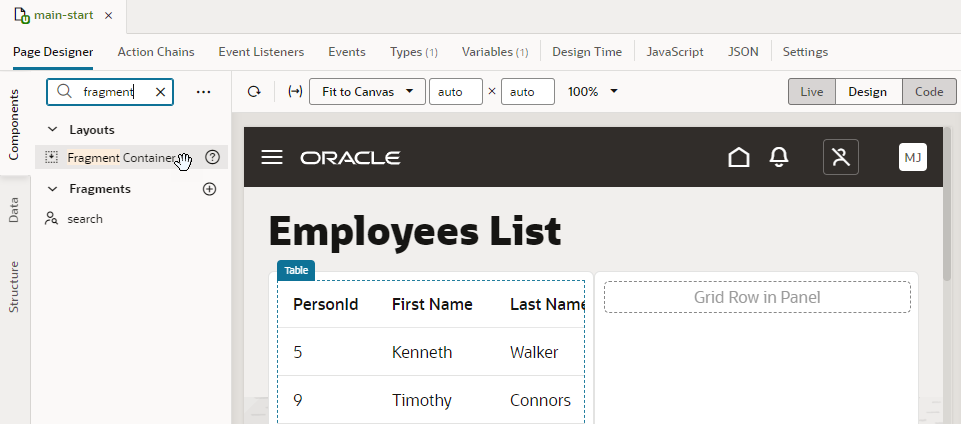
  2. Drag a Fragment Container from the Components palette onto the canvas and drop it where you want a fragment to display.


    Tip:

    Notice how a search fragment shows up in addition to the Fragment Container when components are filtered? That's because all available fragments—including extendable ones defined in a dependent extension—by default become available for use in your App UI's pages. You can simply drag and drop these fragments onto the canvas if you wanted to use them in a page. If you added a Fragment Container to the page (as we've done here), you can select these fragments from the Fragment Container's properties.
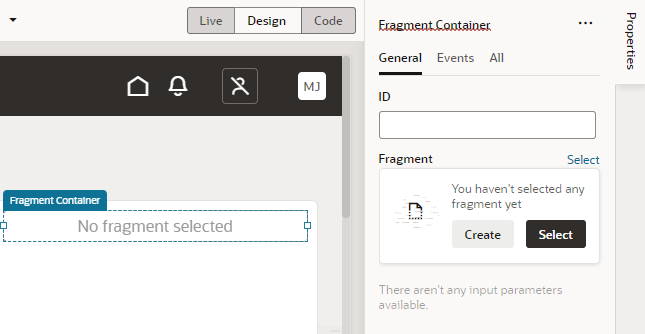
  3. In the General tab of the container's Properties pane, click Select to select an existing fragment or Create to create a new one. For demonstration purposes, we'll create a new fragment.


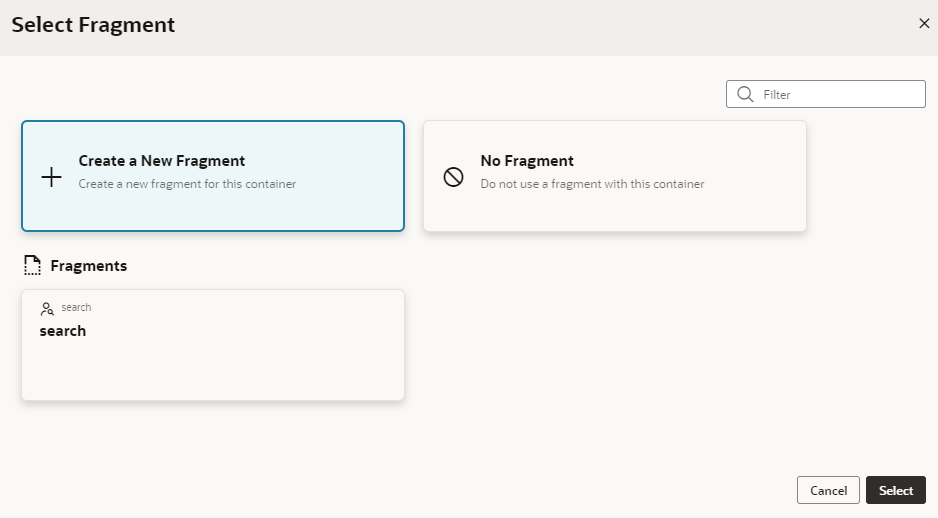
    If you click Select and find that the available fragments don't meet your needs, you can create a new fragment even from the Select Fragment dialog, as shown here:
    Description of fragment-select-appui.png follows
    Description of the illustration fragment-select-appui.png

    Click Select.

  4. In the Create Fragment dialog, enter a name for the fragment in the Fragment ID field.
    1. In the Used For field, select where you want the fragment to surface as you drop it on pages or page components.

      By default, every fragment is tagged as pageContent, surfacing it under Fragments in the Components palette as generic content available for use in any page. But using the appropriate metadata tag displays the fragment only where it is best used. For example, a fragment tagged as formTemplate would be available to you only when you are looking to drop a fragment in a dynamic form template.

      You can always change where the fragment surfaces by editing the Used For setting in the fragment's Properties pane or its Settings editor.

    2. In the Implements field, select tags that suggest the fragment as preferred content for particular components. If you're not sure, leave it blank. You can add it later in the fragment's Properties pane or its Settings editor.
    3. Click Create.

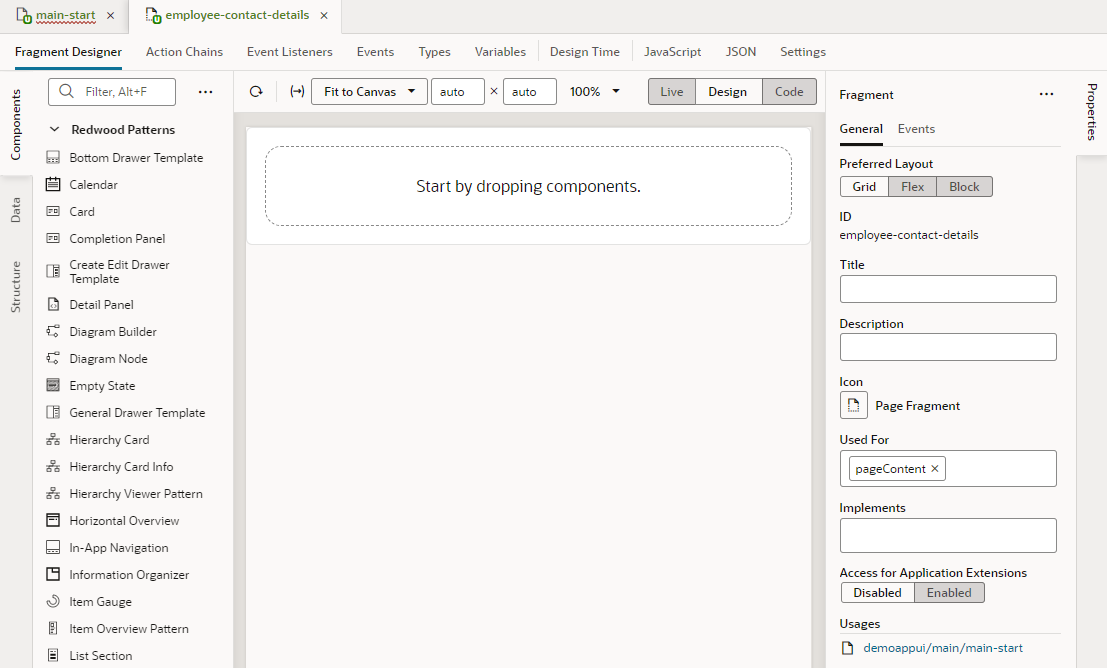
    A new empty fragment opens in the Fragment Designer:
    Description of fragment-designer-view.png follows
    Description of the illustration fragment-designer-view.png

    Tip:

    To view where a fragment is consumed, look under Usages in the fragment's Properties pane. In our example here, the employee-contact-details fragment is being used by the main-start page in the demoappui's main flow. Clicking the demoappui/main/main-start link will open the page in the Page Designer tab.
  5. Now design your fragment in the Fragment Designer.

    The Fragment Designer is similar to the Page Designer, except that it builds a fragment instead of a page. You can add standard as well as dynamic components (including dynamic containers) to your fragment, then use other editor tabs to bind the components to events, action chains, variables, and functions, much like what you'd do when developing a page. You can also define types, including those from code that can be associated to an InstanceFactory variable.

    Keep in mind though that a fragment is a self-contained piece of UI that's unaware of its parent container's context. So what you see on the canvas as well as in the Structure and Code views are the contents of this particular fragment. Other editor tabs allow you to edit artifacts within the scope of this fragment. So a fragment cannot call actions on its parent container, but it can fire custom events that the parent can handle.

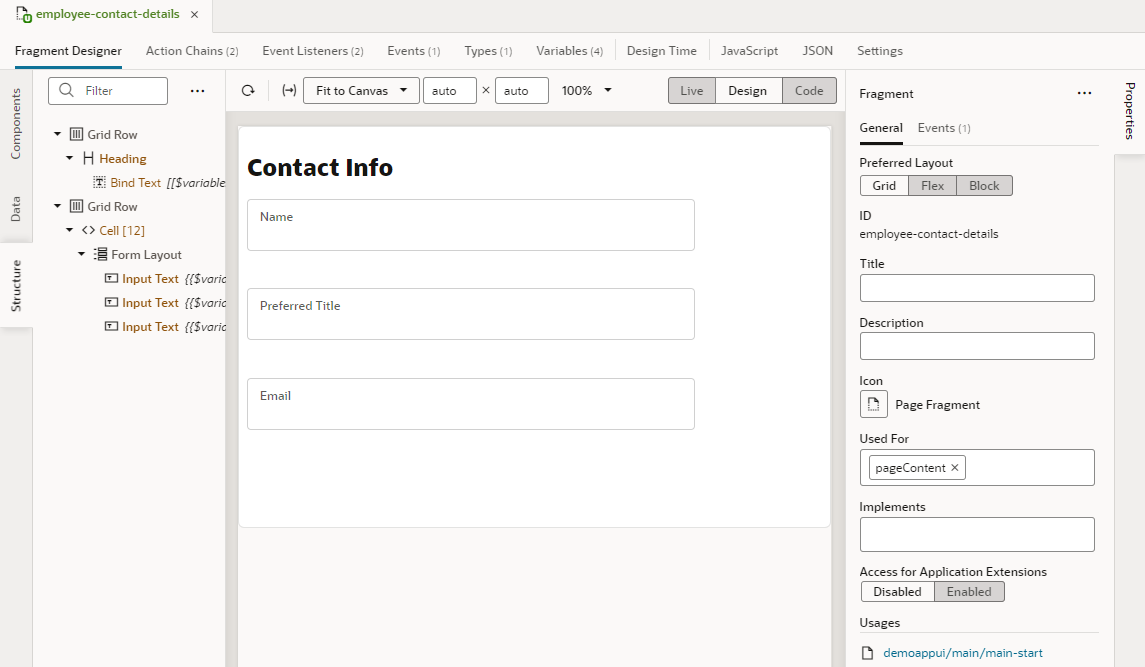
    Here's an example of a fragment set up to show an employee's details in a form:
    Description of fragment-example.png follows
    Description of the illustration fragment-example.png

    (For steps on how to design this sample fragment and wire up the necessary parameters, see Sample Scenario: Create a Fragment and Pass Values.)

  6. Optional: Return to your page to create more fragments and add them to the page. You can add as many fragments as you need to a page, even add fragments to other fragments.
    1. Click Create Fragment icon next to Fragments in the Components palette and create a fragment.
    2. Drag and drop it onto the canvas to add it to the page.
    Alternatively, repeat steps 2 to 5 to create and add fragments starting with a fragment container on a page.

    Tip:

    It's also possible to create pages starting with the contents of an existing fragment, essentially using the fragment as a page template.

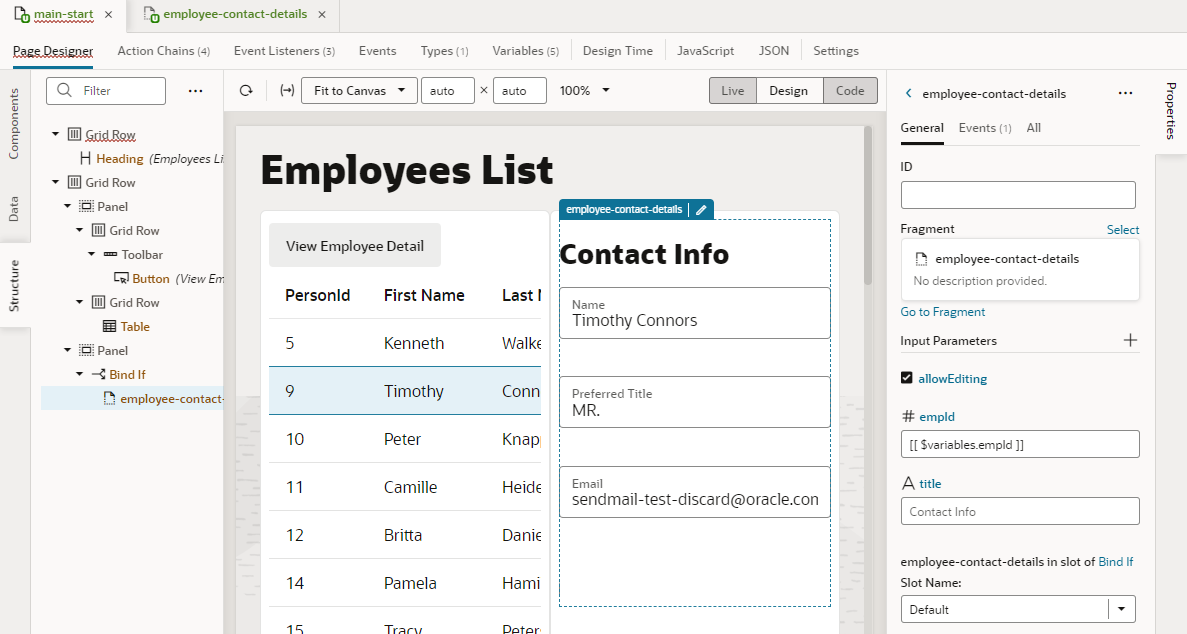
    Once a fragment is added to a page, its content will automatically render on the page that consumes it, as shown here:
    Description of fragment-container-properties.png follows
    Description of the illustration fragment-container-properties.png

    You can then use the fragment container's Properties pane to view fragment variables that have been enabled as input parameters, even create them on the fragment container. You can choose to override the parameter's default value with an alternate value for the page, or use a page variable to provide initial values for a fragment's input parameter. (Hover over each input parameter to view its type and description, if one was provided.)

    You can also configure the fragment's container to react to events raised by the fragment.

Once a fragment is added to a page, you can change it if you want. You can replace it with another fragment, even remove it completely from the page. To do this:
  1. Open the page that uses the fragment you want to change, select the fragment on the page, then in the fragment's Properties pane, click Select next to Fragment.
  2. Make your choice in the Select Fragment dialog:
    • To remove an existing fragment on the page, select No Fragment.
    • To replace the existing fragment with another, select the fragment you want to use under Fragments.
  3. Click Select.