Create Translation Keys
As you develop your App UI, you'll need to enter text for any new headings, labels, and messages you add. To make sure these text strings are translated, you'll need to create a translation key for each new translatable string.
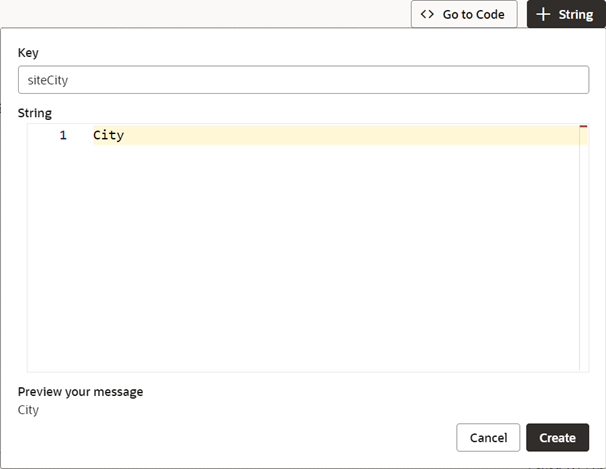
You can do this in one of two ways. You can open the New String popup from your App UI translation bundle. Or, you can create a new translation key from the Properties pane for a new UI component and bind it to the component. In either case, you'll provide a key value, the translatable string, and a description. The description provides your translators with additional context.
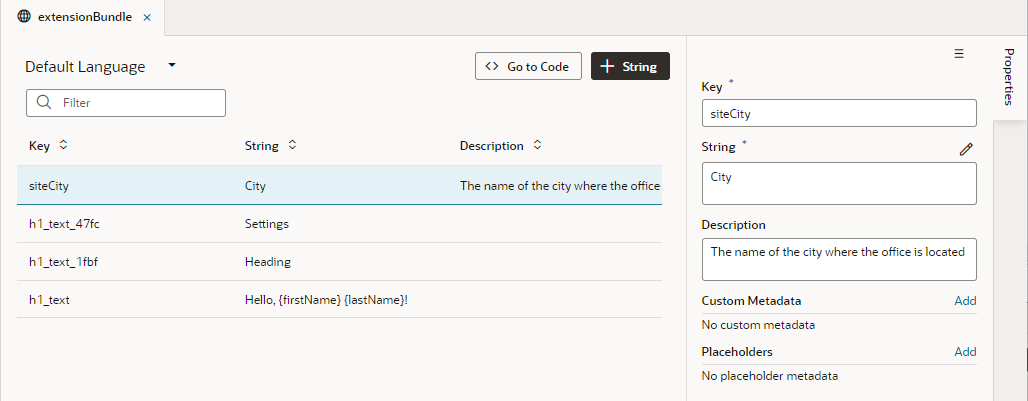
You can also provide custom metadata for a translation key as well as placeholder metadata for strings that include expressions. Access these fields from the Properties pane for a translation key when you select it from your App UI's translation bundle.
Strings can be either static values or expressions written in International Components for Unicode (ICU) format. If you want to use an expression in a translatable string, see Use an Expression in a Translatable String.
Once you’ve added a string to your translation bundle, you can associate it with a UI component using the Translatable String popup available from the component's Properties pane.
If the string you want to use has already been saved, you don’t need to add it here. You can just search for and select it using the Translatable String popup when you add the UI component.
Note:
This task describes how to create a translation key from a translation bundle. For the steps to create a translation key from a component's Properties pane, see Associate a Translation Key with a UI Component.To create a key for a translatable string from your translation bundle:


