Managing Audiences
You use the Audiences page to manage your audiences.
In this topic
Opening the Audiences page
To open the Audiences page:
-
Select Manage > Audiences.
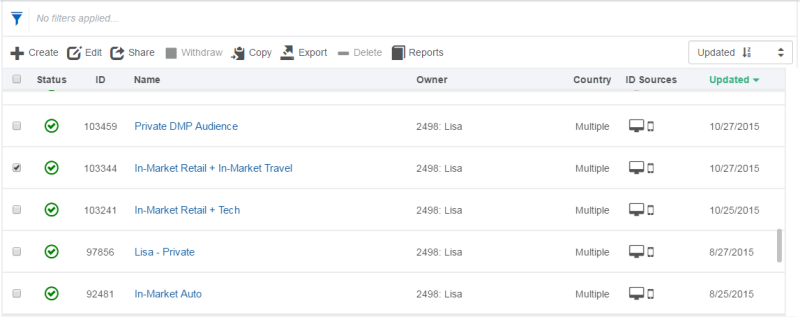
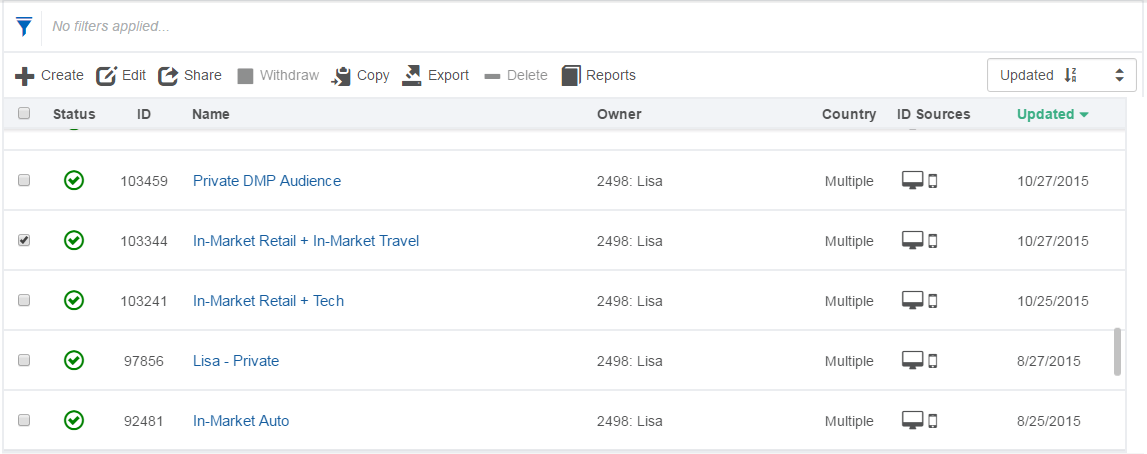
Audiences page features
| Name | Description |
|---|---|
Filter ( |
Click to filter the list of audiences. |
Create |
Click, then choose one of the following three options:
|
Edit |
Click to edit the selected audience. |
Share |
Click to share your the selected audience with a media partner. |
Withdraw |
Click to stop sharing the audience.
|
Copy |
Click to create a new audience by copying an existing one. |
Export |
Click to export an audience to a CSV file. You can modify your segments in the file and then import it back into the platform to create a new audience. |
Delete |
Click to delete the selected audience.
|
Reports |
Click, then choose to run one of the following reports:
|
|
Status |
Lists the current state of each audience, which may be one of the following:
|
|
ID |
Lists and sorts the audience IDs. |
|
Name |
Lists and sorts the audience names. |
|
Owner |
Lists the ID and name of the partner who owns the audience (typically your partner seat unless it is shared by another partner). |
Country |
Lists the countries targeted by the audiences, which can be listed as Multiple if there are too many to display. To see all the countries, open the audience. |
ID Sources |
Lists and sorts the ID Sources tab displays the available ID sources so that you can choose to include only ID sources that interest you, such as mobile advertising IDs (MAIDs). |
|
Updated |
By default, audiences are sorted with the most recently updated audience at the top. |
Sorting and filtering audiences
You can sort the list of audiences by clicking on the column headers on the Audiences page. By default, audiences are sorted by the Updated column in descending order (from most recently updated to earlier audiences).
In addition, you can filter audiences based on a variety of criteria, such as status, ID source, and country.
To filter the list of audiences:
- Click the filter icon
 . The audience filters are displayed.
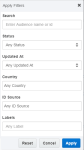
- Select any of the following filters:
- Search: Enter a search string or the audience ID.
- Status: Select a status from the list, such as Shared.
- Updated at: Select Past Week or Past Month to find audiences that were recently updated.
- Country: Specify one or more countries targeted by the audiences.
- ID Source: Select one of the ID Sources targeted by the audiences.
- Labels: Enter a the name of a label to find audiences that have that label.
- Click Apply.
- Click Reset Filters to reset any filters applied to the audiences.

Viewing audience details
You can view a brief summary of each audience on the Audiences page. To view more details, such as its status, reach, price, activity, sharing details, and composition, click its name to open the audience details page. This view allows you to edit, delete, share, and associate the audience with a campaign.
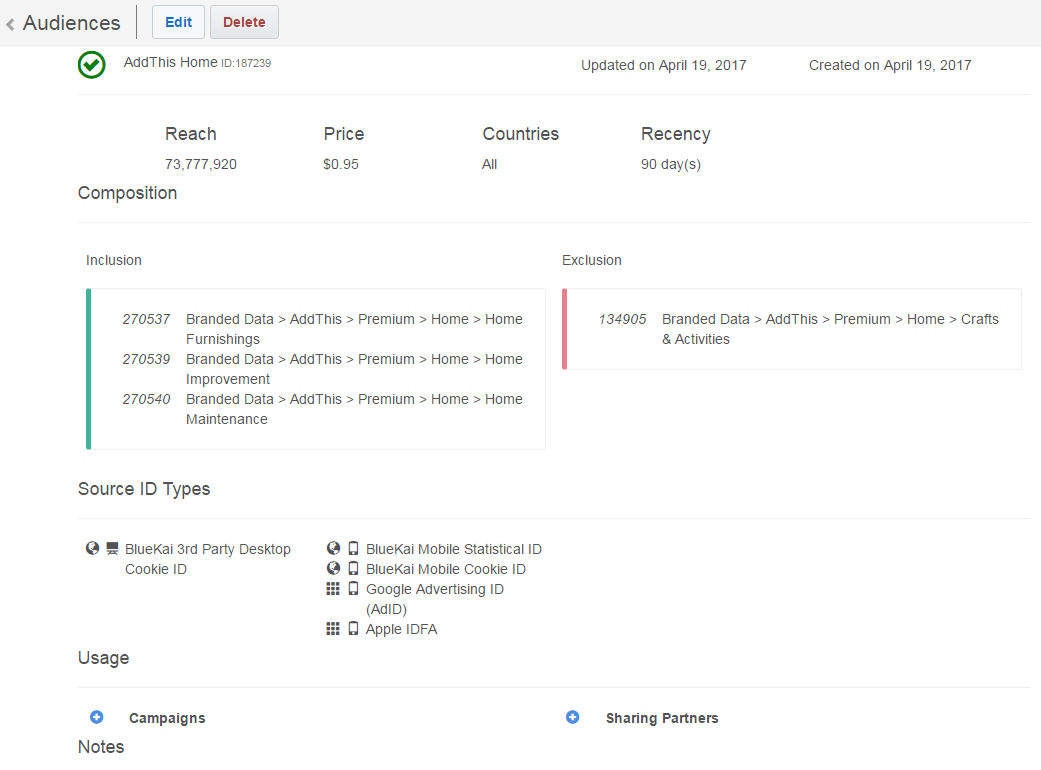
For information about these details, see the audience reference.
To view the details of an audience:
- In the Oracle Data Cloud UI, select Manage > Audiences. The Audience page is displayed.
- Click the name of the audience to be viewed. The audience's details are displayed.
- To associate the audience with a campaign, click the add campaigns button
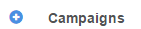 .
. - Use the campaign creation tool to select the campaign type and configure the campaign details.
Editing audiences
You can edit the composition, names, and labels of the audiences you created. This capability is useful for adjusting a campaign's delivery or performance or extending audience reach.
You cannot edit an audience that a partner has shared with you. In addition, you cannot edit an audience that you shared with a partner if it is being used in an active data campaign. To edit the audience, you must first withdraw it. For details, see withdrawing audiences.
Important: If you edit an audience that is being used in an active data campaign, your changes may effect the delivery or performance of the campaign.
To edit an audience:
- On the Audiences page, select the check box for the audience to be updated.
- Click Edit. The audience is displayed in edit mode.
- Modify any of the audience settings as described in creating an audience.
- Click Save.
Sharing audiences
You can share your audiences with a media partner who can then use the audience to create their own campaigns.
When you share an audience, your media partner receives an email notification. They can see the audience on their Manage > Audiences page.
To share an audience:
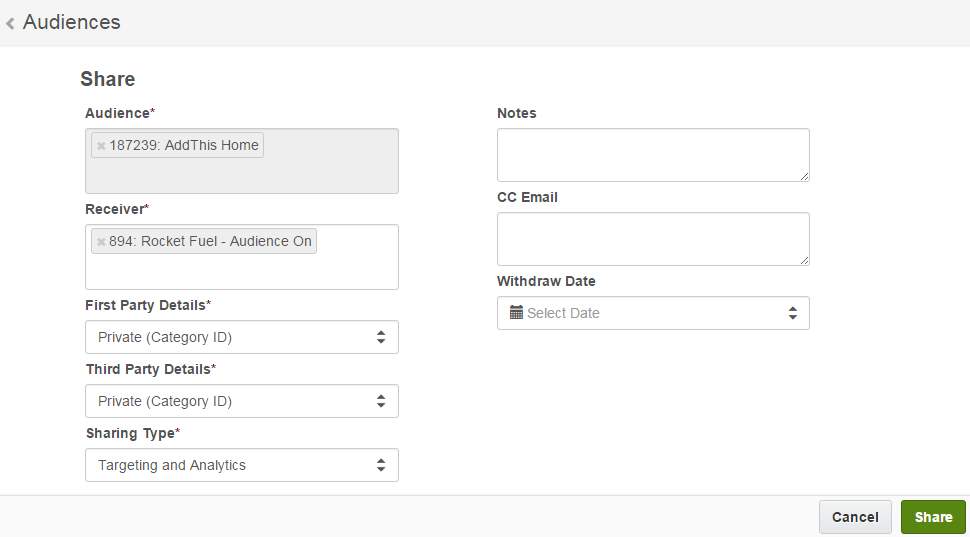
- On the Audiences page, select the check box for one or more audiences to be shared, and then click Share. The Share page is displayed.

- In the Receiver list, enter the names or IDs of your whitelisted partners with whom you want to share the audience. As you enter characters, the possible matches are listed. Contact your account manager for more information on whitelisting partners for audience sharing.
- From the First-Party Details and Third-Party Details lists, specify the amount of information that is displayed for the categories in your shared audience. This setting is applied to all the media partners with whom you are sharing your audience. Select one of the following display options:
Option Category information displayed Example Category ID The unique ID associated with the category 6737 Full Path The full taxonomy path In-Market > Autos > Makes & Models > Chevrolet > Camaro Leaf Node The last node in the taxonomy path Camaro Private The category is marked as "Private" Private - In the Sharing Type box, select how the receiver can use the audiences you have shared with them:
- Modeling, Targeting, and Analytics: The receiver can use your shared audiences to create look-alike models, create data campaigns to target your audiences across multiple media execution platforms, and run audience analytics reports.
- Targeting and Analytics: The receiver can use your shared audiences to target your audiences across multiple media execution platforms, and run audience analytics reports.
- Analytics Only: The receiver can only include your shared audiences in audience analytics reports. Receivers cannot add your shared audiences to their data campaigns.
- Targeting Only: The receiver can add your shared audiences to their data campaigns in order target, optimize, and model audiences across multiple media execution platforms.
- In the CC box, enter the email address of a partner that you want to receive an email notification about the shared audience.
- In the Notes box, enter any notes or messages to be included with the shared audience.
- In the Withdraw by Date, enter the date or select the date from the calendar by which the audience will no longer be shared with the selected media partners. After the audience is withdrawn, your media partners will no longer be able to view the audience or use it in a campaign. In addition, the status of the audience changes to Withdrawn in the Audiences page.
- Click Share. A message regarding the shared audience will appear in the Account Activity page for the sender and recipient.
Tip: DMP partners typically share their first-party categories as private and their third-party categories as full path or leaf node. This keeps first-party data private while providing access to third-party data for media vendors so they can help optimize the performance of data campaigns.
Withdrawing audiences
You can withdraw an audience to stop sharing it with media partners.
Important: After you withdraw an audience, all active campaigns using the audience are suspended and cannot be re-activated. If you share the audience again, your media partners must create a new campaign to use it.
To withdraw an audience:
- On the Audiences page, select the check box for an audiences to be withdrawn.
- Click Withdraw. The Withdraw page displays the associated partners.
- Select the check boxes of the media partners for whom the audience is to be withdrawn and then click Withdraw.
- A withdrawn audience message will appear in the Account Activity page for the sender and recipient and the Audiences page displays a status of withdrawn.
Copying audiences
You can create a new audience by copying an existing one. However, you cannot copy a shared audience.
The new copied audience will have the same composition and configuration as the source. This enables you to rapidly create audiences for similar data campaigns. You can use this feature to create an audience, configure its composition, reach, and frequency, and then use it as a template for creating new audiences.
To copy an audience:
- Select the check box for the audience to be copied.
- Click Copy. A new audience named AudienceName Copy is added to the audience list.
- Edit the audience as needed. For details, see editing audiences.
Exporting audiences
You can export an audience to a CSV file to quickly add specific predefined segments to a target audience and reuse the segments. After you export an audience, open the CSV file with a spreadsheet application, and modify your audience based on the guidelines in the file. You can then import the segments into the Create Audience window.
To export an audience:
- On the Audiences page, select an audience and click Export. A CSV file is downloaded to your computer.
- Open the CSV file in a spreadsheet application.
- Modify the audience following the template and instructions included in the CSV file.
Running audience reports
You can view the audience discovery, profile, and usage reports or download the audience details spreadsheet.
To run an audience report:
- On the Audiences page, select the check box for an audience.
- Click Reports and then select one of the following available reports:
- Audience Details: A downloadable spreadsheet listing the segments in your target audience and including the composition and reach for each segment.
- Audience Discovery: Lists the top categories that are associated with an audience. You can use an audience discovery report to discover new audiences, extend your target audience during campaign planning, improve campaign performance, and increase the return on your advertising dollars. For details, see overview of the discovery report.
- Audience Profile: Provides the behavioral and demographic information about the audience.
- Audience Usage: Lists the audience ID, name, all partners using the audience, and the number of impressions were delivered against that audience. You can export this report to a spreadsheet.
Deleting audiences
You can permanently delete an audience. If the audience is being shared, you must withdraw it before you can delete it.
Important: Deleted audiences cannot be activated, used in a campaign, or shared.
To delete an audience:
- On the Audiences page, select the check box for the audience to be deleted.
- Click Delete.
- Click OK to confirm the deletion.


