Creating a Campaign
You can create a campaign to deliver your audience out of the Oracle Data Cloud platform. A campaign delivers an audience to media execution platforms for targeting, optimization, and analytics. You can also use a campaign to deliver an audience directly to your site or to your system.
In this topic
Entering basic campaign information
When you create a new campaign, you have to specify some basic information, such as the name and validity dates. You can change all of this information later by editing the campaign.
To enter basic campaign information:
-
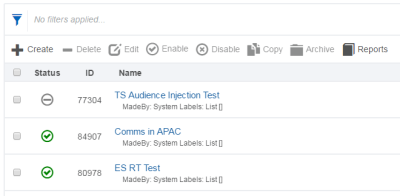
Log in to partner.bluekai.com and select Manage > Campaigns. The Campaigns page is displayed.
-
Click Create. The Create Campaign page is displayed with the Basic Information section at the top..
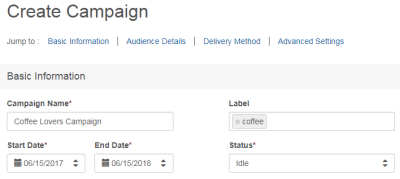
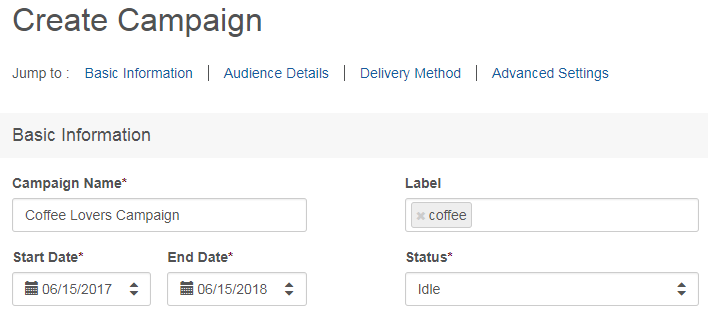
- In the Basic Information section, enter the following details:
- Campaign Name: Enter a descriptive name for the campaign.
- Label: (Optional) Enter descriptive tags to help classify and filter your campaigns in the Campaigns page. Labels must have two or more characters.
- Start Date: The date when your campaign is to begin (the default is today's date)
- End Date: The date when your campaign is to stop. By default, your campaign will end in one year.
- Status: Select the campaign status:
- Active: Select if you are starting your campaign on today's date, it will begin running in approximately 60 to 90 minutes after you click Save. For example, audience injection apps support immediate activation.
- Idle: Select if you want to wait to activate your campaign. For example If you are using an app partner, you may need to wait until you get confirmation that your audience has been mapped in their platform before you can activate your campaign.

Selecting the audience
You select an audience to define which users are delivered by the campaign. You can select from all the audiences available in your partner seat, whether they are based on first-party data and or third-party data. The delivery method you select later interacts with your audience selection. If the delivery method you select does not support the ID sources in the audience, you see an error when you try to save the campaign.
Only one audience can be specified for each campaign, but each audience can include any number of categories. See Creating Audiences for more information.
To select an audience:
-
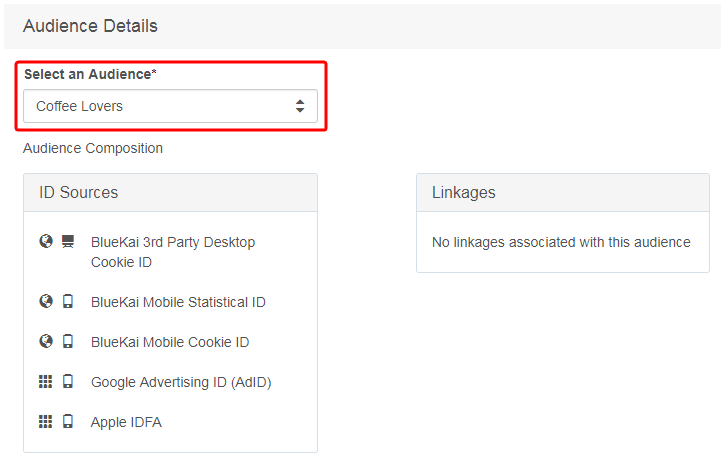
In the Audience Details section of the Create Campaign page, start typing the name of the audience you want to select, then select it when the full name appears.
The audience's ID sources and any linkages are displayed after you select it.

Selecting a delivery method
You can choose from three methods to deliver data:
You can include both apps and a pixel URL in the same campaign, but you can't use a JSON return tag in the same campaign as any other delivery method.
App delivery
You can deliver your audience to one or more channel partners by using apps that you have installed for them. In most cases, you can create a single data campaign to deliver your audience to multiple app partners. Exceptions include campaigns that include Google apps or apps that use different delivery methods, such as SDT or JSON return. For example, if you want to deliver an audience to AppNexus and DataXu, you can create a single campaign. However, if you want to deliver an audience to both Google and GDN and DataXu, you need to create separate campaigns.
In addition, some partners use different settings, which requires separate campaigns. For example, if you want to send an audience to both DataXu (which delivers via SDT) and Optimizely (which uses JSON return), you should create separate campaigns because they require different win frequency settings. You can also create a single campaign to deliver an audience to both app and pixels, but you cannot combine apps or pixels with a JSON return tag delivery.
If your partner does not have an app, you can create a paste-a-pixel campaign.
Campaign delivery estimation
Note: Campaign delivery estimation is currently in controlled availability.
For some apps, you see audience reach and delivery estimates as you create the campaign. The following delivery app partners support campaign delivery estimation:
- Centro
- Oath – Yahoo/Brightroll
- DataXu
- AppNexus
- TubeMogul
- MediaMath
- Oath – AOL
- Turn
- RocketFuel
- The Trade Desk
These estimates are based on the interaction of the selected audience and the app.
- Audience Size is the number of users in the audience that are linked to ID sources that the app partner can receive. For example, suppose the audience includes both users linked to desktop cookies and users linked to MAIDs. If the app can deliver only desktop cookie IDs, the MAID IDs in the audience are excluded from the reach estimate. Factors such as frequency, recency, and country that apply to the audience affect its reach.
- Estimated Delivery reflects the number of users with IDs that have been swapped. Users with MAIDs or other non-cookie IDs do not require ID swapping, so they are included in the estimated delivery. Another ways of thinking about the estimated delivery numbers is that they are the audience size minus any non-ID swapped cookie users. This estimate is defined as a range because of volatility in the numbers used in the calculation.
Selecting the delivery app
To select a delivery app:
-
In the Delivery Methods section of the Create Campaign page, click Select Apps.
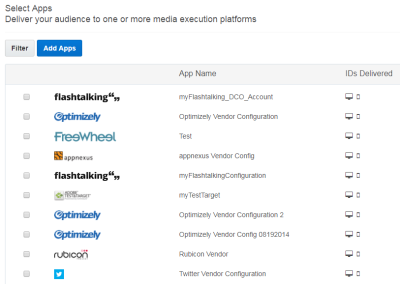
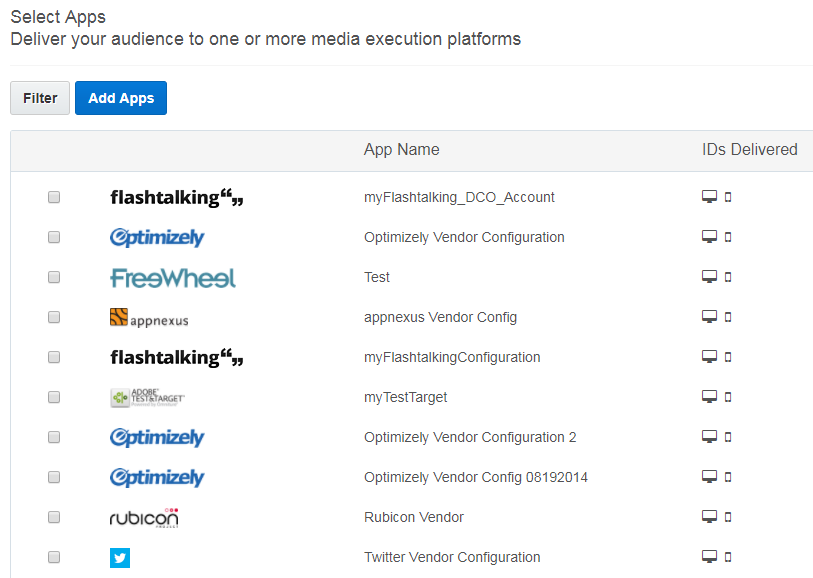
The Select Apps dialog appears, listing the installed apps for your partner seat. If you have many apps installed, you can click Filter and enter the name of the app to narrow the list. If an installed app does not support the delivery of ID sources included in the selected audience, the app does not appear in the list.
- Select one or app more from the list.
- Click Add Apps.
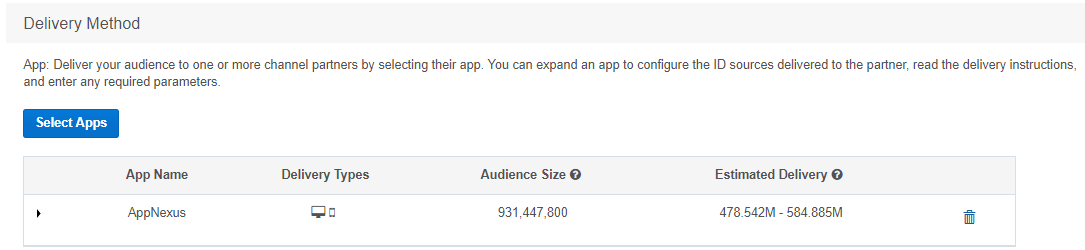
If available, delivery estimates and other information are displayed below the Select Apps button.
For each app, you see the name, icons that represent ID sources, audience reach, and estimated delivery range.

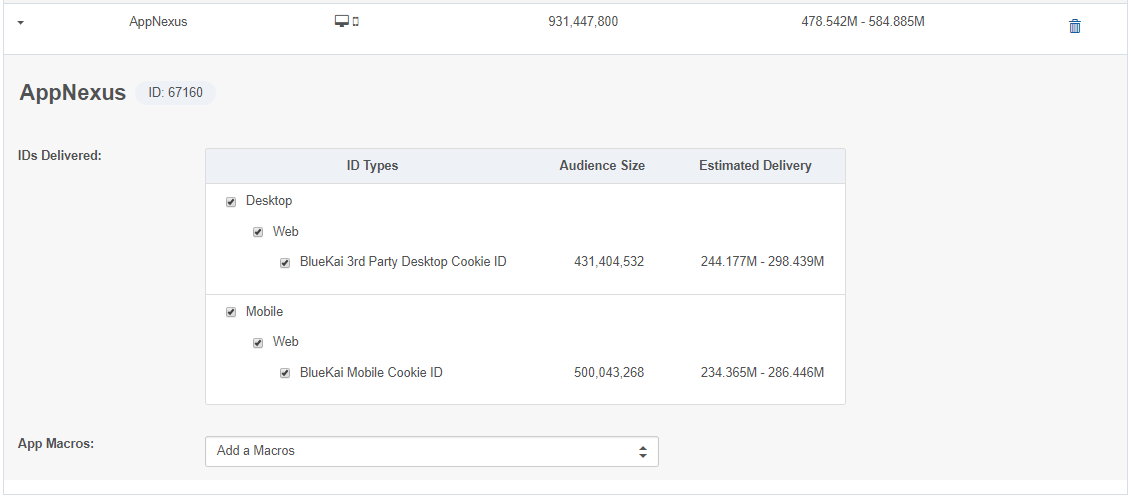
- (Optional) Click the triangle next to an app name to see audience and delivery information for each ID source supported by the app.

-
(Optional) Clear the check boxes for any ID sources you do not want to send to this partner.
For example, you could clear the Mobile check box to send only users linked to desktop cookie IDs. For an app that can deliver users for both apps and mobile web cookies, you could clear the Mobile Cookie ID check box to deliver only Apple IDFAs and Google AdIds.
-
(Optional) Select a macro from the Add Macro list and enter an appropriate value. The macro is appended to the pixel URL created for the campaign. See Pixel URL Macros for more information.
-
If a Custom Parameters section appears and one or more boxes do not contain values, enter the appropriate information.
Important! Do not change any values that appear by default.
Pixel URL delivery
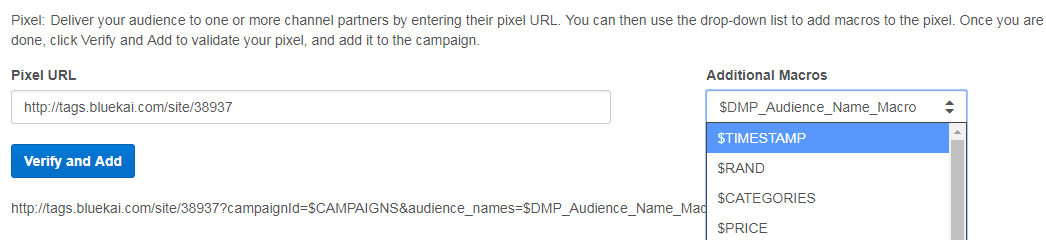
If you want to deliver data to a partner does not have an app, you can enter their pixel URL. Optionally, you can add any required pixel URL macros to the pixel from the Additional Macros list. You can deliver data to a pixel URL even if you have also specified apps in the campaign.
To specify pixel URL delivery:
-
In the Delivery Methods section of the Create Campaign page, enter a URL into the Pixel URL field.
The pixel URL appears below the field.
- (Optional) Select a macro from the Additional Macros list.

The macro is appended to the pixel URL below the field.
- Replace any variables in the macros with the values you want to use.
- Click Verify and Add to validate the pixel URL and add it to the campaign.
JSON return delivery
You can deliver campaign data to your web page by using JSON return. To use this delivery method, create a JS container tag, and insert it before the closing </head> tag on your page. When this tag is fired, a JSON object (bk_results) is returned to the page. It includes each campaign that has won the user and the categories that qualified them for the campaign. You can use this data to customize the content on your page.
Note: If you select an app or enter a pixel, the JSON return option is not available.
To deliver data by JSON return:
- In the Delivery Methods section of the Create Campaign page, click Yes under JSON Return Tag.
Selecting advanced delivery settings
The Create Campaigns page includes advanced settings that you can optionally configure. By default, these five settings are optimized based on the selected delivery method, but you can change them.
There are five advanced settings:
- Category Granularity:
Select whether to deliver parent or parent and child categories in your audience. By default, only parent categories are delivered.
- Deliver Parent and Child Categories: The campaign delivers users whose profiles contain either the category selected in the audience or any of the child categories underneath that category. For example, if your audience is targeting the In-Market > Autos category, your campaign will deliver users whose profiles contain that category or one if its child categories, such as In-Market > Autos > Condition > Used Cars. Selecting this option increases the amount of granular category data that is delivered.
- Deliver Parent Categories Only: The campaign delivers only users whose profiles contain the exact category selected in the audience.
- Categories Per Delivery (pixel campaigns only): Specify the number of categories included per pixel delivery.
- All Categories: All the categories won by the pixel campaign are included in the pixel. This is the default value.
- One Category per Site Visit: The categories won by the pixel campaign are queued. Each time a user is seen online, a pixel is delivered and includes the next category in the queue.
- Win Frequency: Specify how often the campaign delivers data. If this option is not displayed, contact My Oracle Support (MOS) to request this feature.
- Win Every X Days (app and pixel delivery only) The campaign delivers users once every 30, 15, or 7 days after they get tagged with a category for the first time. If a user gets tagged with the a category that is already in their profile before the selected interval has elapsed, they are not delivered. If a campaign targets multiple categories, and a user has been tagged with category A but not category B, the campaign re-delivers the user when they are tagged with category B. The campaign also resets the interval. The default frequency is 30 days.
- Win Every Time (JSON return delivery only): Your campaign delivers users every time they get tagged with a category. This setting is typically used for campaigns that deliver data via the JSON return tag. This ensures that customized site content linked to your campaign is displayed to users every time they visit your web page.
- Win on Sites:
Select on which containers (site IDs) data may be delivered. If this option is not displayed, contact My Oracle Support (MOS) to request this feature.
- Win on All My Containers (Site IDs): Your tag returns data for this campaign on all site IDs in your seat.
- Win on Selected Container (Site ID): Your tag returns data for this campaign only on the site IDs selected. This setting is typically used for JSON return tags to restrict which site IDs can be used to return campaign data. For example, if you select site ID 1 and a JSON return tag is called with site ID 2, this campaign will not be included in the JSON object returned to your web page. If you select this option, a separate field appears where you select site IDs.
- Priority: You can rank campaigns from 1 (lowest priority) to 100 (highest priority) to specify which one has the priority for winning auctions.
To configure advance settings:
(Optional) In the Advanced Settings section of the Create Campaign page, make selections in one or more of the available fields.
Some fields are active or inactive based on other selections you make. If you select Win on Selected Container (Site ID) in the Win on Sites field, another field appears where you can select site IDs one at a time. The IDs you select are shown in a table below the field.
Saving the campaign
When you save a campaign, the Oracle Data Cloud platform verifies that it contains all of the necessary elements and that there are no conflicts in the configuration. For example, it verifies that the ID sources represented in the audience can be delivered by the selected delivery method. If conflicts are found, you see an error message and must correct them before saving.
You can save the campaign in either Idle or Active status. If you save it in Active status, it is ready to start delivering data within approximately 60 to 90 minutes. When a campaign is active, the estimated reach and estimated delivery information is not displayed because you can see actual numbers by running reports.
Click Save.
The platform verifies the campaign configuration, then creates the campaign. The Campaigns page appears with the new campaign included.


