E-planning Ad Server
You can deliver your first-party Oracle Data Cloud cookie data to the e-planning platform. You can use the e-planning platform to target audiences based on this data.
In this topic
Installing the e-planning app
Use the install an app workflow to configure the e-planning app in the Oracle Data Cloud platform.
Generating and deploying a JSON container tag
Because the e-planning app delivers data to web pages by using JSON return, you must create a container and generate a JS container tag. You then copy and paste the tag into the HTML code on your page before the closing </head> tag.
Getting your e-planning ad server tag
In addition to the Oracle Data Cloud JS tag, you paste an e-planning tag on your page.
To get your e-planning ad server tag:
- Log in to https://admin.us.e-planning.net/login with your e-planning account credentials.
- Click the Inventory tab and then select the space for which you want to extract a tag.
- Click HTML code.
- Copy the e-planning ad server tag and paste it directly below the Oracle Data Cloud JS tag on your page.
Delivering audience data to e-planning
To send Oracle Data Cloud platform data to e-planning, you create audiences that include the users you want to target and then deliver those audiences. When you configure delivery, configure JSON return delivery by entering the site ID associated with the JSON return tag you created earlier. In addition, configure the Win Frequency setting for the delivery to Win Every Time.
After you specify the e-planning app and save the audience, e-planning receives an automatic e-mail notification. They then map your data to their segment objects. After you have received notification that mapping is complete, you can deliver the audience and target your audience in e-planning.
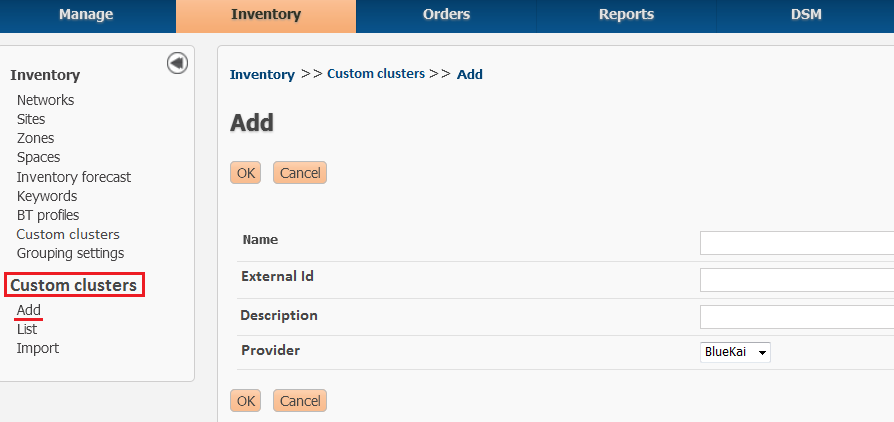
Targeting your audience in e-planning
To target your audience:
- Log in to https://admin.us.e-planning.net/login with your e-planning account credentials.
- Click the Inventory tab and then select the space for which you want to extract a tag.
- Click Custom Clusters.
- Click Add and then enter your segment name and ID. These should be identical to the campaign name and ID you set in your SSO pull seat.

- Click Orders, and then select Add under Campaigns.
- In the Targeting for DMP tab on the form, click BlueKai. All the segments that are based on your audiences are displayed.
- Select the segments that you want to target in your media campaign.
For more details about targeting your audience in e-planning, see DMP Targeting - BlueKai.