Scheduling Tags
Schedules provide instructions for firing tags. They specify where, when, and for whom third-party tags are fired from an Oracle Data Cloud platform container. Creating a schedule entails selecting the tags, containers, and targets you previously created and then configuring the maximum load time, priority, and other quality of service controls for the tag.
To schedule a tag:
Create a schedule
You can use the schedule wizard in the tag management service to specify where, when, and for whom third-party tag are fired from your container. To create the schedule, you select the tags, containers, and targets you previously created, and then configure the maximum load time, priority, and other quality of service controls for the tag. This enables you to ensure the optimum performance for all of the tags contained in your container.
To create a schedule:
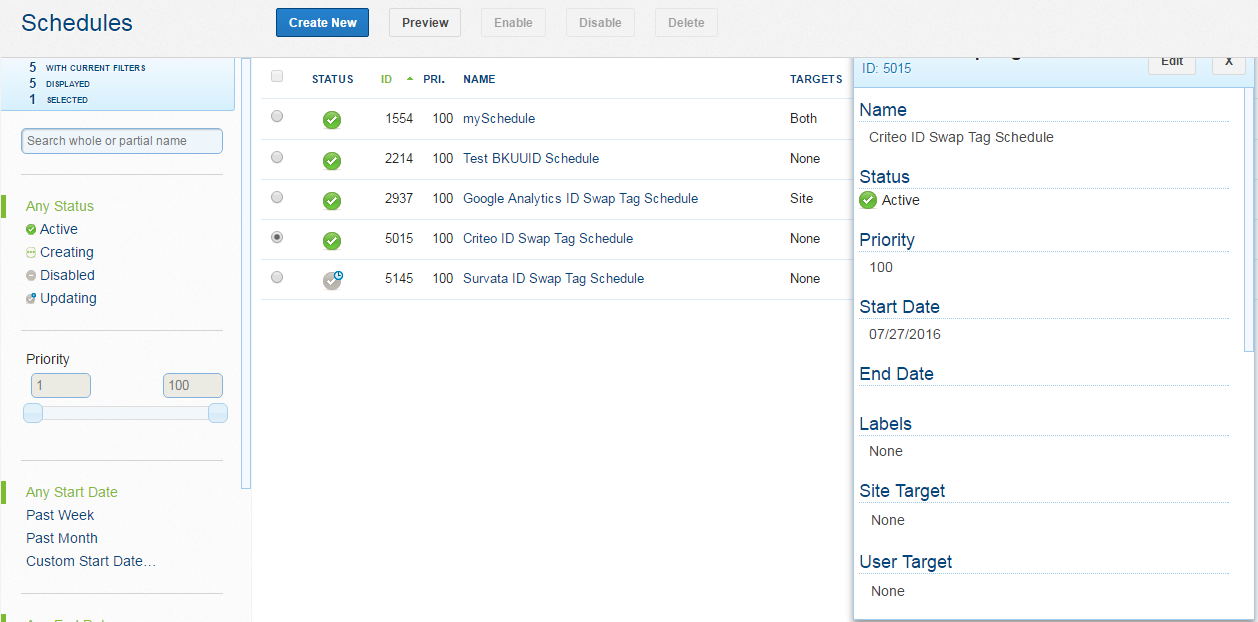
- Select Manage > Schedules. The Schedules page opens.
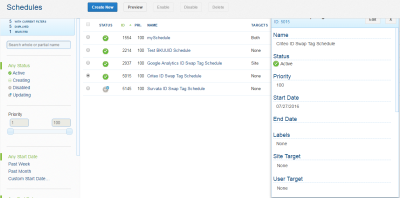
- Click Create New. The Create New Schedule wizard opens.

- In the Name box, enter a unique name for the schedule that makes it easy to identify.
- In the Tag Selection section, click one more tags to be fired. If you have not created any tags, click create a new tag to create a new tag.
- To change the sequence in which the tags are fired, drag the tags to the desired order.
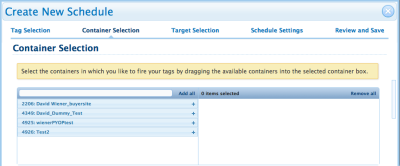
- In the Container Selection section, click the containers from which the selected tag is to be fired. You can manage tags across multiple domains by adding them to different containers.
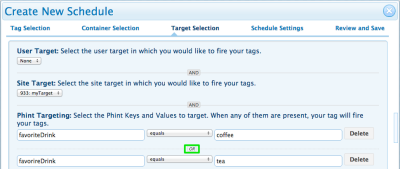
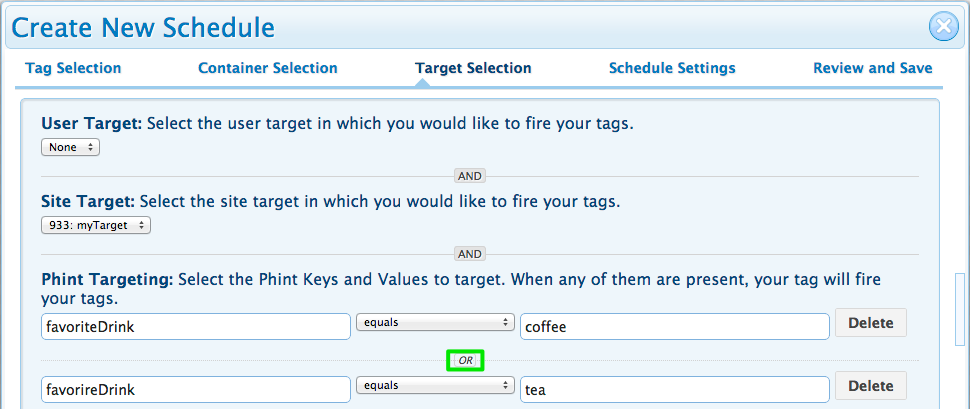
- Specify on which targets (users, sites, and phint conditions) to fire the selected tag.
Important:
Multiple target selections (user, site, and phints) creates an AND condition: all specified conditions must evaluate to TRUE for the tag to be fired.
Multiple phint targets creates an OR condition: only one of the phint conditions must evaluate to TRUE to meet the phint targeting criteria. For example if you enter phint conditions for "favoriteDrink = coffee" and "favoriteDrink = tea", the tag will fire as long as one of these key-value pairs matches one of the specified phint conditions (the key-value pairs passed into the container as phints are "favoriteDrink = coffee" OR "favoriteDrink = tea"), AND they meet all other target selection criteria (they are in the audience segment specified in the user target and/or site target). - Select the User targets on which you which you want to fire your tags.
With user targeting, your tag always fires as long as the user's profile includes the category. This means that the tag will fire if the category you are targeting is created on any page view, including the current one. For example, if a user is tagged with "Tablet Shopper" on a prior page view and you select a user target for "Tablet Shoppers", the tag will fire. For more details, see creating a target. - Select the Site targets and on which you want to fire your tags. With site targeting, your tag only fires if the category you are targeting is created on that same page view. For example, if a user is tagged with "Tablet Shopper" on the current page view and you select a site target for "Tablet Shoppers", the tag will fire. However, if the "Tablet Shopper" category is minted on a previous page view, the tag will not fire.
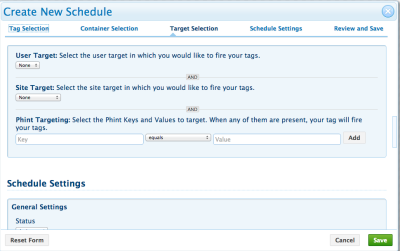
- Specify the Phint Targeting to be used for conditionally firing the tag. You can specify which raw phints (key-value pairs) must be passed into the Oracle Data Cloud core tag in order for the tag to be fired. This feature supports a number of use cases including targeting users based on highly granular product attributes such as exact price, SKU, or model number, and firing affiliate tags that generate conversions on your site. Your phint-based logic is always executed—even if you don't accept cookies.
- In the Key box, enter a string. The key may be a maximum of 256 characters, and it may include underscores, spaces, and other special characters.
- Select a conditional operator (the default is equals).
- In the Value box, enter a string, integer, or float. Strings are case-sensitive (for example, "True" and "true" are different values). The maximum value for integers and floats is 253 or 9007199254740992.
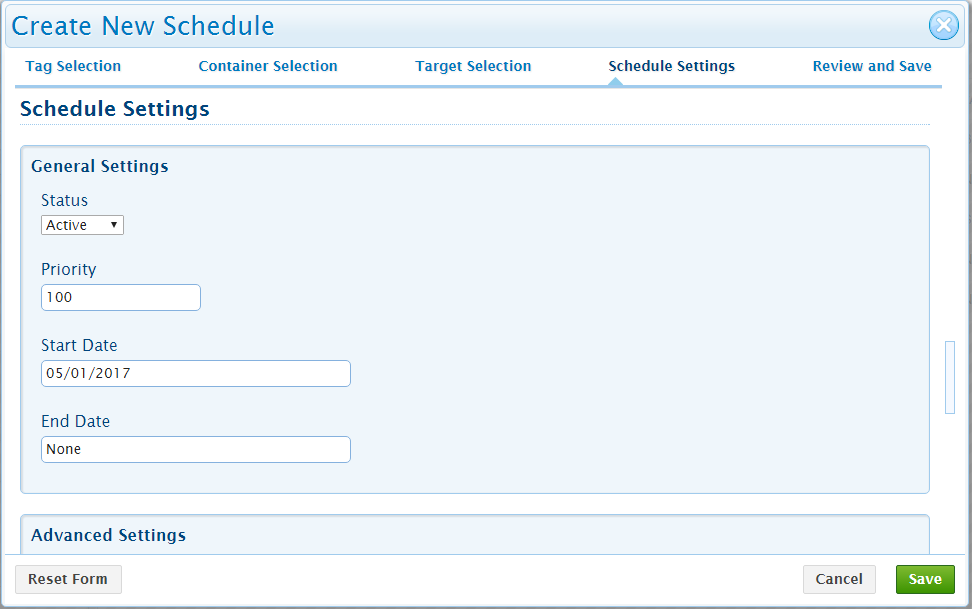
- Under General Settings, configure the following settings:
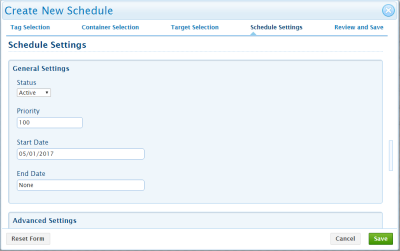
- In the Status list, select Active to immediately enable the tag or Disabled to schedule the tag, but enable it at a later time.
- In the Priority box, enter a unique number that will determine the order of firing based on the page capacity if there are multiple containers to be fired. The lower the value, the higher the priority. For example, 10 is a higher priority than 50.
- In the Start date box, enter the date on which the tag delivery should start.
- In the End date box, enter the date on which the tag delivery should end. If you do not enter an end date, the tag will always fire.
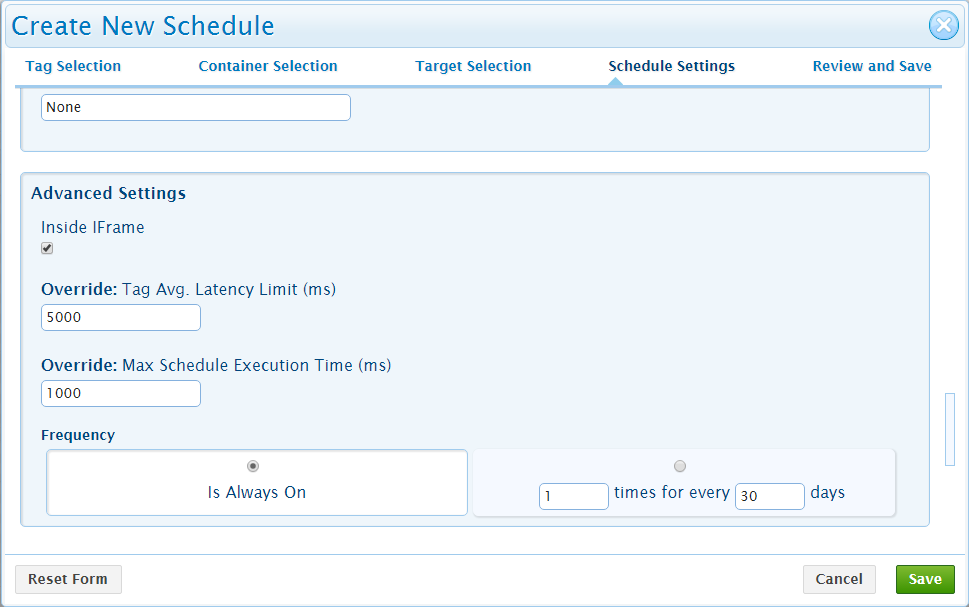
- (Optional) Under Advanced Settings, configure the following settings:
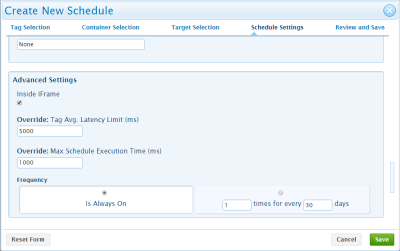
- To place the tag content directly on the first-party page, clear the Inside IFrame check box .
Warning: For enhanced security, the default Inside IFrame setting is cleared and will fire tags inside an iframe. Changing the default requires a special container tag.
- In the Override: Tag Avg. Latency Limit (ms) box, enter the maximum average number of milliseconds in which the scheduled tag should render. Average response time is measured as a running average of the last seven measurements. If a scheduled tag does not render within a specified load time, the tag will automatically shut itself down. The platform tracks the specific number of timeouts per tag for the majority of common browsers.
Important: If you set a different Override: Tag Avg. Latency Limit (ms) than one that is established in the global tag latency settings, the more restrictive setting will apply. For example, if the Global Default Tag Avg. Latency Limit (ms) uses a max load time of 5000 ms (the default) and you set the Override: Tag Avg. Latency Limit (ms) in the schedule at 6000 ms, the 5000 ms max load time is used.
- In the Override: Max. Schedule Execution Time (ms) box, enter the maximum number of milliseconds in which scheduled tags should render or the tag will shut down.
Important: If you set a different Override: Max. Average Tag Execution Time (ms) than the global tag latency settings, the more restrictive setting will apply. For example, if the Global Max Schedule Execution Time (ms) uses the default value of 1,000 and you set Override: Max Schedule Execution Time (ms) to 900 ms, 900 ms is used.
- In the Frequency section, choose one of the following:
- Select Is Always On if the tag is part of an always on delivery, in which case tags in the schedule are fired as long as targeting conditions are met. If you select Is Always On, settings in the frequency will be ignored.
- Establish the frequency by clicking the radio button above the frequency settings and entering the number of times and the number of days per user for which the tag is eligible to be fired. For example, if you select 1 time per 30 days, your third-party tags will be fired once per user within a 30 day period.
- To place the tag content directly on the first-party page, clear the Inside IFrame check box .
- After you have verified the settings, click Save.


Container report