Using Oracle OnRamp to Onboard your CRM Data
The Oracle OnRamp app provides an automated, self-serve offline onboarding solution embedded in the Oracle Data Cloud platform. You can segment the users in your CRM database and then securely upload offline files containing personally identifiable information (PII). OnRamp will match your offline users and then classify their attributes into new categories in your private taxonomy. You can then activate your offline data across multiple media execution platforms for targeting, analysis, modeling, and optimization.
Oracle OnRamp provides the following benefits:
- Self-serve onboarding: Upload your offline files on demand and include new values to capture new data and customize your taxonomy. OnRamp dashboards provide you with near real-time visibility into the match rate and number of users onboarded by segment as your inventory starts to ramp.
- Rapid onboard process via automated workflow: Use a quick and automated workflow that reduces the offline onboarding process. The OnRamp integration with Oracle Data Cloud eliminates the need to work across multiple platforms and teams to onboard your data.
- Maximum match rates: Activate more of your customer base.
This document describes onboarding data by using the OnRamp app. You can also onboard OnRamp data programmatically by using the OnRamp API.
In this topic
Request the Oracle OnRamp app
To get started with Oracle OnRamp, contact your sales representative to gain access to the OnRamp app.
Prepare your offline data
Consider the following when preparing your offline CRM audience data so that OnRamp can properly classify it and achieve the highest match rate.
Data requirements and best practices
| Item | Description |
|---|---|
| Data format |
|
| Files |
|
| PII |
|
| Taxonomy | The number of unique values available per column determines the number of segments created in your private taxonomy. |
Important: QA your data. If you use a spreadsheet application to prepare your data file, ensure that its values are properly formatted. For example, check that Zip codes with leading 0s are not truncated.
Match keys
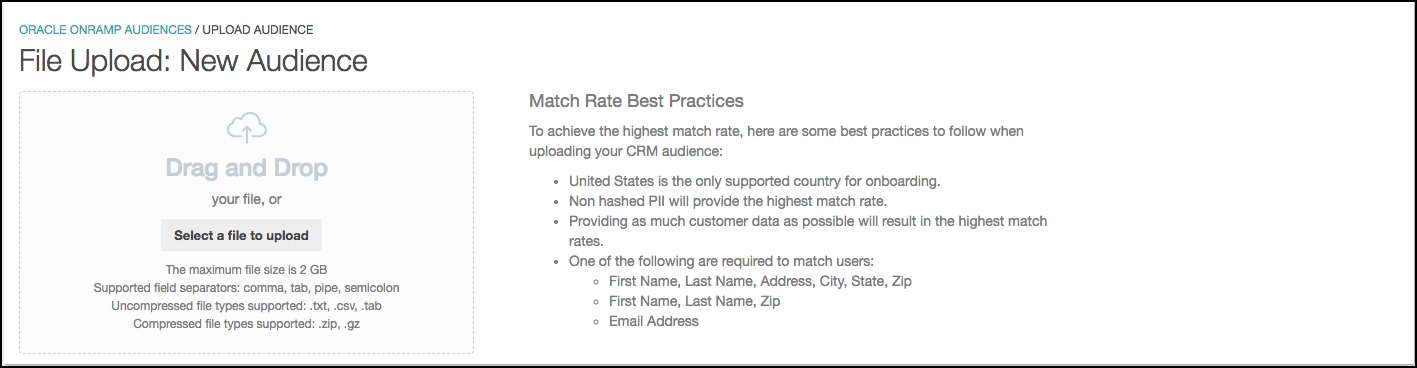
A match key data type selection is used to match the data in your file to known types. For example, if you are using name and address data at a minimum, you will need to select one of the following
- First Name, Last Name, Zip
- Email Address
When you initially upload your file to OnRamp, you will be prompted to select one of the following match keys for reach column in your file:
| Category | Match key | Description |
|---|---|---|
| Raw | Last Name | Unhashed last name (PII) |
| First Name | Unhashed first name (PII) | |
| Address1 | Unhashed first line of the street address (PII) | |
| Address2 | Unhashed second line of the street address (PII) | |
| City | Unhashed city | |
| State | Unhashed US state | |
| Zip (5 digits) | Unhashed Zip code (PII) | |
| Zip Extension (last 4 digits) | Unhashed Zip code extension (PII) | |
| Unhashed email address (PII) | ||
| Phone Number | Unhashed telephone numbers (PII) | |
| SHA-1 | SHA-1-hashed email address | |
| SHA-256 | Last Name | SHA-256-hashed last name |
| First Name | SHA-256-hashed first name | |
| Address1 | SHA-256-hashed first line of the street address | |
| Address2 | SHA-256-hashed second line of the street address | |
| City | SHA-256-hashed city | |
| State | SHA-256-hashed US state | |
| Zip (5 digits) | SHA-256-hashed Zip code | |
| Zip Extension (last 4 digits) | SHA-256-hashed Zip code extension | |
| SHA-256-hashed email address | ||
| Phone Number | SHA-256-hashed telephone number | |
| MD5 | MD5-hashed email address | |
| Customer ID | Customer ID | Customer ID |
| Segmentation | Classification | Select to create a segment for each unique value in the column. |
| Custom Field | Custom Field | Select to drop the data in this column. It will not be stored in the system. |
Upload your offline file
To upload your offline file to Oracle OnRamp:
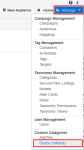
- Log on to partner.bluekai.com and select Manage > Oracle OnRamp.
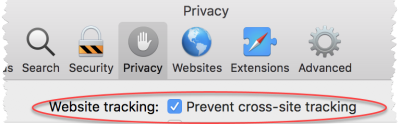
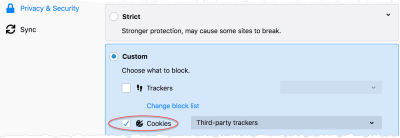
The Oracle OnRamp Audiences page is displayed.Note: If you are using the latest Firefox and Safari browser versions (Firefox 69.0 and later; Safari 13 and later), default privacy settings block usage of OnRamp. Workarounds are as follows:
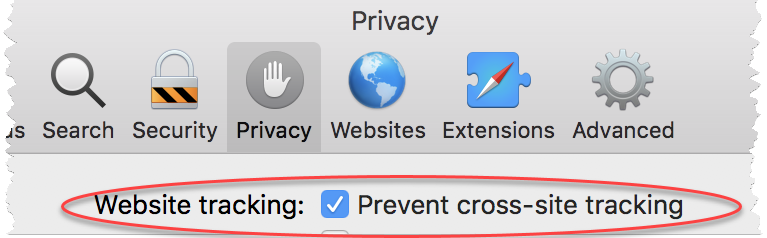
Safari workaround: Disable Website tracking: prevent cross-site tracking in the privacy settings.
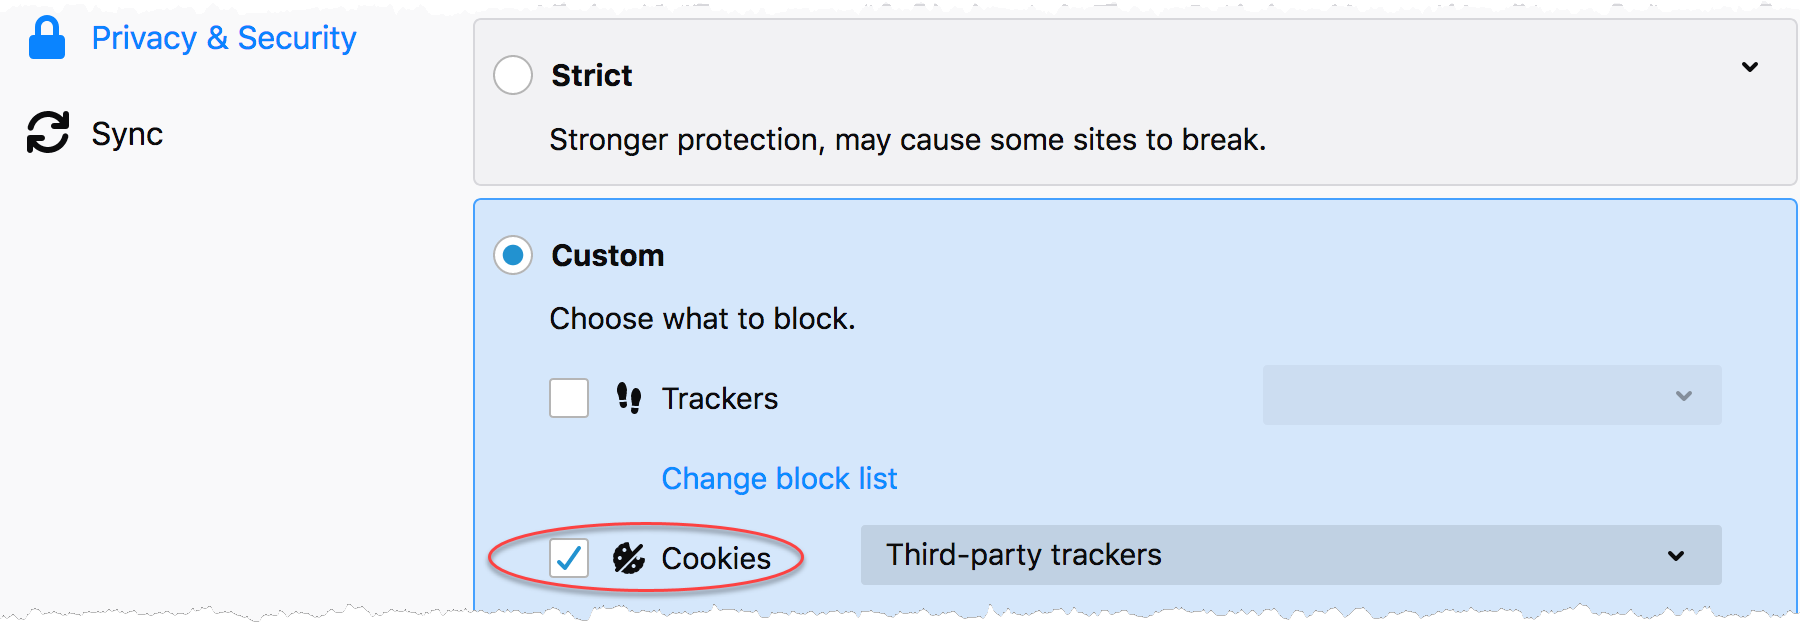
Firefox workaround: Disable Cookies under Choose what to block in Privacy & Security.
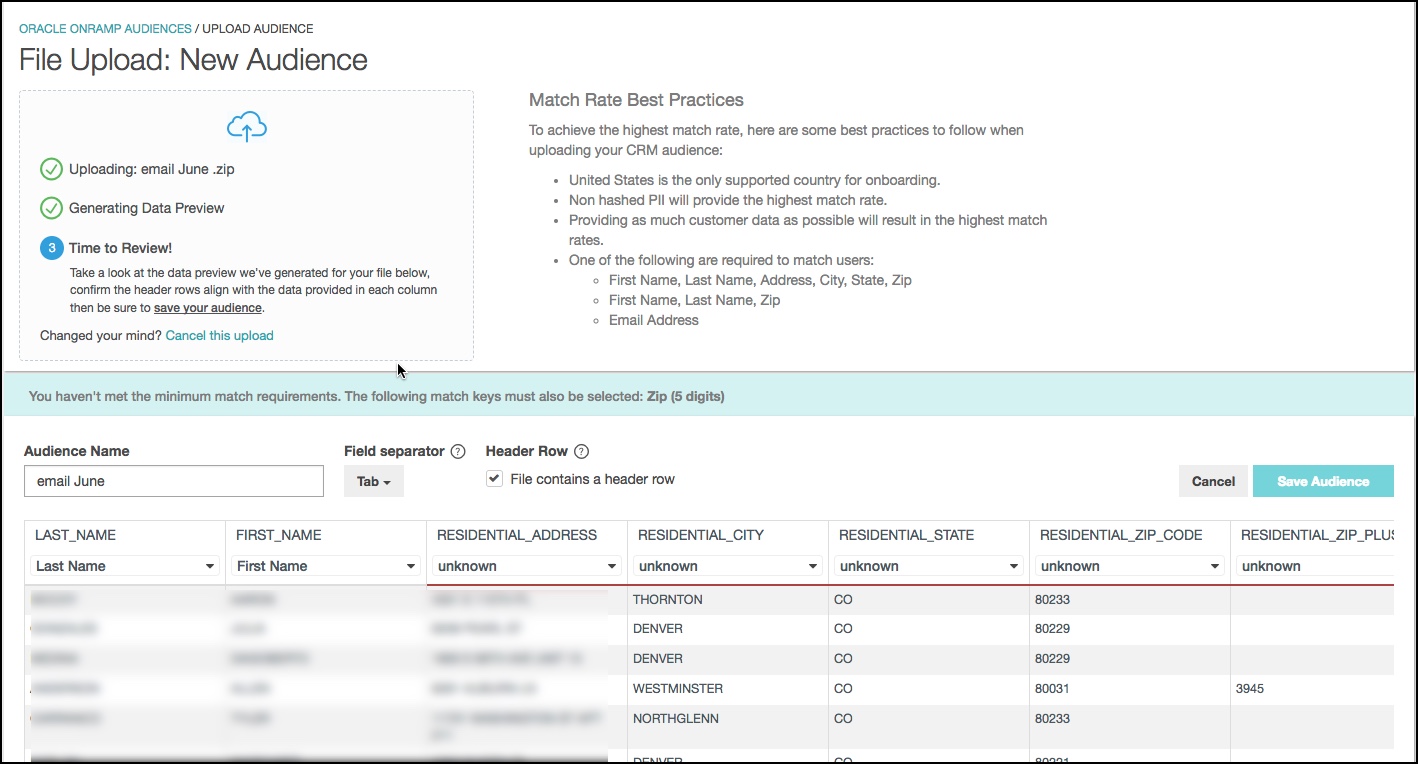
- Click Upload a New Audience. The Upload Audience page is displayed.

- Either drag and drop the file to be uploaded, or click Select a file to upload.
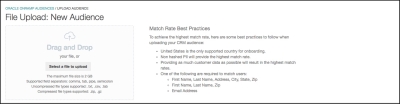
- OnRamp displays the status of your file upload. When the upload is complete, the Data Preview table is displayed.

- Use the column header drop-down lists to identify the correct match key for all columns that include PII, such as names, addresses, postal codes, and so on.
- Optionally, you can edit the following items:
- If you want to rename your audience, enter a new name in the Audience Name box.
- If your file contains columns with multiple delimiter characters , click the delimiter that is used in your offline file to separate fields, such as Comma, Pipe, Tab, or Semi-colon. OnRamp typically detects the correct delimiter, but this gives you a chance to specify it.
- If your file does not contain a header row, clear the File contains a header row check box. Otherwise, your first row of data will be used as a header row. A header row is strongly recommended, but not required.
- Use the column header drop-down lists to identify match keys for columns that do not include PII. If you set match keys for this data, segments are created for the relevant audiences.
- Click Save Audience. The file is uploaded and you are returned to the Oracle OnRamp Audiences page.


Automated upload
Your account manager can provide you with an SFTP location where you can upload data files, which will be automatically processed and ingested into your private taxonomy.
Important! The SFTP account you use for automated uploads must be specifically requested by your account manager. It is different from the SFTP account you use for offline onboarding and for data delivery via SDT.
Before you set up automated SFTP uploads to Oracle OnRamp, you must first use the manual upload process and then publish the resulting audience. This establishes the categories and an audience ID that are necessary for automated file processing. The initial file can contain a small sub-set of your audience (such as 10 to 20 rows), but it should include all of the same columns and use the same formatting, file name, and the TXT extension.
Depending on whether you want to append the data contained in the new file to the existing audience data or completely replace it, use one of the following file-naming conventions:
- Append:
onramp_audience_ID_append.txt - Replace:
onramp_audience_ID_replace.txt
Important: TXT is the only supported file format for automated uploads.
To automate your upload process to OnRamp:
- Manually upload a sample data file to OnRamp.
- When the audience's status is Ready to Publish, click Publish. The categories are created in your private taxonomy and an audience ID is displayed in OnRamp.
- Upload your data file to the SFTP location.
- Validate and track your uploads via the OnRamp match report for the audience.
Monitor and Publish your OnRamp audiences
After you upload your file, OnRamp begins to process your file to match your users, and displays a status of In Progress.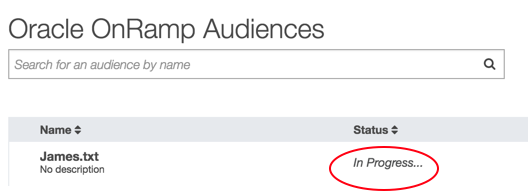
After OnRamp finishes processing the file and creating segments, it changes the status to Ready to Publish.
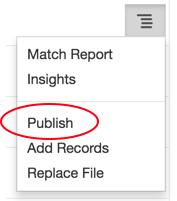
To publish your audience:
- Next to the audience, click the menu icon
 and then select the Publish option.
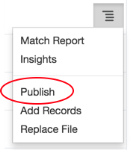
- On the confirmation screen, click Publish. The audience is submitted for further processing to create categories in your private taxonomy for each of your segments and its status is changed to Publishing. When processing is complete, the status is updated to Published.


Note: After the audience data has been matched and published to your private taxonomy, Oracle OnRamp does not retain the data.
Gain insights into your audiences
You can view the match report and audience insights by selecting those options from the audience's menu icon .
Match report
The match report provides detailed metrics, such as matched records, unique individuals, and on what % of a customer’s CRM file were matched to Oracle’s ID graph. Match metrics provide insight into the share of the CRM file that will be addressable online for digital targeting.
Sample match report
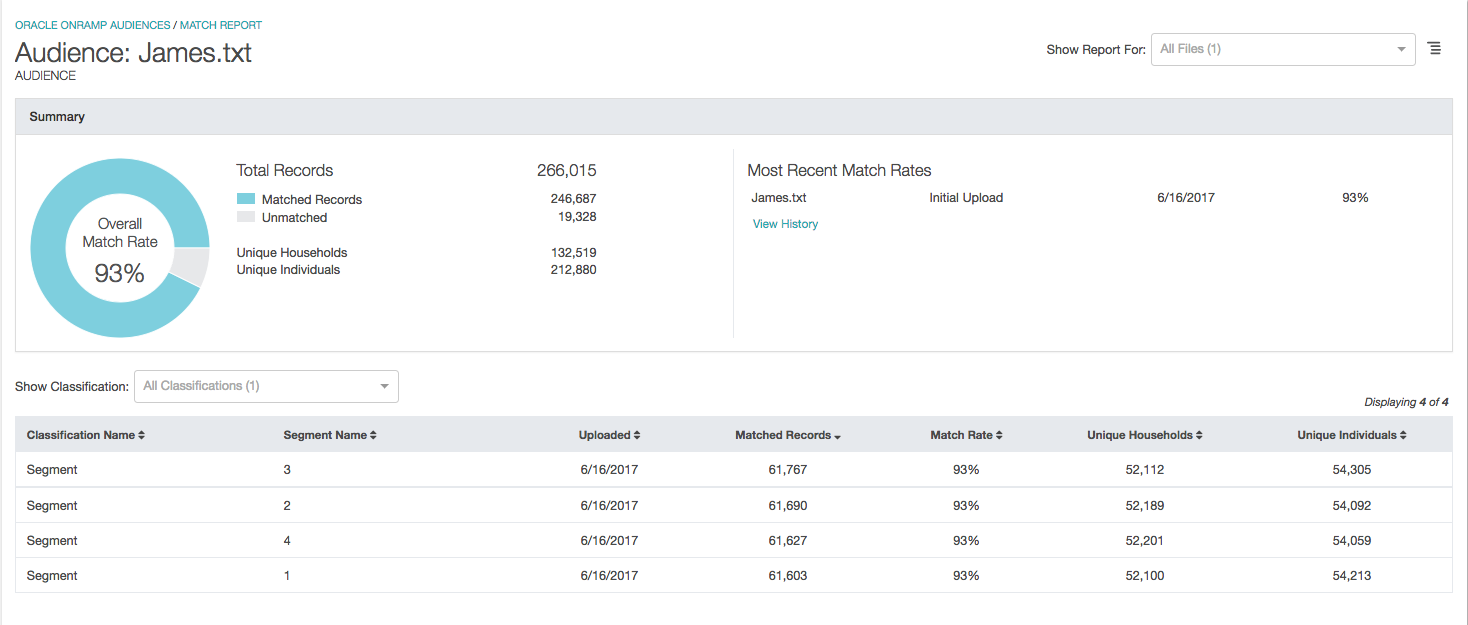
The total addressable reach (for cookies and MAIDs) can be displayed in the Audience Builder after the audience is published.
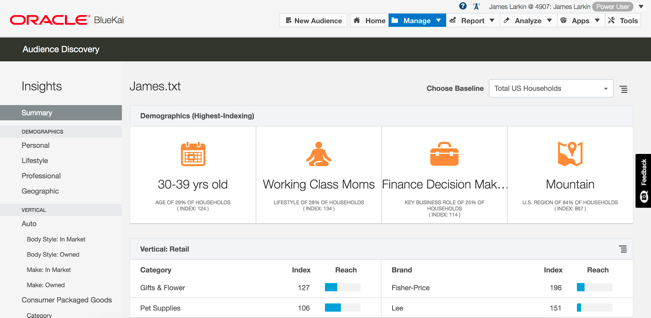
Audience insights
Oracle OnRamp can display insight reports summarizing the demographics, geographic locations, interests, and attributes of your segment. Audience insights, by default, are for the entire matched records for the file uploaded. If segmentation-level audience insights are needed, the initial file must be separated into the relevant segments. For insights on previously uploaded audiences, you will need to re-upload.
Sample audience insights
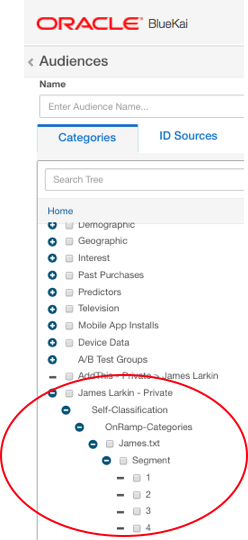
Activate your OnRamp categories
After your offline file has been onboarded, create an audience, add your offline categories, and then deliver the audience across multiple media execution platforms. Your OnRamp categories are located under the Self-Classification node in your private taxonomy.