Synchronizing Specific Users and Groups in IAM Interface
To provision specific users and groups, enable and configure synchronization for your application, and test your application to verify that users are provisioned correctly. See Synchronization Steps for Specific Users and Groups in IAM Interface
There are three methods to synchronize specific users and groups. You can:
- Synchronize users without any group membership
- Synchronize users with membership to a specific group in the target domain
- Synchronize a group in the source domain to a specific group in the target domain
Synchronize Users Without Any Group Membership
- Sign into IAM Interface as an Identity Domain Administrator in the source domain. See: Accessing the IAM Interface.
- Navigate to the Integrated applications tab.
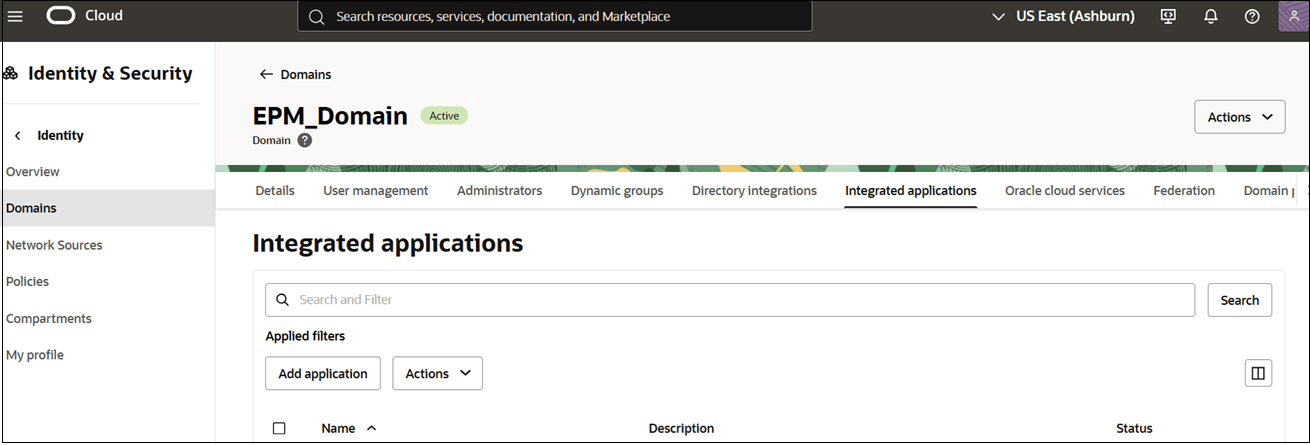
- Click on the Oracle Identity Domain application that you created earlier. See Steps to Complete in the Source Identity Domain in IAM Interface
- Navigate to the Users tab.
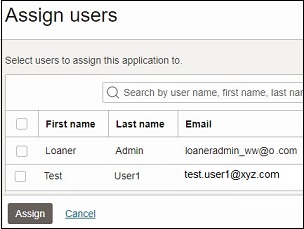
- Click Assign users.
- On Assign Users page, search and select the user, and
then click Assign.
The user will now be provisioned in the target domain.
Synchronize Users with Membership to a Specific Group in the Target Domain
Identify the group to which you want to map the required users in the target domain. If needed, create an Identity Cloud Service group. See Creating IDCS Groups.
- Sign into IAM Interface as an Identity Domain Administrator in the source domain. See: Accessing the IAM Interface.
- Navigate to the Integrated applications tab.

- Click on the Oracle Identity Domain application that you created earlier. See Steps to Complete in the Source Identity Domain in IAM Interface
- Navigate to Provisioning tab.
- Click ellipses next to Provisioning, and select Refresh Application Data.
- Click Provisioning under Resources, and then click Refresh Application Data.
- Navigate to Groups tab.
- Click Assign groups.
- On Assign groups page, search and select the groups, and then click
Assign
The group will now get access to the application.

- Click the group name that you want to assign certain users.
- Navigate to the Users tab.
- Click Assign user to group.
- On Assign Users page, search and select the user, and
then click Assign.
The user will now assigned access to the application.

- On Add Groups, search and select the group in the target
domain to assign to this user.
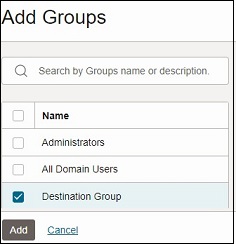
- Click Add, and then click Assign
user.
The user will now be provisioned to the group in the target domain.
Synchronize a Group at Source Domain to a Specific Group in the Target Domain
Identify a group in the source domain and one in the target domain. If needed, create an Identity Cloud Service group.- Sign into IAM Interface as an Identity Domain Administrator in the source domain. See: Accessing the IAM Interface.
- Click Applications under Identity domain.
- Click on the Oracle Identity Domain application that you created earlier. See Steps to Complete in the Source Identity Domain in IAM Interface
- Click Provisioning under
Resources, and then click Refresh Application
Data.
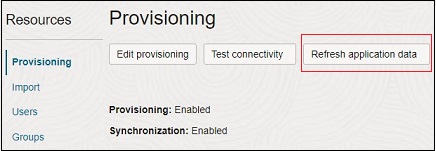
- Click Groups under Resources, and
then click Assign groups.

- On Assign group to application page, search and select
the group, and then click Assign on the menu next to the
group.
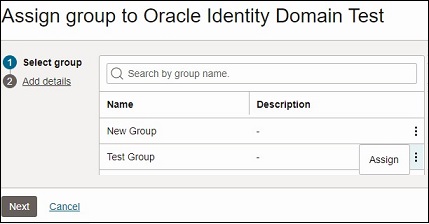
- Click Next.
- On Add details, scroll down and check Groups, and then click Add.
- On Add Groups, search and select the group in the target
domain to assign to this user.

- Click Add and then click Assign
group.
Users in the source group will now be provisioned in the selected group in the target domain.