Configure a Scenario Step

Configuring a scenario step is a process that offers maximum flexibility. The Add scenario step and Modify scenario step windows contain four tabs from which you can specify the settings related to message generation:

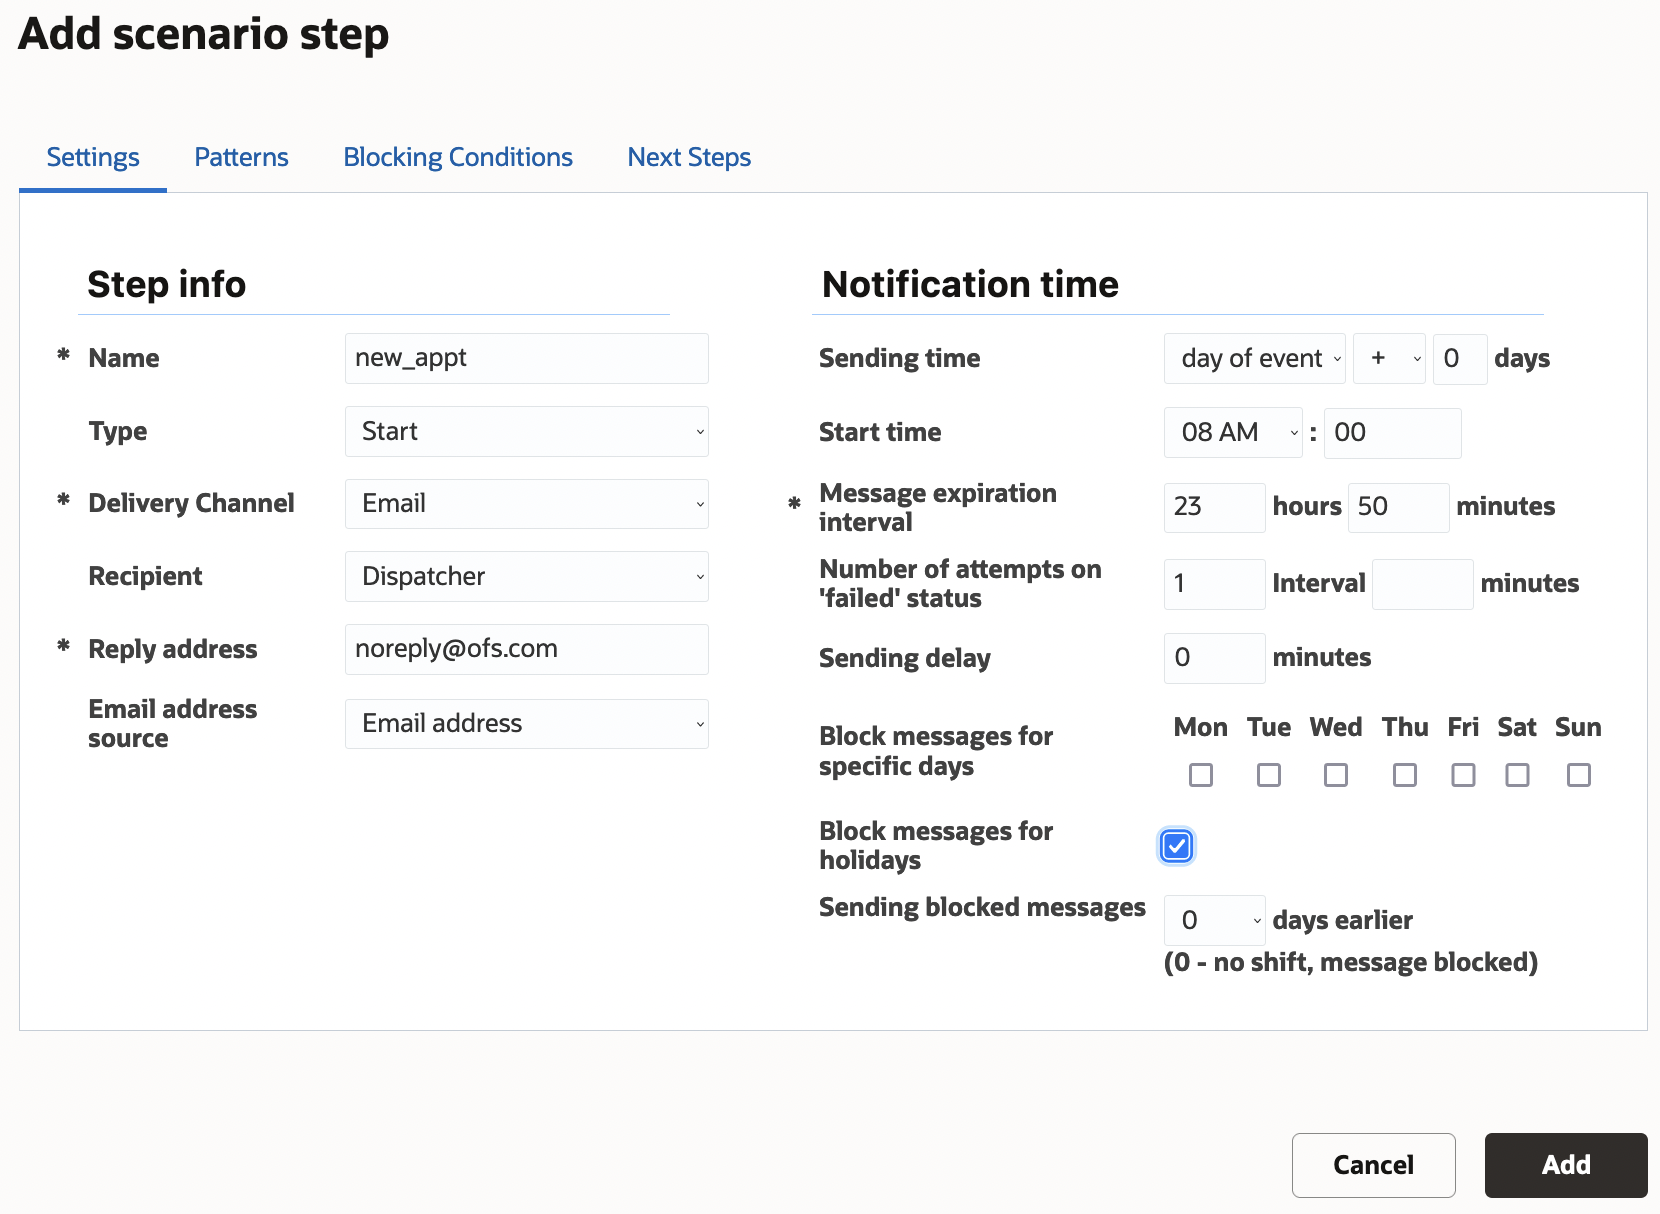
  • The Settings tab contains the basic parameters of the message generated at a certain scenario step, that is, how, when, and where it should be sent.

  • The Patterns tab defines the content of the message to be sent.

  • The Conditions sets the blocking conditions, that is, the conditions under which the message should not be generated at this ste.p

  • The Next steps tab defines the conditions of the subsequent steps run.

To configure a scenario step:

  1. Click Configuration.
  2. Click Message Scenarios under Subsystems and Integrations.
    The Message Scenarios screen opens.
  3. Select the appropriate message scenario from the left panel.
  4. Do one of the following:
    • Click the scenario step name or click the action button and select Modify to open the Modify scenario step window with the Settings tab on top.
    • Click Add new to open the Add scenario step dialog box with the Settings tab on top:
      This screenshot shows the Add scenario step dialog box with the Settings, Patterns, Blocking Conditions, and Next Steps tabs.
  5. Refer to How do I configure the Settings tab? and complete the fields on the Settings tab.
  6. Click the Patterns tab and the type content into the Subject and Body fields. For information about how the Patterns tab differs for each of the delivery channels, refer to How do I configure the subject and body of a message in the Patterns tab?.
  7. Click the Conditions tab and complete the fields. For information about the Conditions, refer to How do I define the blocking conditions for a message scenario?.
  8. Click the Next steps tab and complete the fields. Refer to Add Next Steps.