6 Add and Manage Vehicles
In Oracle IoT Fleet Monitoring Cloud Service , a vehicle is any conveyance such as a car or truck that is used to transport goods to customers. Fleet vehicles are groups of cars or trucks that are owned or leased by a business, government agency, or other organization. To monitor the location or operational parameters of a vehicle with Oracle IoT Fleet Monitoring Cloud Service, a data logger must be connected to the OBD-II port of the vehicle and configured to communicate with Oracle IoT Fleet Monitoring Cloud Service.
Vehicles are a critical component of your business operations. Using Oracle IoT Fleet Monitoring Cloud Service to manage these expensive assets effectively can help your business realize these benefits:
-
Vehicle security. You know where every vehicle is located at all times.
-
Cost efficiency. Assign vehicles to a route that avoids unnecessary stops and idling.
-
Driver safety. You know where your drivers are and how long they have been working.
-
Vehicle utilization. You can make sure every vehicle is operating and not sitting idle in a parking lot.
Note:
If you are using multiple organizations, the vehicles and vehicle types created within an organization are not available to other organizations.Create a Vehicle Type
Create vehicle types to group vehicles with similar attributes. Grouping vehicles with similar attributes can simplify performance management.
Edit a Vehicle Type
Edit a vehicle type to edit, add, duplicate, or remove vehicle type settings including the vehicle type name, description, image, attributes, device model reference, and sensor attributes.
- Click Menu (
 ), and then click Design Center.
 - Select Vehicle Types from the Design Center sub-menu.
- In the left pane, select a vehicle type on the Vehicle Types dashboard.
- Click Edit (
 ) against Description.
 - If the Edit Vehicle Type Warning dialog appears, click Yes.
- (Optional) To view dependency information, click a dependency in the Dependencies area.
- (Optional) Edit the Name, Description , Make, Model, Year. or Category fields.
- (Optional) Click Upload Image to add a new image for the vehicle type, or click Delete to delete the existing image.
- (Optional) Select one of these options in the Attributes area:
- Click Add (
 ) to add a new attribute.
- Click Edit (
 ) to edit an existing attribute.
- Click Duplicate (
 ) to quickly copy the settings of an existing attribute to a new attribute.
- Click Delete (
 ) to delete an attribute.
- Click Add (
- (Optional) Select one of these options in the Sensor Attributes area:
- Click Add (
 ) to add a new sensor attribute.
- Click Edit (
 ) to edit an existing sensor attribute.
- Click Delete (
 ) to delete a sensor attribute.
- Select the sensor attribute and then click Select Device Model to change the device model associated with the sensor attribute.
- Click Add (
- Click Save.
- (Optional) Click Back to return to the Vehicle Types dashboard.
View Vehicle Type Dependencies
View vehicle type dependencies to view the trips, vehicles, rules, and shipments currently associated with the vehicle type. These dependencies can help you determine if the vehicle type is used frequently. If it is not in use or used frequently, consider deleting it.
- Click Menu (
 ), and then click Design Center.
 - Select Vehicle Types from the Design Center sub-menu.
- In the left pane, select a vehicle type on the Vehicle Types dashboard.
- Click Edit (
 ).
). - If the Edit Vehicle Type Warning dialog appears, click Yes.
- To view dependency information, click a dependency icon in the Dependencies area.
- Click Back to return to the Vehicle Types dashboard.
Duplicate a Vehicle Type
Duplicate a vehicle type to quickly copy the settings of an existing vehicle type to a new vehicle type.
- Click Menu (
 ), and then click Design Center.
 - Select Vehicle Types from the Design Center sub-menu.
- In the left pane, select a vehicle type on the Vehicle Types dashboard.
- Click Duplicate (
 ).
). - Enter a name for the vehicle type in the Name field and then modify the other vehicle type settings including the image, attributes, device model, and sensor attributes.
- Click Save.
- (Optional) Click Back to return to the Vehicle Types dashboard.
Delete a Vehicle Type
Delete a vehicle type when it is no longer required. Delete all associated KPIs, and dependencies before deleting a vehicle type.
Edit Vehicle Details and Device Sensor Attributes
Edit vehicle details and device attributes when vehicle information changes or you want to request new vehicle sensor data or replace a device assigned to a vehicle.
View Vehicle Dependencies
View vehicle dependencies, such as vehicle trips and other dependencies, currently associated with the vehicle.
- Click Menu (
 ), and then click Design Center.
 - Select Vehicles
 from the Design Center sub-menu.
 - Select a vehicle and then click Edit (
 ).
). - To view dependency information, click a dependency in the Dependencies area.
- Click Back to return to the Vehicles dashboard.
Delete a Vehicle
Delete a vehicle when it is no longer required. Remove all dependencies before deleting a vehicle.
- Click Menu (
 ), and then click Design Center.
 - Select Vehicles
 from the Design Center sub-menu.
 - Select a vehicle in the Vehicles list.
- Click Delete (
 ).
). - If the vehicle type does not have has dependencies, click Delete in the confirmation dialog.
- If the vehicle has dependencies, the Existing Dependencies dialog appears. These dependencies must be removed before the vehicle can be deleted. Select one of these options:
- Click a dependency icon to view details of the dependency.
- Click Close to close the dialog.
View Your Vehicles in the Operations Center
The operations center vehicle information dashboard displays information about vehicles in motion, unassigned vehicles, idle vehicles, and stopped vehicles. The dashboard includes vehicle availability and utilization information. You can also see any open incidents against the vehicles.
View Vehicle Information and its Operational Status
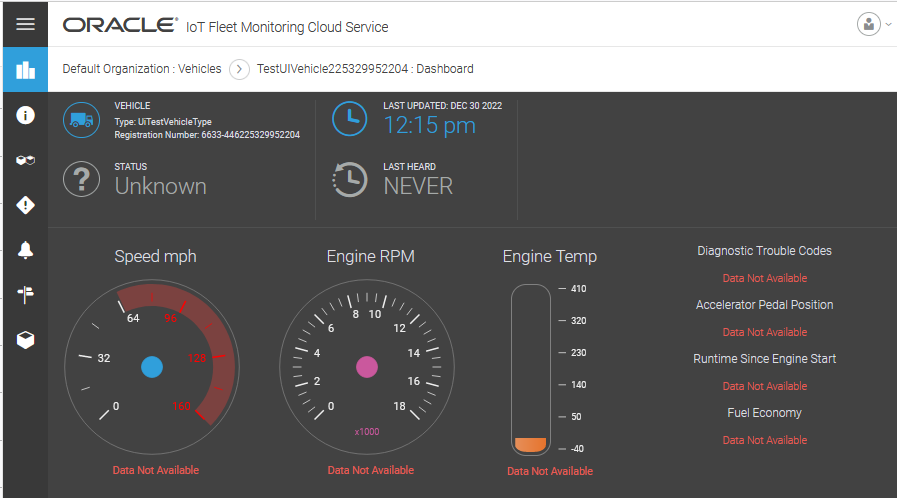
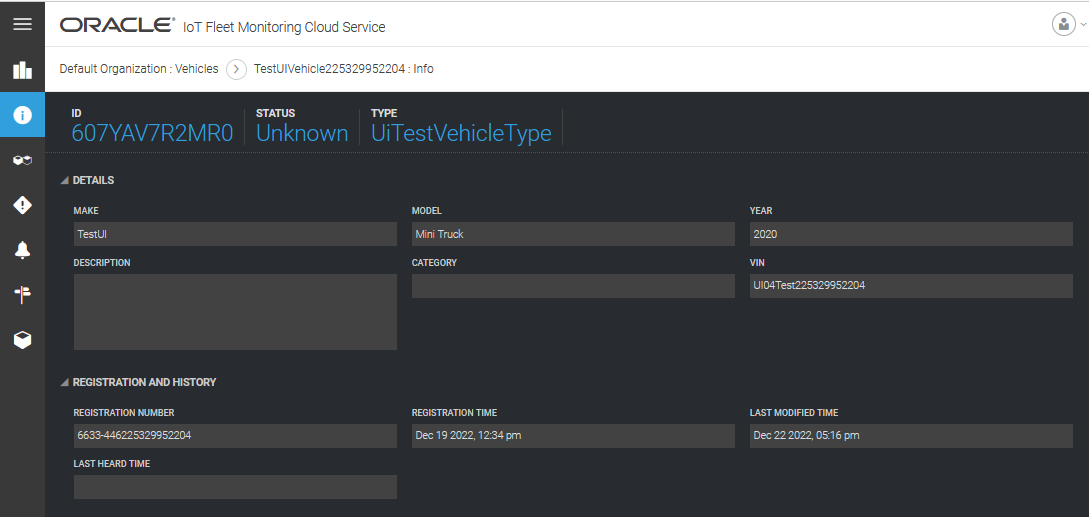
Use the vehicle information page to view static vehicle details such as its make, model, year, vehicle category, VIN, and so on. You can also view the registration and related details associated with the vehicle. On the other hand, use the Dashboard page to quickly determine the operational status of a vehicle, including its current location, its speed, engine temperature, and fuel level.
Note:
The Vehicle Dashboard page will be deprecated in a future release. As an alternative, use the following pages:
- Vehicle Information page: Use this page to view static vehicle details such as its make, model, year, and so on. See the procedure described later in this topic for more information.
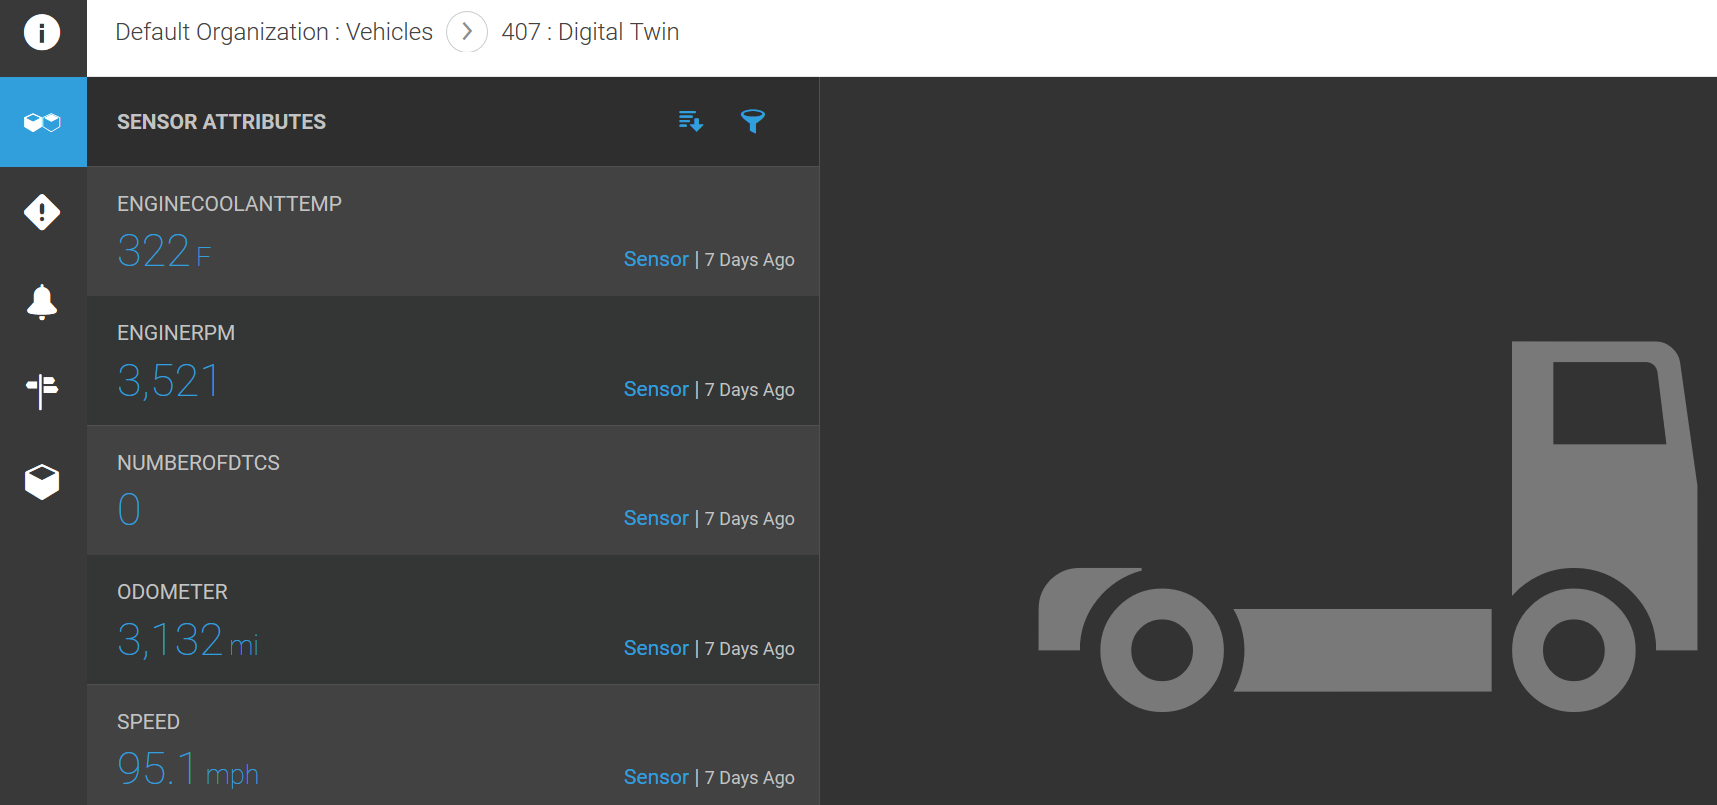
- Digital Twin page: Use this page to obtain a detailed view of the sensor data being sent from the vehicle to Fleet Monitoring. See View Vehicle Digital Twin Data for more information.
- Custom dashboard: Create a custom dashboard to track key metrics data for your vehicle. Manage and Monitor Custom Dashboards for Vehicle Types, Drivers, and Trips for more information.
View Vehicle Incidents
Use the vehicle incidents dashboard to view incidents reported for a specific vehicle.
- Click Menu
 and then click Operation Center.
 - Click Vehicles
 in the operation center toolbar.
 - Select a vehicle in the Vehicles list.
- Click the View (
 ) icon.
 - Click Incidents
 in the toolbar to the left of the vehicle details.
 - To filter the incidents list, click a pie chart segment or use a search filter:
- Click Search (
 ).
). - Select Status, Priority, Type, Creation Date, Description, or Creation Date.
- Select additional search parameters.
- (Optional) Click Add (
 ) or Remove (
 ) to add or remove search filters.
- Click Search (
View Vehicle Alerts
Use the vehicle alerts dashboard to view alerts reported for a specific vehicle. Alerts are issued when the requirements set for an alert condition are met or exceeded. For example, an alert is issued when the vehicle engine temperature exceeds a specific limit.
- Click Menu
 and then click Operation Center.
 - Click Vehicles
 in the operation center toolbar.
 - Select a vehicle in the Vehicles list.
- Click the View (
 ) icon.
 - Click Alerts
 in the toolbar to the left of the vehicle details.
 - To filter the alerts list, click a pie chart segment or use a search filter:
- Click Search (
 ).
). - Select Alert Type, Rule Type, Severity, Creation Time, Description, or Driver Name.
- Select additional search parameters.
- (Optional) Click Add (
 ) or Remove (
 ) to add or remove search filters.
- Click Search (
View Vehicle Trip Information
Use the vehicle trips dashboard to view the trips completed or in progress for a specific vehicle.
- Click Menu
 and then click Operation Center.
 - Click Vehicles
 in the operation center toolbar.
 - Select a vehicle in the Vehicles list.
- Click the View (
 ) icon.
 - Click Trips
 in the toolbar to the left of the vehicle details.
 - To filter the trips list, click a pie chart segment or use a search filter:
- Click Search (
 ).
). - Select Status, Start Time, ETA, Source, Destination, Stops or Trip Length.
- Select additional search parameters.
- (Optional) Click Add (
 ) or Remove (
 ) to add or remove search filters.
- Click Search (


