Creating response actions
Actions are data transactions between Eloqua and Salesforce. The Campaigns > Response Actions tab is where you create actions to send data to Salesforce based on response rules configured in your Oracle Eloqua instance. When a response occurs, Oracle Eloqua records the response based on priority and the response is sent to a Salesforce custom object.
Important: Avoid uploading contact activities that are older than 30 days. These contact activities will not be sent to the Salesforce Integration app.
Good to know
- Users can map the Salesforce URL field to the Eloqua Large Text and Text fields. Use the Large Text field if the value in your URL field contains more than 100 characters. Mapping the URL field to any other Eloqua field results in an error.
- Contacts must have a Response ID for campaign response actions. If a contact is missing the Response ID, Eloqua alerts you with an error message.
- For the Account, Contact, and Lead Salesforce objects, you can split the Address field onto a new line in Oracle Eloqua, and the split will remain at the same place once that address is pushed to Salesforce and imported back into Eloqua. For example, if you split an address to a new line after 80 characters, and that's pushed to Salesforce, the address will still be split to a new line at 80 characters once it's imported back into Eloqua.
- For the Campaign Member Salesforce Object, the Response Action queries Salesforce for an existing Campaign Member ID for the given CRM Campaign ID and Lead ID or Contact ID. If the returned Campaign Member ID is not blank, the app initiates an "Update" call to Salesforce using this Campaign Member ID. Otherwise, it initiates a "Create" call to Salesforce.
Important: This feature is currently released under our Controlled Availability program. To request access to this feature, please log in to My Oracle Support and create a service request.
- You can associate both Contact ID and Lead ID in the same Response Action call for reporting purposes. If both Contact ID and Lead ID are present on an Eloqua Contact, the Salesforce App will automatically generate two separate calls to Salesforce, associate both Salesforce Contact and Lead to the Salesforce Campaign.
Important: This feature is currently released under our Controlled Availability program. To request access to this feature, please log in to My Oracle Support and create a service request.
Prerequisites
- A configured connection
- A campaign object or a custom object in Salesforce for Eloqua campaigns
- A response rule configured in your Oracle Eloqua instance
To create a response action:
- In the Salesforce Integration app, click Campaigns.
- Click the Response Actions tab.
- Click Add Response Action and select a connection for which you want to create a new action. The Create Response Action page is displayed.

- Complete the response action details:
- Action Name: Enter a name for the action.
- Campaign Response: The Eloqua object is set to CampaignResponse and cannot be modified.
- Salesforce Object: Select a top-level object from the list, such as Campaign Member.
If you've selected Campaign Member for the Salesforce Object, the following mappings are set by the Salesforce Integration app and cannot be modified: Status in the Campaign Response section, Contact ID and Lead ID in the Contact section, as well as Campaign ID in the Campaign section.
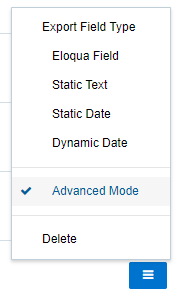
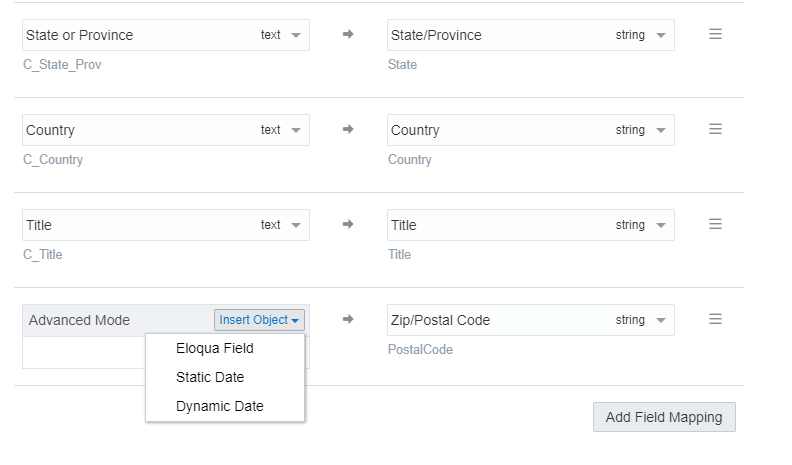
- Update Salesforce Fields: The Eloqua unique identifier is Integration Return Value. The Salesforce unique identifier is determined by the Salesforce Object selected in Object Mapping. For example, if you select Campaign, the unique identifier is Campaign ID. Add more mappings by clicking Add Field Mapping. For each set of fields, specify the Salesforce field that will be mapped to Eloqua contacts. Click the menu icon
 to delete the mapping, or use Advanced Mode to switch the field type to static text, static date, or dynamic date.
 - If you select Advanced Mode from the menu, you can enter multiple objects to be sent to a single Salesforce field: Eloqua Object, Date, or Dynamic Date. You can also type static text into the box as needed. For contacts, you can use Advanced Mode to select a Contact and its fields. For custom objects, the Advanced Mode allows you to select a custom object and its related Contact fields.
In Advanced Mode, concatenated Eloqua values can be mapped to Salesforce fields of the following types: reference, double, currency, text, string, ID type, and integer.
Note: Each action can map up to a maximum of 249 fields. See the Eloqua Developer Help Center for more information.
- (Optional) Click +Add Related Object, select an object from the list, and click Add Related Object.
- Click Save Response Action and click Close to be returned to the Response Actions page.
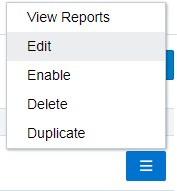
To modify the action, click the menu to display the options. You can edit, enable or disable, duplicate, or view report data for the action. Only one campaign response action can be enabled at a given time. Enabling a new action will disable an existing one. You can delete disabled actions.
Campaign response rules for CRM integration
Using the app in a program or campaign
Campaign response setup for marketers
Developing for campaign responses