Step 2: Configuring form processing steps
Now that our form is together, it's time to configure the form processing steps. Form processing steps allow you to configure what should happen after a contact submits a form (such as updating a contact record or custom data object), and what actions to take as a result of the submission (for example, sending the submitter an email or adding them to a campaign).
For our form, we're going to use form processing steps to do the following:
- Update the contact record with the form data
- Send the form submitter an email
- Redirect the form submitter to a new page after they submit the form
Learn more about the available form processing steps.
To configure form processing steps:
- Open the form you created earlier.
- Click Processing to view the form processing steps.
Here, you can see all the processing steps for your form.
- Click
 and verify that the email address field from the form is mapped to the correct contact field.
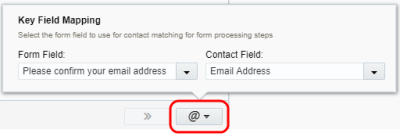
Before you start adding processing steps, you need to make sure that Oracle Eloqua can correctly identify the form submitter. Usually, an email address is used to identify contacts. Our form only includes one email address field, and Oracle Eloqua automatically used this field for contact matching. However, if your form had multiple email address (email address, confirm email address, and so on), you would need to manually map the correct form field to the contact field.
- Click
 and add the following steps:
 Update Contacts - With Form Data
You can update a contact, account, or custom data object record with information from a form. You can specify when to update the information as well.  Send Submitter an Email
You can send a visitor an email after they submit a form. You can choose to always send the same email or send a specific email based on a picklist or form field value. You need at least one email to configure this step.  Redirect to Web Page
You can redirect a contact to a new page after the contact submits a form. You can choose to always redirect users to the same landing page or redirect a user to a specific landing page based on a picklist or form field value. You need at least one landing page to configure this step. - Click the Update Contacts - With Form Data step. Double-click Job Role and select Job Role from the Target Field drop-down.
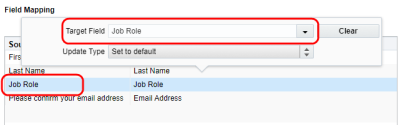
Every contact field has update logic that determines when new data is allowed to overwrite existing data. Your administrator decides whether a new value coming from a form submission is allowed to overwrite an old value already saved in Oracle Eloqua. This ensures that only the most trusted data sits in your database. We left the Update Type field alone so that the default settings from the administrator are used.
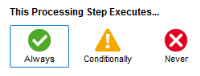
At the bottom of the screen, note that this form processing step is configured to always run.
- Click the Send Submitter an Email processing step. This step allows you to automatically send the submitter an email. In our case, we will send them a link to download their trial software, and we will choose an email that we already have built.
- Click
 and choose the email from the chooser. We will not change any of the other settings which means that Oracle Eloqua will always send our email after submitting the form. The email cannot be resent to the same recipient. Learn more about the settings for this form processing step.
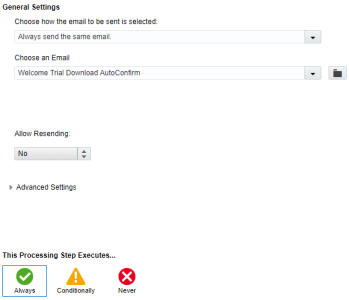
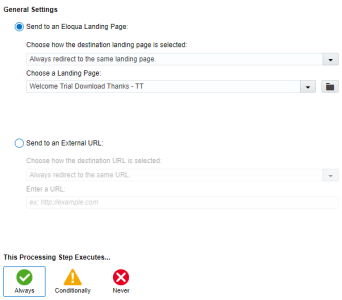
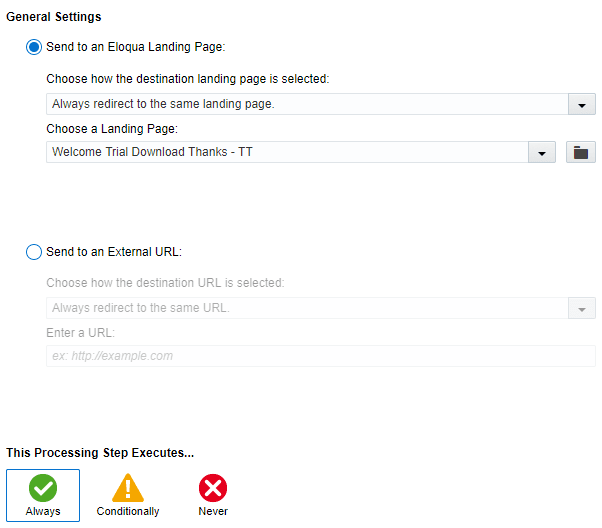
- Click the Redirect to Web Page processing step. This processing step sends the form submitter to a new web page confirming the form submission. In our case, we have an existing landing page to use. However, you could redirect to an external web page as well.
- Click and choose the landing page from the chooser. We will not change any of the other settings which means that Oracle Eloqua will always redirect them to the landing page. Learn more about the settings for this form processing step.
- Save your form and return to the Design view.
Lastly, let's add an HTML name. This is a friendly name to refer to the form name that is referred to when uploading a landing page that uses this form. We will be using this when we create our landing page in the next part of this tutorial.
Oracle Eloqua automatically generates an HTML name for your form. You could just use this name, but for our campaign, let's create a new one that better reflects our form's purpose.
Note: The name cannot contain any spaces. When you stop typing, Oracle Eloqua will automatically check for the validity and availability of the name you have selected.
- Under General Settings
 , enter TrialDownloadSignup in the HTML Name field and verify that the name is available.
Tip: If the text Invalid Form HTML Name displays, make sure the HTML name you have entered is not being used in another form.
Now set a failure page for the form. This is the page that the form submitter is redirected to if the field level errors fail to trigger.
- Click
 beside Validation Failure Page and choose Default Validation Result.
 Your install should have a Default Failure page that you can select for this purpose. Most likely no one will ever see this page, but it is there as a secondary safety net.


You've now created your very first form in Oracle Eloqua! To use it in our welcome campaign, we want to put it in a landing page. Let's get started on creating the landing page.