Sending an autoresponder email
You can send a contact an autoresponder email after they submit a form. For example, you could use an autoresponder email in the following scenarios:
- Send a confirmation message after a contact subscribes to your mailing list
- Send a thank-you email when a contact submits a form
- Send event details after signing up for a webinar
Note:
Unless the contact is on your master exclude list, Oracle Eloqua sends autoresponder emails regardless of the contact's subscription status.
There is a maximum number of times that you can send the submitter the same auto-response email. Learn more about setting the limit.
Before you begin:
- Create the email that you will be sending.
- An autoresponder email cannot be configured with signature rules. If you need to use signature rules, use a campaign or program instead to send the autoresponder email.
- You can always send the same autoresponder email or you can choose an email based on a form field.
To send an autoresponder email:
- Open a form or create a new one.
- Click Processing.
-
Add the processing step:
- In the classic UI,
 in the left pane and double-click
  Send Submitter an Email.
 - In the Redwood Experience, select
 and select
  Send Submitter an Email.
- In the classic UI,
- Choose how the autoresponder email should be selected:
Option Steps To always send the same email - Click Always send the same email.
- Choose the email to send.
To use a form field - Click Use a value of the form field to select the email.
- Select the form field from the Choose a field drop-down list.
Tip: This could be a hidden field with a static value that specifies the email by its asset ID.
To use a picklist You can use a picklist to determine the autoresponder email to send. In this case, the form must have a field that you can use along with the picklist to determine the email to send. For example, you want to send an email based on the submitted customer satisfaction rating. In this case, you could have a picklist in the form to capture the rating and a picklist mapping the rating's actual value to the email asset ID. Contacts don't see the second picklist that has the asset ID.
- Click Use a picklist to select the email.
- Click the form field containing the data you can use with your picklist from the Choose a form field drop-down list.
-
Click:
- In the classic UI, click the picklist in the Use a Lookup Table drop-down list. To create a new picklist, click
 and then click .
 - In the Redwood experience, click the in the Picklist drop-down. To create a new picklist, click
 and choose Add Picklist.
- In the classic UI, click the picklist in the Use a Lookup Table drop-down list. To create a new picklist, click
-
Click the desired Allow Resending option. The number of resends per day limit is set by your administrator. Learn more about this limit.
Classic UI
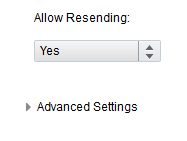
Redwood Experience
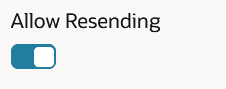
Note: In most cases, you will not want to allow re-sends. However, if you are using the same autoresponder email for multiple forms, you may want to enable this setting.
- To override the default key field mapping, click Advanced Settings and choose the key field. This is the contact field used to identify the contact. Typically this is done using the email address submitted with the form.
- Specify when to process this step.
- Click Save.