Installing Profiler
Before you can use Profiler a user with client administrator rights must install the app and configure the settings for your Eloqua instance.
Important: Because deleting or deactivating the installer user account will impact installed apps, we recommend installing apps using a user account that is not tied to a specific person. The user account must have customer administrator rights.
To install the Profiler app:
- Follow the Profiler installation URL provided:
- Log in with your Eloqua credentials, if required.
- Click Accept and Install to add the app to your Apps list.
- Confirm your credentials and click Sign In.
- Configure Profiler:
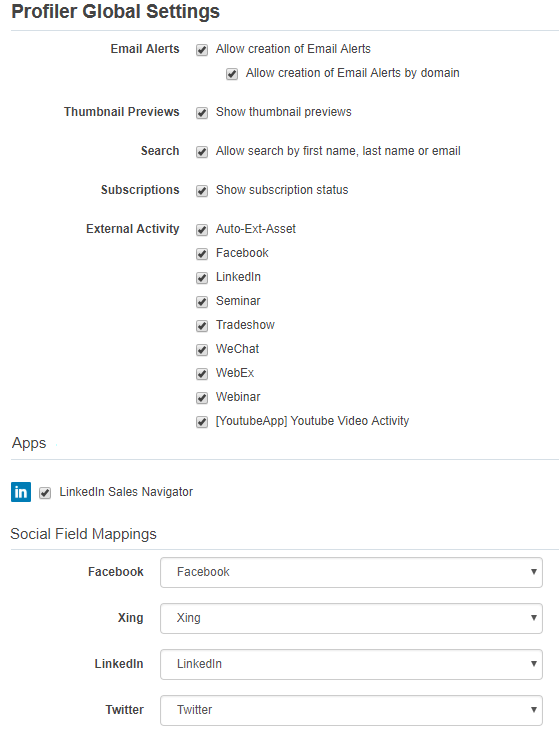
Settings
- Email alerts: Allow users to create email notifications for contact web visits.
- Thumbnail previews: Allows users to see a thumbnail preview of marketing assets associated to a contact's activity.
- Search: Allows users to search for contacts in Profiler by contact fields (name, email address, domain, etc.). Otherwise, users can only search by email address.
- Subscriptions: Allows users to view the email address of contacts that have globally unsubscribed. Users cannot email these contacts and a visual indicator indicates the contact's global subscription status. Otherwise, users cannot view the email address of such contacts.
- External activity: Allows users to see external activities in Profiler. Choose the external activity assets that should be visible to users.
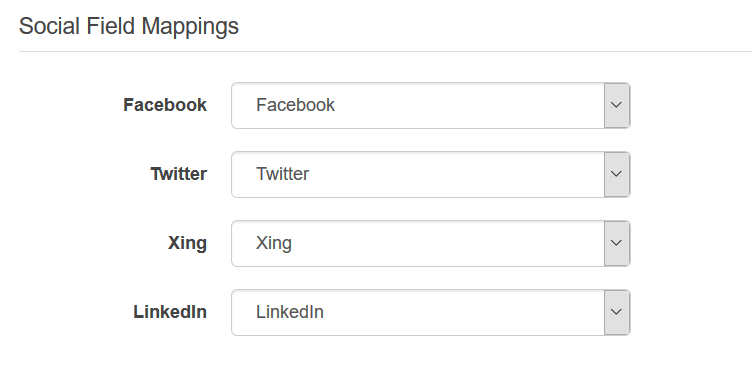
Social Field Mappings
- The Social Field Mapping section allows you to specify the social network account links available in Profiler as part of the contact summary. Profiler will build the links to the social network site using the mapped contact field.
To link to social network sites, choose the contact field that should be used for each social network.
Apps
- View and search installed Profiler apps.
App Access
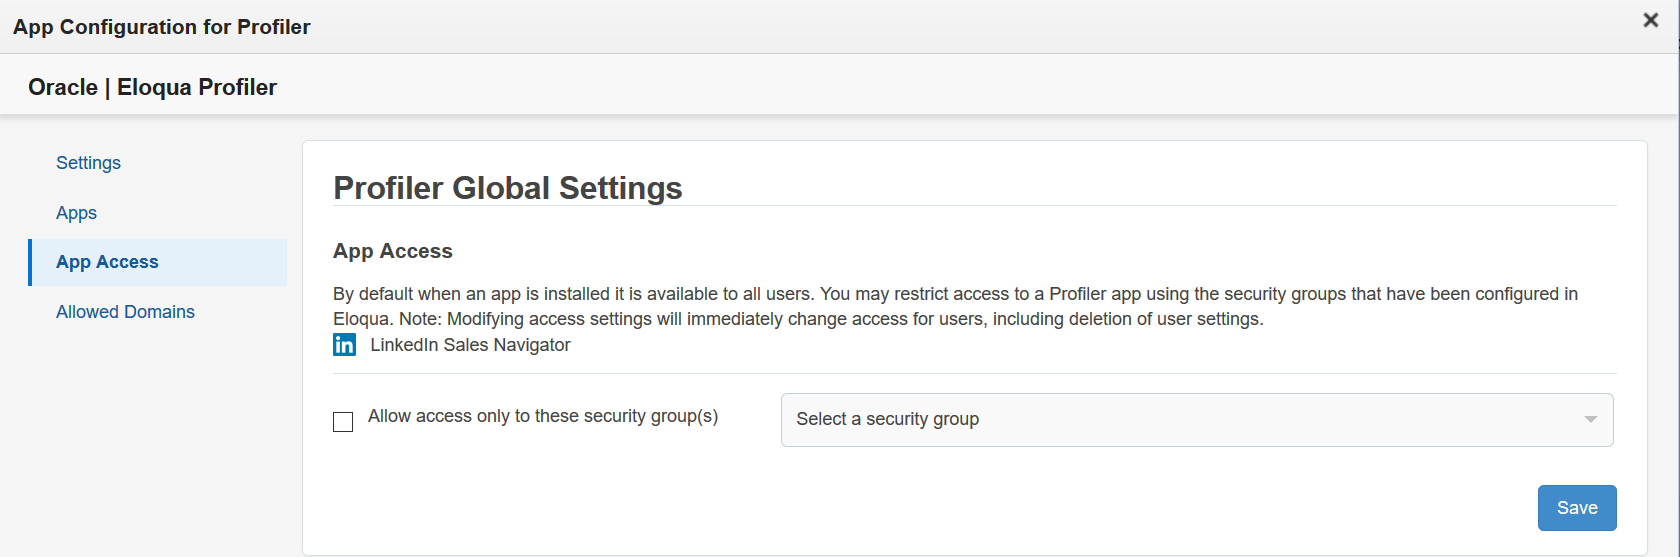
- Select the security groups which should have access to the Profiler app.
Note: Users must log out of Eloqua for Eloqua security group changes to take effect.
- Identify which domains are allowed to host Sales Tools pages. For example, if you embed Sales Tools in an iframe hosted by your CRM, add the domain of the page hosting the iframe to your allowlist. You can allow a domain and its sub-domains using a wildcard (*).
To avoid broken iframes, add your CRMs to the
- Salesforce: *.force.com, *.salesforce.com, *.my.salesforce.com, *.lightning.force.com, and *.visualforce.com
- Oracle CX Sales: *.oraclecloud.com
- Oracle CRM On Demand: *.crmondemand.com
- Microsoft Dynamics: *.dynamics.com
To learn more about embedding Profiler in different CRMs, see Profiler integration.
- Click Accept or switch users.
The app is now installed and can be viewed in your Apps list (Settings  > Apps, under the Platform Extensions section). Select an app to view a description, modify the configuration settings, reinstall, or uninstall it. You can also check its status and dependencies.
You can change these configuration settings at any time. Learn more about reconfiguring Profiler.