Creating dimensions
If you have the necessary rights, you can create dimensions for use in reports.
To create a dimension:
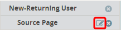
- Open a report and hover over a dimension in the report until the plus icon is displayed:

Note: The plus sign is only displayed for dimensions below the top dimension of the report table.
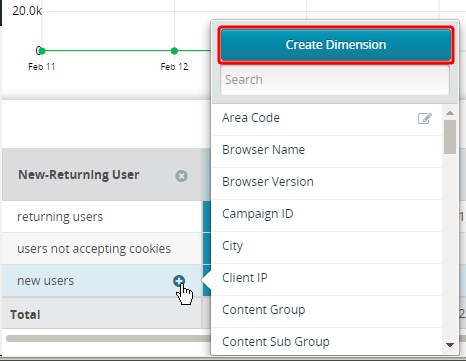
- Click the plus icon . The dimension menu is displayed.
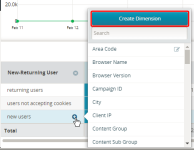
- Click Create Dimension. The Create Dimension dialog is displayed.
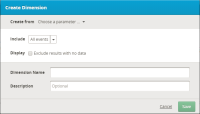
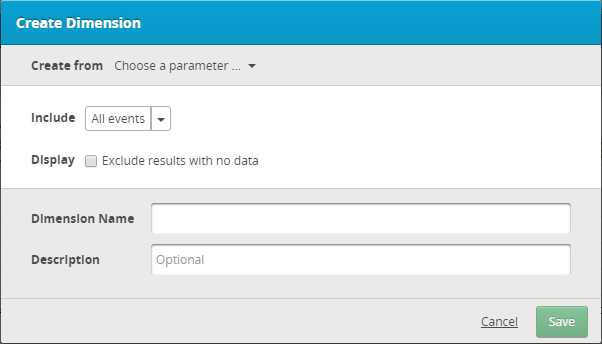
- In the Create from section, click Choose a parameter to display the list of parameters.
- Type a parameter name to search for it or browse the list to find and select it. The parameter is added to the dimension.
- In the Include section, click the list to select one of the following event types to include in the dimension:
- All events (the default): Identify all events where the dimension's parameter is present.
- First event in sessions: Identify events where the dimension's parameter is present in the first event of the session.
- Last event in sessions: Identify events where the dimension's parameter is present in the last event of the session.
- First occurrence of an event in sessions: Identify events where the dimension's parameter is first present in the session.
- Last occurrence of an event in sessions: Identify events where the dimension's parameter is last present in the session.
- Most recent in sessions: Accumulate the measure values of this dimension and attribute values to the most recent occurrence of this dimension in the session.
- (Optional) In the Display section, you can choose to exclude results with no data.
- Enter a name for the dimension that is unique within the account and enter a description so that others can quickly understand the purpose of the dimension.
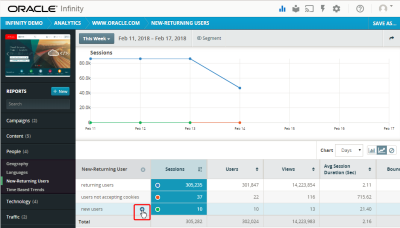
- Click Save. The dimension is added to the location in the report where you clicked the plus icon . An edit icon
 is displayed next to it because it is a custom dimension. Standard dimensions cannot be edited, so they lack an edit icon.