Creating message variants
Variants can be created for subject lines and for regions in your email message to personalize your email content. You can create up to 50 variants per region. Variants can be created using the source editor and the visual editor.
To create message variants:
- After creating your message based on the steps listed in Creating messages, select the subject line or region of your message for which you want to create a variant.
-
Select
 Variants.
 -
Click Create Variant.
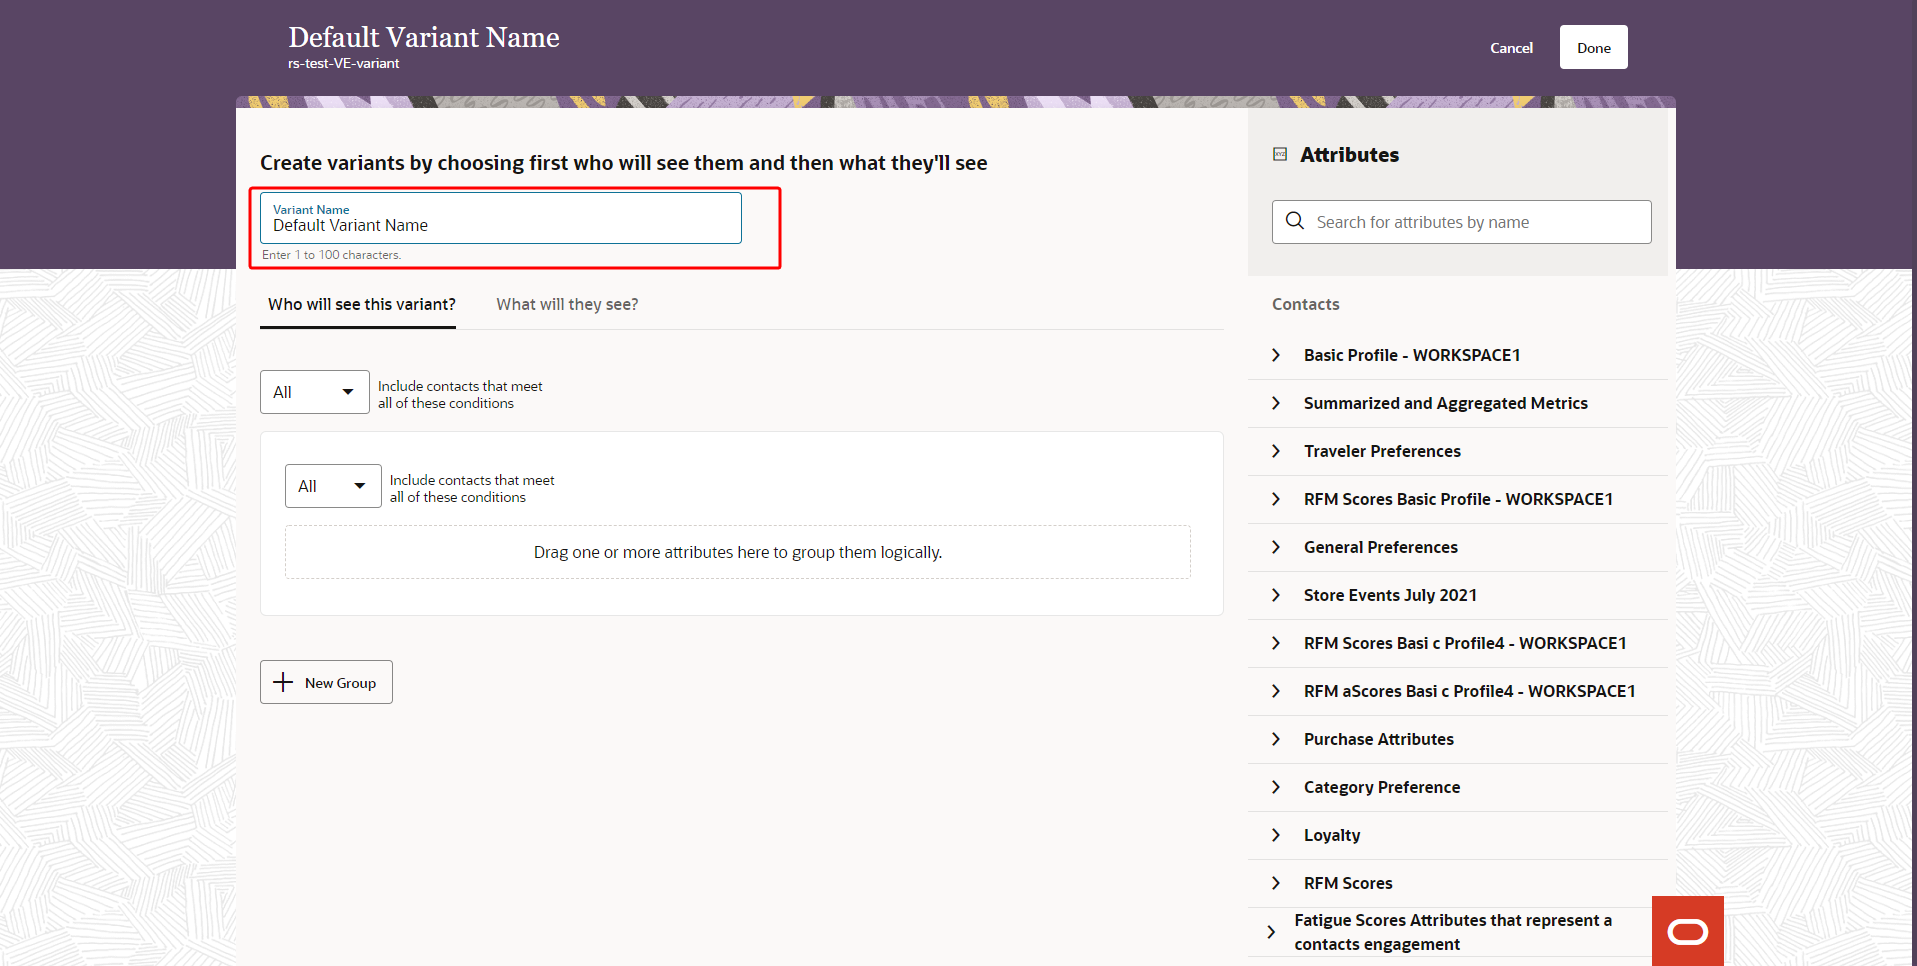
- In the variant design editor for your variant, name your variant in the Variant Name box. By default, your variant is given the name Default Variant Name.
-
In the Who will see this variant? tab, decide who will see the variant based on contact attributes. To define a condition, drag attributes from the right panel to the canvas. Fill in the conditional fields and operators for each condition to define the conditions within the groups.
-
Click the What will they see? tab to customize what the contacts will see if they meet your conditions. In the source editor, you can choose to add a single image, add content using an HTML or a WYSIWYG editor, or you can choose to display no content. In the visual editor, you can either display no content or add a single layout to customize your variant.
-
Click Done. You will be taken back to the Variants tab. To view your variant, choose it from the list of variants.
- Click Save.
A contact will receive the content from the first variant for which they meet the conditions. Ensure that you organize your variants in the order you want them evaluated. To change the order of the variants, use the
 menu and choose Move up or Move down. If the contact meets none of the variant conditions, the Default variant will display.
Contacts are skipped if they have no value for the attributes used in the variant conditions. For more information, see Previewing message variants.
Note: When using the source editor, you can only create variants for regions that have <td> or <div> tags, and when using the visual editor, you can only create variants for regions that are layouts.
Tip: You can edit the page so that contacts who either meet any or all conditions can see the variant. When defining who will see this variant, you can create up to 10 conditions per condition group, and up to 30 condition groups per variant.
The following video clip demonstrates steps 1 to 5:
The following video clip demonstrates steps 6 to 8: