In-app Campaign Designer - Trigger and schedule
Important: This information applies to the In-app Campaign Designer, which is now generally available for all accounts. It replaces the In-app Campaign Workbook.
To see how the In-app Campaign Designer differs from the old Campaign Workbook, see In-app Campaign Designer changes. For a breakdown of the Campaign Designer's visuals, see In-app Campaign Designer visuals overview.
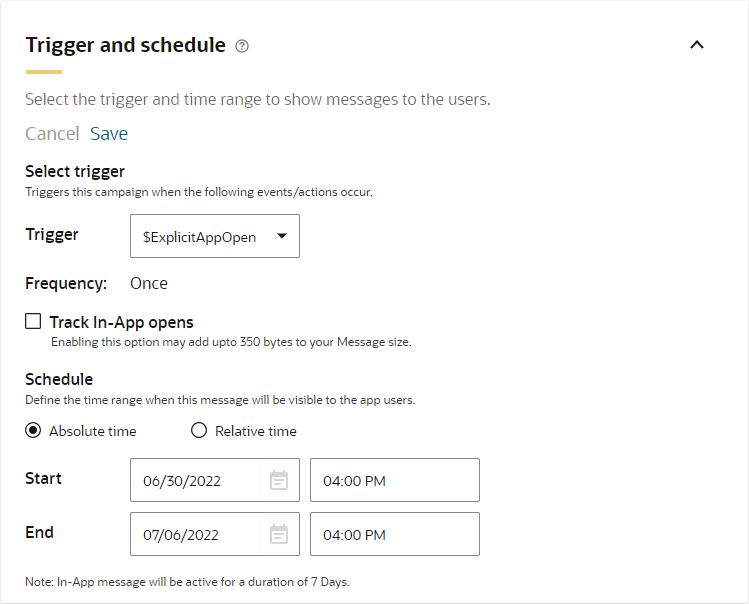
Use this panel to configure the in-app message trigger and the message schedule, and to turn open tracking on or off. Click  to expand the panel. To discard any changes in the panel, click Cancel. To save your changes, click Save .
- Select trigger: The trigger specifies which event triggers the message. The Standard Trigger ($ExplicitAppOpen) displays the message when the app is opened. A Custom Trigger displays the message when a specific event occurs. Custom Triggers are created by the app developer and added by the Account Administrator. By default, the Standard Trigger is used as the trigger event.
- Track In-App opens: Tracking opens records In-app message opens or displays, indicating when each recipient opened the message. To track opens, Oracle Responsys places an open tracking pixel in the message. To track opens and displays, you need to enable Link Tracking for the campaign.
Note: Enabling this option may add up to 350 bytes to your Message size.
- Schedule: The schedule defines the time range or expiration date for how long the message is visible to the app users. Schedules can be set using Absolute or Relative Time.
Absolute Time: Specify an absolute Schedule Start and Schedule End Time
Relative Time:
Schedule Start is fixed as Campaign Launch (or message send) time.
Marketers can specify a Schedule End Time that is relative to the Campaign Launch (or message send) time.
- The default is Absolute Time (as shown above) with a default period of 7 days from the campaign creation date.
-
To set the Schedule for Absolute time:
- The Absolute time radio button is pre-selected. Select the Start Date and Time using the calendar widgets or by entering the text in the required format.
- Enter or select the End Date and Time. The default period is 7 days from the campaign creation date.
-
To set the Schedule for Relative Time:
- Select the radio button for Relative time. The Relative time options display.
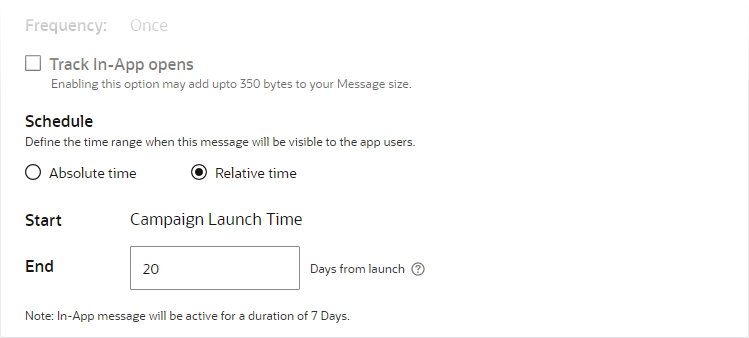
The Start is the Campaign Launch Time and can't be changed.
- Enter an integer number of days for the campaign to end or expire from 1 to 365. The default period is 7 days from the campaign launch date.
OR
Optionally, enter a Responsys Personalization Language (RPL) expression that evaluates to an integer from 1 to 365.
Note: If an RPL Expression is provided for the schedule end "Relative Time" setting, and the resolved RPL leads to disallowed values:- The In-app message is NOT sent / launched.
- An In-app Campaign Skipped Event is logged with the reason: Personalization resulted in an Invalid Value for Attribute "Schedule End" Time.
Important: This feature is backwards compatible. For all existing In-app Campaigns that already have an Absolute value set for the Schedule:
- The existing Schedule Setting Option will be set to "Absolute Time".
- The value will be set to the Date and Time currently specified in the Campaign for Schedule Start, Schedule End.
Note: This feature is available to all Accounts that are enabled for Mobile App Channel AND In-app Messaging.
- Select the radio button for Relative time. The Relative time options display.