In-app Campaign Designer visuals overview
Note: The In-app Campaign Workbook has an updated interface and is now called the In-app Campaign Designer. Campaign Designer is now enabled for all accounts, and it replaces Campaign Workbook for this channel. Unlike the Campaign Designer, there were no major changes made to the Message Designer's interface.
Use the Campaign Designer to review details of the selected campaign, see any errors that need correction, and more. Click  to expand the panel. Learn more about Launching an In-app campaign with the Campaign Designer.
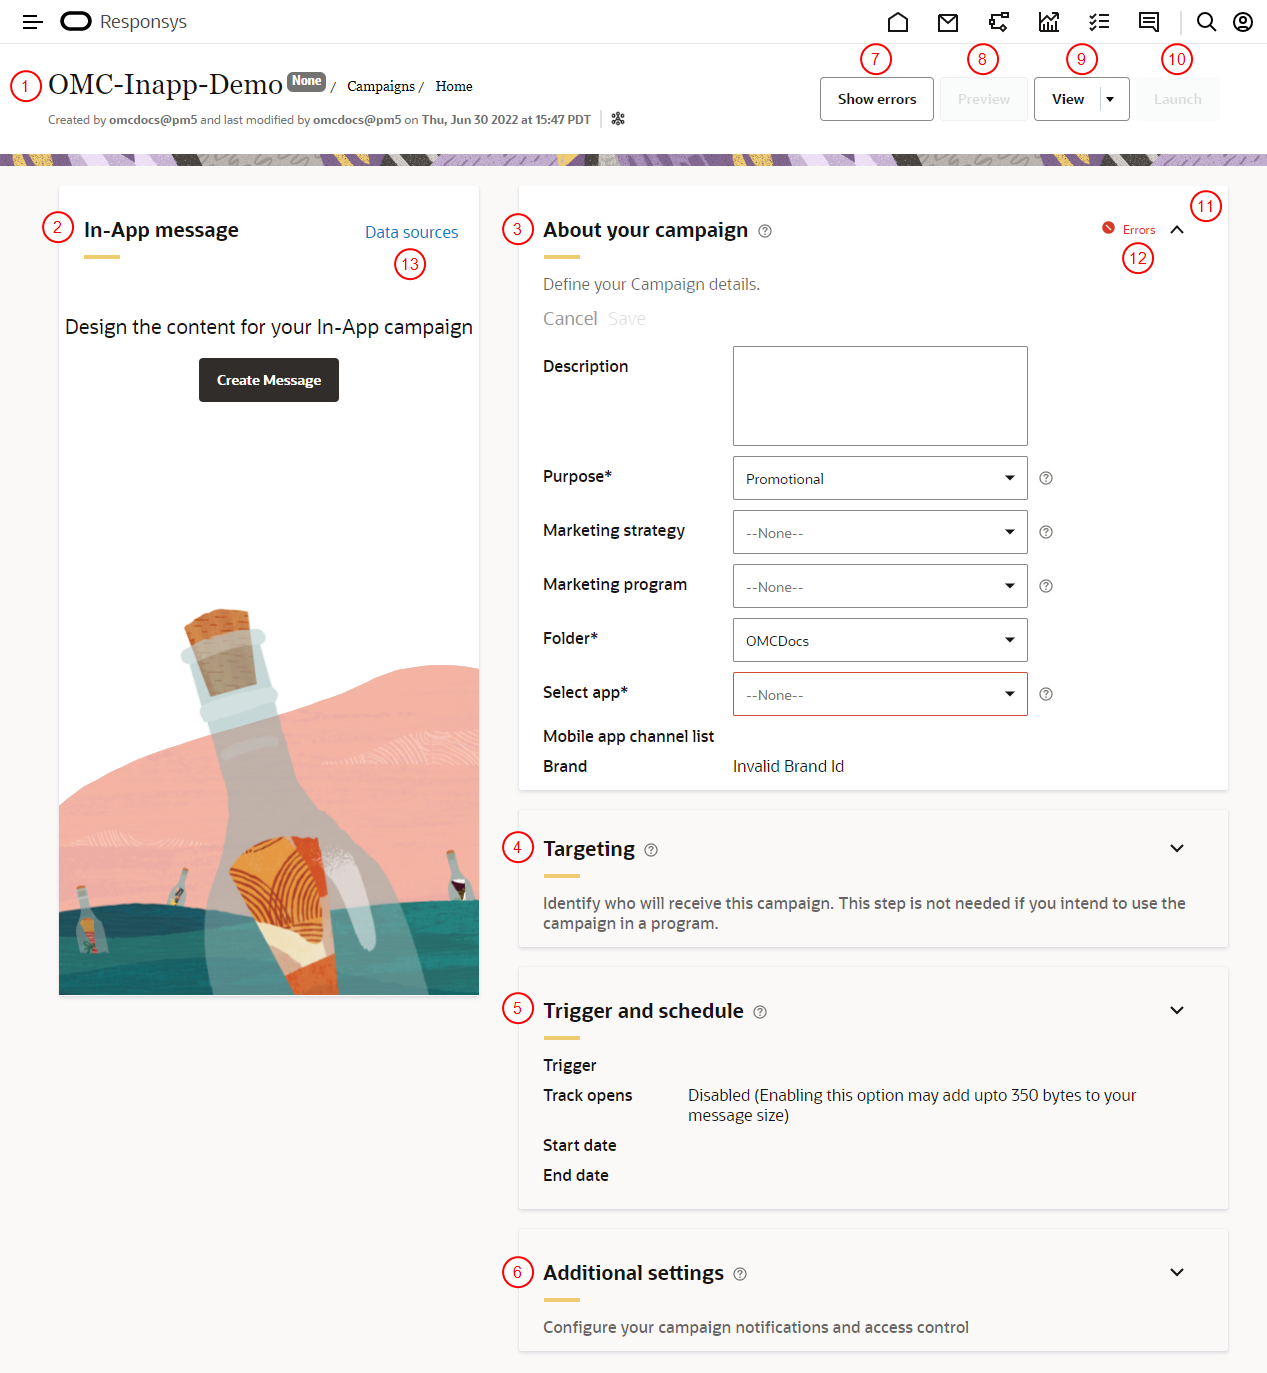
 View information related to your campaign's status (Draft, Active, Closed) and creation. Here you'll see who created the campaign, and when it was last modified and who modified it. Click on the campaign's name to change it.
 In-App message panel. From this panel, you can edit your campaign's Data sources, Create Message, Edit Message (if the message has been saved), and view a summary of your message's configurations (if the message has been saved). If you have saved the message, you'll see a snapshot in the In-App message panel.
 About your campaign panel. View your campaign's Description, Marketing strategy, Marketing program, Folder, Mobile app channel list, and app.
Note: If you change a campaign’s marketing strategy or marketing program for a standard launch, Insight will display the new marketing strategy and marketing program values for both historical and new standard launches. This does not impact the CED behavior.
 Targeting panel. Use this panel to ensure your campaign is targeting the right contacts.
 Trigger and schedule panel. Use this panel to configure the in-app message trigger and the message schedule, and to turn open tracking on or off.
 Additional settings panel. Use this panel to configure settings related to the in-app campaign's notifications and (if it's enabled for your account) organizational access control.
 Show errors button. Click this button to view and correct validation errors in your campaign. Once all the errors are corrected, Show errors will be replaced with Validate.
 Preview button. Use this option to preview the message as your contacts will see it.
 View button. With this drop-down, you can analyze your campaign.
 Launch button. Click this button to configure your campaign's launch and to launch it.
 Click Expand
  to expand a panel. Once a panel is expanded, click Cancel to discard any changes in the panel, and click Save to save your changes.
 Errors. Hover over this text to see a description of the error.
 Data sources. Click this button to configure your campaign's data sources.