Launching a Web Push campaign with Campaign Designer
Important: This feature is currently released under our Controlled Availability program. To request access to this feature, please log in to My Oracle Support and create a service request.
Use the Campaign Designer as part of your customer engagement strategy by reaching customers through communication personalized to them. Web Push campaigns allow you to engage a web browser audience by sending notifications to web browsers such as Chrome, Opera, and Firefox. To learn more, see Web Push Campaign Designer visuals overview.
Learn more by watching the video!
Best Practices
- When catering to a browser audience, keep in mind to not overdo the number of notifications as the user may find them distracting.
- Note that rich text formatting is not available for Web Push messages. However, when targeting users on browsers such as Chrome or Opera, you can add a big image and notification buttons in the Message Designer. For the big image, the recommended size for Windows 10 is 360 px by 180 px (2:1 aspect ratio).
- In addition to the big image, the icon for the notification can also be customized for every Web Push app or website, but this cannot be done in the Campaign Designer. Marketers need to consult with the Developers or Account Admins to customize the Web Push notification icon through the App Developer Console.
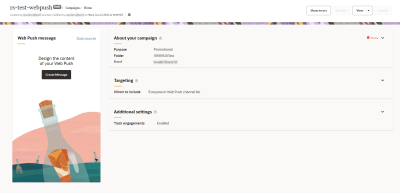
- Note thatTrack engagements under Additional settings is enabled by default, but you can disable it if you would like.
With the Campaign Designer, create and launch a campaign in four steps:
- Create your campaign and define its targeting
- Create personalized messaging
- Test your campaign
- Launch your campaign
To navigate to the Campaign Designer :
- On the side navigation bar, click
 Campaigns and select Manage Campaigns.
The Manage campaigns page opens.
- Click Create Campaign, or open an existing campaign.
Step 1: Create a targeted campaign
- Create your Web Push campaign
- Select your app and configure the About your campaign panel
- Configure the Targeting panel to ensure your campaign is targeted
- Configure the Additional settings panel
