Selecting List Columns
Click the Columns icon ![]() in the list panel or press
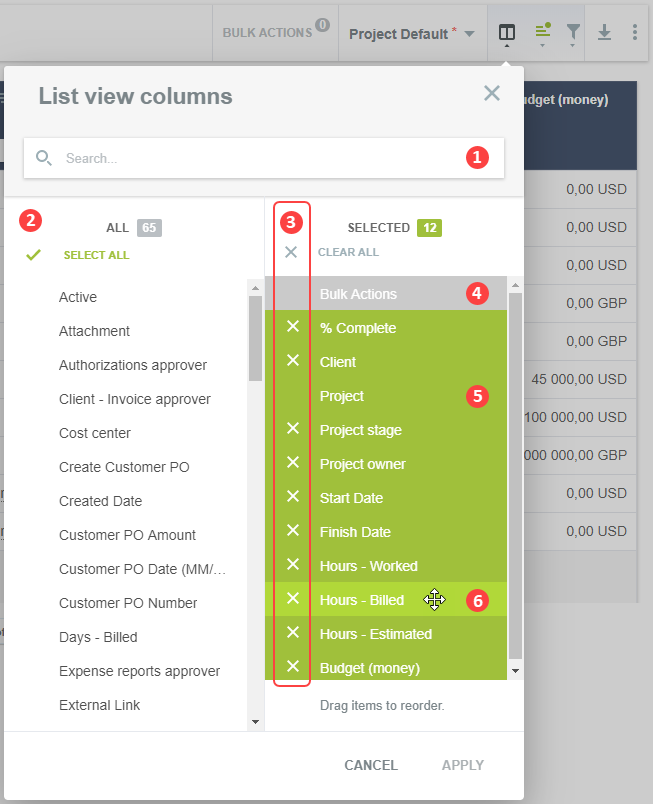
in the list panel or press ![]() on your keyboard to display the List columns flyout panel. Select the columns you want to include in the active list and specify the column order. Click Apply to validate your changes and return to your list. Any column preferences applied to a list continue to apply the next time you go to the same list until you change them or switch to a different list layout.
on your keyboard to display the List columns flyout panel. Select the columns you want to include in the active list and specify the column order. Click Apply to validate your changes and return to your list. Any column preferences applied to a list continue to apply the next time you go to the same list until you change them or switch to a different list layout.
|
1 |
Type any characters from a column title in the search box. The lists of available and selected list columns are filtered as you type and only includes the column titles containing the string you have typed. Matching strings are highlighted in bold in the filtered column list. |
|
2 |
Click a Column title to include the column in the list or click Select all to include all available columns. |
|
3 |
Click the remove icon |
|
4 |
Some columns, for example Bulk actions or Actions, are required and set to display as the first columns on the left. You cannot remove them from the list nor change their position. These columns are displayed with a gray color background. |
|
5 |
Some columns are required but can be reordered. For example, you cannot remove the Project column from a Project list but you can change its position. These columns do not have the remove icon |
|
6 |
Click a column to select it then drag the selected column to change its position. |
You can save these column preferences as part of a custom list layout. See Personalized List Layouts.